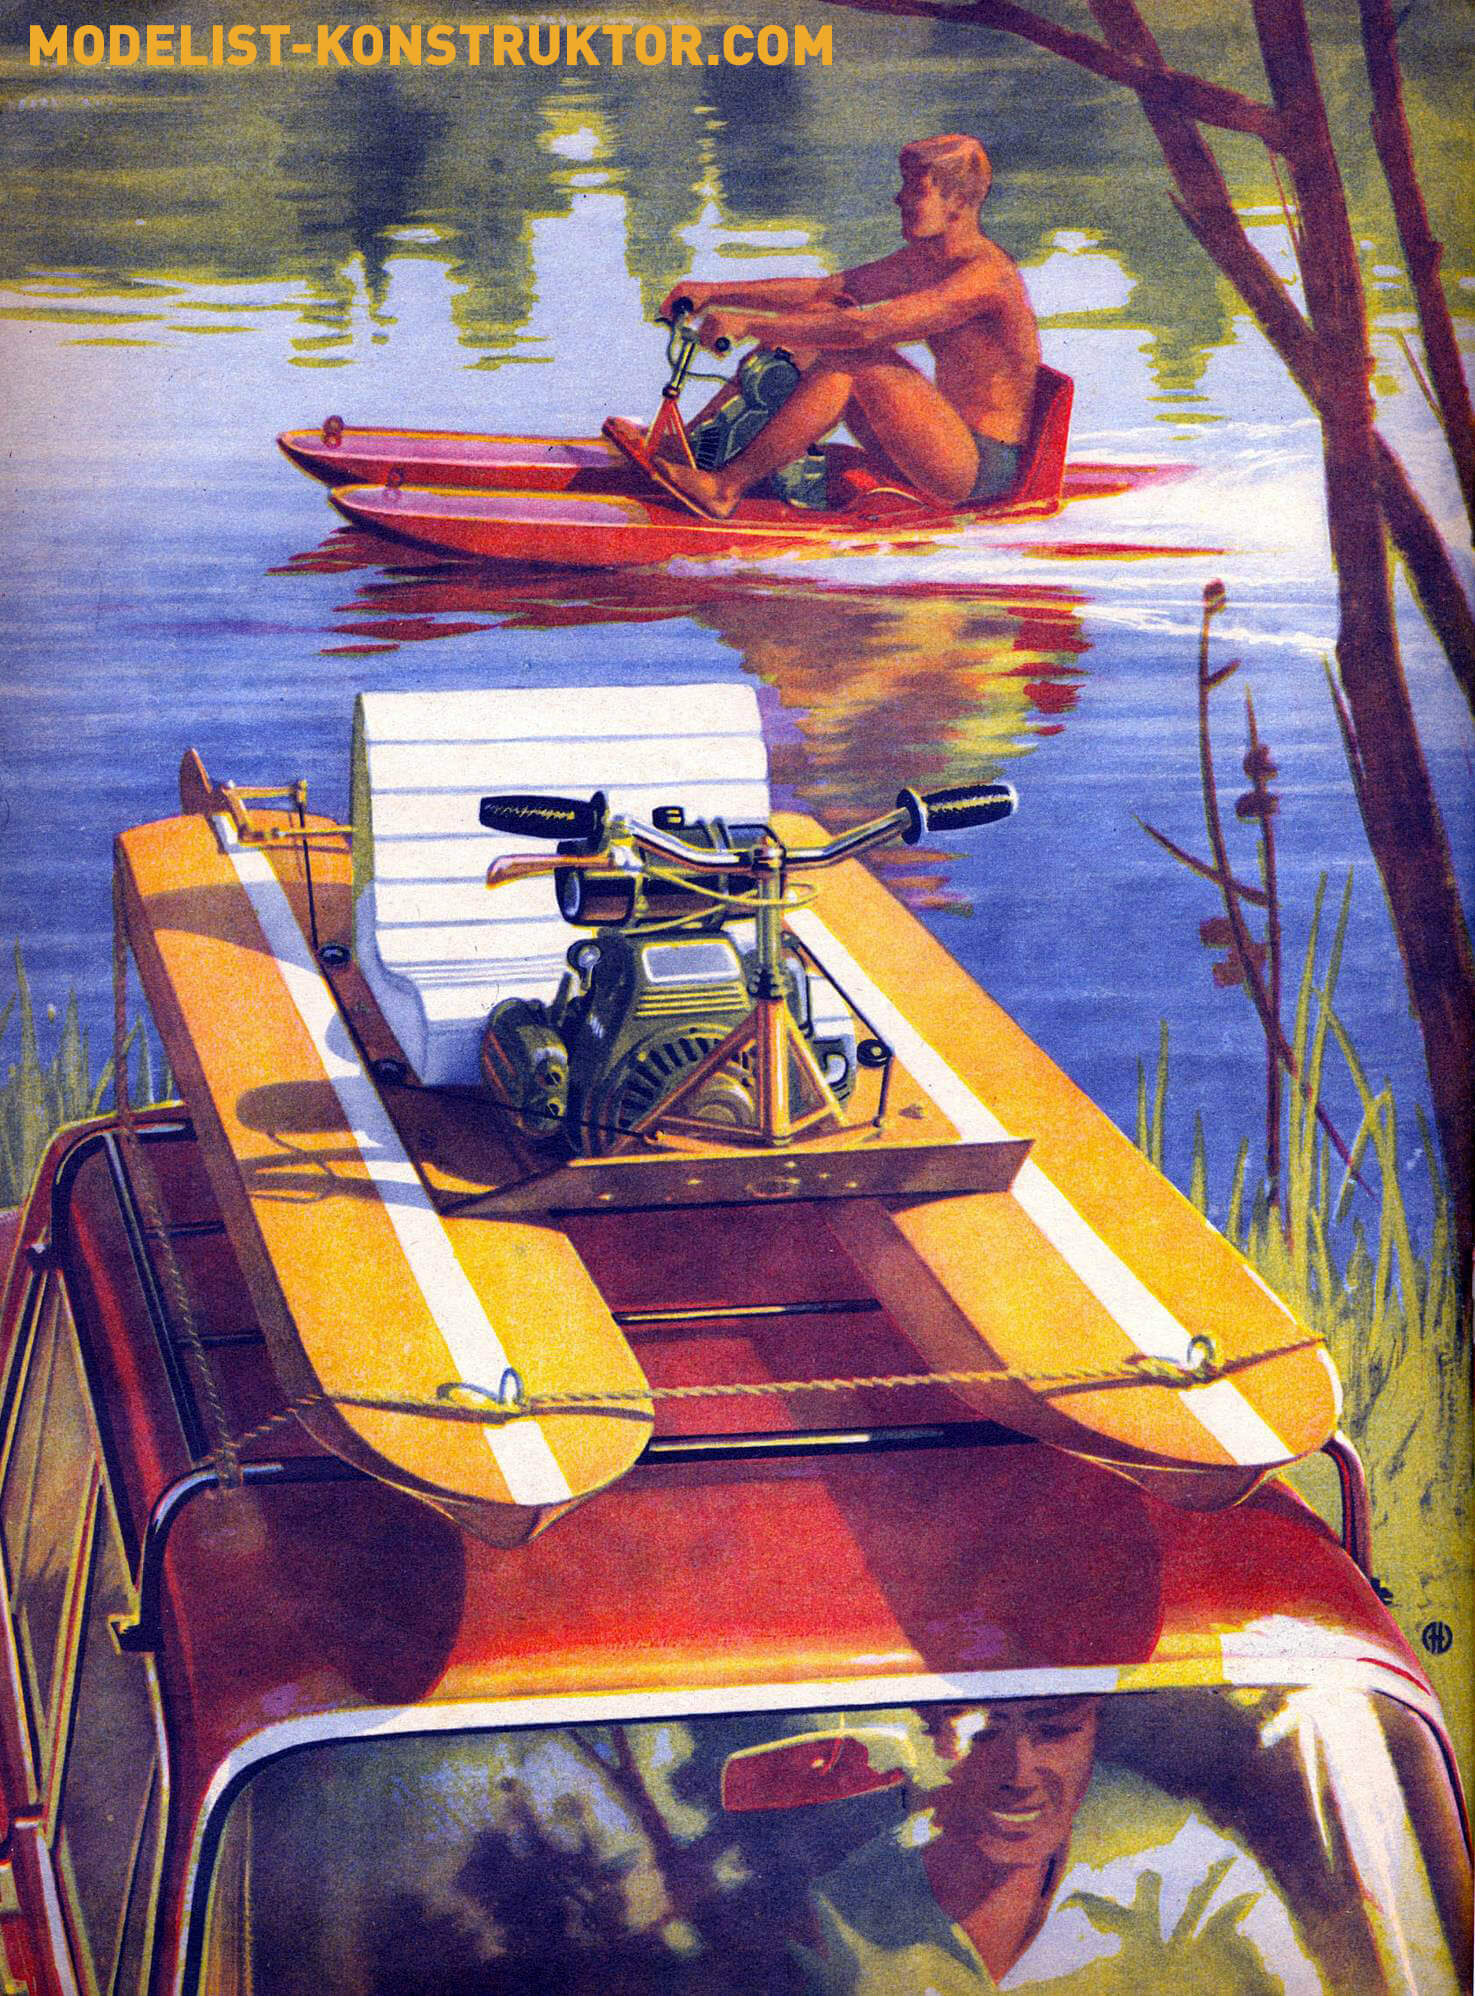
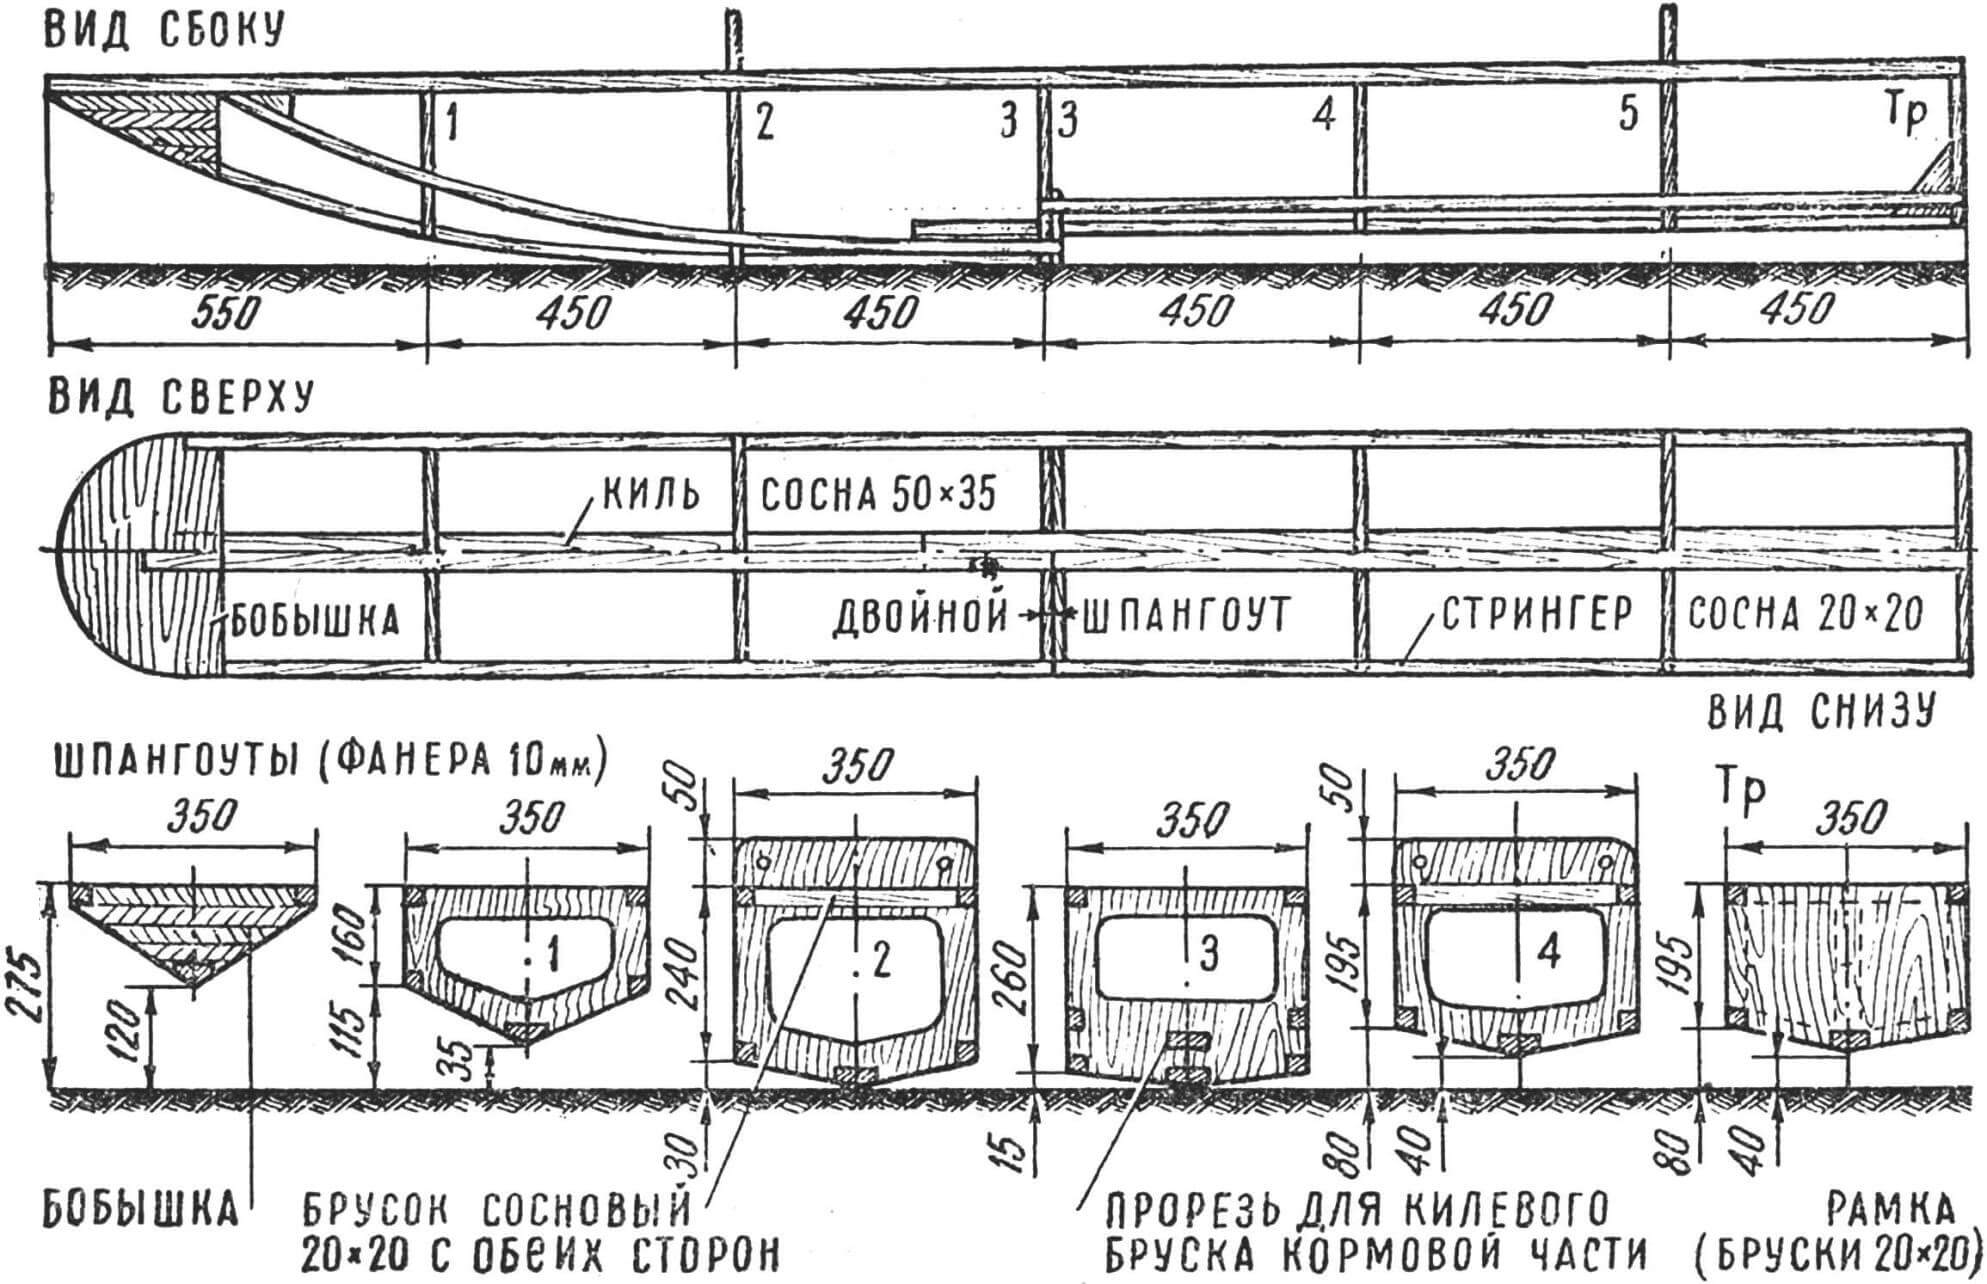
The pedal boat is a machine that has long been mastered by technology lovers, both young and old. Two light floats connected by a simple bridge, and on it is a frame from an old bicycle with a saddle, handlebars and pedals. The propeller is a homemade propeller. Get in and go wherever you want: to the beach, fishing or just for a walk. No oars or sails are needed: a steel horse that has served its time on land will still work great on the water and will bring its owner many pleasant moments. There is only one bad thing: you have to pedal all the time, and this is tiring on long trips. And the speed is too low: 8 – 10 km/h. Therefore, the thought of motorizing pedal boats does not leave inquisitive designers. As a result, more and more interesting cars are appearing, used both for recreation and sports, as well as for tourism, hunting, and fishing.
The easiest way is to install a D-4 or D-5 bicycle engine on a pedal boat, as suggested by engineer Yu. Moralevich in No. 13 of the collection “Young Model Designer”. Since this collection has become a bibliographic rarity, we will briefly recall the design of this water bike, taking into account the changes suggested by the practice of long-term operation of such machines.
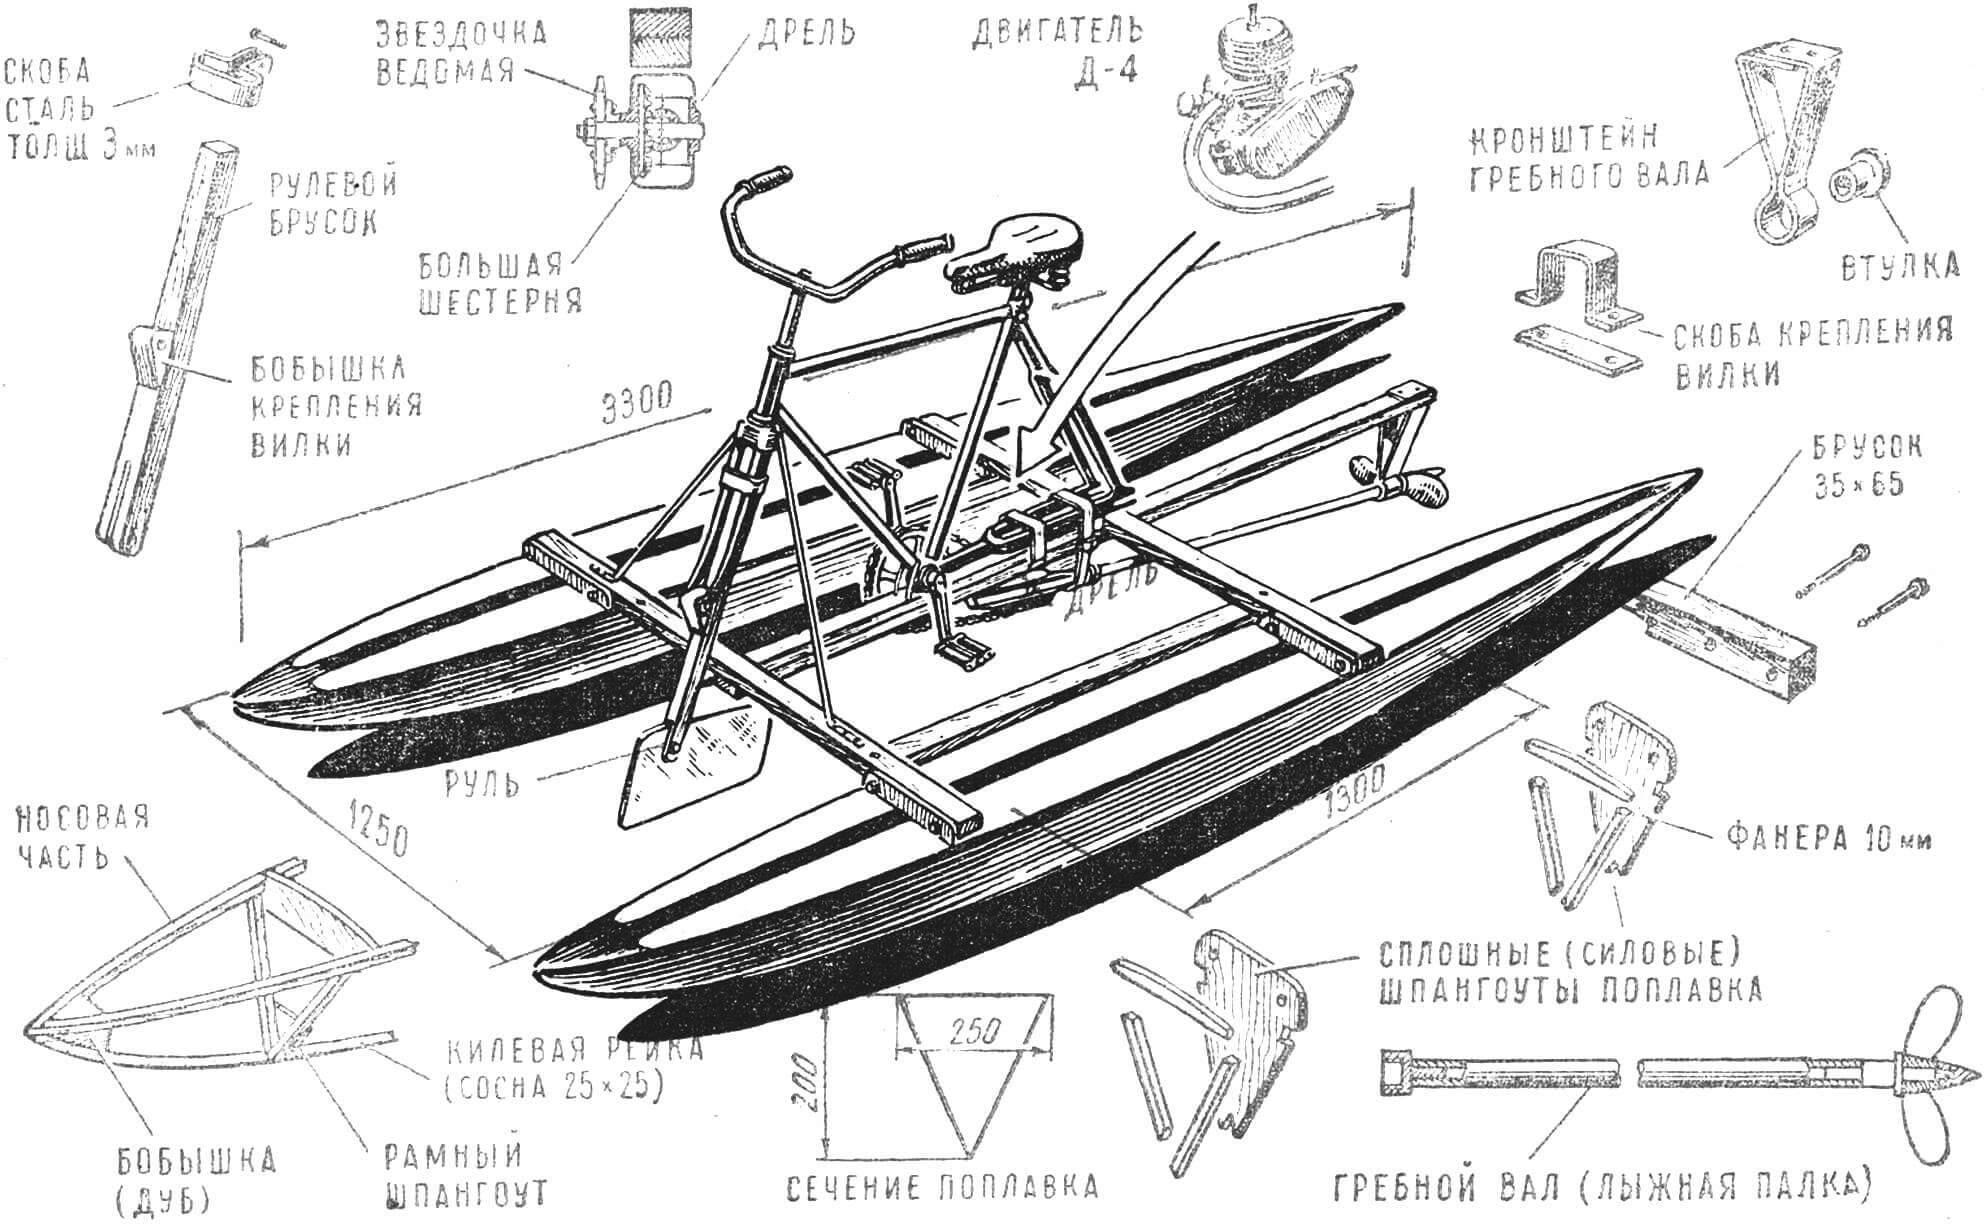
Figure 1 published below shows all the dimensions and additional data, which are enough to build a pedal boat in a technical circle at school or in a pioneer camp. The bicycle engine can be installed either on the bicycle frame, as is done on land vehicles, or on the bridge, in front of the frame. The latter method is more rational, since the engine located in the front is cooled better.
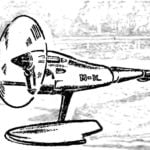
The main and, perhaps, the most difficult part of the work when building a water bike is making the floats. This is where ship modelers can show their skills: after all, the float of a pedal boat, both in terms of the materials used and in technology, is similar to the hull of a large model ship. Floats can be made from wood and plywood, gauze, craft paper, sheet metal and duralumin, and finally from fiberglass. The simplest is, undoubtedly, the wooden design of the floats, which is why we present its description.
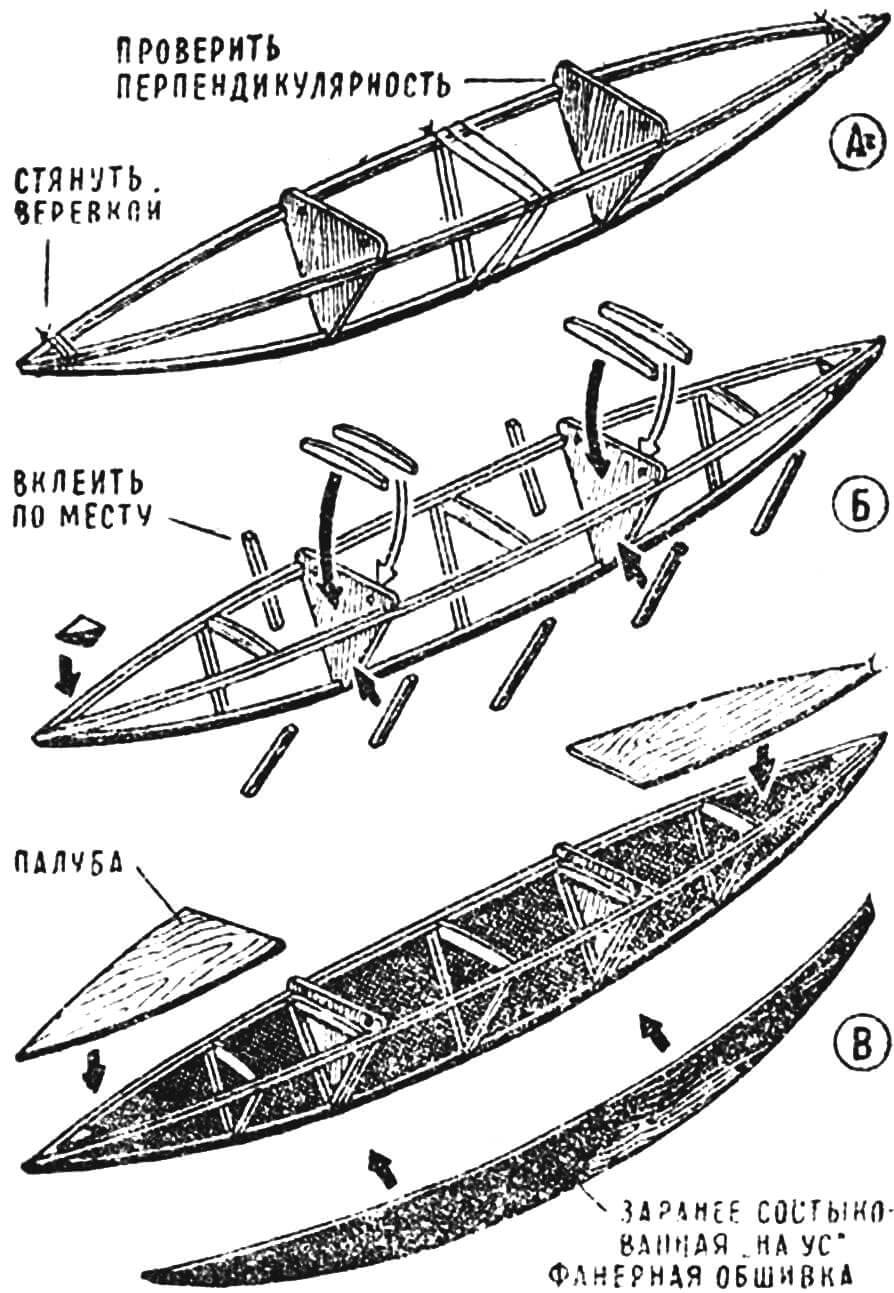
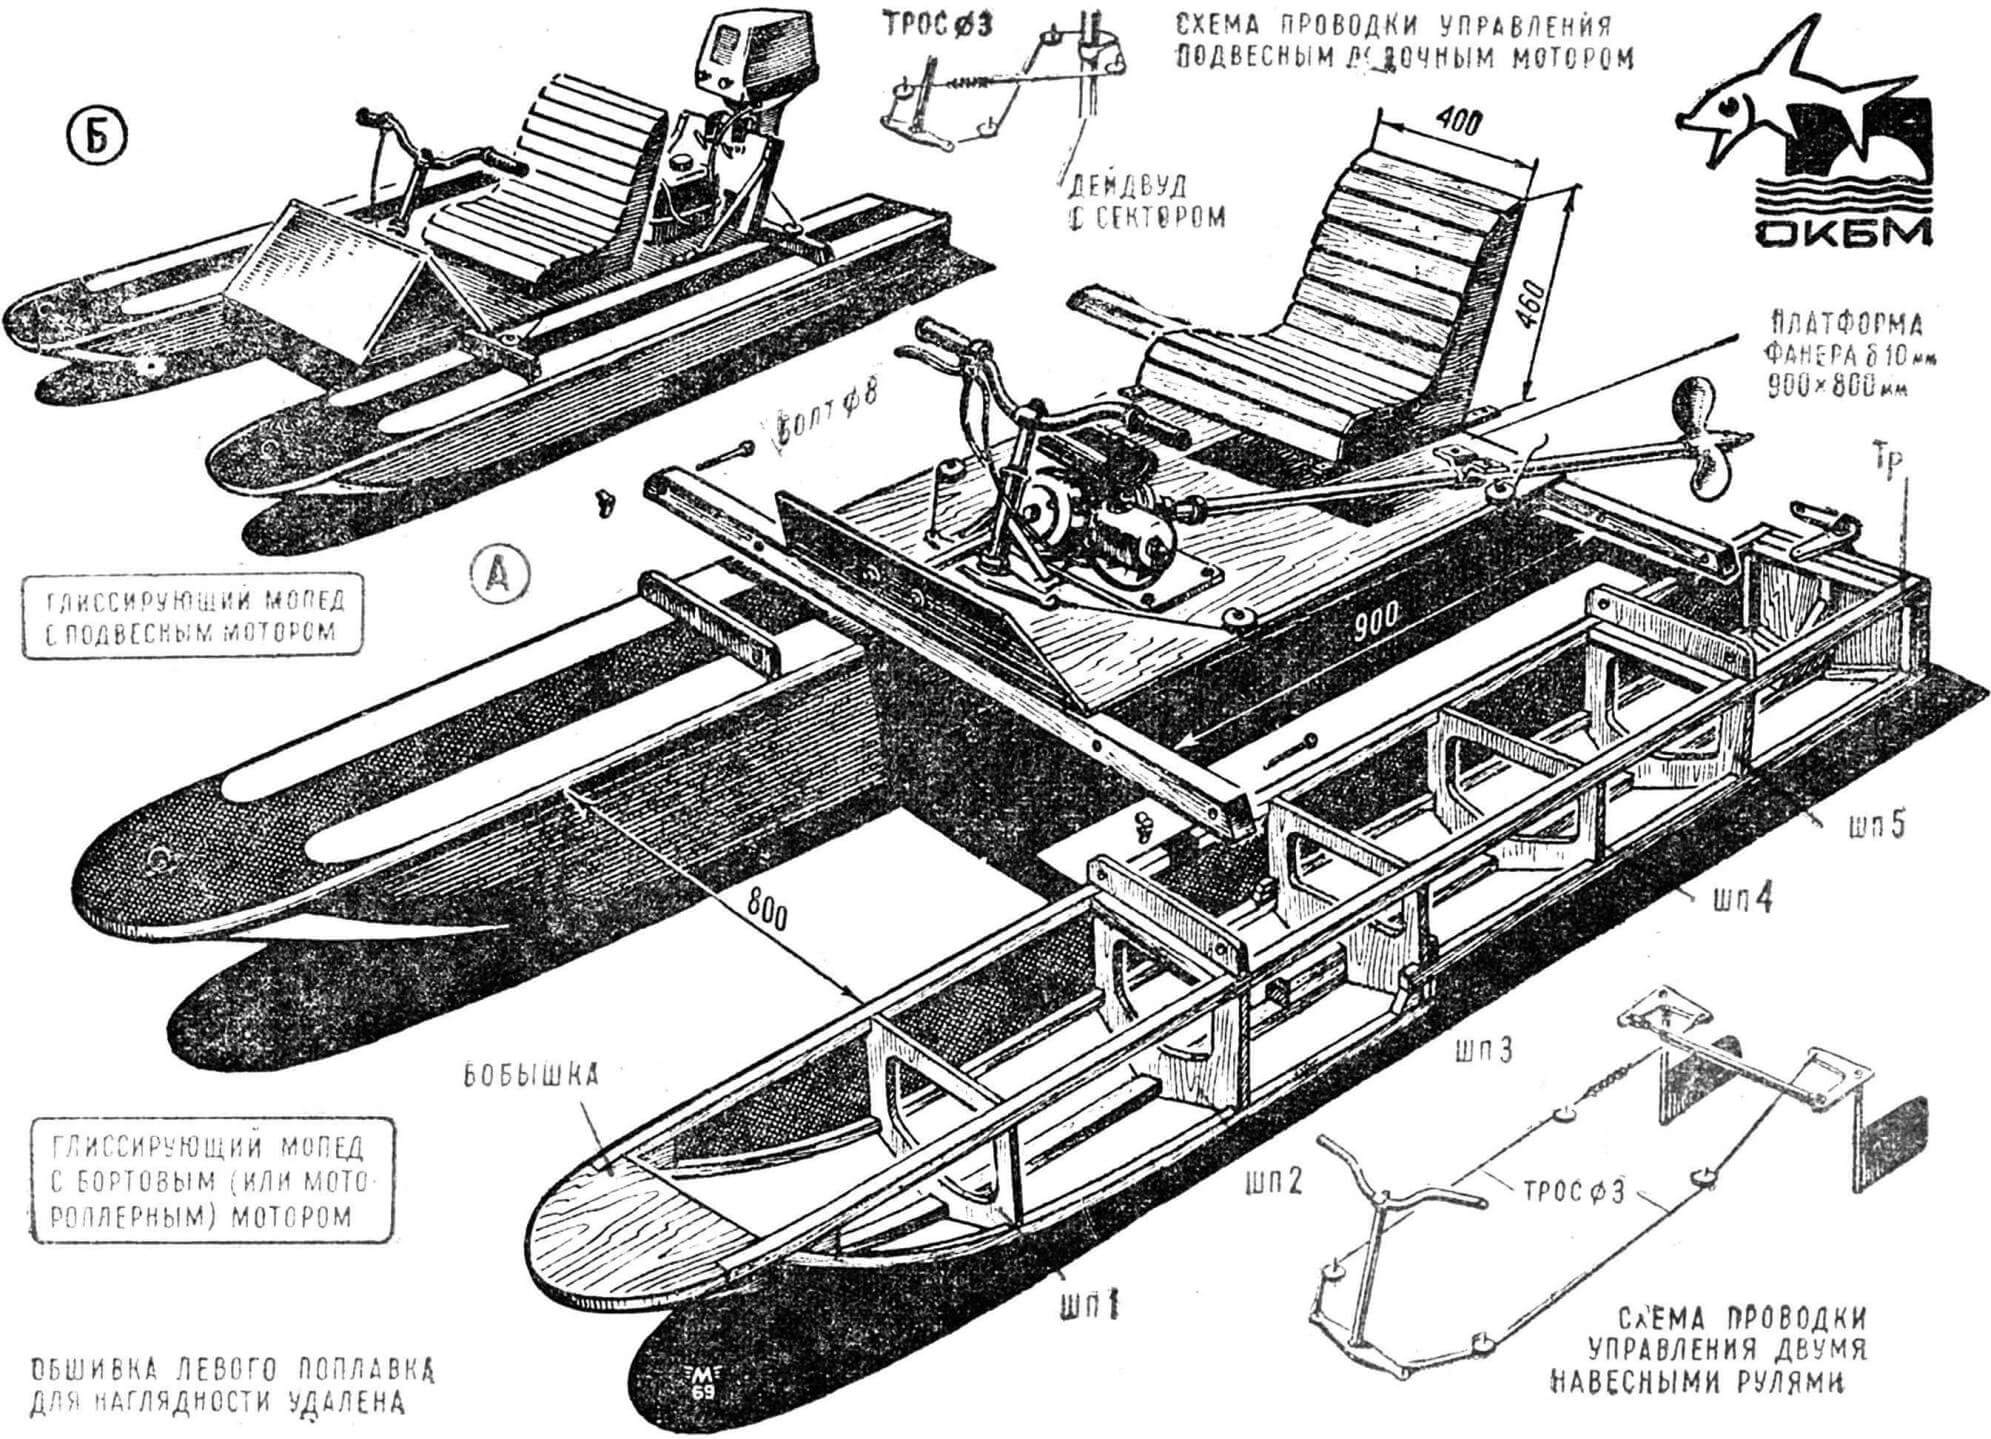
A – installation of stringers on solid plywood patterns, B – insertion of spacers for frame frames, C – small frame.
To make two floats and a bridge, the following materials will be required: pine slats with a cross-section of 22X22 mm, length 3500 mm – 8 pcs.; plywood plywood (preferably waterproof) size 750X300 mm – 1 sheet; pine bars measuring 1400X100X20 mm – 2 pcs. and size 200X70X40 mm – 1 pc.; one mechanism of an old hand drill with transmission to the spindle by two bevel gears; ski pole made of duralumin or a piece of tube for making a propeller shaft measuring 1500×20 mm – 1 pc.
Figure 2 shows the sequence of float assembly. Before installation in the slipway, the ends of each pair of side stringers must be adjusted to each other so that they acquire a sharp shape and fit well with the keel rail, which is placed in the frame “on edge”. To make it easier to fit the ends of the float, you should first tie the ends of the stringers with rope or wire. This will show where and how much material needs to be cut to get the desired shape. If the stringers are made of wood of the same quality, they will bend evenly and smoothly, forming a regular triangular prism.
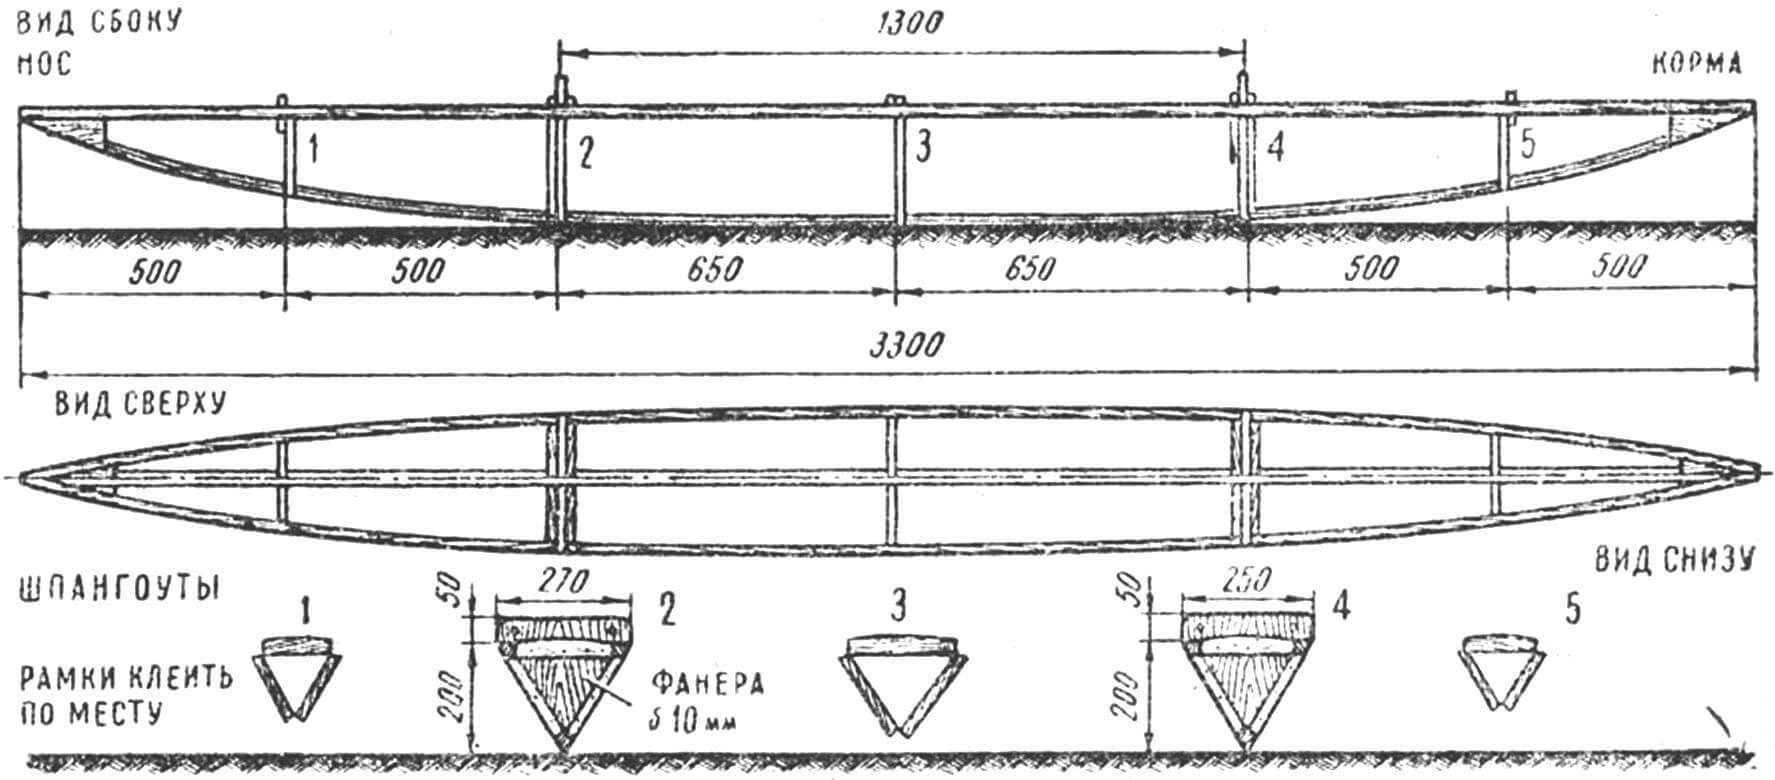
Having assembled the float body on the main plywood patterns, you can begin inserting the spacers that form the frame frames. They are adjusted to the location, temporarily secured with twine, and then with nails, glue and pressed with tape (or twine). After the glue has dried, the entire frame of the float must be carefully aligned with the plywood sheathing, or, as shipbuilders say, “smoothed out.” Malkovka is performed with a plane, chisel and rasp.
The sheathing of the frame is best made of waterproof plywood with a thickness of 1.5 to 3 mm (the lighter the float, the higher the driving performance of the car). If there is no plywood, you can use thick cardboard, thin hardboard or plastic, but you will have to install more intermediate frames and under-deck beams. The sheathing is attached to the frame using waterproof glue (epoxy resin, nitro-glue or casein) with press-fitting with 30 mm nails and 15 mm screws. Since the frame is very light, when driving nails, you should use the so-called “support” on the back side with a heavy hammer or some other metal object. At the same time, the nails enter more easily and the structure does not become loose.
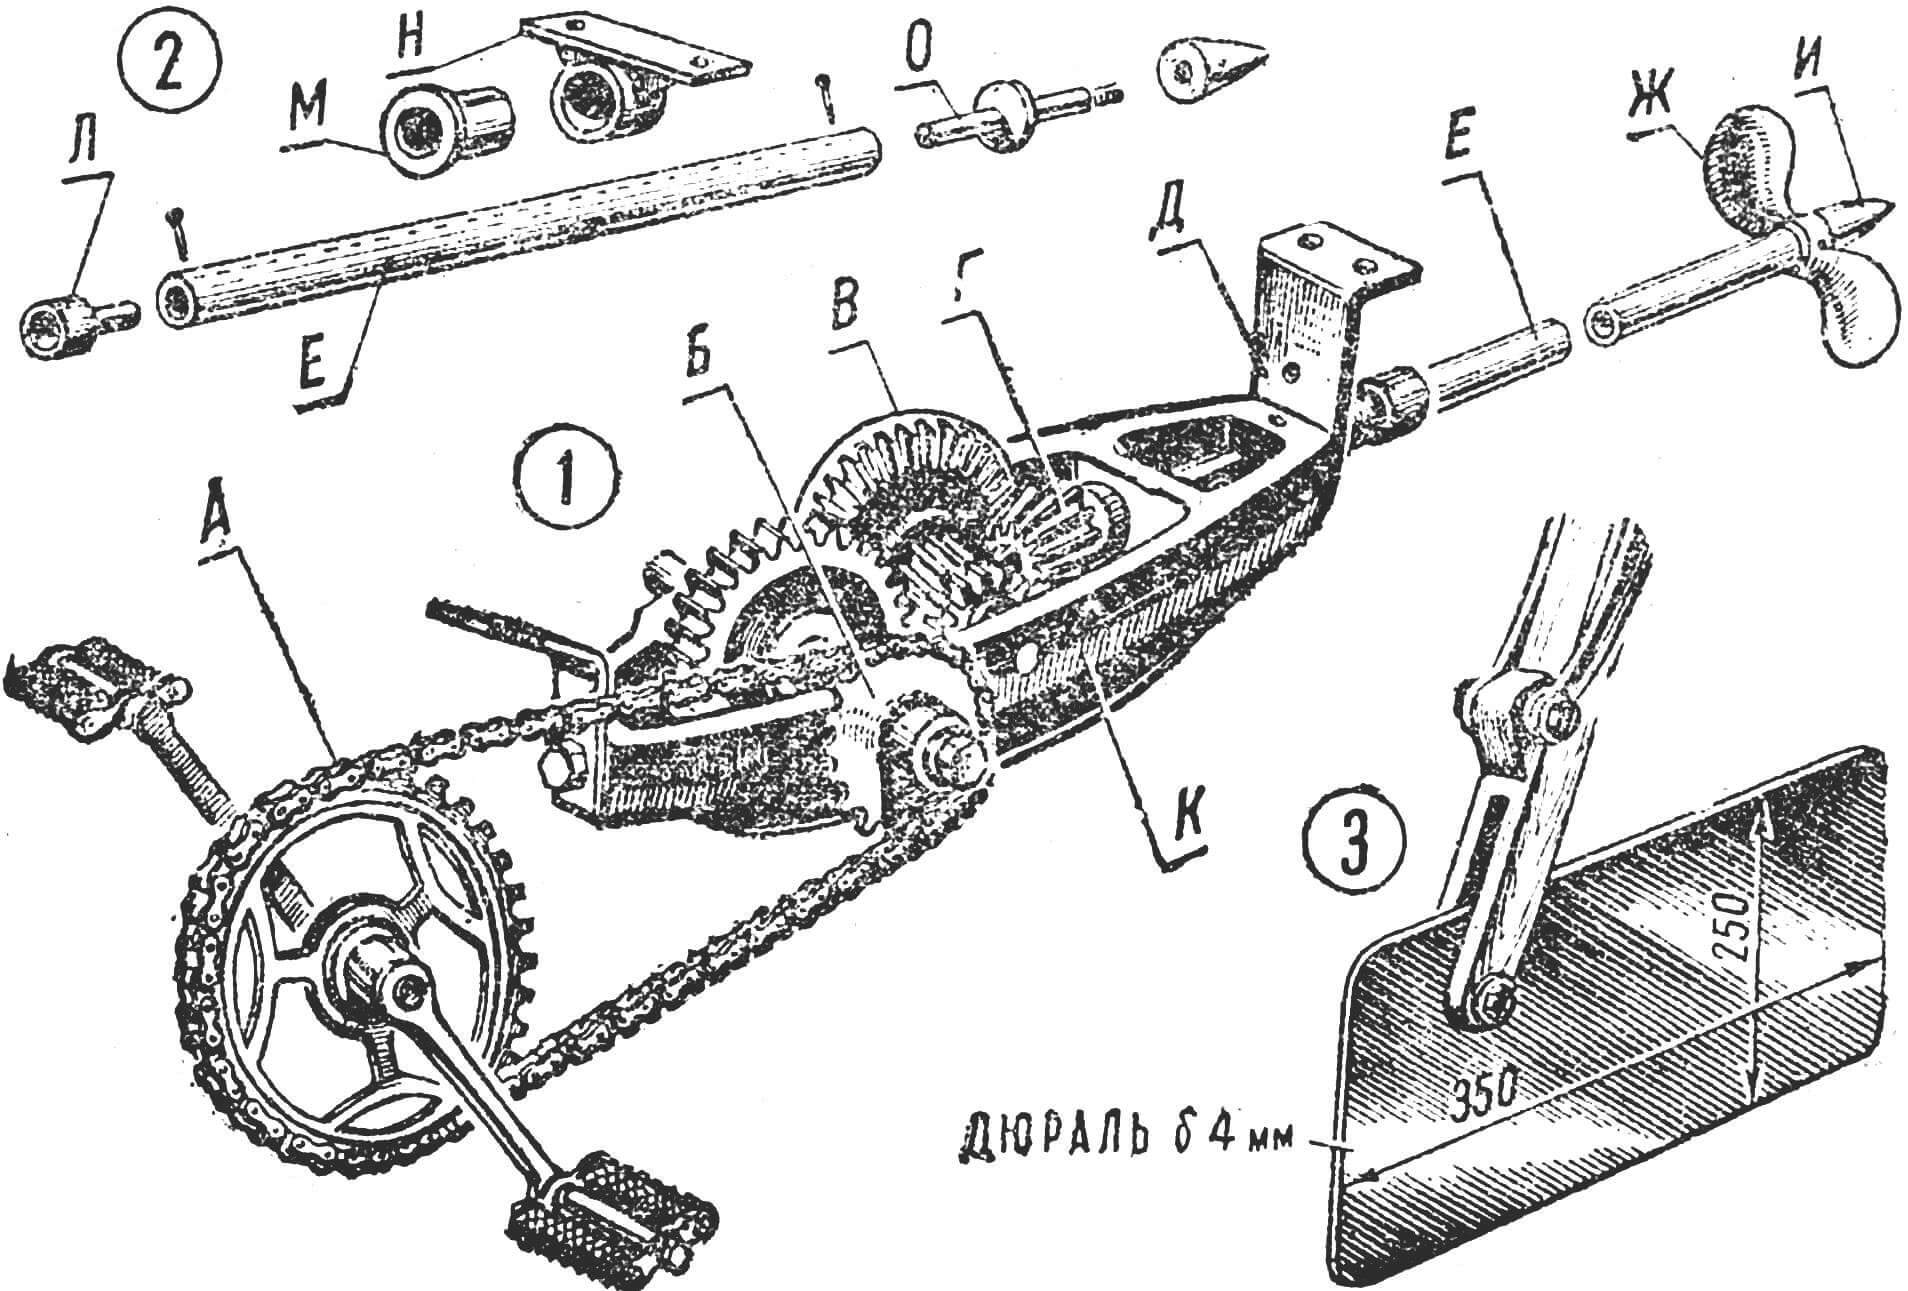
A – drive gear, B – driven sprocket, C – large bevel gear, D – small bevel gear. D – bracket, E – propeller shaft, F – propeller. And – fairing (nut) of the propeller. K – drill body, L – coupling, M – fluoroplastic bushing. H – rear bracket, O – screw shaft.
The sequence of framing the frame is: first the sides and last the deck. Before laying the deck, it is advisable to cover the inside of the float with plywood sheathing with drying oil or liquid oil paint – primer. The outside of the float is covered with one layer of calico on nitro glue and painted in the desired color.
If it is impossible to get sheet material for the sheathing, use kraft paper and glue it with layers of ordinary gauze (kraft paper is thick, especially strong brown wrapping paper used for packaging cement and some food products). The gluing sequence is as follows: first, a layer of kraft paper is glued onto the float and dried, forming a kind of base for subsequent layers; then one layer of gauze and one layer of craft paper are sequentially glued on, and the float is again thoroughly dried. After this, another layer of gauze, one layer of kraft paper and one (outer) layer of cheap calico are glued on. The result is a thin but very durable shell that does not have a single seam, since when the material is glued, its edges overlap each other.
In the float body, it is necessary to leave or cut out after gluing a hatch measuring at least 150X150 mm for draining water, inspecting the insides and storing things necessary for the trip. You can make a special compartment for these purposes – for example, between solid plywood patterns.
G. STEPANOV
Recommend to read
 IN A CONFRONTATION WITH TWO ELEMENTS
"Competition motors"... These words you will hear today in any event — such was the struggle for victory in almost all sports classes. Ship-, auto - and aircraft modeling — all success...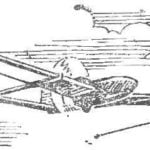 WITH ELECTRIC MOTOR — IN THE SKY!
In the CSC-306 MAI constructed several devices with the power electrical system, but to talk seriously about the problem of creating a workable small elektroleta became possible only...
