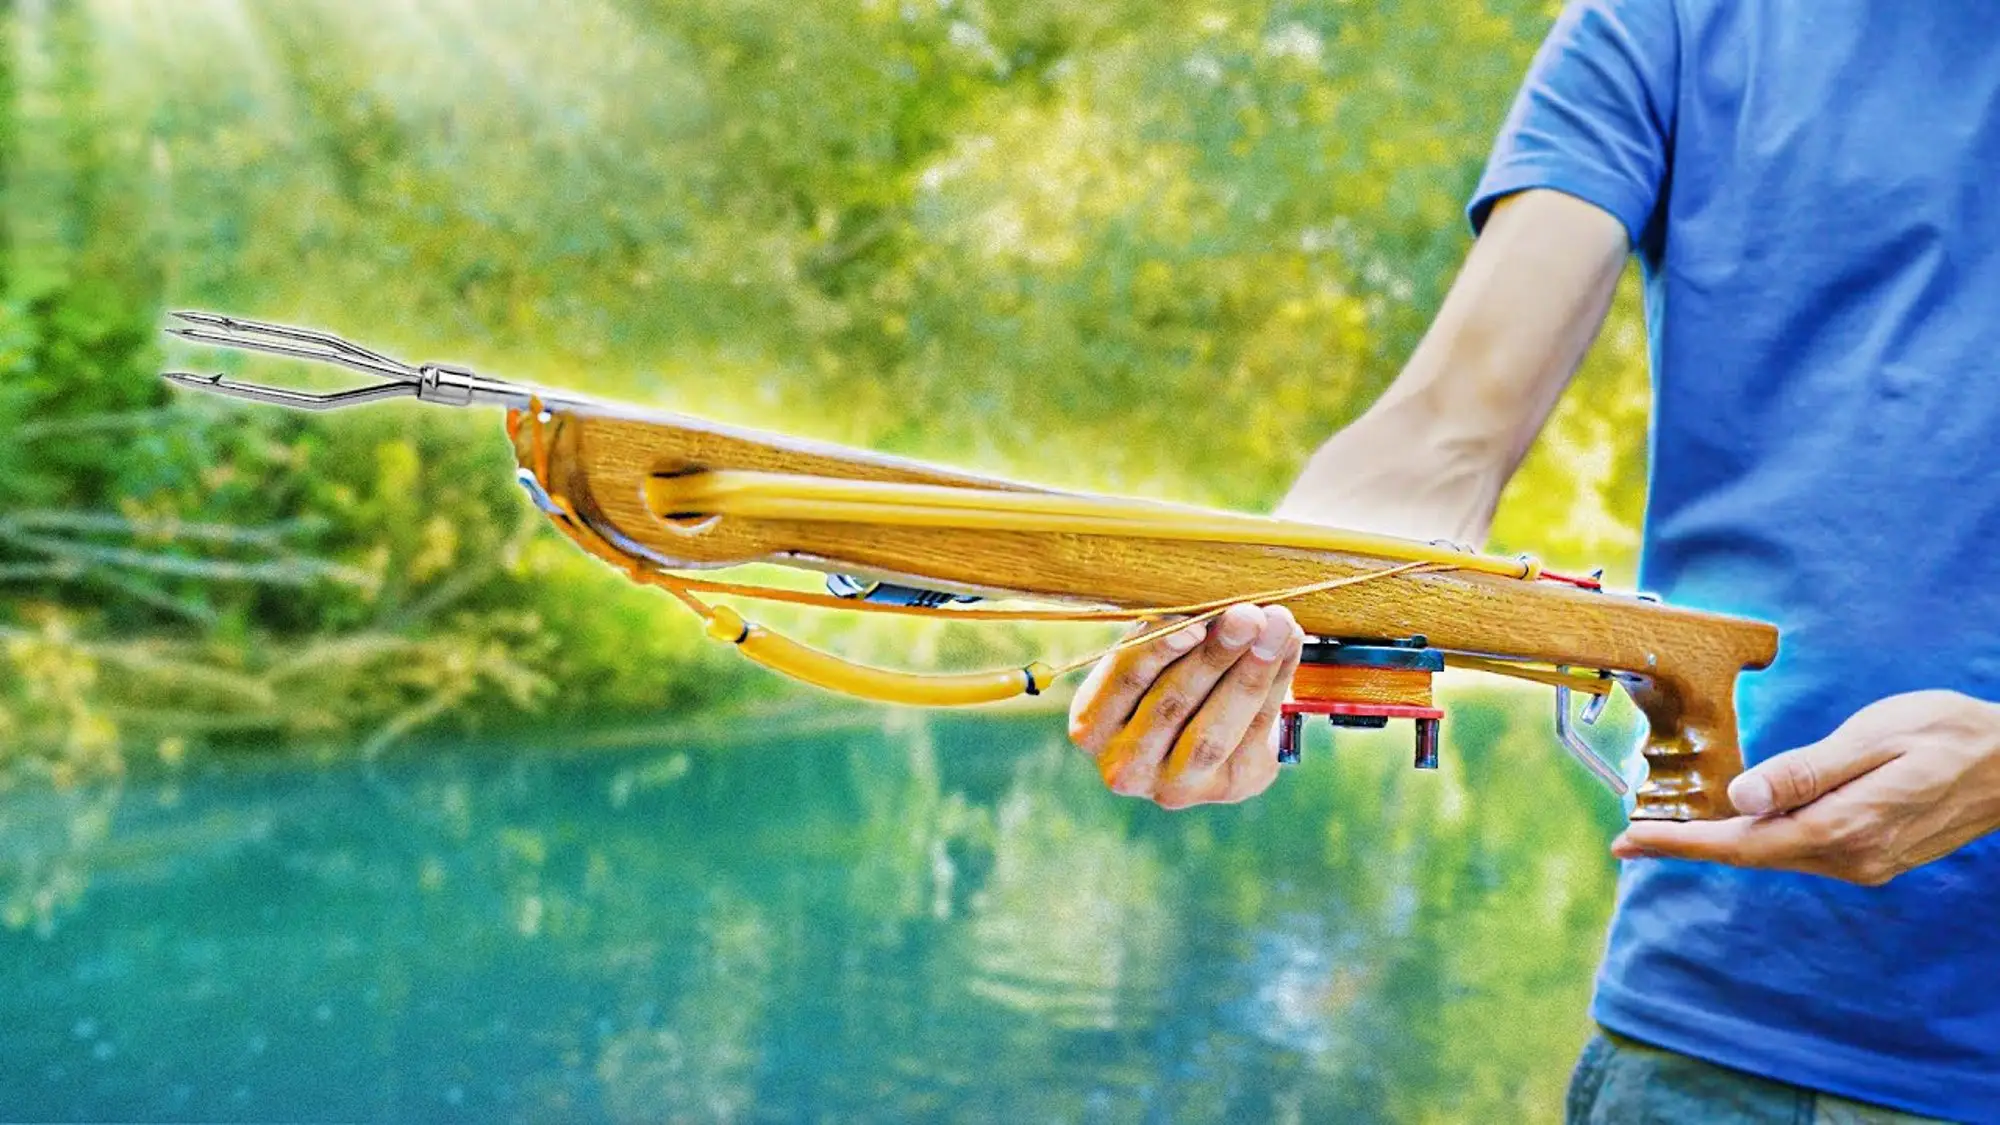
Imagine this: you’re standing by a river, the water is crystal clear, and fish are darting just beneath your feet. But instead of store-bought gear, you’re holding a speargun built with your own hands. That’s how our project began. We set out to create a real underwater speargun from scratch, using natural materials, minimal tools, and a lot of patience. Why? Because we wanted to prove to ourselves — you don’t always need to buy something when you can make it yourself. So, armed with a fallen oak tree and a circular saw, we got to work.
Oak isn’t just wood — it’s the tank of the forest. Strong, heavy, but incredibly reliable. No surprise we chose it for the body of our speargun. Its durability and water resistance make it ideal for underwater hunting gear. Of course, the initial processing took some effort. The circular saw buzzed, sawdust flew everywhere — it felt like a full-on lumber mill in our backyard. But the moment the first plank hit the workbench, we knew we were off to a solid start.

Interestingly, this story didn’t begin with a technical drawing or factory blueprint. We simply sketched the future shape on paper, cut out a stencil, and traced it onto the wood. Our jigsaw groaned under the resistance of the oak — it barely managed. It smoked, cut slowly, but each pass brought us closer to the dream. This was the first step in our underwater adventure.
The Speargun Shape: Ergonomics and Functionality

Once the base shape was cut out, it was time to focus on comfort. Everything underwater must feel intuitive. We grabbed a rasp and started rounding the sharp edges. It seemed like a small detail, but those curves turned a rough wooden blank into something you could comfortably grip, even with gloves on.

The anatomical grip — that’s a story on its own. We literally traced our fingers to carve out notches for each one. It immediately felt right — like the gun was molded to our hands. Once we added a harpoon guide — that longitudinal groove along the body — it became clear the accuracy would be spot-on. Without it, the harpoon would just fly off in random directions.

Work was slow, but with every passing minute, the speargun looked more and more like a real weapon. We carefully drilled cavities for the trigger mechanism and fine-tuned the parts. All it needed was a glossy, waterproof finish. That’s when the final sanding started. Sanding discs of 180, 240, 320, 400 — not exactly a beauty salon, but the results were impressive. The surface turned silky smooth, as if lacquered. For the hard-to-reach areas, we sanded by hand — patience, sandpaper, and a little bit of magic.
Waterproofing the Speargun
Once the surface was prepped, it was time to protect it. We applied two coats of wood oil. First, it brought out the oak’s natural grain — giving it that rich, expensive look. Second, it protected against moisture and bacteria. But we didn’t stop there. On top of that, we applied an epoxy resin — the kind made especially for wood. And the speargun? It sparkled! The surface looked like glass — a glossy finish like a lacquered piano, only made for underwater.

This protection is essential. Without it, the wood would swell and crack underwater. With it — you can dive, shoot, catch, and dive again. Even if you’re not a hunter but just love making things — this is worth checking out. Because you didn’t just make a speargun — you made it beautiful. It might not be showroom-perfect, but quality-wise — it holds its own against factory models.
And once the body became glossy, waterproof, and surprisingly ergonomic, we moved on to the most exciting part — the mechanics. The trigger mechanism had to be reliable and simple. That’s when a basic metal hook came to the rescue.
DIY Speargun Mechanics: Trigger, Bands, and Harpoon
How do you make a trigger when all you’ve got is a hook and a sharpening stone? Easy! We sawed off the extra bits, filed it down, bent it — and voilà: a part that both holds and releases the harpoon. A nail served as the axis, and a rubber band acted as the return spring. Simple, reliable, homemade.

We made the bands from rubber tubing and nylon cord. We tied knots to prevent slipping and wrapped them in thread for extra strength. Inserted them into an oval hole at the front — they held tight. Right next to it, we added a spool and a metal bracket — the line guide. Just like professional gear.

The harpoon itself? Also handmade. A steel rod, 70 cm long, sharpened on one end. We attached a flopper (barb) to ensure the fish wouldn’t slip off after a hit. We added notches on the rear end — to secure it in the gun and connect it to the bands. Once it clicked into the groove, you just knew — this shot would be powerful.

We also added a flashlight — a PVC tube mount on the body, and that was it. Now we could hunt even at dusk. All the functions of a real speargun — in one DIY device. And then came the moment of truth: testing.
Speargun Testing: Apples, Fish, and Real Hunting
First — the test shot. Load the harpoon, stretch the bands, aim at an apple. Click — and it pierces right through! The flopper holds the target in place. We took a few more shots — everything worked like clockwork.

But the real challenge? Underwater hunting. We headed to a river with crystal-clear water. Visibility — perfect. You could see fish from the shore. Full gear: wetsuit, gloves, socks, fins, snorkel, mask, belt, stringer. We dove in. First came the minnows, then roach. First shot — miss. Second — almost. Then came the big one — a wary carp. We swam closer, it darted off. But the harpoon caught up! Fish on the harpoon — success.

That feeling… You’re not just holding a fish — you’re holding the result of your hard work. Wood, metal, rubber — all turned into one cohesive mechanism. And you didn’t just catch that fish. You did it with a homemade speargun. That’s the real joy.
Why You Should Try It Yourself
So what did we learn? The most important thing — don’t be afraid. Even if you don’t have pro tools or experience, with patience and curiosity you can build something awesome. Our speargun doesn’t just work — it shoots straight, looks cool, and makes us proud.

Yes, oak is hard to saw. Yes, the trigger requires precision. But that’s part of the fun. Every stroke of the rasp, every drop of epoxy, every shot — it’s not just DIY. It’s an experience you’ll want to share.
So if you’ve got a circular saw, a few rubber bands, and the desire to build something with your own hands — go for it. Make a speargun. Or anything else. Just start. The rest will follow.
Ihor, Lazarevka village, Ternopil region, Ukraine
Recommend to read
 IN THE SAND WITH OIL
Usually in rural houses and garden plots economic tool stored in sheds or workshops outside of the house. Such areas are characterized by high humidity, corrosion of metal parts. To... THE TRAILER-TRUCK
Trailers for passenger cars, turning them into a small truck, particularly popular with rural residents and owners of summer cottages. Naturally they greatly facilitate the delivery of a...
