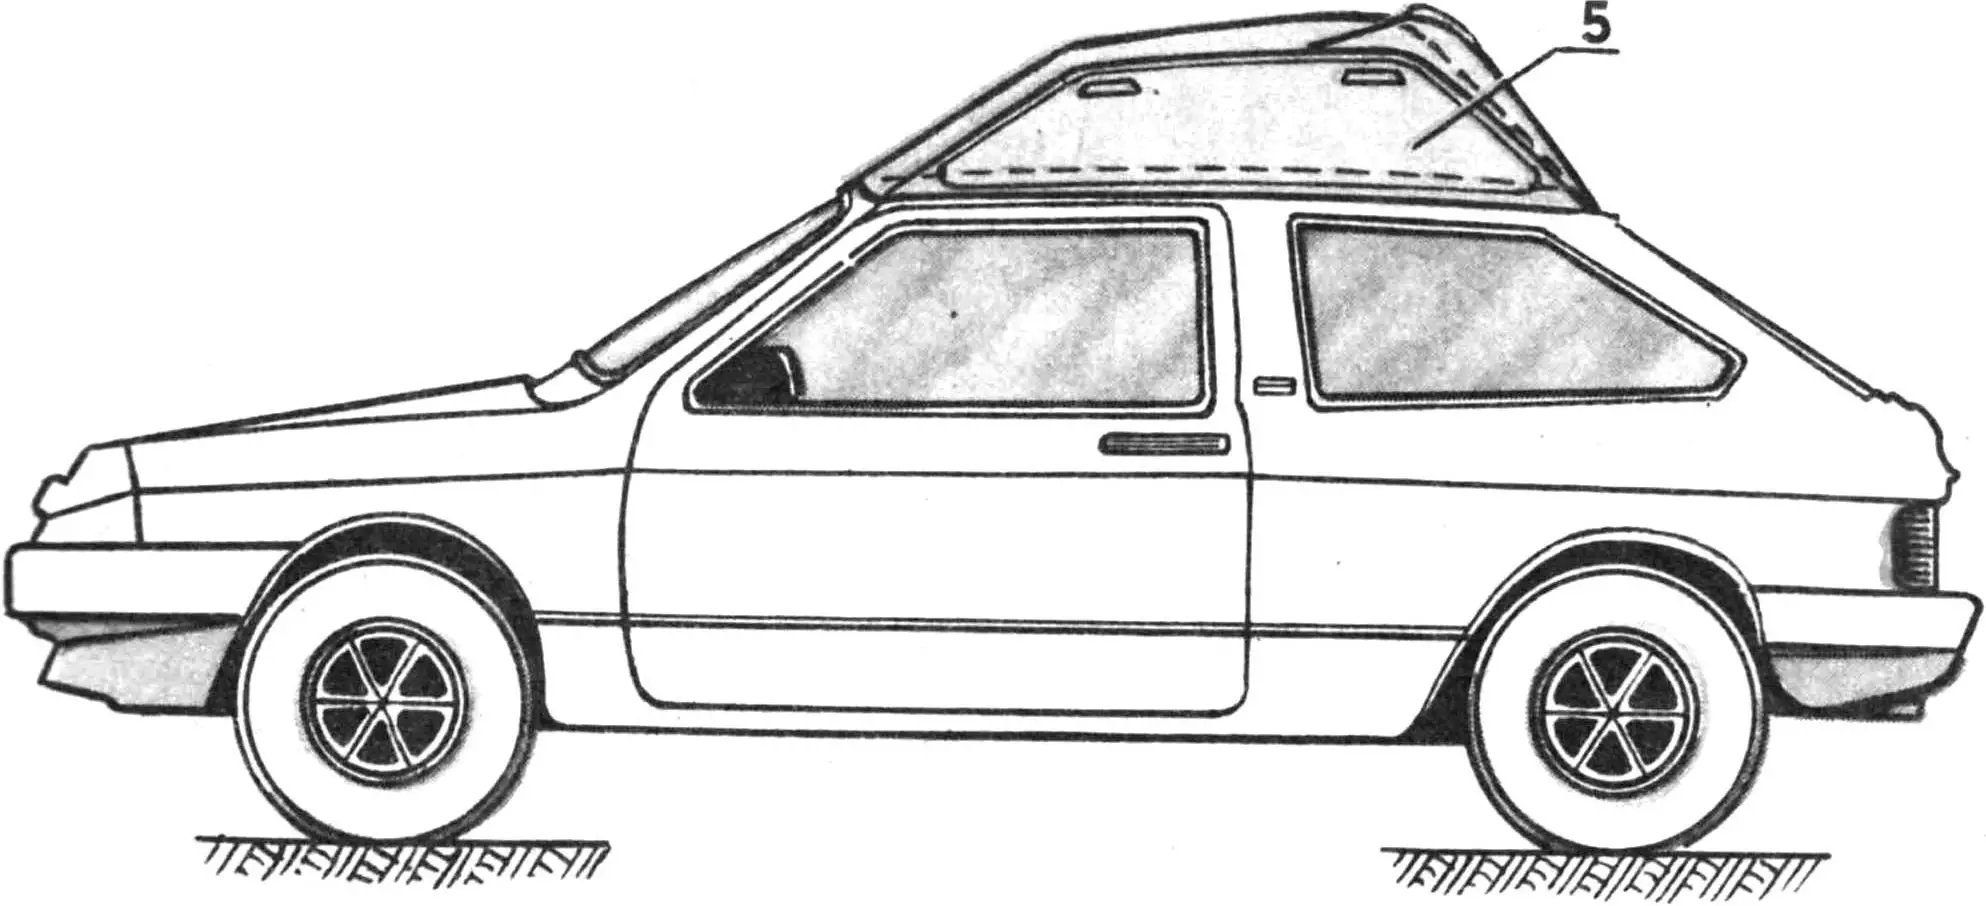
To begin with, I suggest that car‑enthusiast readers run a small experiment. Next time you drive out of town, stop on a high‑speed stretch of highway and watch the passenger cars rushing past. In fact, you shouldn’t so much watch as listen. After fifteen minutes you’ll learn to recognize the main car makes by ear: in this “sound portrait,” the key role is played by the characteristic noise of airflow washing over the body. But then a car approaches with a roof rack — and the sound picture changes sharply. It feels as if the car is literally squeezing through a dense, unyielding medium. By the way, that impression is confirmed by wind‑tunnel tests. Blowing scale models and full‑size cars with roof racks showed a steep increase in the so‑called \(C_x\) — the drag coefficient. And it directly affects both cruising speed and fuel consumption.
It’s especially frustrating to install a lattice‑type rack — a kind of “air brake” — on cars such as the VAZ‑2108, the Tavria, or the new Moskvich, which have a much lower \(C_x\) than the previous generation (the VAZ‑2108 has 0.38 versus 0.47 for the VAZ‑2106) and therefore enjoy reduced fuel consumption.
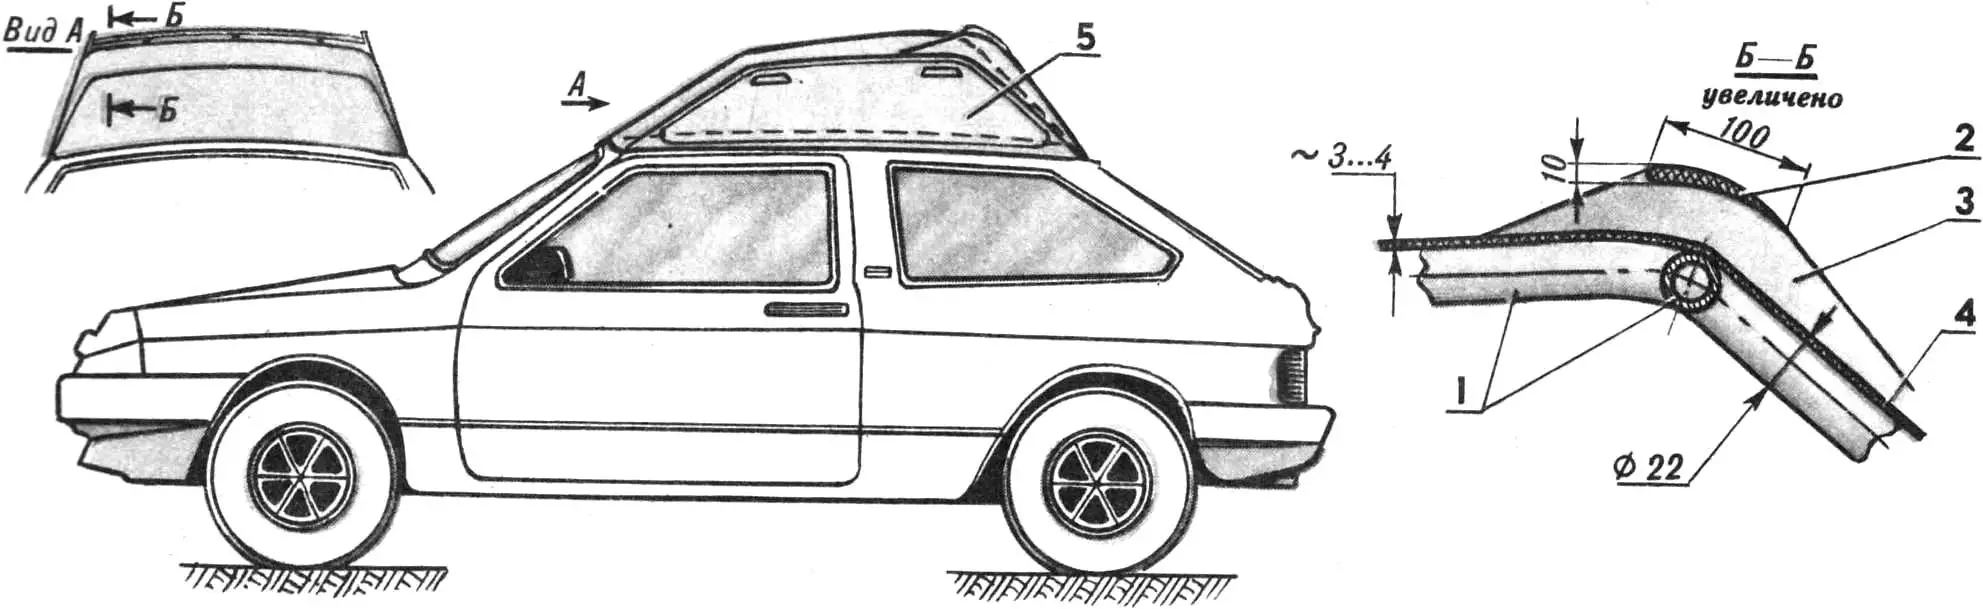
1 — frame (duralumin tubes), 2 — deflector, 3 — deflector bracket, 4 — trunk shell, 5 — access hatch.
Meanwhile, with a closed trunk of a streamlined “aerodynamic” shape, fuel consumption would be only slightly higher than on a car without any trunk at all. Besides, such a container lets you carry items in any weather.
Making this kind of trunk isn’t too difficult. First, you need to mold the container’s bottom from fiberglass cloth and epoxy resin — essentially a cast taken from your car’s roof. To do this, stretch a polyethylene film over the roof surface. Just make sure it has no punctures or tears (otherwise you can damage the paintwork). Tack the film down with adhesive tape, then lay several layers of fiberglass cloth on top, impregnated with the binder — epoxy resin mixed with hardener (ratio: 8 parts resin by volume to 1 part hardener). Then cover everything with another layer of film, which is pressed against the layup across the whole surface in one way or another. The simplest method is to place polyethylene bags half‑filled with river sand on the roof. After the binder cures, trim the layup to the roof outline; its thickness should be 4 … 5 mm.
Next, assemble the future trunk’s frame from Ø 22 mm duralumin tubes. When bending the tubes, it’s recommended to use templates made from cardboard or thin plywood that match the corresponding roof contours — this guarantees the frame will follow the roof’s lines. Join the tubes using duralumin gusset plates and rivets, or bolts with nuts.
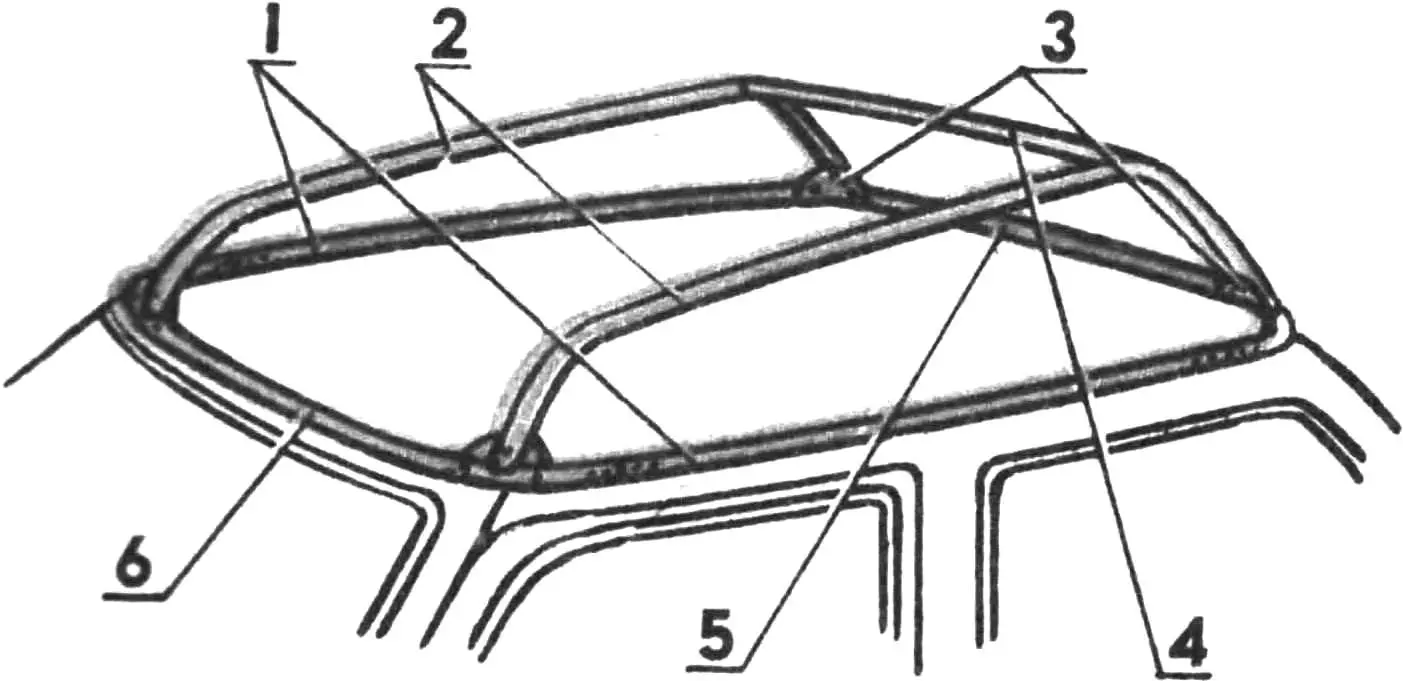
1 — lower longitudinal elements, 2 — upper longitudinal elements, 3 — gussets, 4 — crossmember, 5 — rear base crossmember, 6 — front base crossmember.
After assembling the frame and making sure it matches your car’s roof, pull polyethylene film tightly over the outside of the frame (you can also secure it with tape). Then flip the frame “upside down” and hang it from the workshop ceiling — preferably with thin steel wire, as shown in our drawings. After that, lay fiberglass mat impregnated with epoxy resin onto the polyethylene. The layup thickness should be 3 … 4 mm. To obtain a smooth double‑curvature surface, place a polyethylene film over the mat and pour a layer of river sand onto it. Do this carefully, constantly watching how the surface forms. The curvature of the shell will depend on the sand layer thickness at each spot, so while the resin is curing (about 2 … 3 hours), you can adjust the body shape by adding or removing sand in specific areas. If a local, fairly sharp bend is needed, place a long polyethylene bag filled with sand — or even a regular stocking — on the area of interest. After curing, the polyethylene comes off easily and the shell is covered on top with a layer of fiberglass cloth.
Access to the trunk is provided through hatches in its side surfaces. The hatch covers are the side panels of the shell reinforced with foam plastic and two layers of fiberglass cloth. Keep in mind: first glue foam strips 10 … 15 mm thick to the inside of the sides, then apply two layers of fiberglass cloth; after the resin cures, cut the hatches along the marked outline — this can be done with a fine‑tooth fret saw or, better yet, a hacksaw blade.
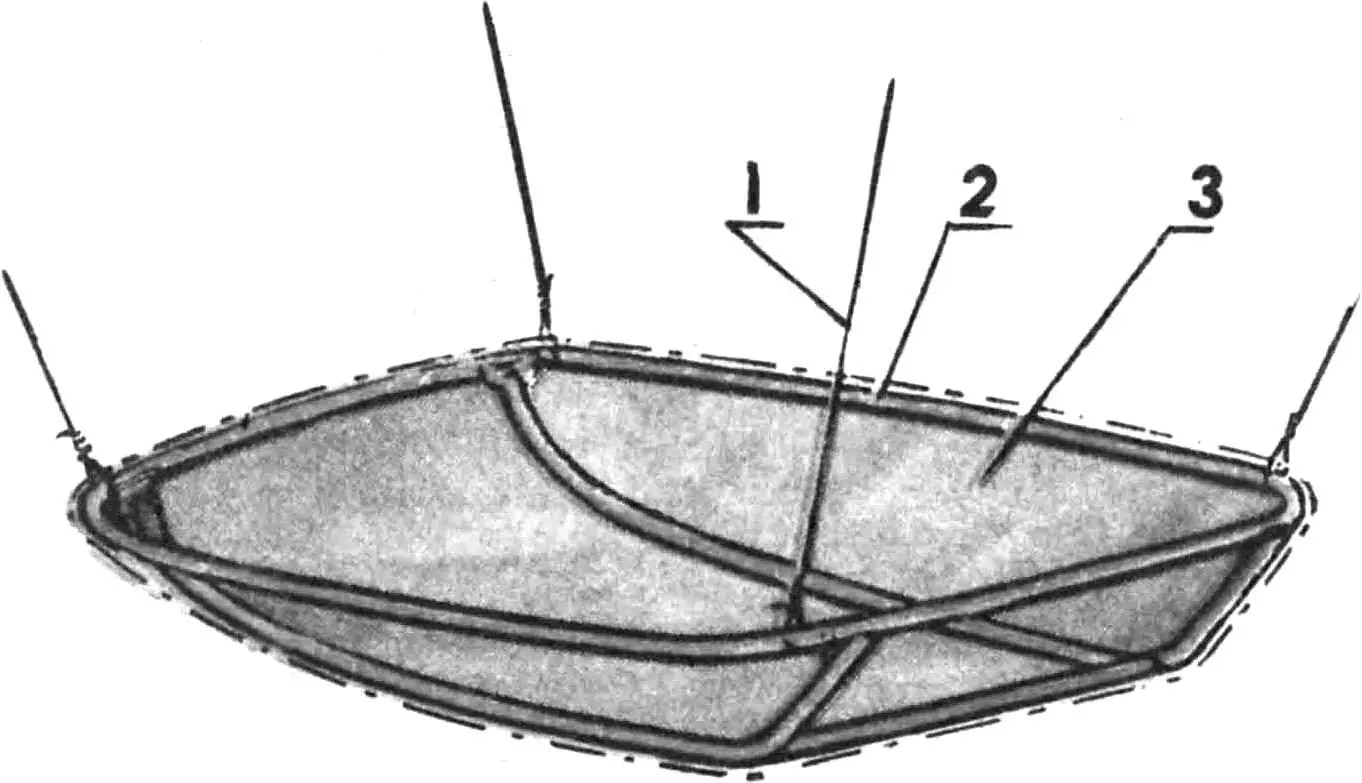
1 — wire, 2 — frame, 3 — polyethylene film.
The covers can be mounted on hinges, but it’s better to make them removable. The best way to secure them is with furniture locks featuring a cylindrical sliding latch and a “Yale‑type” key.
Bond the trunk body to the bottom using strips of fiberglass cloth and epoxy resin.
At the roof break of the trunk, it’s advisable to install a deflector — a wing‑like aerodynamic surface designed to improve airflow around the rear of the car. The deflector itself can be laid up from epoxy resin and fiberglass cloth, or bent from 1.5 mm sheet duralumin.
Final surface finishing includes sanding, filling with a compound based on epoxy resin and talc, final sanding, and painting the trunk in several coats with intermediate surface sanding.
“M‑K” 5’91, based on materials from Popular Mechanics (USA)
Recommend to read
 FIGHTER I-5
FIGHTER I-5. Scale model 1:33. The history of this car, dubbed the I-5, began in the summer of 1927, when Polikarpov developed a preliminary draft of the fighter under the British... INSTEAD OF A SHOVEL – A MICROCHAVER
“Hello, dear editors! I have been prescribing M-K since 1969. I made a number of homemade projects based on the magazine's drawings. I am, as they say, one hundred percent happy with them....
