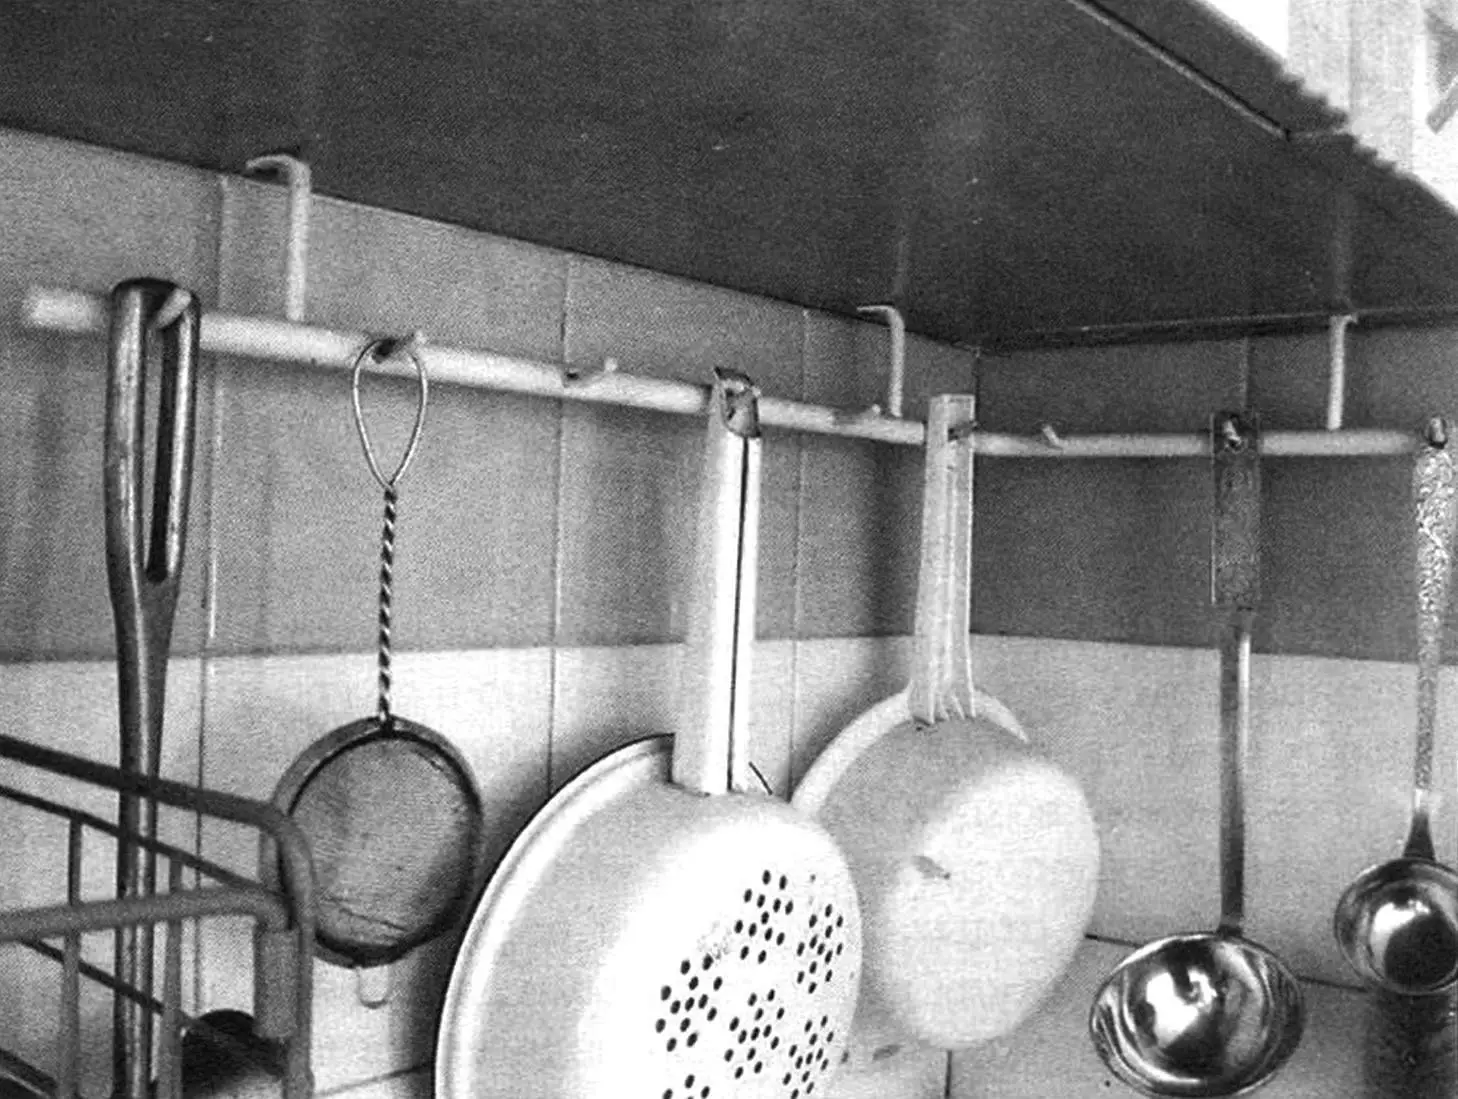
Kitchens in most of our homes are small. The set of kitchen furniture is also limited and rather monotonous, if not outright standard. But there is often so much cookware and other kitchen household equipment that it is no longer possible to place it all in cabinets and cupboards. At the same time, homemakers want everything to stay visible and close at hand.
Home craftsmen have long found a way out of this situation and came up with various brackets and rails with hooks for hanging different tools and accessories. Industry picked up this initiative too, producing complete sets with ready-made brackets or rails. What can be said about this? Yes, it is convenient and looks good. The problem is that they are usually mounted to walls, and the walls are tiled with ceramic tile – attractive and not cheap, so drilling holes in it for wall plugs is hard to bring yourself to do. Besides, placing “non-standard” devices on such holders is quite problematic.
So after I renovated my kitchen (tiling the walls), I also faced the same issue: buy brackets and rails or make them myself. After checking what was available in specialized stores and at construction markets, I realized I still would not find exactly what I needed, so I had to go with the second option.
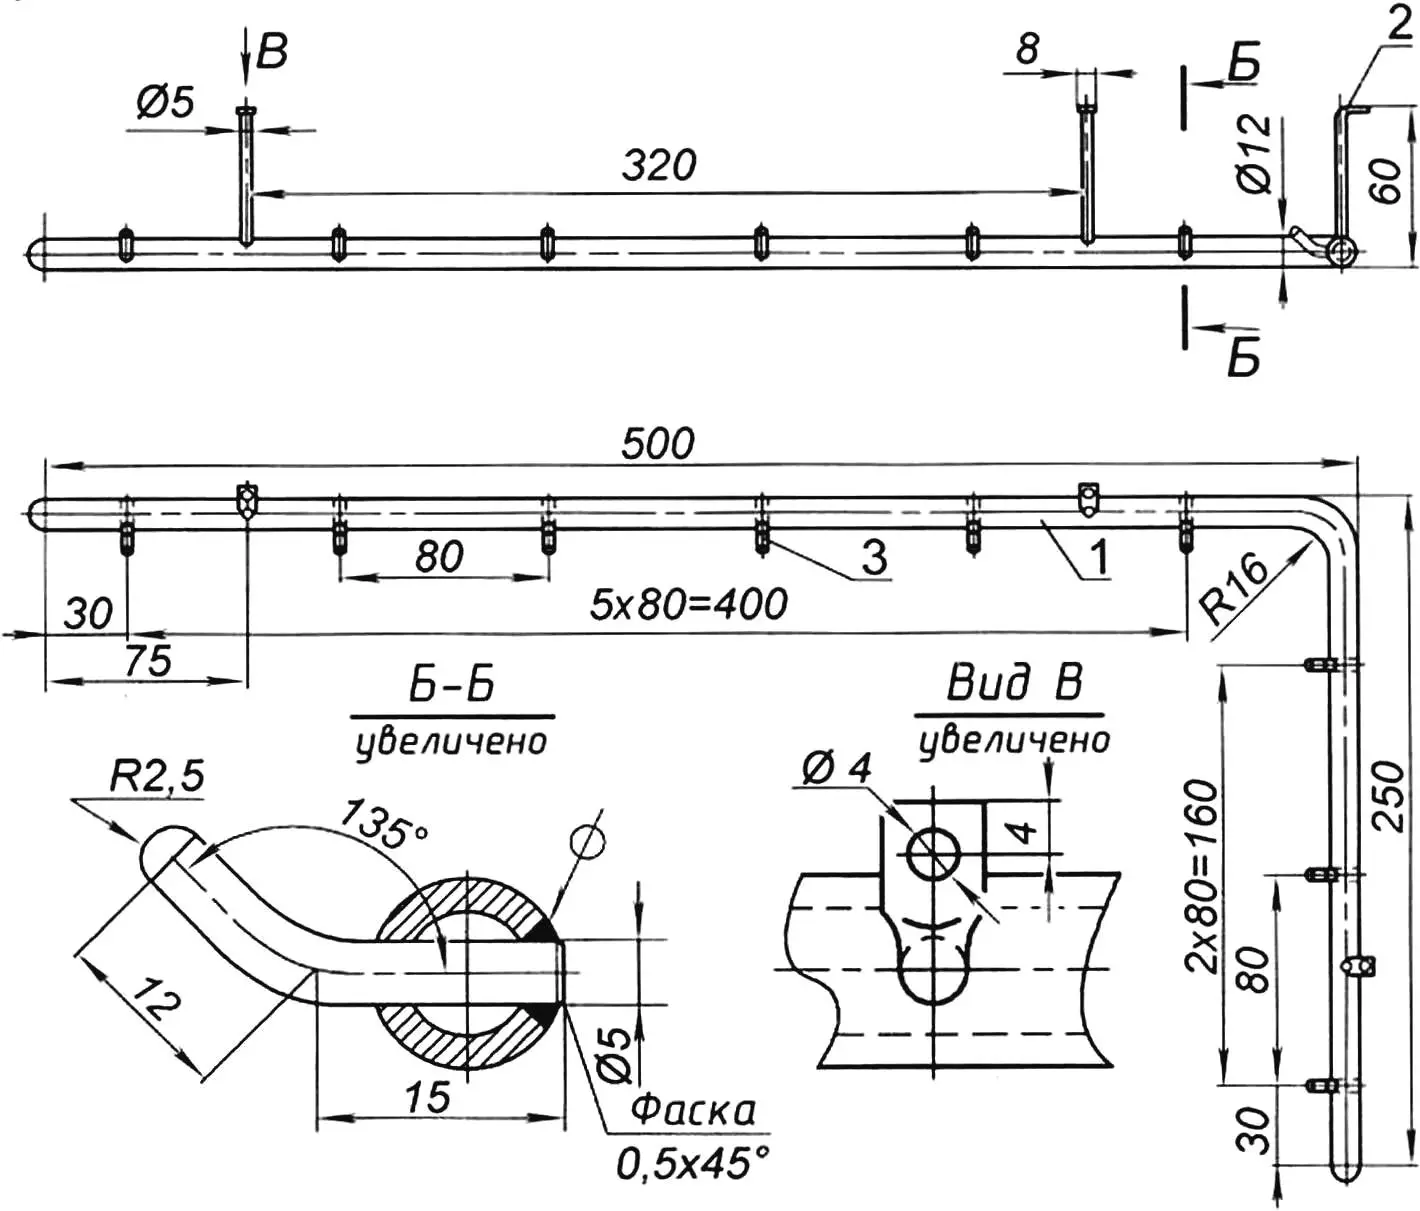
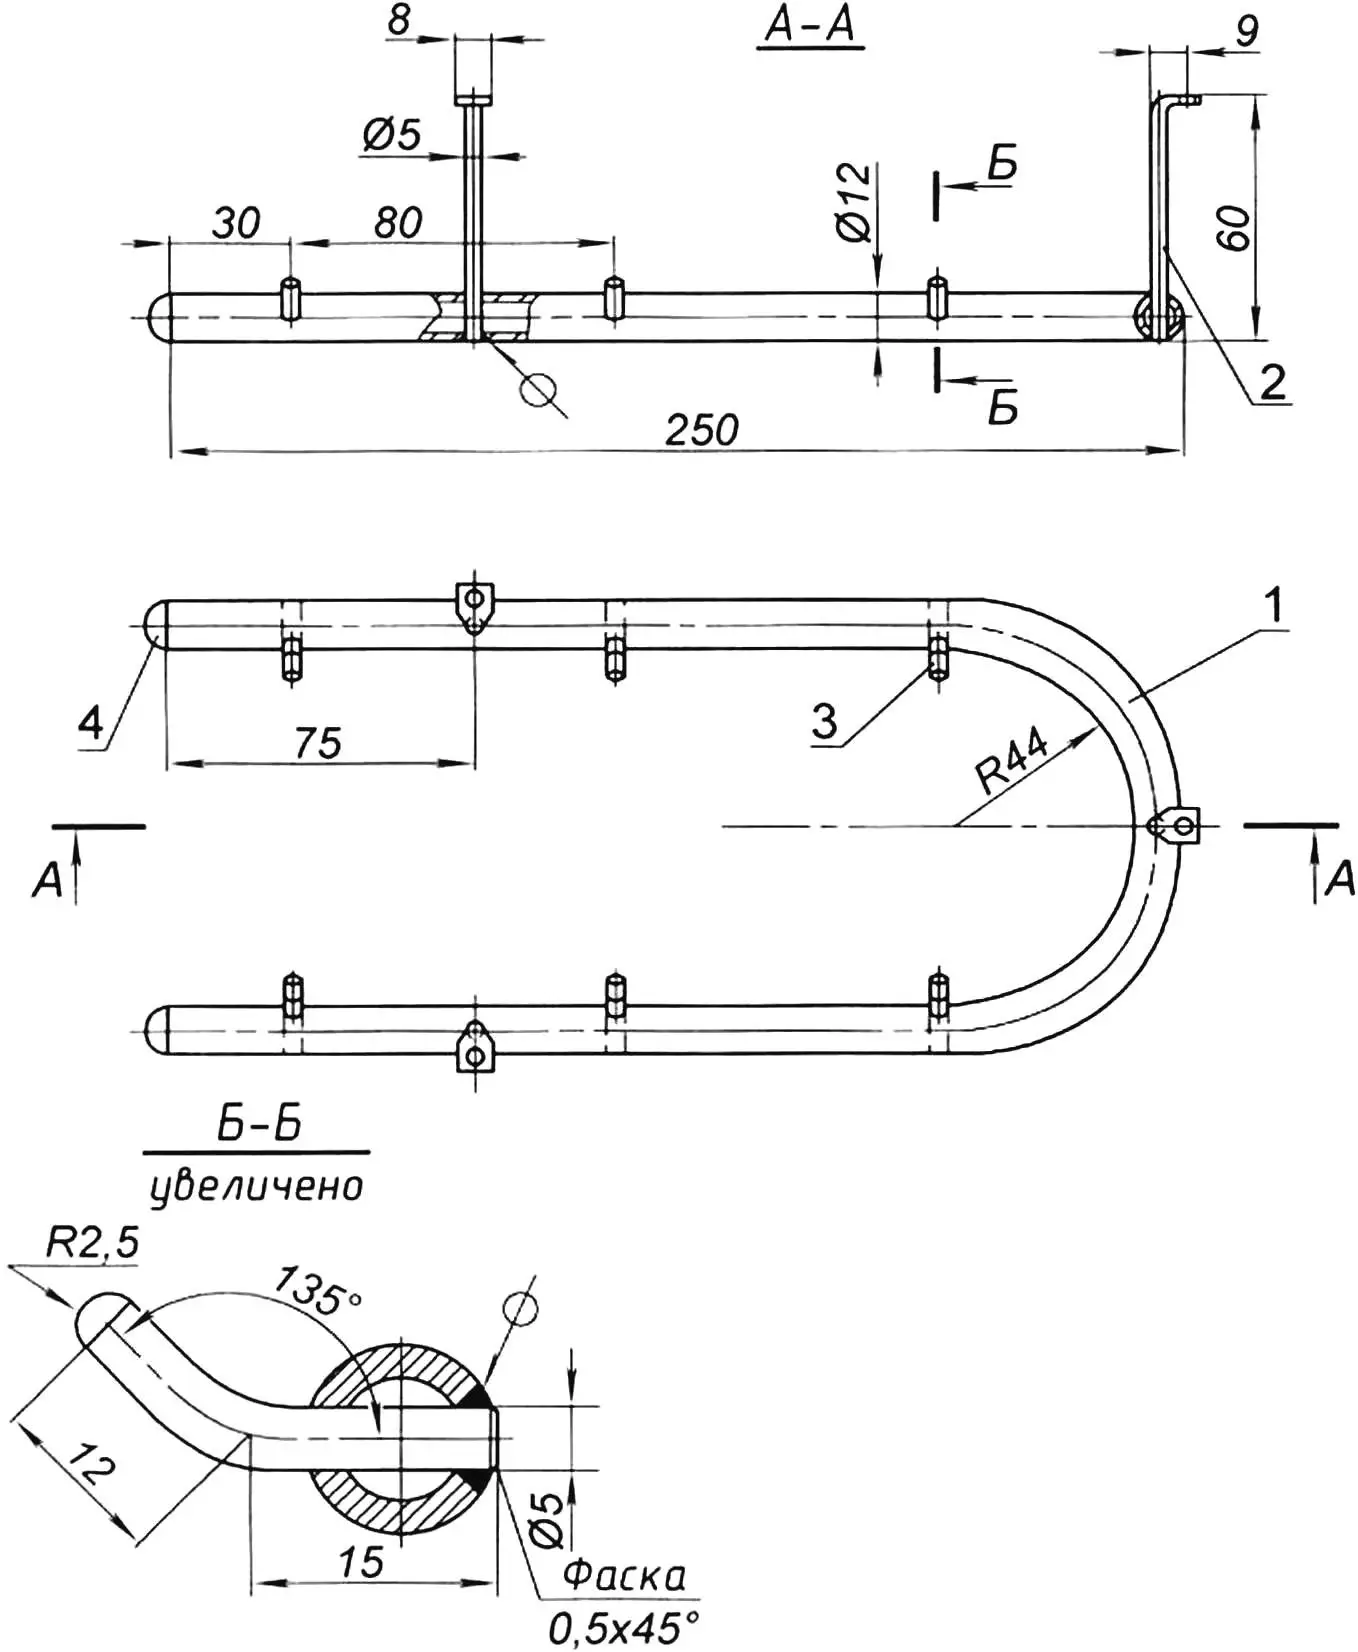
1 – rail (steel tube Ø12×1); 2 – bracket (steel wire Ø5); 3 – hook (steel wire Ø5); 4 – end cap (caprolon)
After coming home and not putting things off, I checked my stock and selected suitable materials. The main one was a thin-walled steel tube with an outer diameter of 12 mm. The other material used was steel wire 5 mm in diameter. By all estimates, it made sense to produce not one but two hangers. After consulting my wife (after all, this is largely her “work area”), we agreed on that.
I made the first hanger as an L-shaped rail, and the second as an arc. These configurations naturally followed from their location and intended function.
A little about the manufacturing process. It is fairly standard. I bent the tubes on a tube bender “cold.” Before drilling through holes in the tube, I filed flats at the marked points and center-punched deep marks. Where welding was planned, I countersank the holes and made deep chamfers.
The hooks on both hangers are of the same type (their dimensions even match), and so are the brackets. These parts were made of 5 mm steel wire. I heated one end of each bracket to red heat in a gas burner flame, flattened it on an anvil, and bent it to 90 degrees. There I drilled a 4 mm hole and countersank it for a flat-head mounting screw. On the other end, I ground a 1 mm chamfer so the bracket could pass through the through-hole in the hanger rail without problems. For the same reason, I made chamfers on one end of all hooks. Their other ends were shaped into hemispheres. The brackets and hooks entered their holes with slight interference (I even had to tap them lightly with a hammer) and were welded at the outlet to the rail tube. I ground the welds flush with the tube wall.
After that, I cleaned rust spots with sandpaper, degreased the entire surface with solvent, and coated the hangers with a light (gray) primer. After drying, I painted the hangers in two coats of white PF enamel (NC enamel can also be used), with intermediate drying as well.
Finally, I made caprolon end caps and inserted them into the end holes of both rails.
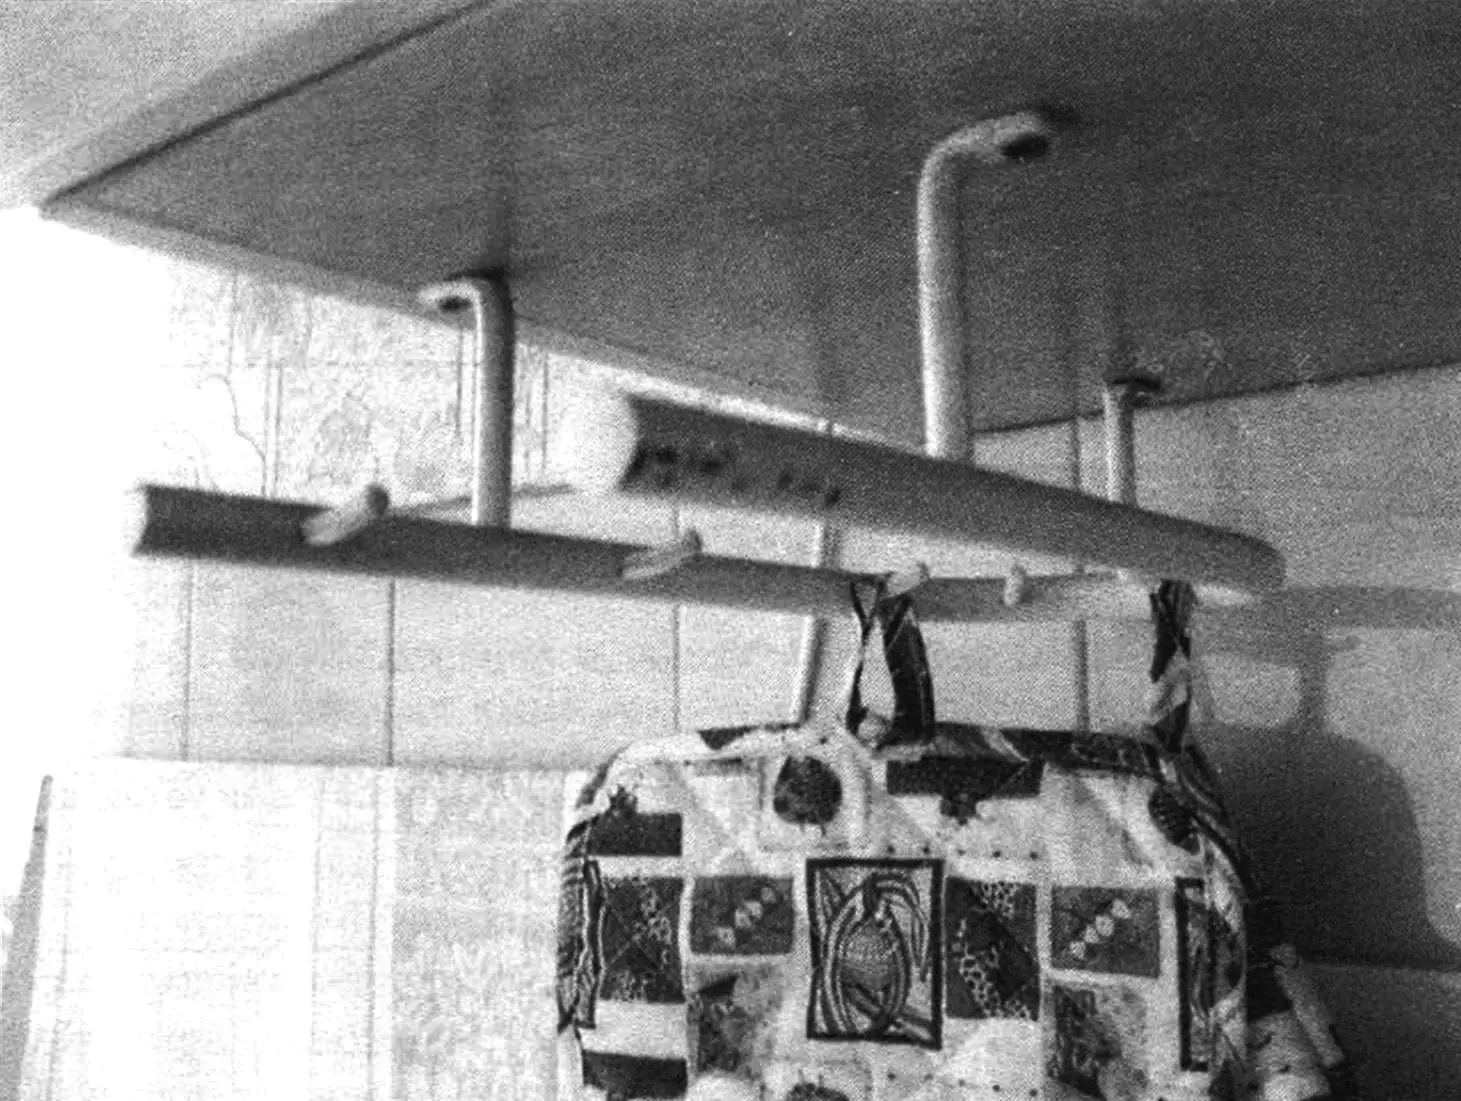
I fastened the hangers to the upper shelves made of veneered particle board, each in its own place: the corner one above the sink, and the arc one closer to the electric stove.
It so happened that making these hangers coincided with the upcoming March 8 holiday. But you can present such a gift to your wife on ordinary weekdays too.
“Modelist-Konstruktor” No. 5’2011, A. MATVIYCHUK
Recommend to read
 “TROUBLEMAKER” – A GARAGE ON WHEELS…
No matter what, the army of auto - and motor-fans continues to grow; it now joins a band of enthusiasts velomobiles transport. Much worse is the case with garages. However, they had... SO THE RESEMBLANCE WAS COMPLETE
For the manufacture of parts for models of artillery and torpedo armament of the marine models usually spent a lot of time, it is not always possible to achieve full similarity. Some of...
