There’s no need to prove how important it is to have a water reserve on a garden plot: if something happens to the irrigation system, flowerbeds and lawns will turn into hay in just a week of July heat. So when my old steel tank rusted through and started leaking, I urgently needed a replacement.
The first idea was to order the same kind, then paint it and let wild grapevine cover it so it would blend into the landscape. But a tank made of plain (black) steel is not only unattractive, it’s also impractical: it’s expensive and it rusts. An aluminum or stainless-steel tank would be great, but the price!!! And you might only use such a tank for a single season: in winter, “guests” will come and “privatize” your treasure for scrap metal.
After taking a hard look at reality and weighing all the circumstances, I decided to design and build a solution that would meet all my requirements: decorate the plot, be strong, not cost too much, resist corrosion, and not attract “guests”.
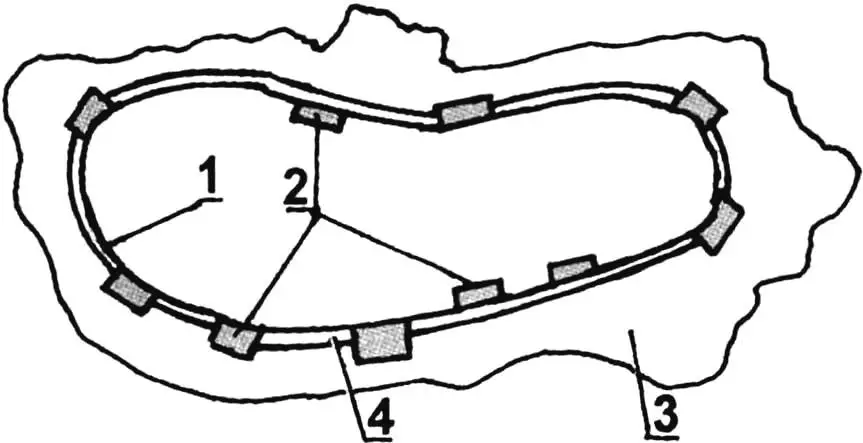
1 — foundation; 2 — drain tube; 3 — wall; 4 — clean-water draw-off tube; 5 — bottom
1 — wall; 2 — bricks (positioning blocks); 3 — foundation; 4 — bottom
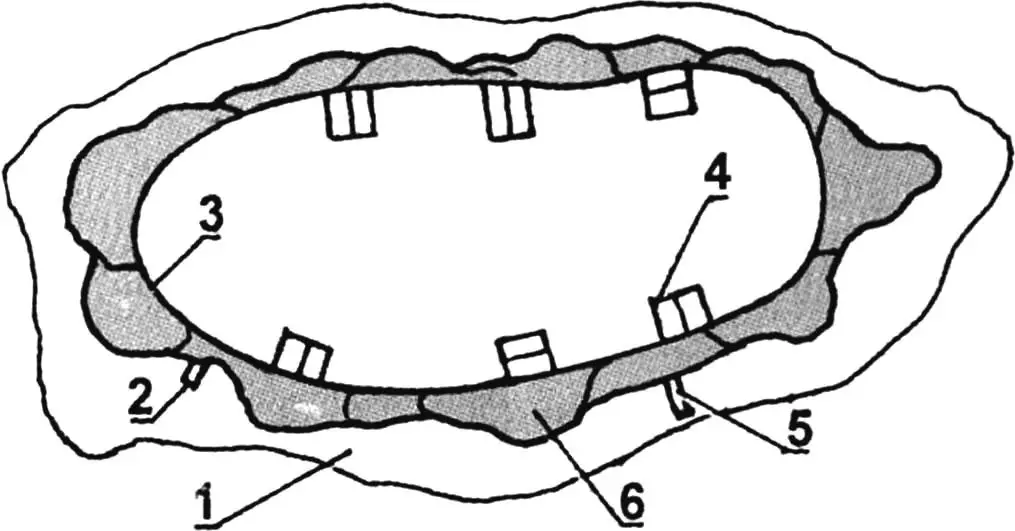
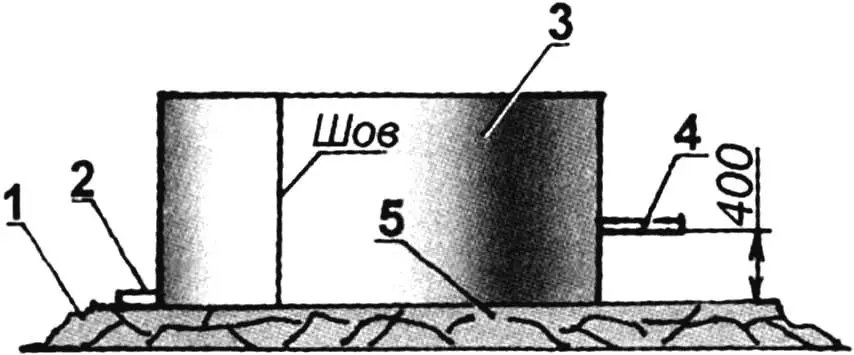
1 — foundation; 2 — drain tube; 3 — wall; 4 — base pillars (brick); 5 — clean-water draw-off tube; 6 — concrete wall
Below is a detailed description of how I solved this task.
To begin with, the future container should decorate the garden—meaning, at minimum, its design and shape must blend harmoniously into any location, becoming part of the landscape. For example, my garden is divided into terraces, so I designed the container as a retaining wall for the upper one. In different conditions, you’ll likely need other shapes and additional functions.
The second issue is the material: corrosion resistance and lack of appeal for unwanted “guests”. Bare iron is ruled out for the first reason; non‑ferrous metals for the second.
After considering various options, I chose what I believe to be the best one: make the tank’s base from galvanized steel sheets and “dress” it in concrete.
The base is made as follows.
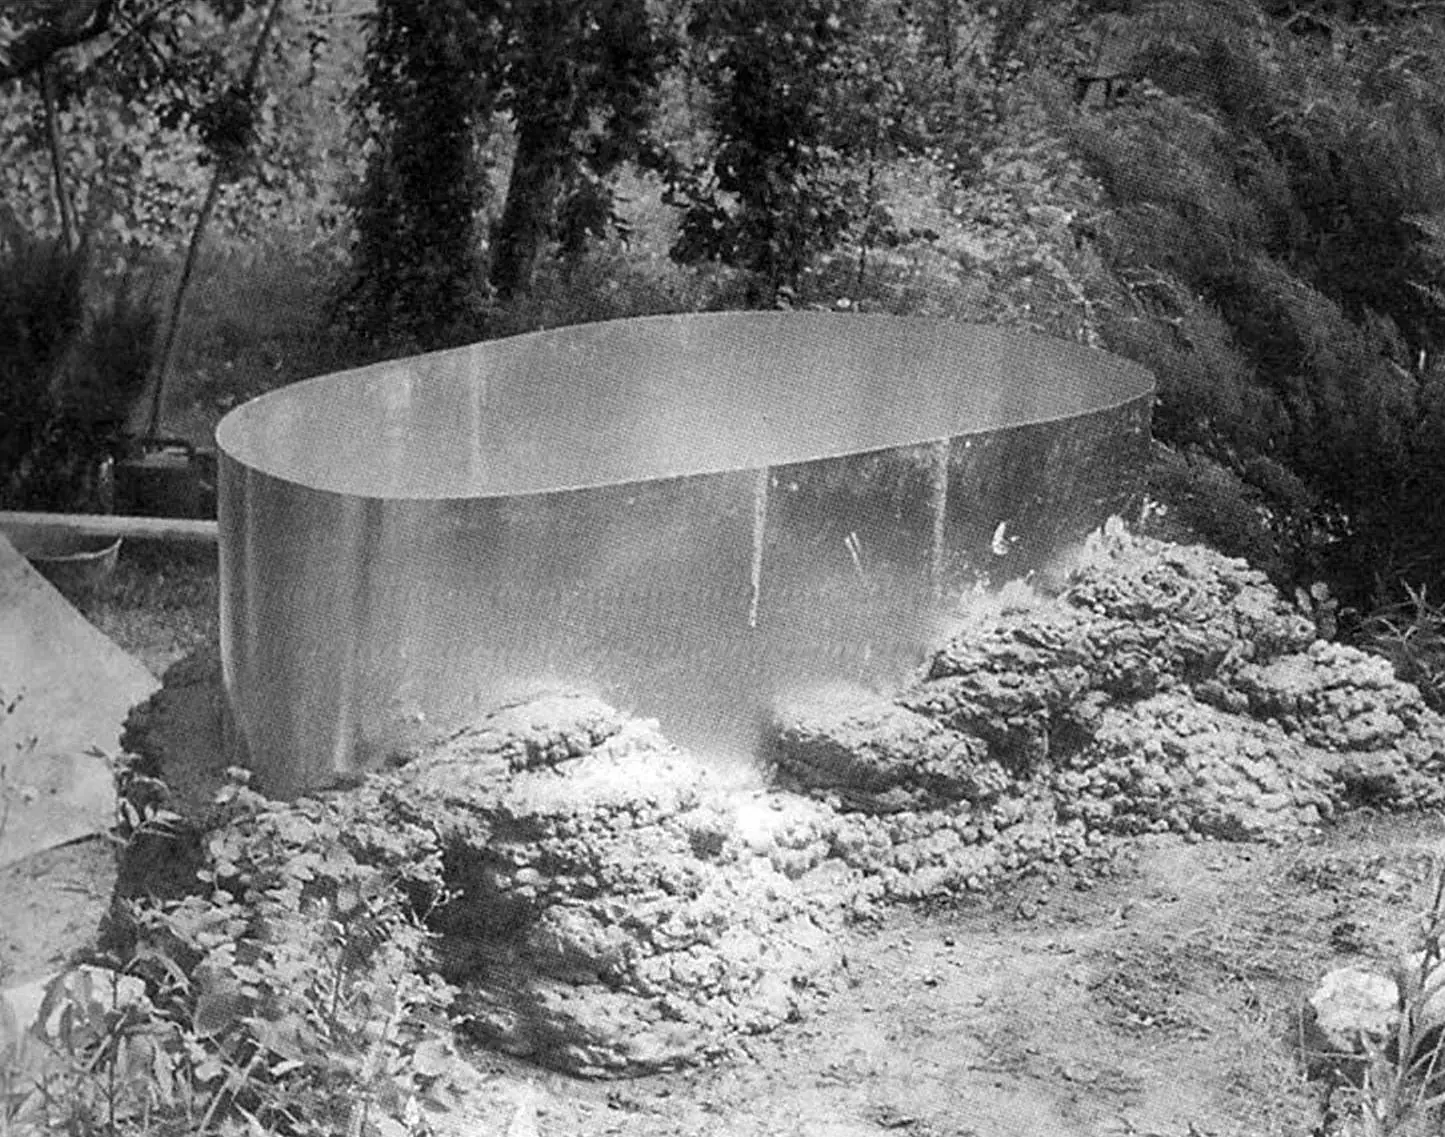
Steel sheets sized 1000×2000 mm are joined into a ring. The ring length (number of sheets) depends on the desired volume. My tank holds 1 cubic meter, so two sheets were enough.
The sheets can be joined like this.
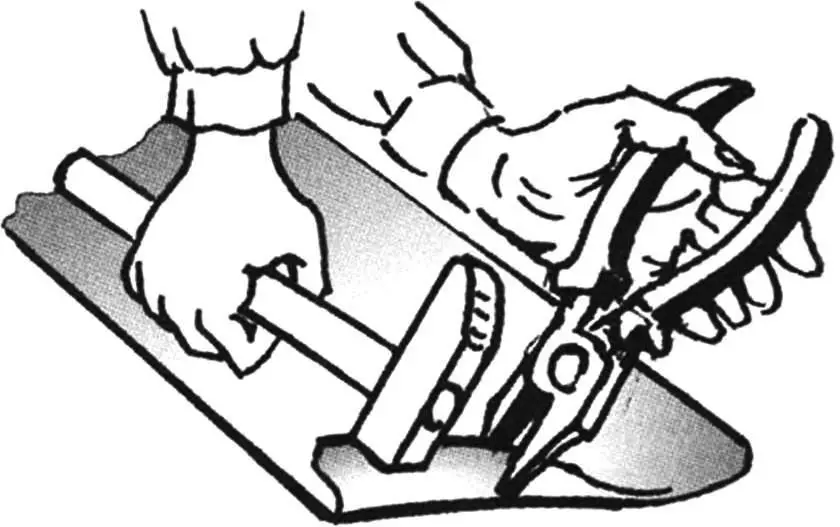
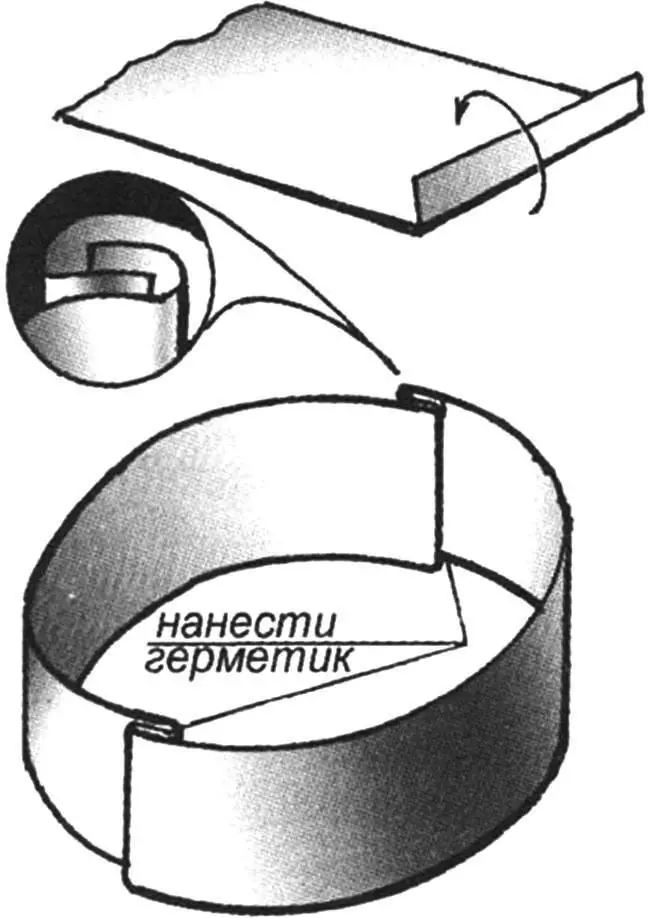
Place a sheet on a flat surface (for example, chipboard). Step back 10 mm from the edge and scribe a line. Using pliers, carefully bend the sheet edge along that line to a 90° angle. Continue bending with light taps of a small hammer gradually along the entire line, as shown in Fig. 1. Do the same along the opposite edge. After preparing all sheets this way, join them as shown in Fig. 2, squeezing a little sealant into the seam (plumbing sealant works, or you can even use ordinary modeling clay). Then, with light hammer taps, gradually “press” the seam together and in three or four places make firm “locks” with a center punch so the sheets won’t shift. The result is a springy, flexible ring that can be given any shape: bent like a bean, stretched into an ellipse, or made into something more intricate.
The next stage is the foundation. For a 1 m³ tank, it’s sufficient to make a foundation 120–150 mm thick, laid on a crushed-stone bed. Naturally, the foundation area should be slightly larger than the tank bottom. After choosing a location, remove soil to a depth of 150–200 mm, fill the pit with crushed stone and sand, water it thoroughly, and compact it. Now lay a layer of concrete equal to half the total thickness; place reinforcement (steel rods and pipes) on it; then add the rest of the mix. Concrete in a 2:2:1 ratio is prepared from crushed stone, sand, and cement respectively (expanded clay can be used instead of crushed stone). Add just enough water so the concrete doesn’t run but resembles gingerbread dough—then you won’t need formwork, and the edges will look like “stone flows”. Don’t pour the concrete; place it with a shovel and compact it (a wooden mallet works for tamping).
Next comes installing the metal base, but first the foundation surface must be carefully leveled. To do that, pour a cement–sand mix (1:3) with the consistency of thin sour cream onto the surface and spread it with a straight 2‑meter batten. Then, after letting the leveling layer dry slightly (it should lose its flow), place a galvanized steel sheet on it and press it down with bricks (the more bricks, the better). This is the tank bottom. Beforehand, trim the sheet so it matches the tank outline and also protrudes outward along the perimeter by 20–30 mm. Leave the foundation to dry in this state.
After a day, you can install the wall onto the bottom—i.e., the previously made ring of galvanized steel. Before installing the ring, make two holes in it: one at the very bottom for the drain tube, and another 300–400 mm higher for drawing off clean water.
The ring springs quite strongly, so use the same bricks to fix it in the desired position. If the previous work was done correctly and neatly, any gaps between the wall and the bottom will be no more than 5 mm—this won’t affect the tank’s quality.
Next, from the outside, pack the joint between the ring and the bottom with a stiff but pliable “dough” made from a cement–sand mix (1:1) with PVA glue added: about 1 tablespoon of glue per 0.5 liters of water. After drying this “dough” for a day, remove the bricks and insert a drain tube (aluminum, stainless steel, or plastic) into the hole near the bottom.
Now the steel base is ready for the next stage—building the concrete wall.
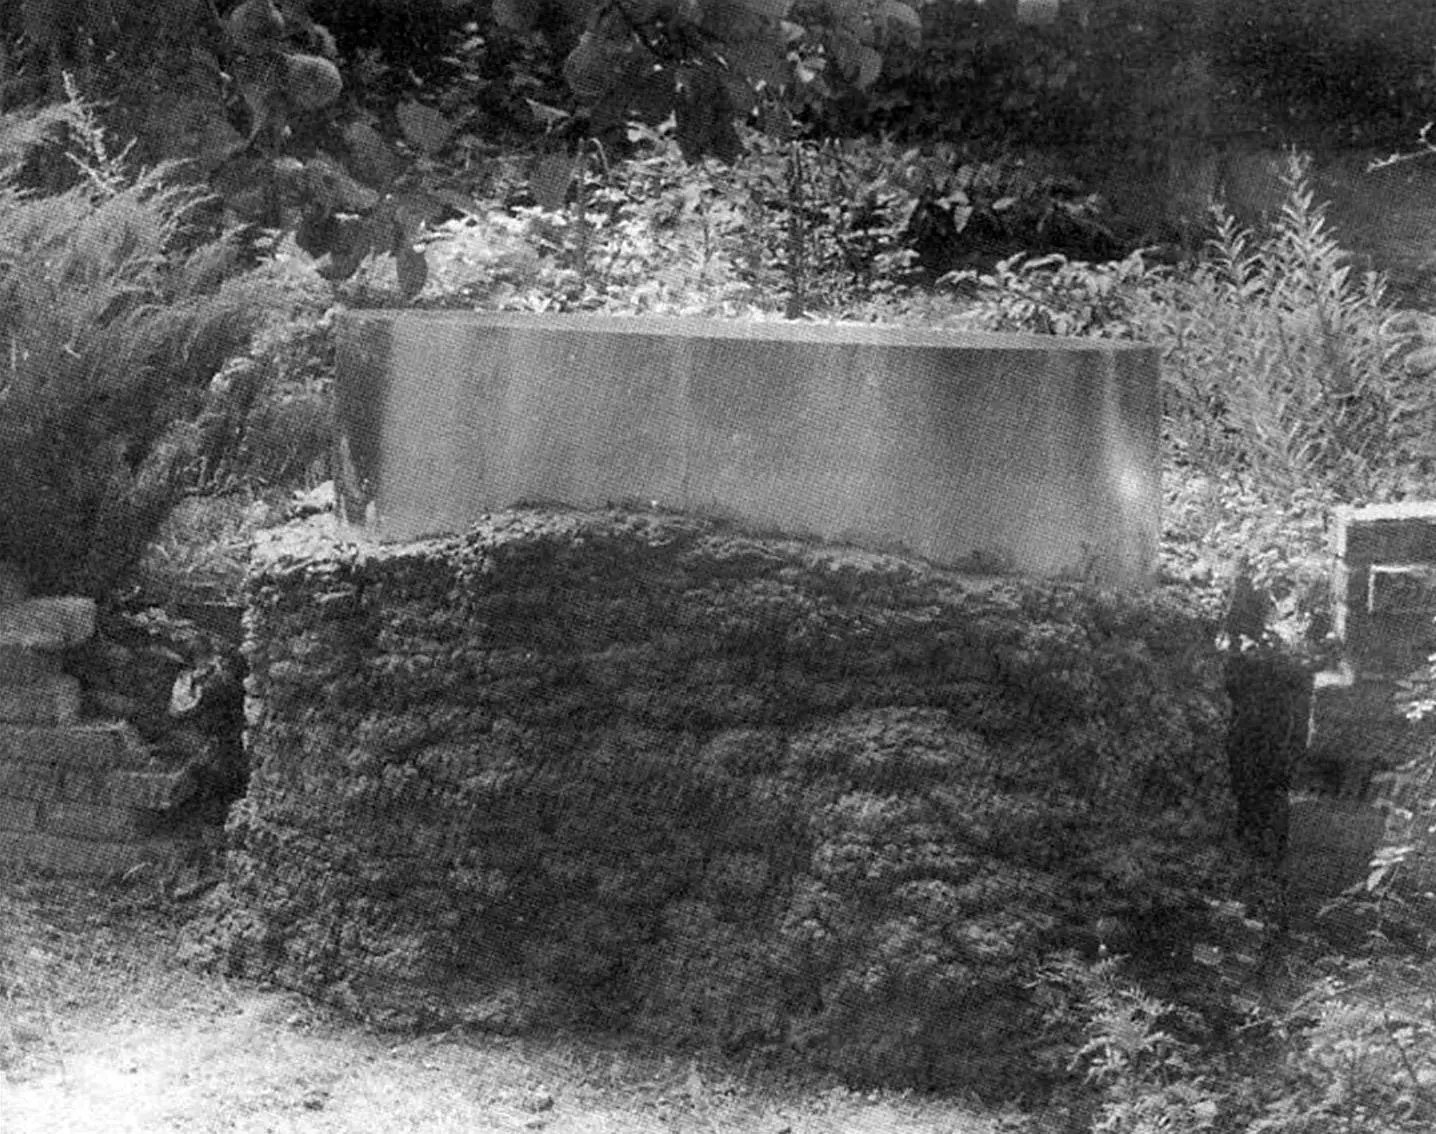
Prepare the concrete the same way as for the foundation. Work like this: take a trowelful of concrete, place it against the wall (which acts as a one-sided form), and lightly compact it so the concrete spreads and presses tightly to the wall. Then place the next portion, and so on around the perimeter. While placing the concrete, aim for a non-uniform wall thickness—this creates a surface resembling natural stone. To make the tank look more expressive, not only deliberately increase or decrease thickness, but also form more pronounced bulges or, conversely, recesses—sculpt the wall like a sculpture, on “autopilot”: don’t think about masonry technique, but follow your own sense of beauty and harmony.
Then you’ll be able to materialize your impressions and get exactly what you wanted.
When building the wall, don’t forget that at a height of 300–400 mm from the bottom you need to embed another threaded tube for a valve, to draw off clean water.
So the steel base doesn’t deform during concreting, it’s advisable to stack brick support columns inside the tank (Fig. 5). They won’t allow the thin wall to “move” inward under concrete pressure. After laying 5–8 courses, let the concrete wall dry until the next day; otherwise it may “slump” or some details may be damaged. If you’re shaping a sharply protruding ledge, don’t do anything near it until the next day. The same applies to a recess or any detail whose position and shape must be preserved. Work in such areas should continue only after the concrete has hardened.
To finish the laying, make a small inward lip at the top edge of the steel base so it won’t separate from the concrete.
The final stage is finishing the concrete wall.
Various options are possible here using natural stone, bottle glass, ceramics, etc. For my tank I chose the simplest option: the entire outer surface was carefully coated with a cement–sand mortar (1:1) and brushed with a wet broom. This technique gives an excellent result. I didn’t paint the concrete, deciding that the gray color blends well with the garden greenery.
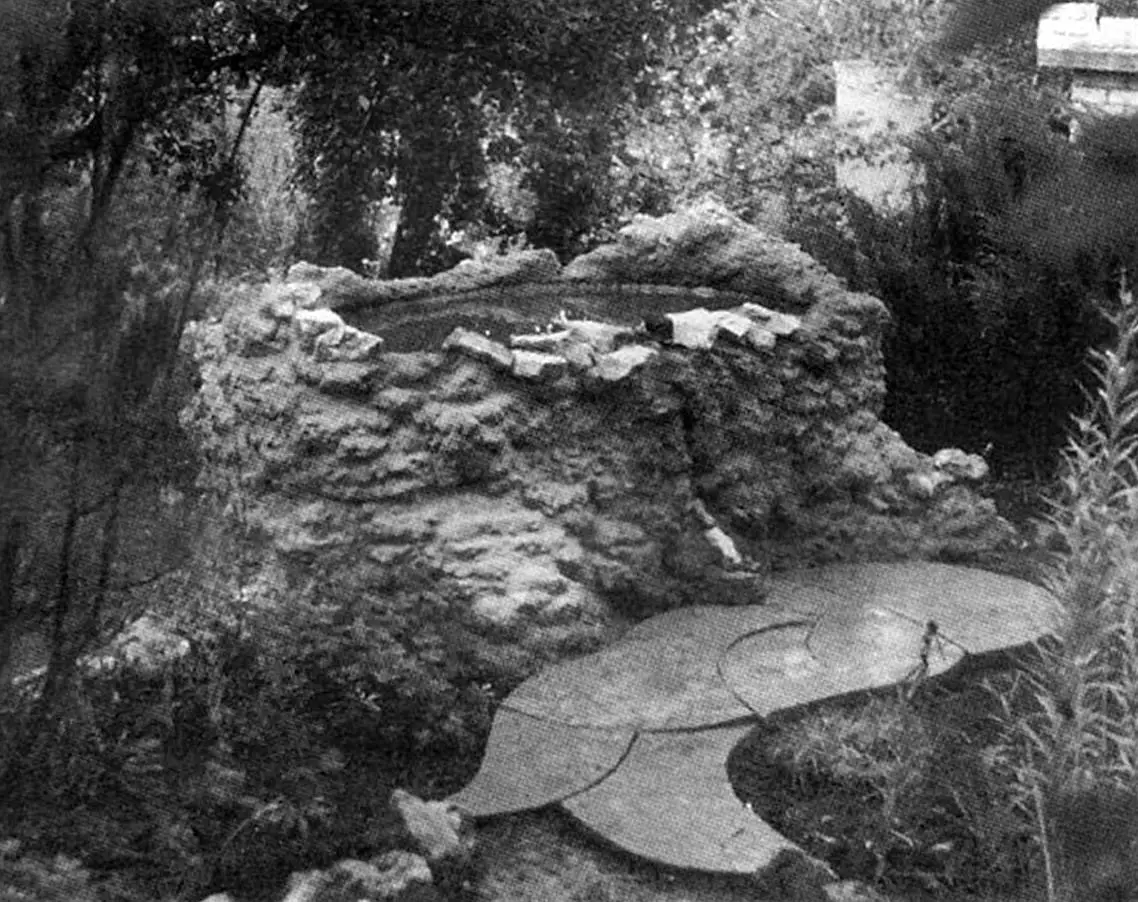
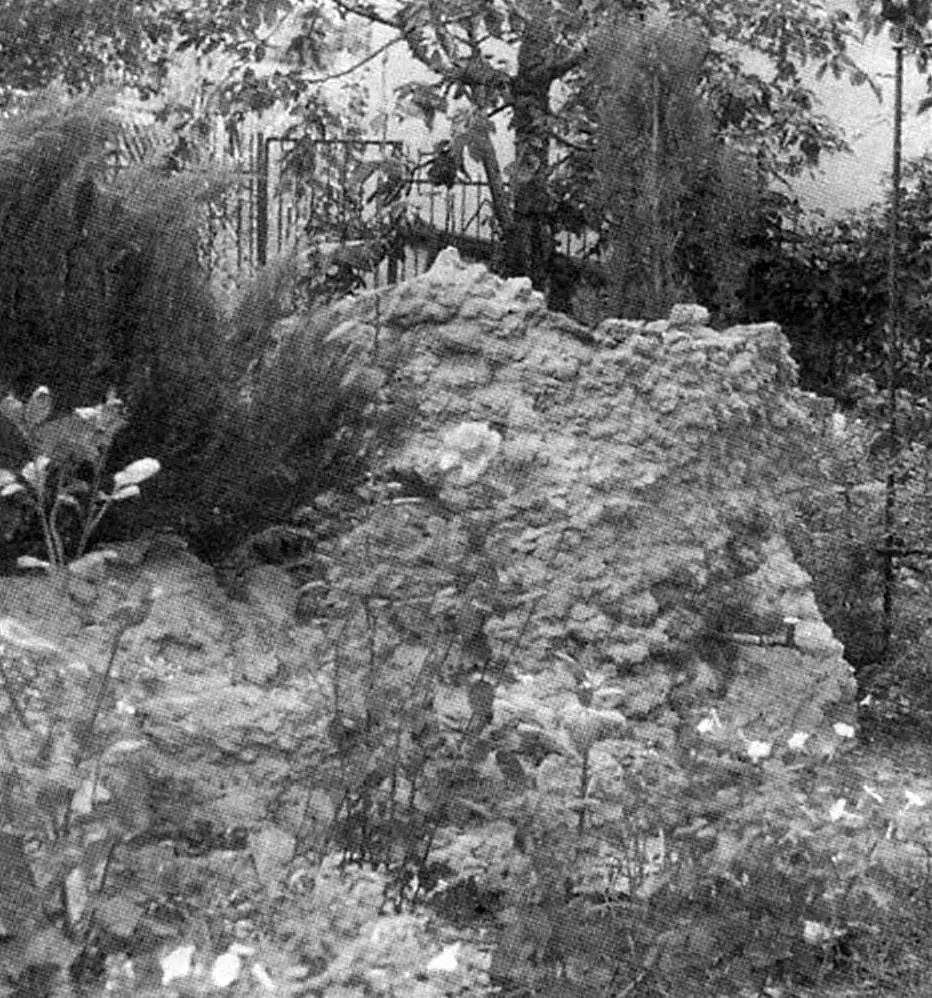
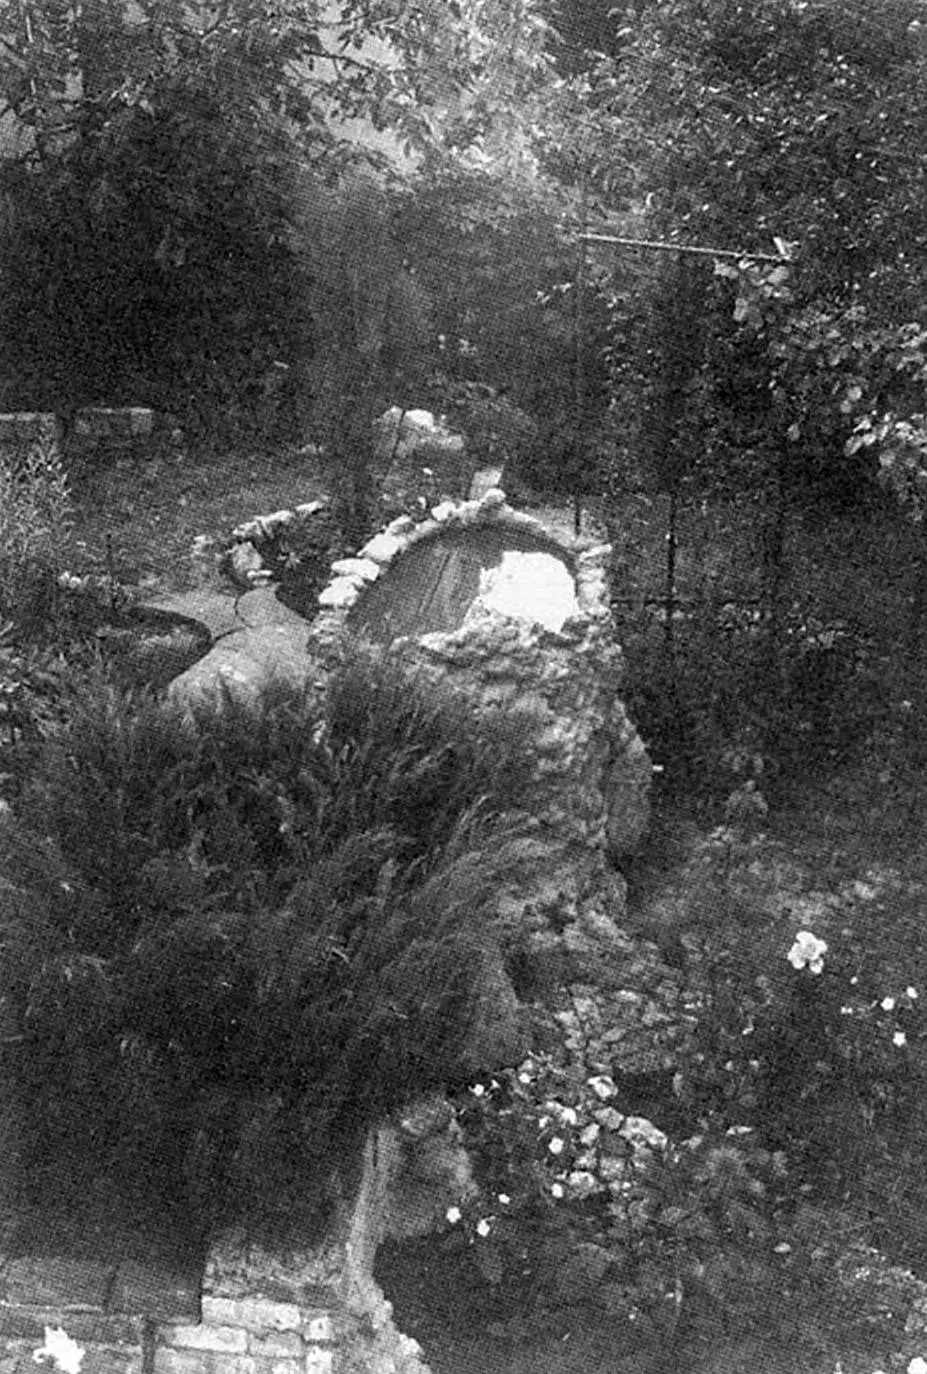
What ultimately came out of my idea can be seen in the photos.
In conclusion, here are the obvious advantages of the design.
1. It’s relatively inexpensive. For a 1 m³ tank I used three galvanized steel sheets, six bags of cement, 13 bags of expanded clay, and 13 bags of sand.
2. Simple to make. There’s no welding, soldering, or complicated technical methods requiring special tools, materials, or skills.
3. The tank doesn’t need an anti-corrosion coating.
4. If the water is hard and rich in iron—which, on contact with air, precipitates as rust—then in such a tank the water settles faster, rust sinks to the bottom, and the raised tube in the wall allows you to drain clean water. It can be used for a bathhouse, and after filtration—even for cooking.
5. The tank is aesthetic. It pairs beautifully with a rock garden, waterfall, fountain, flowers, and greenery—while still performing its practical role as a water storage reservoir.
6. The tank is versatile. Using the same techniques, it can be made in any shape and size, and “fit” into the chosen location without disrupting the garden’s existing structure.
7. Finally, the tank can’t be “carried away”, which is quite relevant in our reality. The only drawback is that it can’t be moved—so choose the location carefully, remembering that this is a permanent structure.
“Modelist-Konstruktor” No. 3’2005, S. Kovalev
Recommend to read
 THE PAINT WON’T HURT
Many decorative vases and figurines have a rough bottom, which can scratch the surfaces of polished furniture. This can be avoided by sticking to the bottom of the paper or cardboard,... GASOLINE IS NOT NEEDED
I built most of the vehicles are based on commercially available motorcycle or bike noisy and power hungry internal combustion engines. It was with one hand comfortably, and the other is...
