You can enhance the wheel without welding. To do this, from a sheet of aluminum 3 mm thick and cut out two disks the diameter of the rim. In the centre of each disc, cut a hole under the bushing, after which together with the bushing mount them to the wheel using the M5 bolts and distance sleeves — sections of tubes with inner diameter 5.5—6 mm. Over a distance bushings lay dural strip. Wheel ready. It remains to attach the driven sprockets from any moped or even a lead front — bike type “Eaglet”. It attaches with three bolts M8 nuts.
Now install the wheel into the forks attach to the frame, the engine, fuel tank, seat, headlight, ignition coil, steering wheel and controls — grip throttle, clutch lever and gear lever — hand or foot.
Not do it without the brake and foot pegs. For reliable stopping power is quite enough for one brake wheel —rear. The brake is simplified, drum type. This is a clip made of steel sheet thickness 2.5—3 mm, welded to it the brake pedal is located on the right side of mokik on the rear fork of the frame. Steps — self-made from pipe sections. They are fixed by welding on the feathers of the front fork.
A few words about fuel. Mokiki engine runs on a mixture of gasoline And-76 with the engine oil at a ratio of 25:1. This means that two-gallon canister of gasoline will need 0.4 l of oil.
Before starting the engine make sure the transmission is filled with engine oil, and the ignition set in accordance with the regulations. Move the shift lever to the neutral position, open the fuel valve, click utilities float carb and fill the float chamber, vigorously tap the leg kick. Warming up the engine, depress the clutch, put it in first gear and gently release the clutch lever, adding “gas”. When mokik start, accelerate its speed to 15 km/h, again depress the clutch and turn on the second transfer. In any case, do not drive at top speed, not convinced of the reliability of the brakes.
All right? Then Godspeed! Try to be reasonable. Even a mini-mokik can cause Maxi trouble.
Mini-mokiki — especially a land vehicle is easy to turn into a motor catamaran. It is enough to put mokik on floats, cross beams and fastened (on the same day and fixed the machine) to be installed on the transoms paddle wheels and start the engine…
If you like this design, get to work. Catamaran hull made of hardboard with a thickness of 4 mm. as illustrated raschertite sheet of hardboard on the cells of 100×100 mm and transfer it to the contour of the hull. As you can see, each body of the float is formed from a single sheet. To bend it exactly according to the planned lines, cut them with sharp knife-joint by approximately half the thickness. Bending the workpiece, to drill in the joints of the edges of a series of holes with a pitch of about 50 mm. And “stitch” the hull with pieces of copper or annealed steel wire.
In the formed body: glue the transom Board and the two formers, after which all the joints and bends from the inside, carefully glue the strips of fibreglass on the epoxy in 4-5 layers. When the glue is dry, remove the wire outside the housing, and the edges will clean up with a file and glue strips of fiberglass in 3-4 layers. Frames place where there are cross beams of a catamaran. Cut them out of 12 mm plywood, the size of pick up at the place. Insert the case also with epoxy glue and strips of fiberglass. The deck cut out of hardboard and attach to the body with wire and epoxy glue. For the final finish the hull glue the outside of the fiberglass, and the inside several times cover parquet lacquer.
As the cross beams use pine bruski section 50×60 mm. Attach them to the housings and frames with long screws and epoxy glue. Pre-frames for screws drill pilot holes. Docking — bracket, bent steel strips — attach to crossbars. To the axes of the nuts could be tightened with the installation of mokik, between the cheeks of the docking units, insert the spacer. Front docking port to mount the hinge on the front beam, the rear — by means of two M6 bolts with nuts and washers. On the rear cross beam place an extra star, which will provide chain tension of the drive paddle wheels.
Paddle wheels dural. The blades them from a sheet thickness of 1-1,5 mm, and shape each like a scoop. Collect them into a single node in the duralumin discs of 3 mm thickness with 5 mm bolts.
The axis of paddle wheels — steel pipe with a diameter of 30 mm, it is necessary to weld the driven sprockets from any moped or a Bicycle “Eaglet”, “Student”, and the disk having the same diameter as the sprocket. To the ends of the tubular shaft insert two turned on a lathe axis, the diameters of them in places of landing of landing correspond to the diameters of those bearings that you will be able to pick up. On the transom of each hull bearings fasten with clamps curved steel strips of thickness 3 mm.
The maneuverability of matkatavaraa provide tail feathers. Cut them out of 12mm plywood and pivotally hung on the transoms with the help of improvised loops of the l-shaped hooks, curved 6 mm wire. Install them on feathers, and on the transoms — two parts, resembling a pin with a ring. Attach all the parts with epoxy glue.
And now — on water. Mokiki remove the wheel, fix it to the axle pins in the front and rear attachment points, replace the chain for a longer, throw it through the driving sprocket of the motor and driven, located on the axis of the paddlewheel. That’s all. Start the engine, turn on the first or second gear and full speed ahead! Do not forget that going even in the near journey through water, be sure to wear a life vest. To make it you can own several pieces of foam and dense fabric.
I. ZHUKOV, engineer
Recommend to read
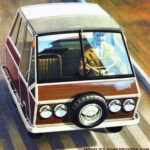 “MINIMAX”: BIGGER INSIDE THAN OUTSIDE
CAR - FOR WHAT?
Do you need a car? Which one exactly? This question arises before anyone who intends to purchase a factory-made car. But, as you know, the choice of the type of car you...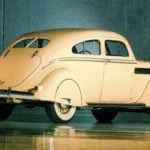 IN SPITE OF THE AIR FLOW
"Aerodynamic" Chrysler Airflow. Biography of Walter Chrysler of the typical American entrepreneur. Before creating his own company, he has worked as an assistant locomotive engineer, and...

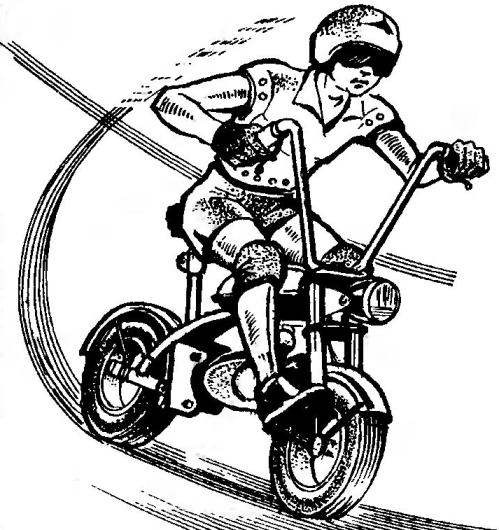 Mini makiki always use the boys great success. And for good reason! Small size, cost-effective, modern appearance, excellent performance — what more can you ask for? Maybe that’s why many of them roll up his sleeve so take tools. After all, if you try, you can do mokik, able to compete with serial two-wheeled machines. However, it is not very easy, but it’s worth it.