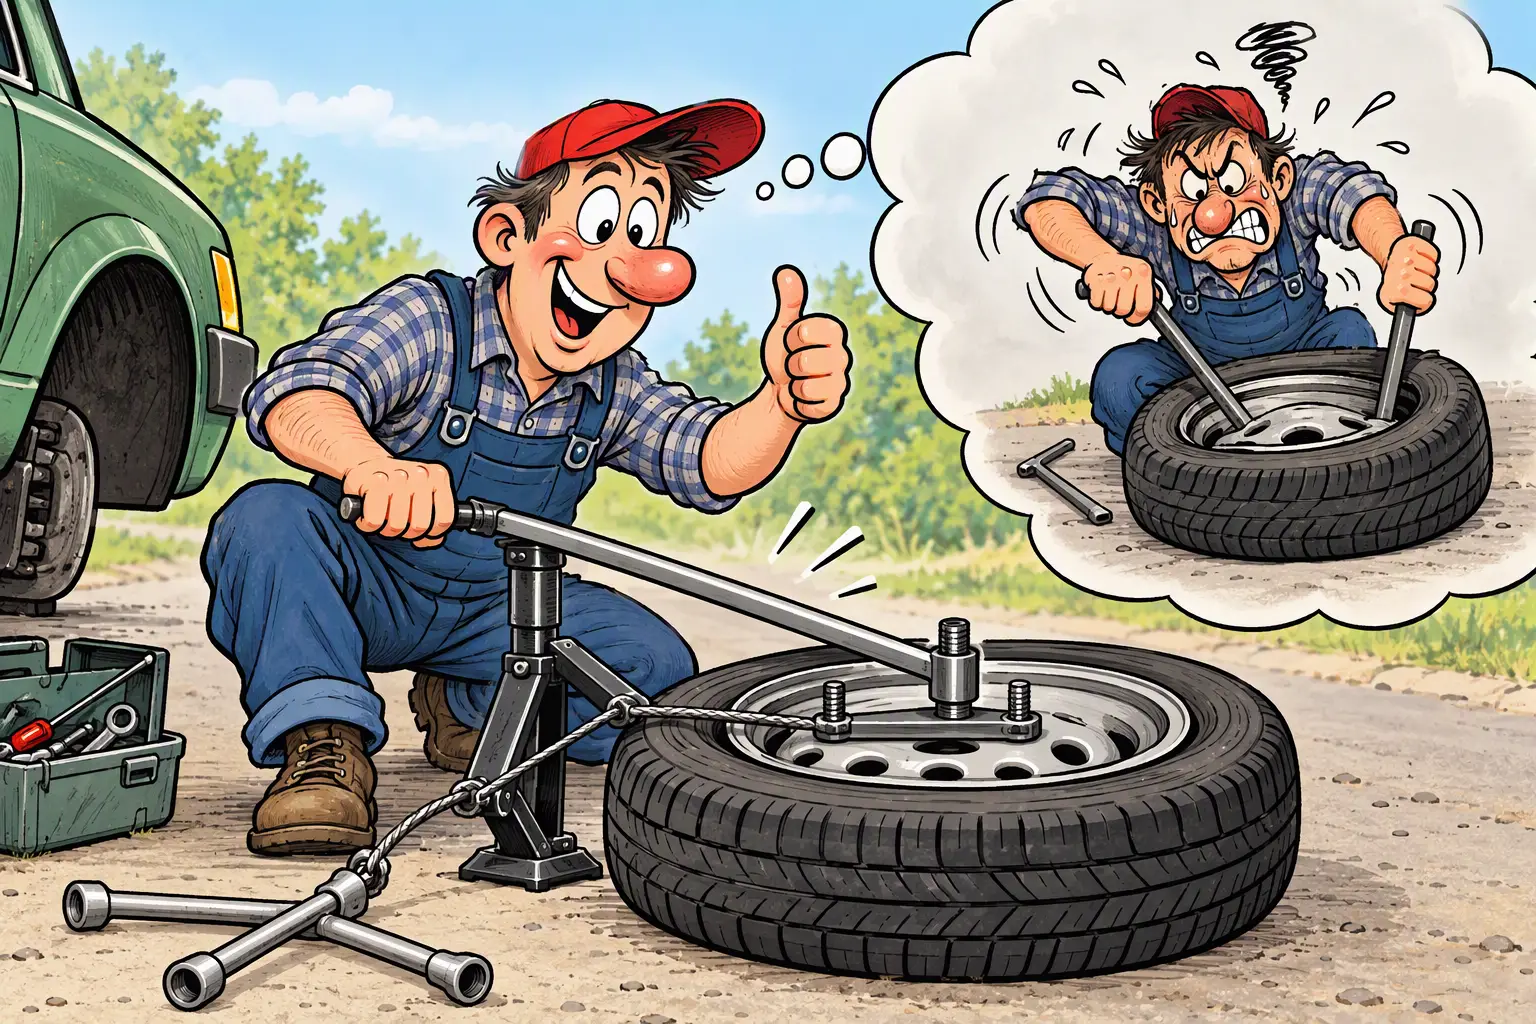
How much trouble tire demounting and mounting on passenger-car wheels causes for beginners (and not only them)! Bent rims, torn tire beads, tubes bitten by a tire iron, and even injured fingers are frequent companions of this work. That is why many car owners prefer to go to a service station and entrust it to specialists, which has its well-known downsides. (Besides, as someone once shrewdly noted: tire punctures happen the more often, the farther you are from a service station).
Taking all of the above into account, I set myself the task of developing a simple and compact device that works together with a jack (included with any car) and makes tire bead breaking and seating easier.
Judging by the feedback of fellow motorists who have used this homemade device, and from personal experience, I can say that the task has been solved quite successfully.
The fixture consists of three parts (assemblies) of a very simple design. They can be made by a DIY motorist with elementary metalworking skills.
The design and operating principle of the fixture are clear from the photographs and drawings.
The plate is a steel strip measuring 140x36x4 mm. Three threaded (M8) pins are welded to it perpendicular to its plane: one in the middle and two at the ends. The outer fastening pins are identical — simple threaded rods. The distance between them on the plate matches the diameter of the circle on which the centers of the wheel disc mounting holes lie (for Zhiguli cars — 100 mm). The central pin is stepped: at the bottom there is a collar-foot, above it a thickened section, and at the top a shaft-axis with a thread on the end. The collar improves stability, the thickened section keeps the lever bar at the height of the wheel rim, and the shaft-axis fixes one end of the lever bar on the pin.
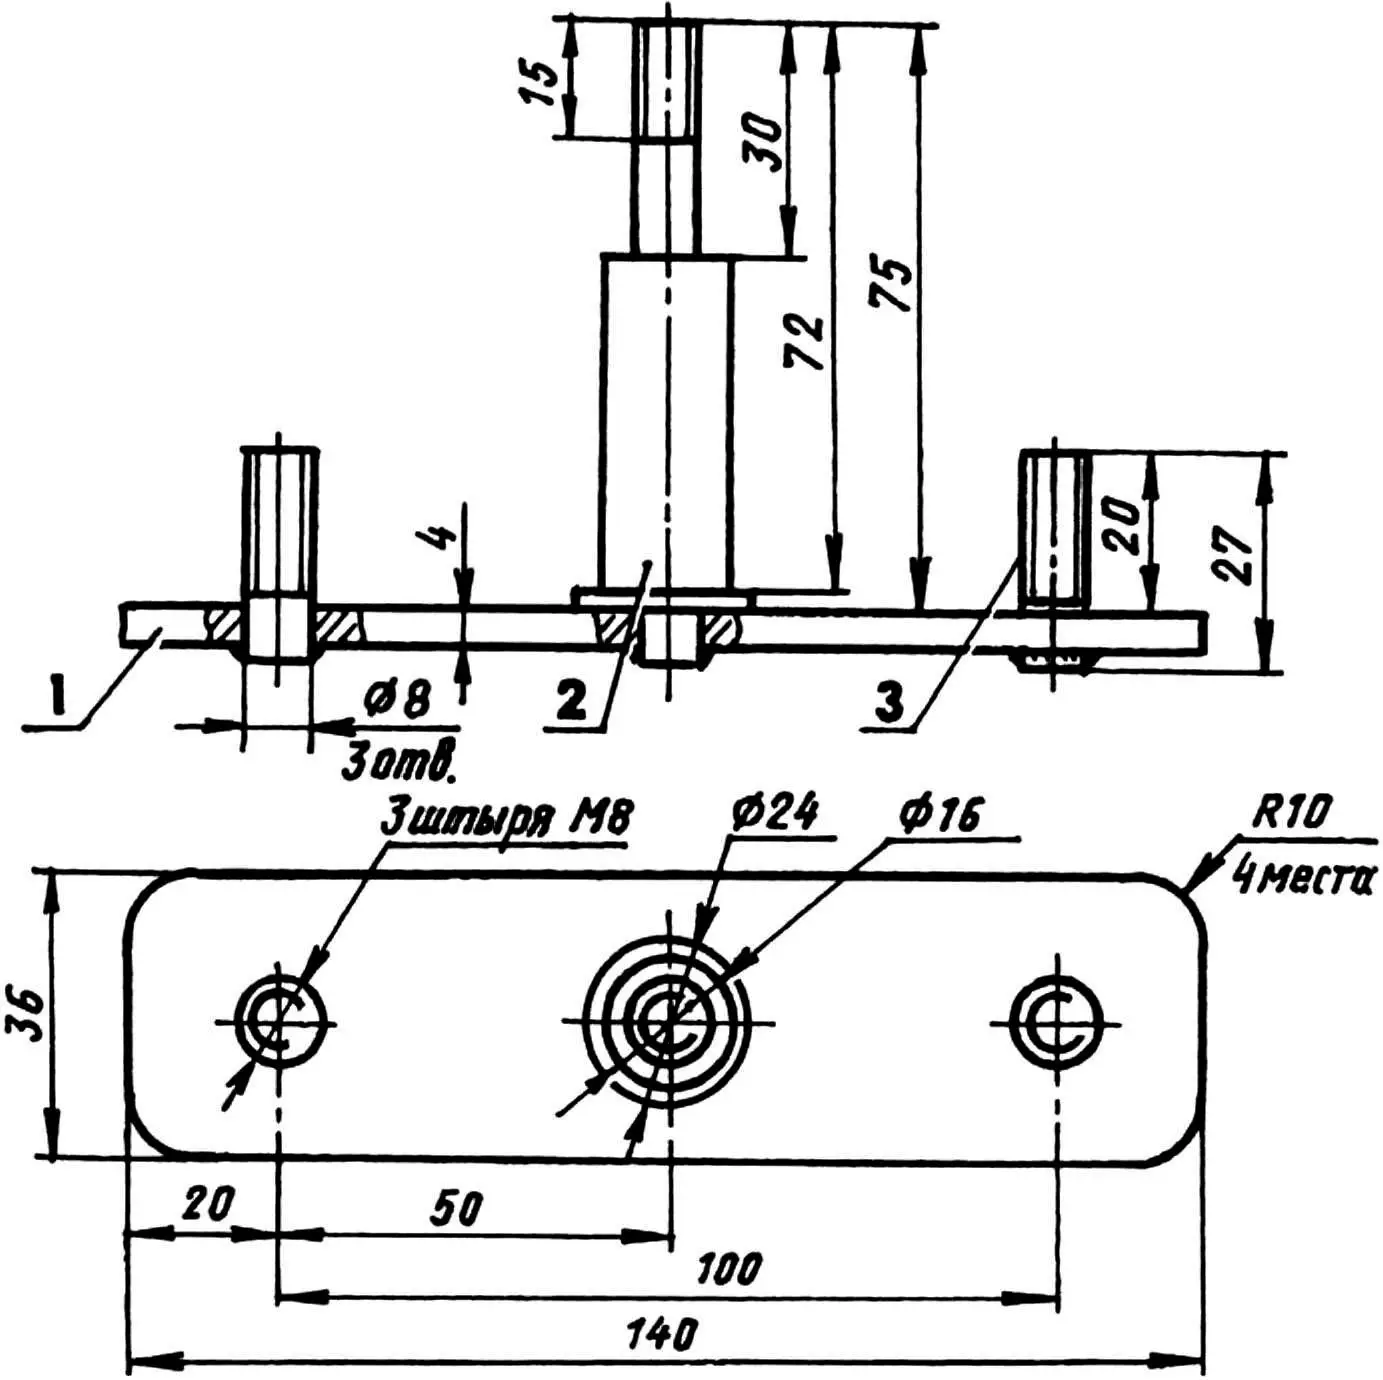
1 — plate (St3, sheet s4); 2 — central pin (St3, rod Ø24); 3 — outer pin (St3, rod Ø8, 2 pcs.)
The pins may be fastened to the plate by any available method: on a thread with locknuts, by riveting in square holes, etc., as long as the pins neither come out nor turn. In my case these parts are inserted into round 8 mm holes in the plate and welded to it from below. To speed up mounting the fixture on the wheel, matching wing nuts were selected for the pins (if none are available, ordinary nuts will do).
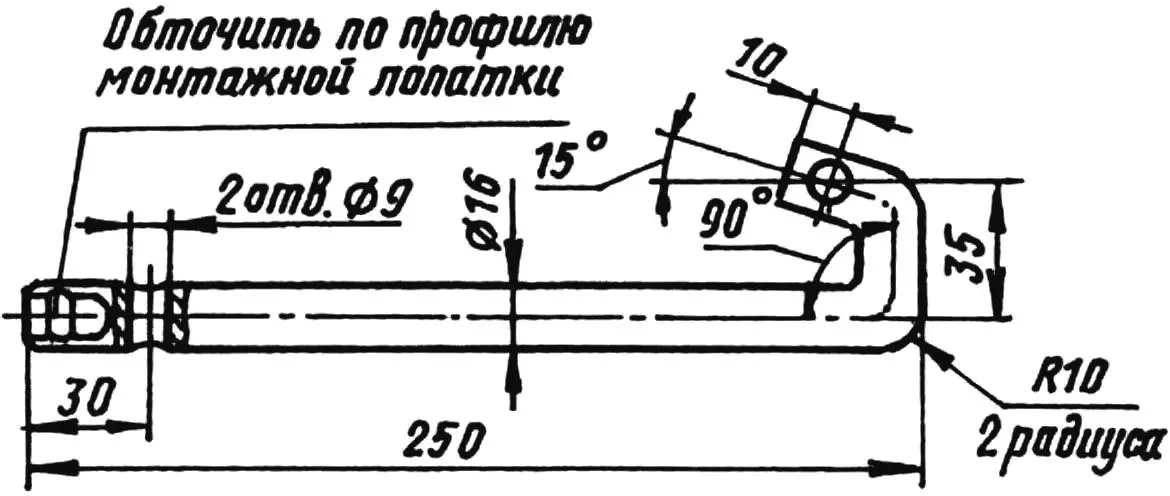
The lever bar is made from a steel rod 16 mm in diameter. One end is ground to the profile of a tire iron and well polished. Nearby, behind the profiled surface and in its plane, a 9 mm hole is drilled in the bar. The other end is bent into a hook while heated, and near that end the same size hole is drilled, but with its axis perpendicular to the axis of the hole at the other end of the bar.
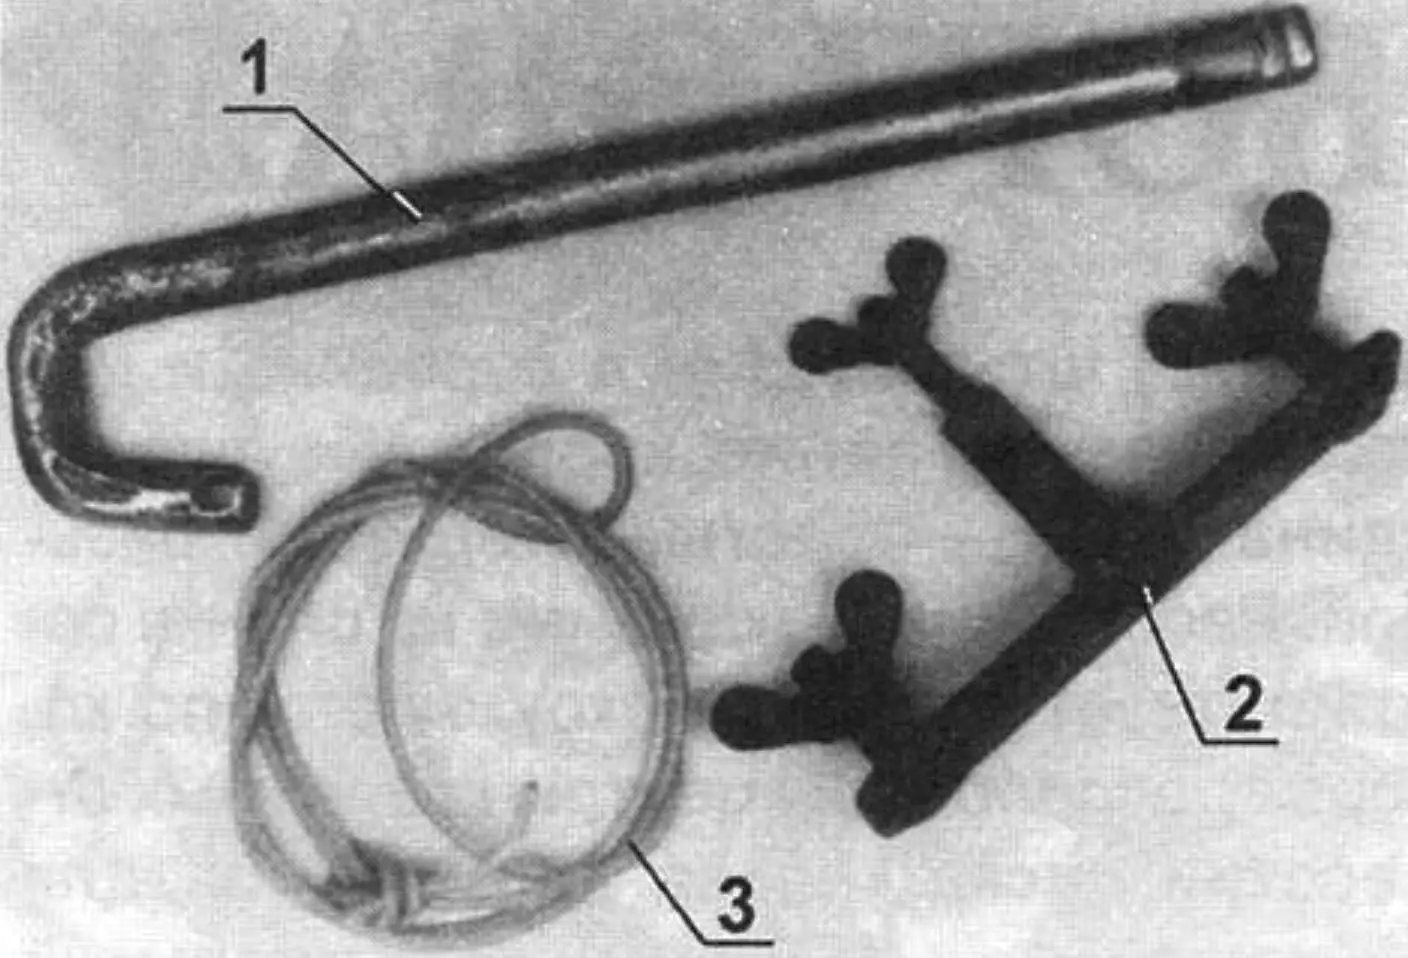
1 — lever bar; 2 — plate; 3 — cable
The cable is steel. Its diameter is chosen so that it passes easily “doubled” through the lower hole in the foot support and through the longitudinal slot of the jack stand into which it is inserted for work. The cable is tied into a loop. During operation it is better to keep the knot outside the “pull-through” zone — throw it over the support (lug wrench) or over the jack bracket.
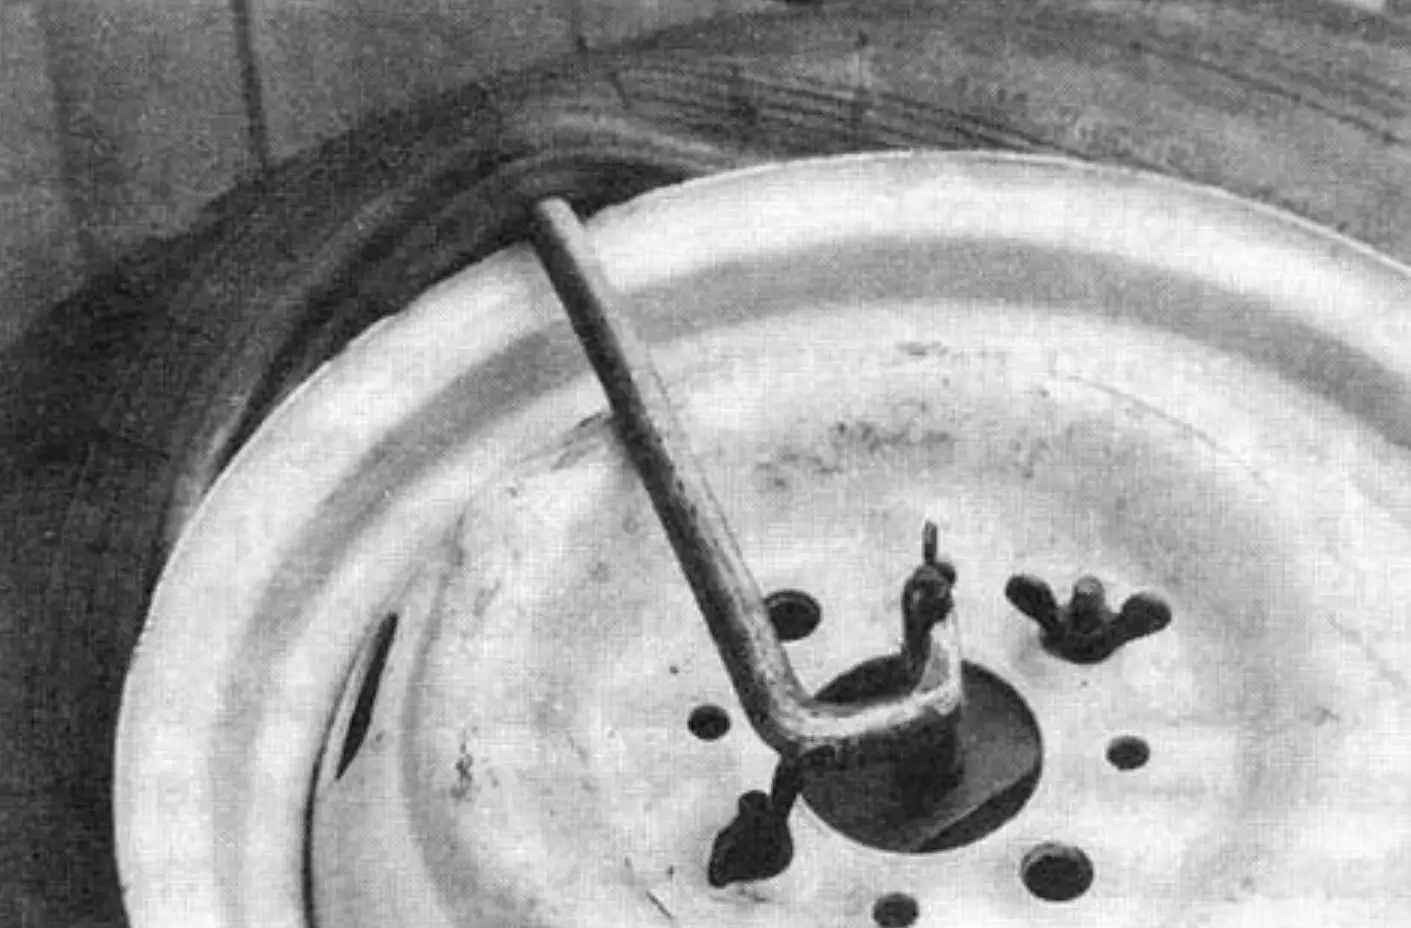
When demounting a tire, the fixture works as follows. First the plate is fastened to the wheel disc with the outer pins and wing nuts. Then the straight end of the lever bar is inserted under the tire bead (like a tire iron), and its bent end is placed on the central pin of the plate and secured with a wing nut. Next, a lug wrench is inserted (socket upward) into one of the disc windows nearest the bar, and the lower loop of the cable ring is thrown over it. The other loop, previously passed under the bar and through the foot hole, is placed on the jack bracket. After that the jack is set on the bar and its handle is turned “for lifting,” i.e. clockwise. The cable is then taken up and moves the bar with the jack toward the lower cable-loop attachment point (the lug-wrench head), while the straight end of the bar brings the tire bead onto the wheel rim. Then the lug wrench is moved to another window and the operation continues.
When replacing a tire, its second bead is brought out in the same way onto the same side of the disc. The force on the jack handle during this work is roughly the same as when lifting the car.
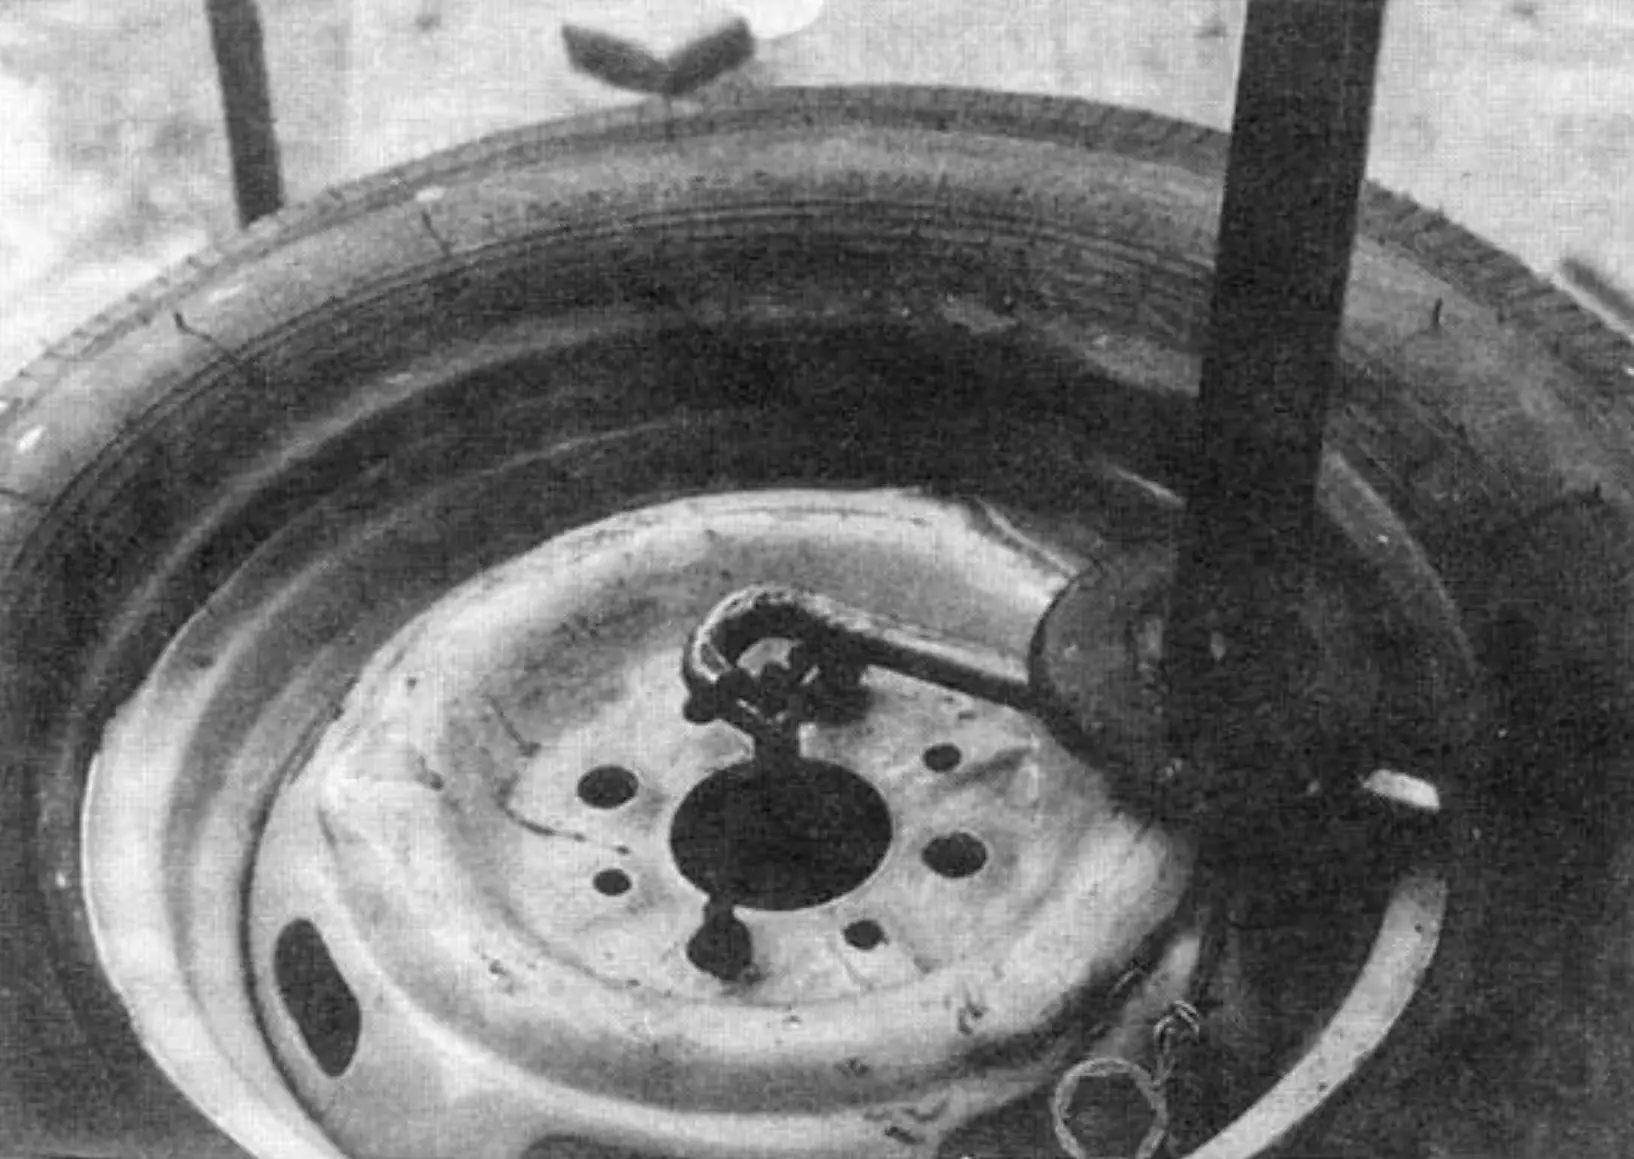
To mount a tire on the wheel, the position of the lever bar is changed. Now its bent end is inserted between the rim and the tire bead, and the straight end is fastened on the central pin of the plate. The positions of the wrench, cable, and jack remain the same as for demounting.
The fixture was designed for the jack of Zhiguli-type cars, but with adjusted part dimensions it can also be made for jacks of other car makes.
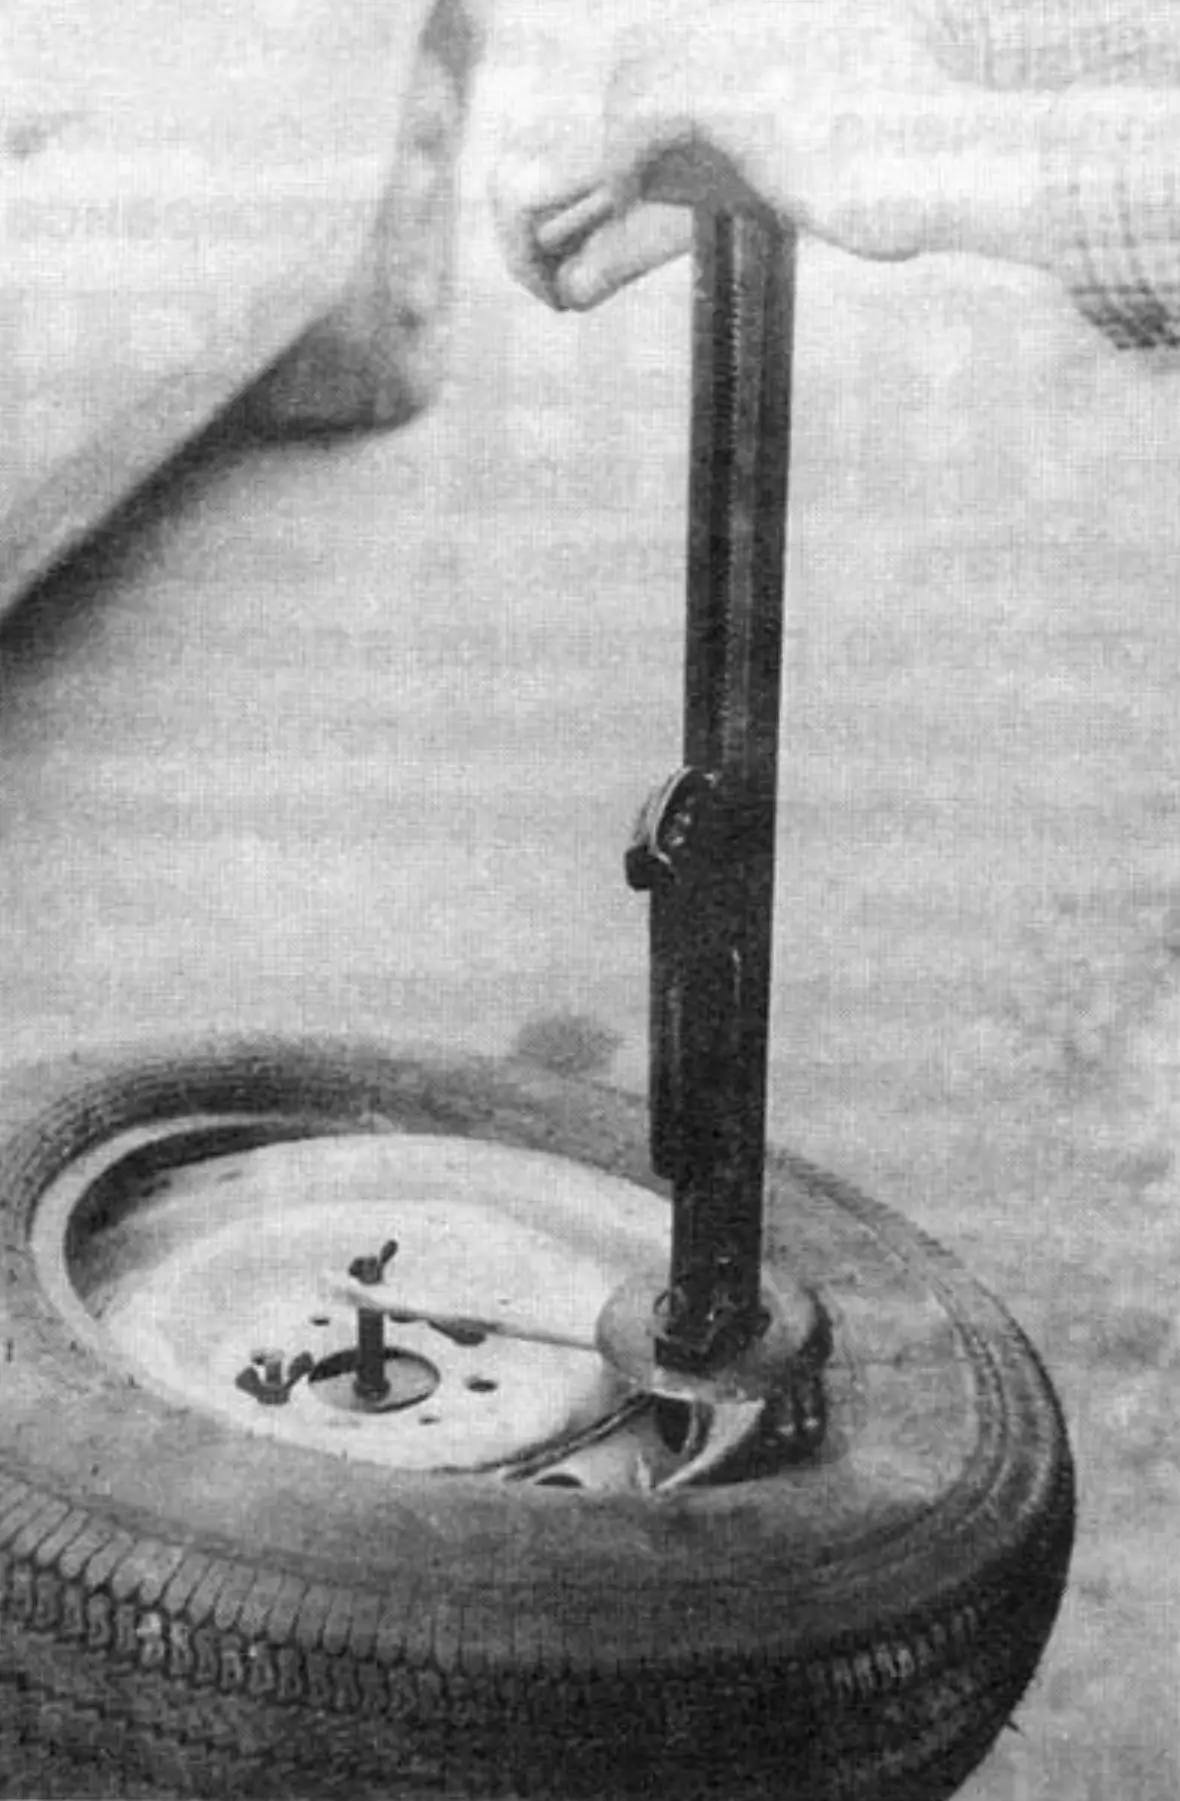
Using the device is especially effective when mounting and demounting tires with stiff beads. Most importantly, not only the wheels and tires remain intact, but your hands do too.
The reliability of the fixture comes from the simplicity of its design. The mass of the device (without stock equipment) is a little over half a kilogram, and it fits in a tool bag together with a set of tools.
“Modelist-Konstruktor” No. 4’2004, O. CHERNYKH, Luhansk, Ukraine
Recommend to read
 GLIDER WITHOUT SECRETS
"Fly higher, farther, faster!" This aircraft is the slogan became the motto of hang gliders. In our picture the glider master of sports M. B. Gokhberg. The front part of the dome is... DELICATE SURFACE GAUGE
All good traditional marking gauge. Its only drawback is that after marking the workpiece on its surface still scratches. If you make the tool, shown in the figure, on one side of the...
