 After the publication of “imaginative artists of Karelia” in No. 1 of 2008 “Modeller-designer” category “Panorama photos of readers ‘letters” to me began to address the readers-homebrew with a request to describe the method of manufacture of lightweight tires for the Amateur designs of all-terrain vehicles standard tyres of tractors. I understand these people — he was in this position. He remembered his ordeal in the curing chambers punctures of the tires in the cold to 30°C, the endless repair of the retaining straps of the cleats and decided on this issue to prepare the material and answer readers through the magazine, so as to write each one individually is not possible.
Before you start talking about technology improvements (facilitate) tires, let me remind you about the structure of the standard tyres Tyre has the following components inside the frame with a cushion (rubber cord) under the treadmill, landing diameter of the bead in the form of a loop with core (ring of steel wire), outside the tread and sidewall (rubber).
In fact, the tires, especially large, designed for multi-ton loads, which improvised the technique and not the case And because of that, and has the ability to alleviate them by removing unnecessary layers of rubber and cord even with the sides and sidewalls. This significantly increases the elasticity of the tires a Different reserve (and the main) reducing the weight of tyres — removal of a large portion (thickness) of the tread (figure Jogging track pieces, trees, rings) with the simultaneous registration of new “developed” of the cleats. And this, in turn, increases the permeability of the cars, “clad” in such a (lightweight) tires.

Bus:
1 — frame (rubber cord), 2 — cushion (rubber cord), 3 — the protector (rubber); 4 — sidewall (rubber); 5 — Board (rubber); 6 — hinge frame (rubber cord); 7 — core Board (ring of steel wire); 8 — chamber or the sealing layer tubeless tires, 9 wheels, 10 — valve.
Most suitable tires for the manufacture of all-terrain vehicles — high profile, that is, those who have the height larger than or comparable with the width of the Most preferred aviation tires, fit perfectly and from selhozperepisi PTS-4, PTS-6, PTS-9, is acceptable Krasovskii tires and tractors T-150, K-700, but only diagonal Now modern technology comes mainly with radial tyres, but they are hardly suitable for the improvement of the Tyre can be used and worn, with almost no tread pattern is Important only so they did not have significant end to end gaps (more than 2 — 3 cm), especially on the running surface.
For work I use a common tool (mechanical, electrical), which is available in the Arsenal of every homebrew. cutting machine (referred to as the craftsmen, “Bulgarian”) with circular saw-mill, hand vise (or small table) and another winch, but it may be replaced by an assistant Without a winch or assistant will dramatically decrease performance, and quality of work also worsen angle Grinder is supplied in a restrictive foot, the bending of which is regulated by the depth of cut (kerf).

Electric hand-held cutting-off machine (“Bulgarian”), fitted for the revision of standard tires to Pneumatics:
1 — machine 2 — handle, 3 — housing, 4 — cover bracket, 5 — disc (cutting) mill, 6 — restrictive foot-ski, 7 — clamp, 8 — pinch bolt.
The depth of cut (and hence subject) of the layer depends on the intended load and purpose lightweight tires (all season, winter), but at first you should not seek the lowest ground, it is better to leave the “surplus” layer than to ruin the tire.
First, the easier the tyre is. To do this, the tire is fixed vertically installed in the frame-bars of the wall or falls in a pit 1/3 of the diameter. Eat-roughing is carried out by separate strips, ribbons, depending on the pattern of the treadmill on some tires in a circle on the other — across (from side to side), on the third (for example, for the protector “Christmas tree”) — diagonally (which is much harder) To do this in the tread “grinder” cuts are separated by rows (stripes). With a sharp knife cut the beginning of the number. Then, the cut end is clamped in hand tisochki, which stretch to an assistant or hoist, Stripping strip. I use an electric winch. The cable through the block pulls tisochki, and its administration is under the foot, which frees up both hands with a Knife the correct cut, ensuring a clean removal. The knife all the time moistened with soapy water.

Revision of a standard tyre — removing unnecessary layer of rubber (a “circle”: b — “radially” from bead to bead):
1 — bus, 2 — machine (wooden beams), 3 — knife, 4 — detachable layer; 5 — manual vise, 6 — sheet winches.

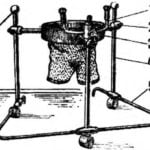
Installation light weight tires on the wheels (a — core on non-powered wheel with removable rim, b — without core mount disc wheels):
1 — the frame (hairpin – tube Ø 16 with welded bolts M10 on the ends), 2 — spokes-brace (pipe Ø 16), 3 — disk, 4 — holder cradle to the disc (nut M10 with spring washer) 5 removable rim (motor wheel), 6 — Lite bus, 7 — camera, 8 — core; 9 — fastening, lightweight tyres for drive (M6 bolt with a “mustache” washer).
The next operation — facilitate the sidewall It is performed mainly on the large tire For this tire fit one side on the table or floor and fixed a simple wooden clamp Now only a knife (without a cutter) cut the layer of rubber on the sidewall, is also clamped in tisochki, and further extends to an assistant or hoist Must leave the “safety” safety layers of rubber on the lunge frame side (especially as there is no skill in this operation).
Relief after the sidewall is handled by the Board. He ordereda from rubber and cord to the outside of the wire rings of the core. And if some of them leave is not assumed, the rings can be removed from the beginning. The edges of the sides (edges of planting diameters) should be left as is (at least part of the inner side) is necessary to increase the durability of lightweight tires. Large tires usually at the core of the two multiple wire rings. If you intend to use modified tires on non-powered wheels (e.g., steering, trailer), it is rational to leave one (inner) core and to apply such a light tire like a normal tire, without attaching it to the wheel rim.
A similar sequence of operations to alleviate the tire should be taken when Stripping their “circle”. When removing the same layers of rubber “radius” can be roughing the strips from one side to the other, and at the same time making the ranks of “checkers,” But this option is suitable for those who have the knack of it now.
The next stage is the formation of a new tread To the tire put the camera, which is slightly inflated. Further, they are again installed in the “pit” (or the machine), and on the treadmill tires mark the future “grenade” (predominantly) or “the tree”, taking into account the remnants of the former lug. The size and number of transverse and longitudinal rows “checkers” depends on the purpose for Example, for light trucks (such as the tricycle-air suspension and the like) “checkers” are made narrow but quite high, especially if you intend to winter operation in deep snow.
For lightweight all-season tire between the transverse rows should be one or two of the width of the “checkers” “Checkers” can be done in a staggered manner to increase the grip of the tires with the ground, and hence the maneuverability of the cars, although much more difficult to manufacture and requires mandatory even number of transverse rows of “checkers”. Line marking is applied first with chalk, and then with a marker, noting the removed strip to stay. Further development of the tire is carried out with a angle grinder with disc milling-cutter and limiter in the form of foot-skis, the Depth of the slot is controlled by tucking the foot-skis cutters, first leaving a thicker layer of safety with a Cutter, cut along the lines of markup, given the width of separation of the teeth, slipping the slot in the side of the depressions On the small tires (car UAZ, aircraft An-28 and An-2) can “drive” a few times, shifting the cutter, thereby completely removing the rubber from between the ranks of future “checkers”.


Lightweight tires:
from small… …to large.
Strip trimmed from the side (edge of the treadmill) and are clamped by tisochki Further actions are the same as in the roughing of the side walls and the cleats of the “radius” Removing unneeded lanes, designated under them cleaned up with a knife (from this work is the future of tyre). The rest of the series-shaped mark on the right amount of “checkers” — the distance between adjacent “swords” in a row should not be more than 4 cm At chess picture intervals equal to the width of the “checkers”, and location “checkers” in the ranks of the alternates — “even-odd”.
On the tires of large sizes (from KrAZ, tractors T-150 and Kirovets) “checkers” is much larger, respectively, and gaps between adjacent grousers significant (intermediate strips), it is preferable to cut with a knife, “after a” pre-cutter along the drawn dividing lines with displacement in the direction of the troughs. In conclusion, surface modified tires sharp (razor) knife to cut the bumps, smoothing the surface.

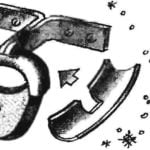
Remove core standard tyres:
1 — bus, 2 — remove the tire (rubber Board and the outer half-loop of the frame), a 3 — ring removable core, 4 — knife, 5 — hook, 6 — levelling of the removed layer.

The tires to completion was the same, and lightweight — have a different tread pattern.
Of course, all the work on the facilitation of the tire requires patience and perseverance. But it’s worth it the Factory tires are 12 — 15 thousand rubles, and much heavier, and given that they need three or four (and sometimes five), the amount of their purchase obtained impressive and for most homebrew, I think, not acceptable.
The installation of the corresponding wheel rim of lightweight tire with left wire ring core produced by the usual dressing of the bead of the tire over the rim flanges using Montauk or on the machine. Hold the Pneumatics on the wheel rim from turning is due to the pressure in the chamber and the friction of the bead of the tire on the rim flanges.
Another modified way of mounting tires on a wheel rim is quite unconventional small bolts (M5 or M6).
To mount the tire bead to the rim flanges of the rim (or disc) wheels need bolts in the amount of 6 — 12 pieces on the Board for light vehicles and 30 pieces 36 — in heavy duty all-season car. The bolts from turning inside the tires are kept welded to the heads square washers with curved corners — “whiskers”. Pay attention to weld quality and craftsmanship of the surface from the bolt head, as she turned to the camera. Specalty — with only one hand — where will be the installation of the wheel to Demount these tires have very rarely, I always had to do it twice — because of faulty welding of the bolt head with the washer.
The advantage of fastening the tyre to the rim by bolts — to reduce the tire pressure without fear of turning them on the wheel, and thus to increase the throughput and smoothness of the machine. In addition, it is not required and strict compliance with the landing diameter of the rim and tire.

Filling wheel ATV foam to exclude the ingress and delays in mud and snow (a complete filling of the sealed wheel b — partial filling of a collapsible wheel):
1 — wheel, 2 — filler (foam), 3 — circular tides (foam), 4 — disk, 5 — axis with wheel hub.
And one more thing. In the experimental procedure produced a lightweight wheel with a tubeless tyre (pneumatic), but it’s thoroughly untested, and therefore can’t recommend it to readers of “M-K”. But I believe that the tubeless option promises greater smoothness and increased permeability, and most importantly — a significant reduction in mass. Because of the camera, for example from T-150, weigh 16 — 17kg each. However, nothing comes for nothing — the tires have to be modified very efficiently, especially the Board.
Wheels which are provided with modified tires, in General ordinary, and talk about them in detail makes no sense. But some tips for improvements, I think will be useful to Amateur designers.
The internal cavities of the wheels (or at least the big bumps in them) is to pour foam construction (foam), or fill in pieces of packing, correcting the flaws “Makrofleks”. The whole “Makrofleks” pour not recommended for financial reasons and because of difficult the possibility of obtaining a uniform (besposchadnogo) filling the Surface of foam after full cure (2-3 days) it is better to paint 2 — 3 coats of any paint and the surface, which will be based on the camera, it is desirable to paste over any fabric (strips directly on the paint) In the paint, you can add epoxy resin — the surface is durable and smooth. In the foam-filled cavities do not get dirt, snow and ice, and these tires increases the buoyancy of the vehicle.


Wheel filled with foam.

The wheel is partially filled with foam.
Another way to protect the cavity of the wheels from dirt and snow — close wheels on both sides with decorative (and in this case, also functional protective) wheels with hubcaps.
And the last one. Work on the Stripping of tires is best done outdoors or in a well ventilated area and preferably a respirator. Do not be afraid of the volume and difficulty of work — as the saying goes “the Eyes are afraid, and hands do”. Spent the labor will be compensated. I started with wazowski tires, and then easily “clicked” and from freight cars To date, I’ve modified more than fifty tires, including four tires from “Kirovtsa”.
A. KOKSHAROV, p. Loukhi, Republic of Karelia


