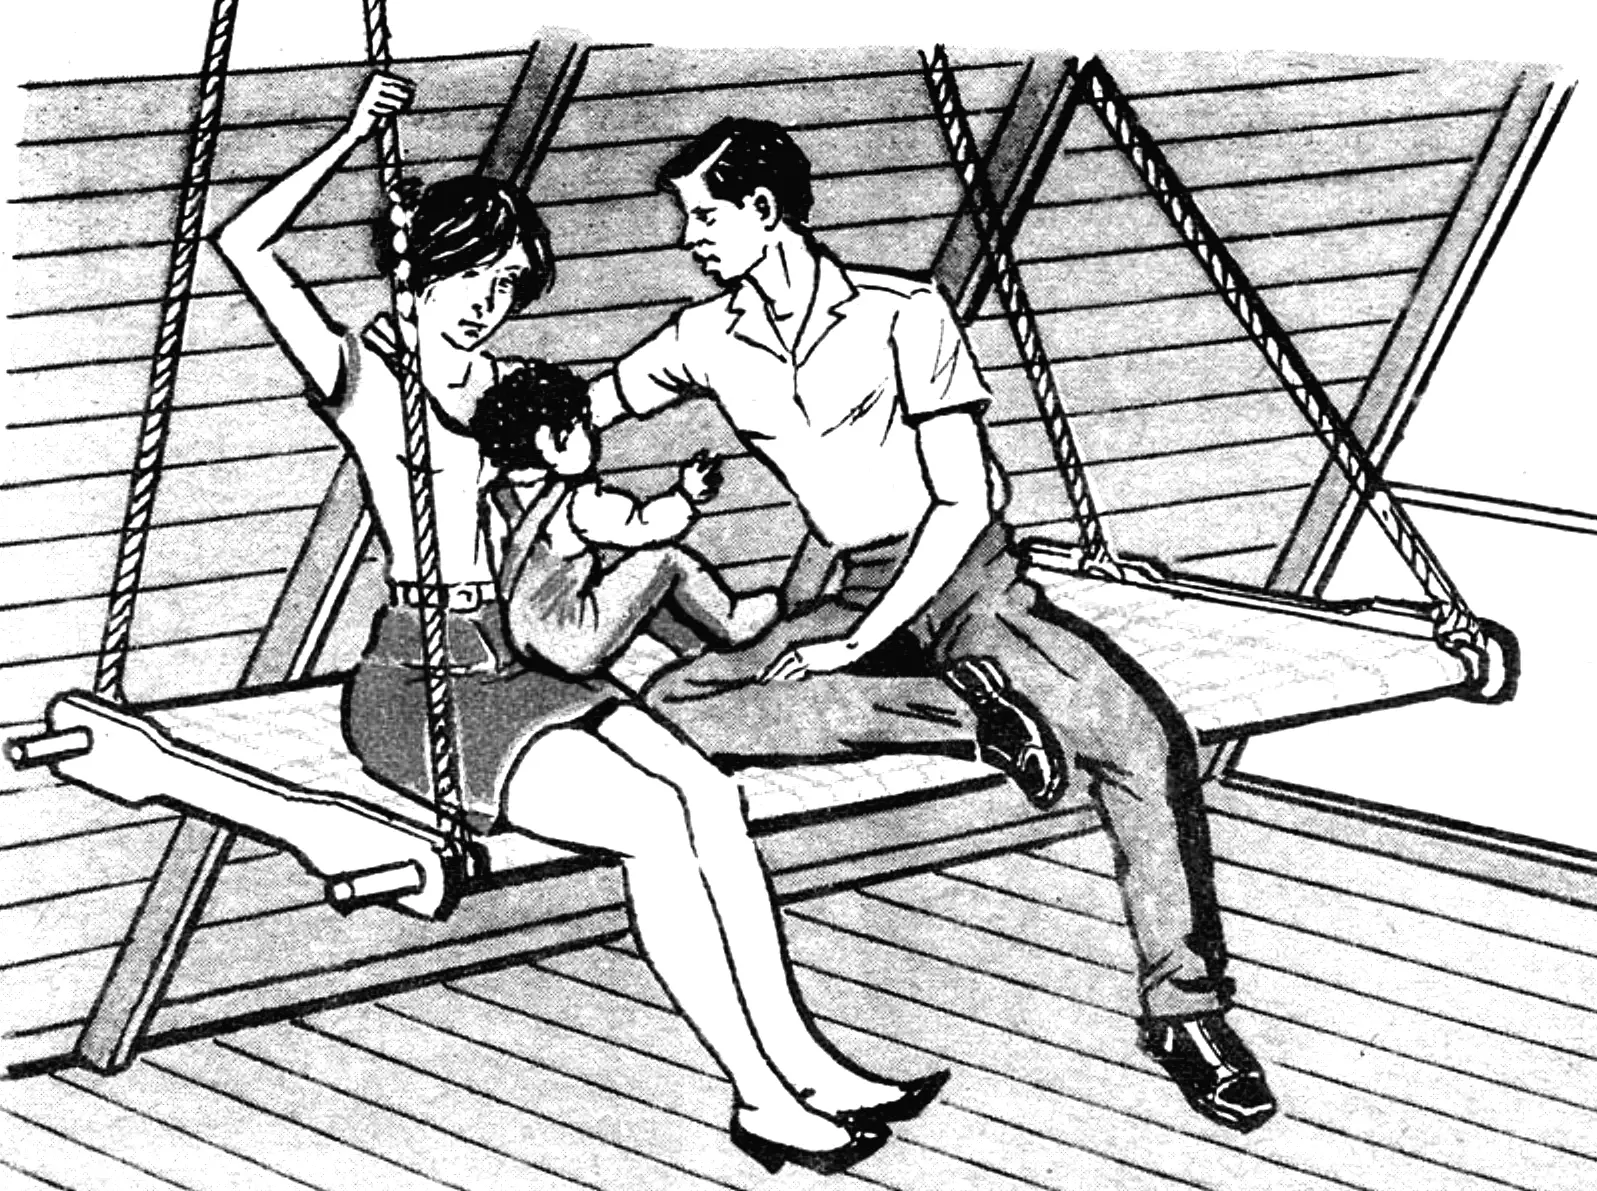
In dacha conditions, especially if it is a new build and everyday life is not yet settled, the proposed design will prove as necessary as it is versatile. Quick and simple to make, it will faithfully serve not only during the first stages of developing a country plot and building a house, but also later on: after all, a hammock is always a hammock, and when it is no longer needed in the house, it will come in handy outdoors, for relaxing in the garden.
But the main thing is that it will save the day while there is still no real furniture in a new country house, especially in its attic. Because you can make it on the very day you arrive at the dacha, even if you did not take care of it in advance: after all, even more simplified versions of its parts are possible. For example, instead of a canvas sheet, an old mattress pad will do, and instead of plank crossbars for the frame — improvised ones made from sticks tied in pairs or from garden-tool handles.
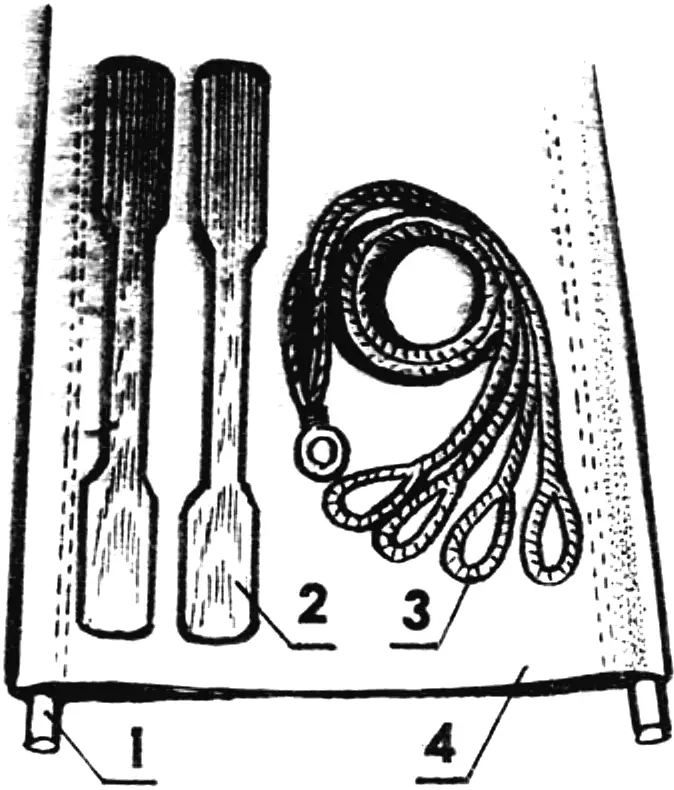
1 — frame pole (2 pcs.), 2 — frame cross-spreader (2 pcs.), 3 — rope suspension, 4 — bed sheet.

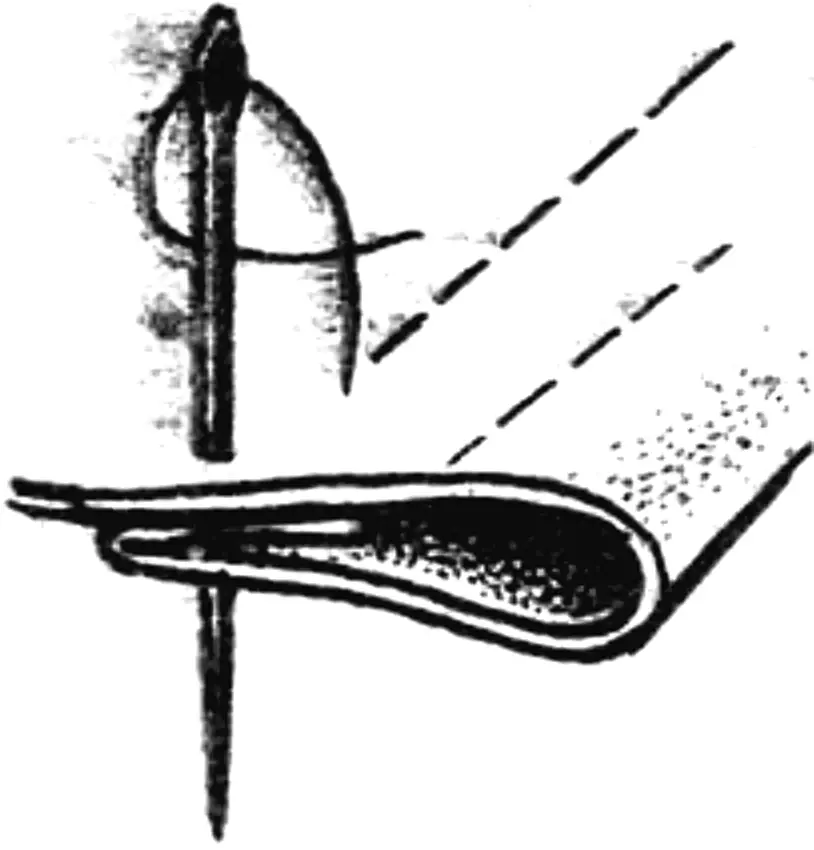
However, it is better, of course, to follow the design variant shown in the drawings. For it, you will first need a sheet of canvas or strong fabric such as mattress or upholstery material, measuring 2000×1080 mm. Along its longitudinal edges, a slot for the frame poles is folded and sewn — wooden poles 45—50 mm in diameter and 2250 mm long. Corresponding holes are also drilled in the plank cross-spreaders of the frame, measuring 22x100x950 mm.
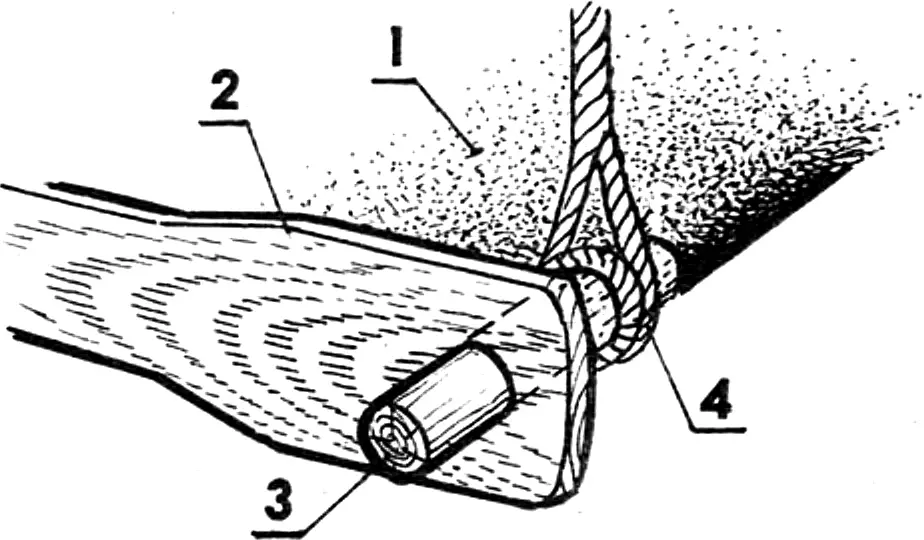
1 — sheet, 2 — frame cross-spreader, 3 — frame pole, 4 — suspension loop.
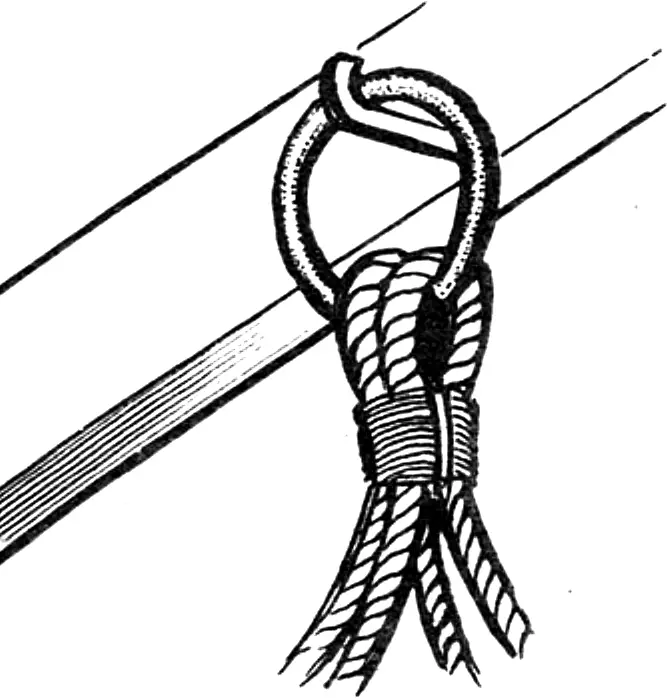
All that remains is to prepare the suspension — a strong rope (for example, twisted from clothesline) twice as long as the hanging height. Its ends are finished into a loop as shown in the drawing. It is better to make the loop with some reserve so that, for reliability, it is put over the frame pole as a double ring (see drawing). At the top, the rope may be caught in the middle if it is passed through a ring for suspension on one hook, like a cradle (see drawing). But it is better, of course (if conditions allow), to hang it on two “points”: the position will be more stable.
Such a hammock bed has sufficient rigidity in the working position, and in disassembled form it is convenient for storage or transport.
“Modelist-Constructor” No. 5’96, based on materials from the magazine “Ezermester” (Hungary)
Recommend to read
 UNDERWATER DIGGERS
Upcoming XXV Congress of the CPSU will summarize the implementation of the ninth five-year development plan of national economy and chart a new rollers of Communist construction in our... COLLAPSIBLE WORKBENCH
What should be the bench? Of course, durable and easy to use! However, many, in addition to this, note the compactness and the possibility of quick disassembly, as not all fans polotical...
