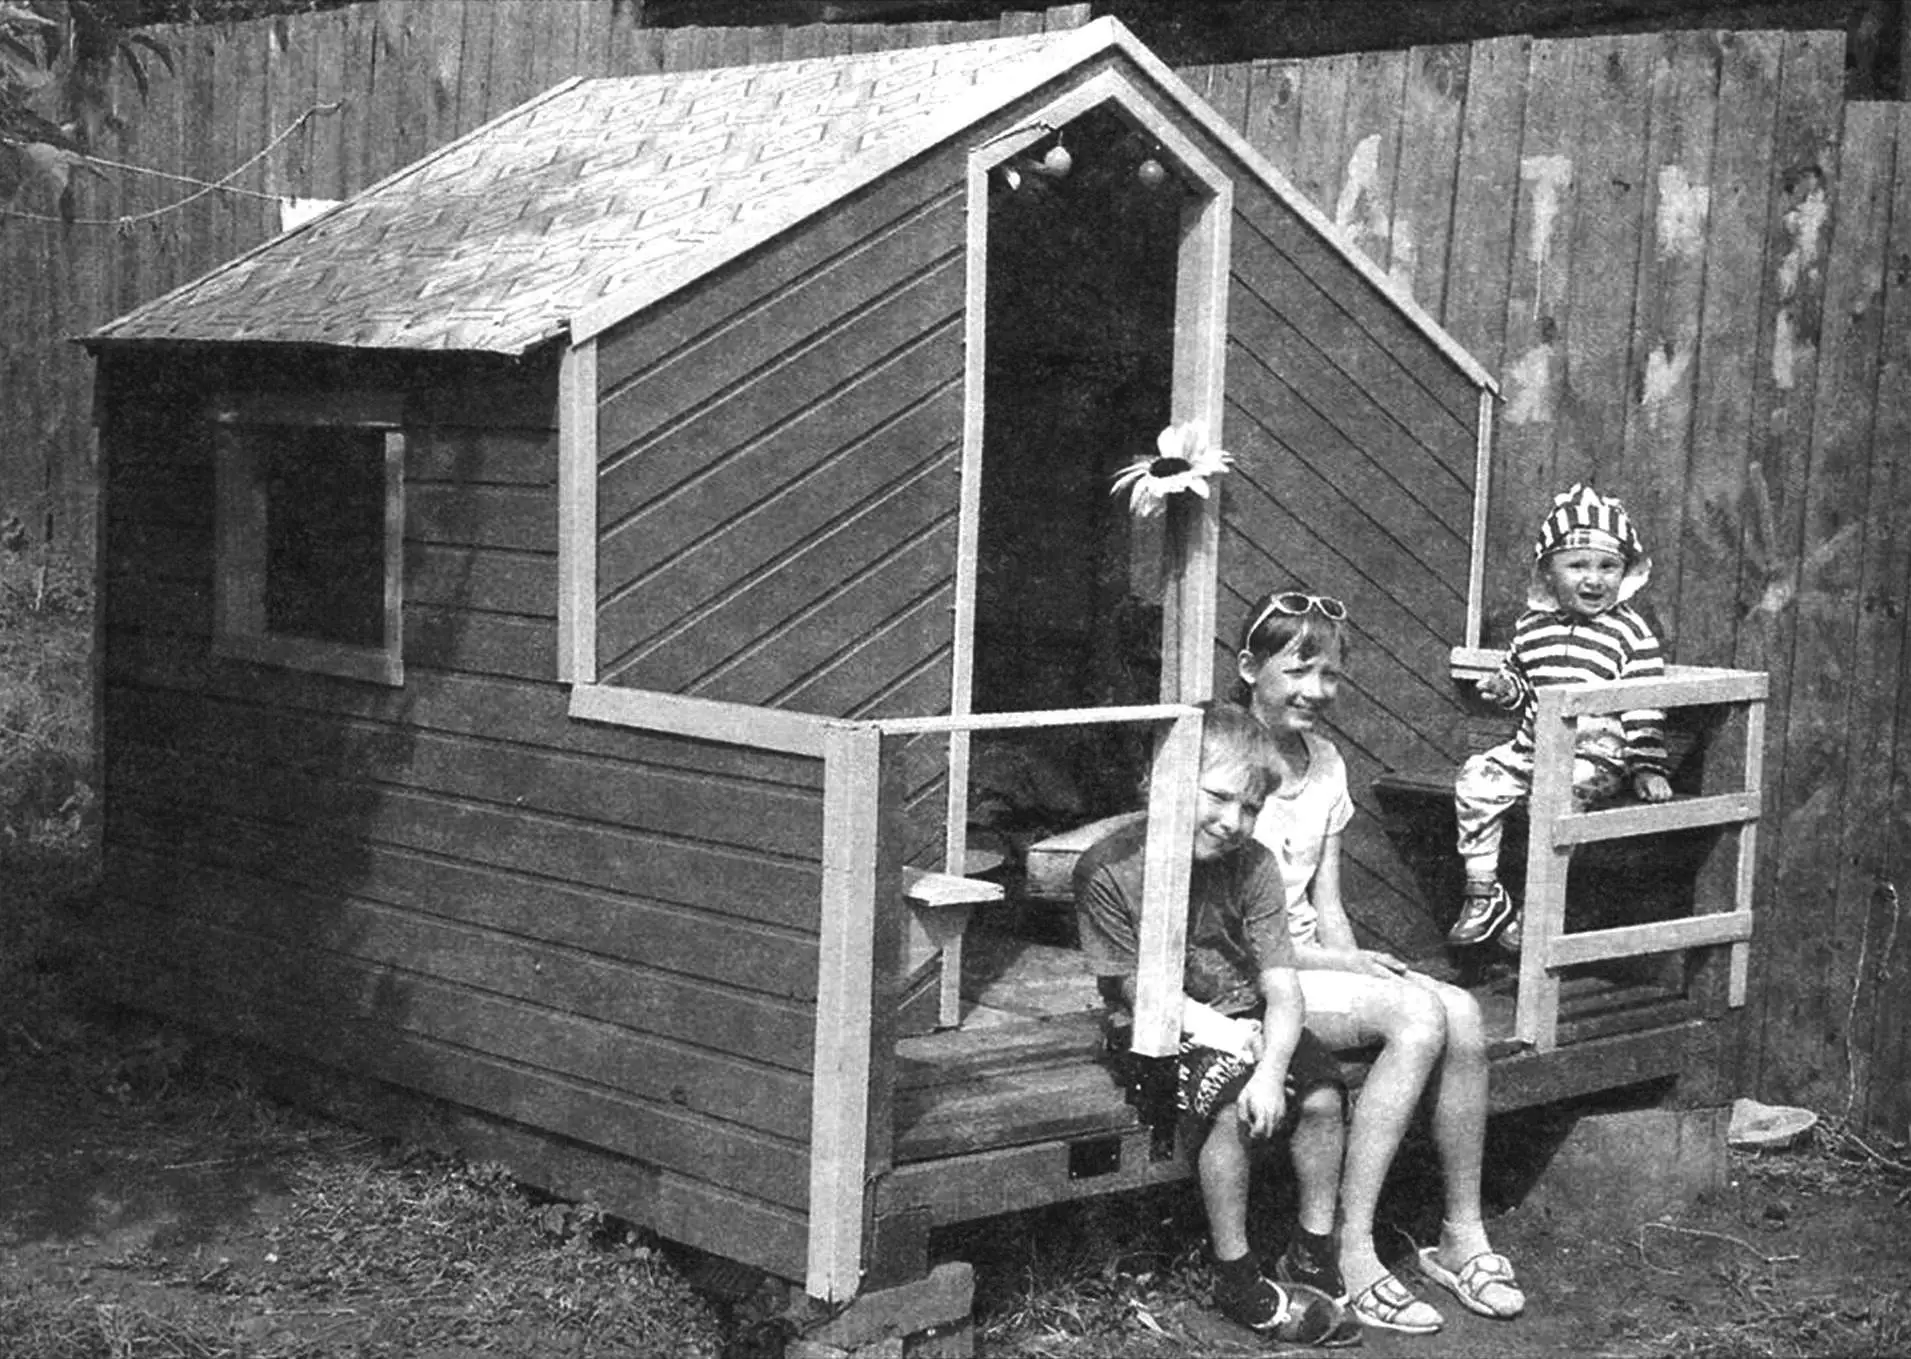
The wish to build a children’s playhouse on the garden plot for my grandchildren (I have three of them) came when I was leafing through a magazine with illustrations on the subject. But none of the published options was quite right: I wanted not just a playhouse, but a sports-and-play corner.
Working in that direction, I had planned a ladder with a platform above the roof and a flagpole, as well as a “monkey bars” run. Reality was different: my wife allocated too little space for the structure — a plot right up against the fence, but next to the sandbox and swings. In the end it all came down to the simplest playhouse design, 2×2 m, of which only 3 m2 counted as “living space.”
I made the foundation from four corner posts: I found a concrete block for one, the rest are brick.
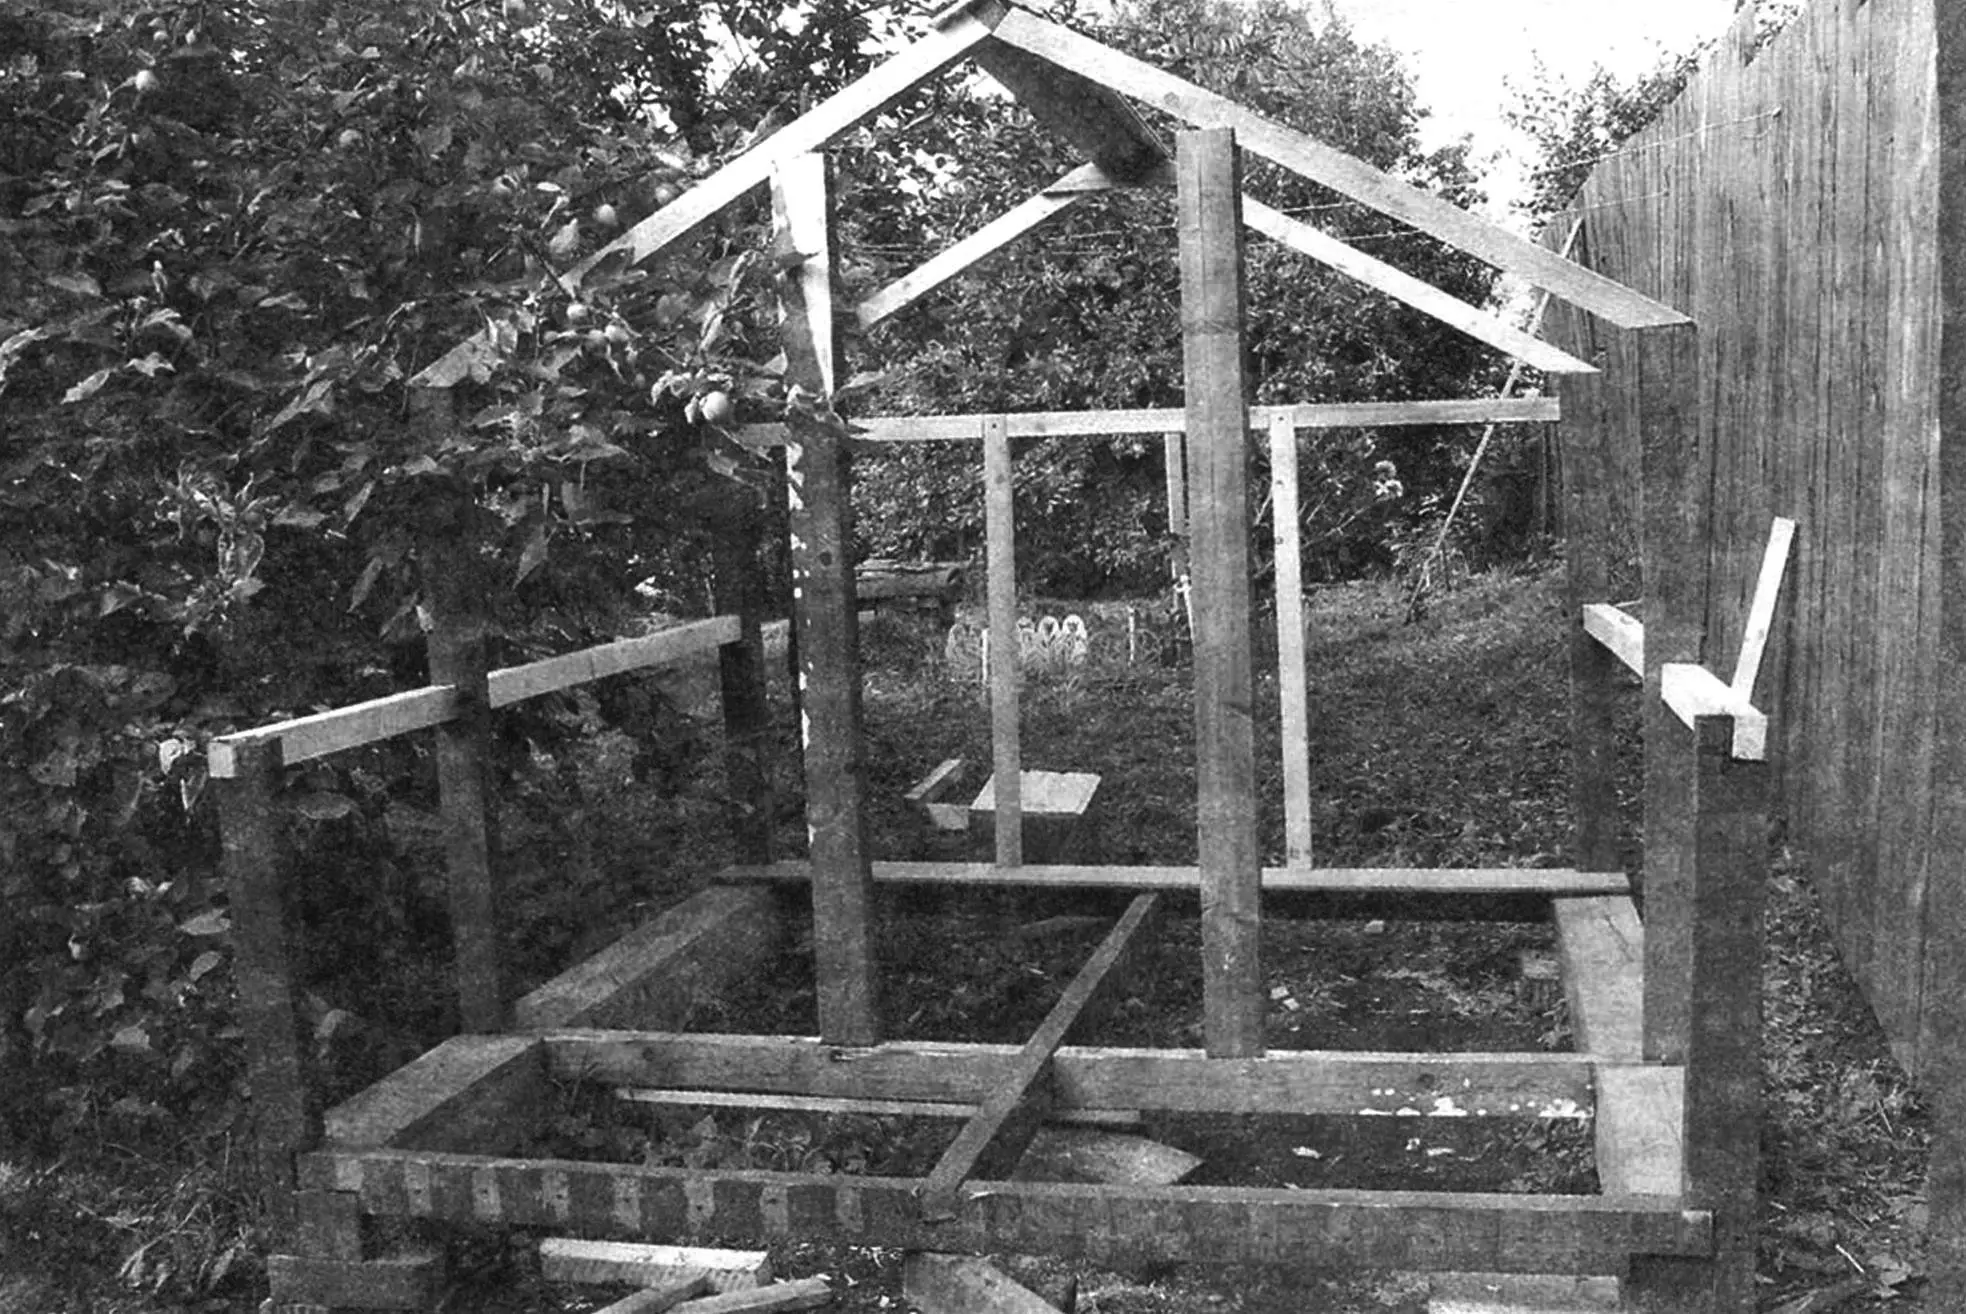
Once I started building, I tried to minimize trips to the hardware store and used offcuts left over from renovating the house. When assembling the lower sill band of the playhouse, I laid two two-meter timbers 150×150 mm on the sides and joined them with two-meter offcuts of 50×75 mm timber. From timber of the same size I made the cross and longitudinal ties of the band. Of course, I set the band on the foundation level using a spirit level.
Then I began erecting the frame, using offcuts of 50×50 mm and 50×75 mm timber. I chose the height of the playhouse posts (50×75 mm), fixed around the perimeter, “by eye” — 1 m, and on the porch — 0.6 m. I attached the vertical supports to the sill band with screws, inserting them into pre-cut dados.
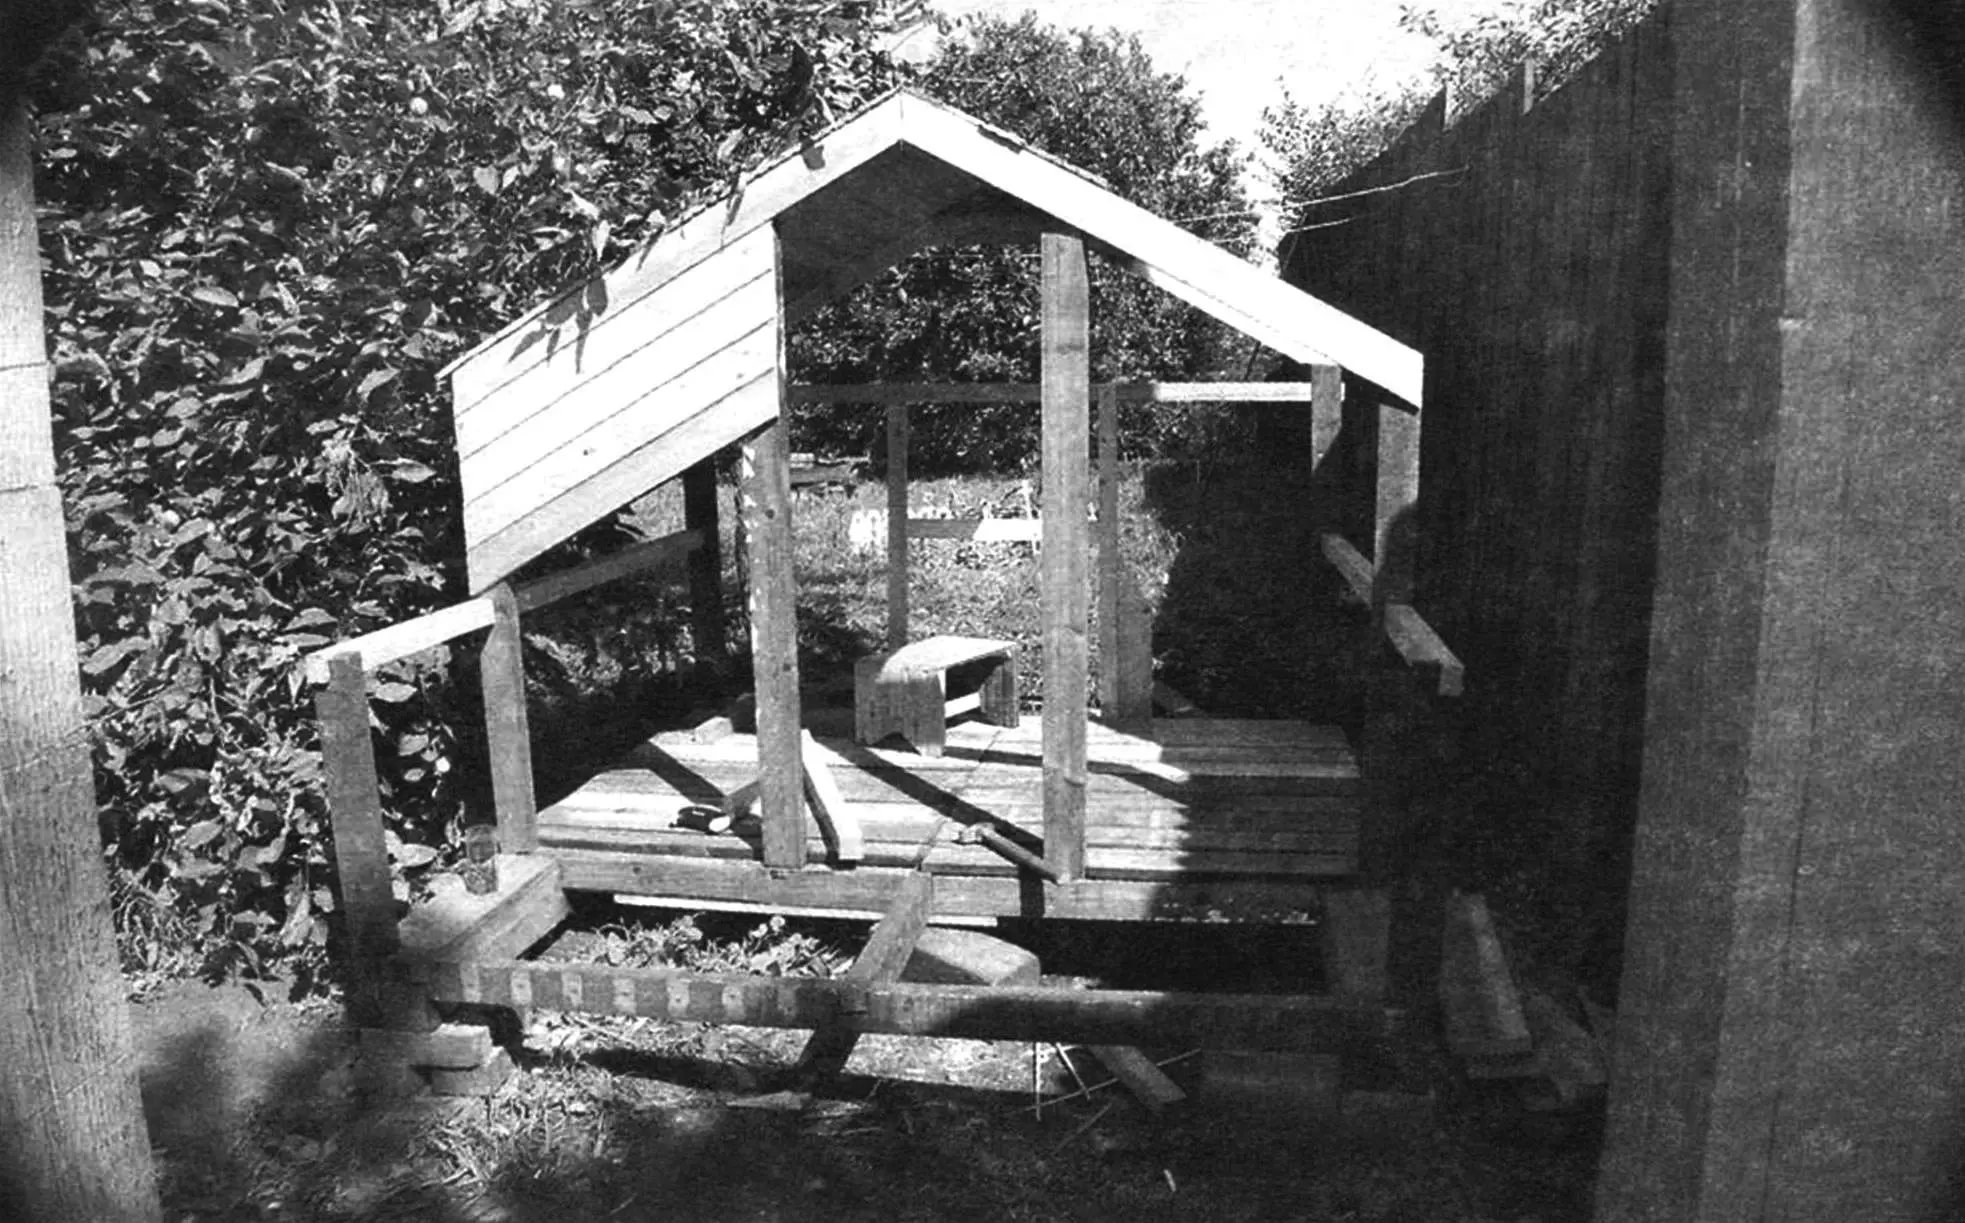
I tied the vertical supports at mid-height with 50×50 mm timber. I set the entrance height by my eldest granddaughter’s height, with a little room to grow. So the roof had to be gable, with a ridge. Accordingly, I made the entrance opening posts 1.3 m high. Because the walls were to be clad with tongue-and-groove offcuts left from building the main house, I did not tie the tops of the vertical supports with timber along the sides. The exception was only the back wall, whose side posts I joined with 50×50 mm timber using screws.
At the front and back I connected the vertical supports to rafters made of 50×50 mm timber, joining the rafters at the ridge with a timber of the same section. At the back I braced the rafters near the ridge with a wooden gusset.
I did not cut the window openings (there are three) yet, deciding to build the roof first, since the summer was rainy.
I started the roof with sheathing — it is solid: I covered it with tongue-and-groove offcuts, nailing them to the rafters. I did not yet close the gap along the ridge at the top. For strength (winters are often snowy) I reinforced the roof in the middle with 10 mm wooden strips, resting them on the ridge timber and the upper 15 mm boards of the side wall cladding, and screwed them from inside into the roof boards.
At the same time I clad the front with the shortest tongue-and-groove offcuts.
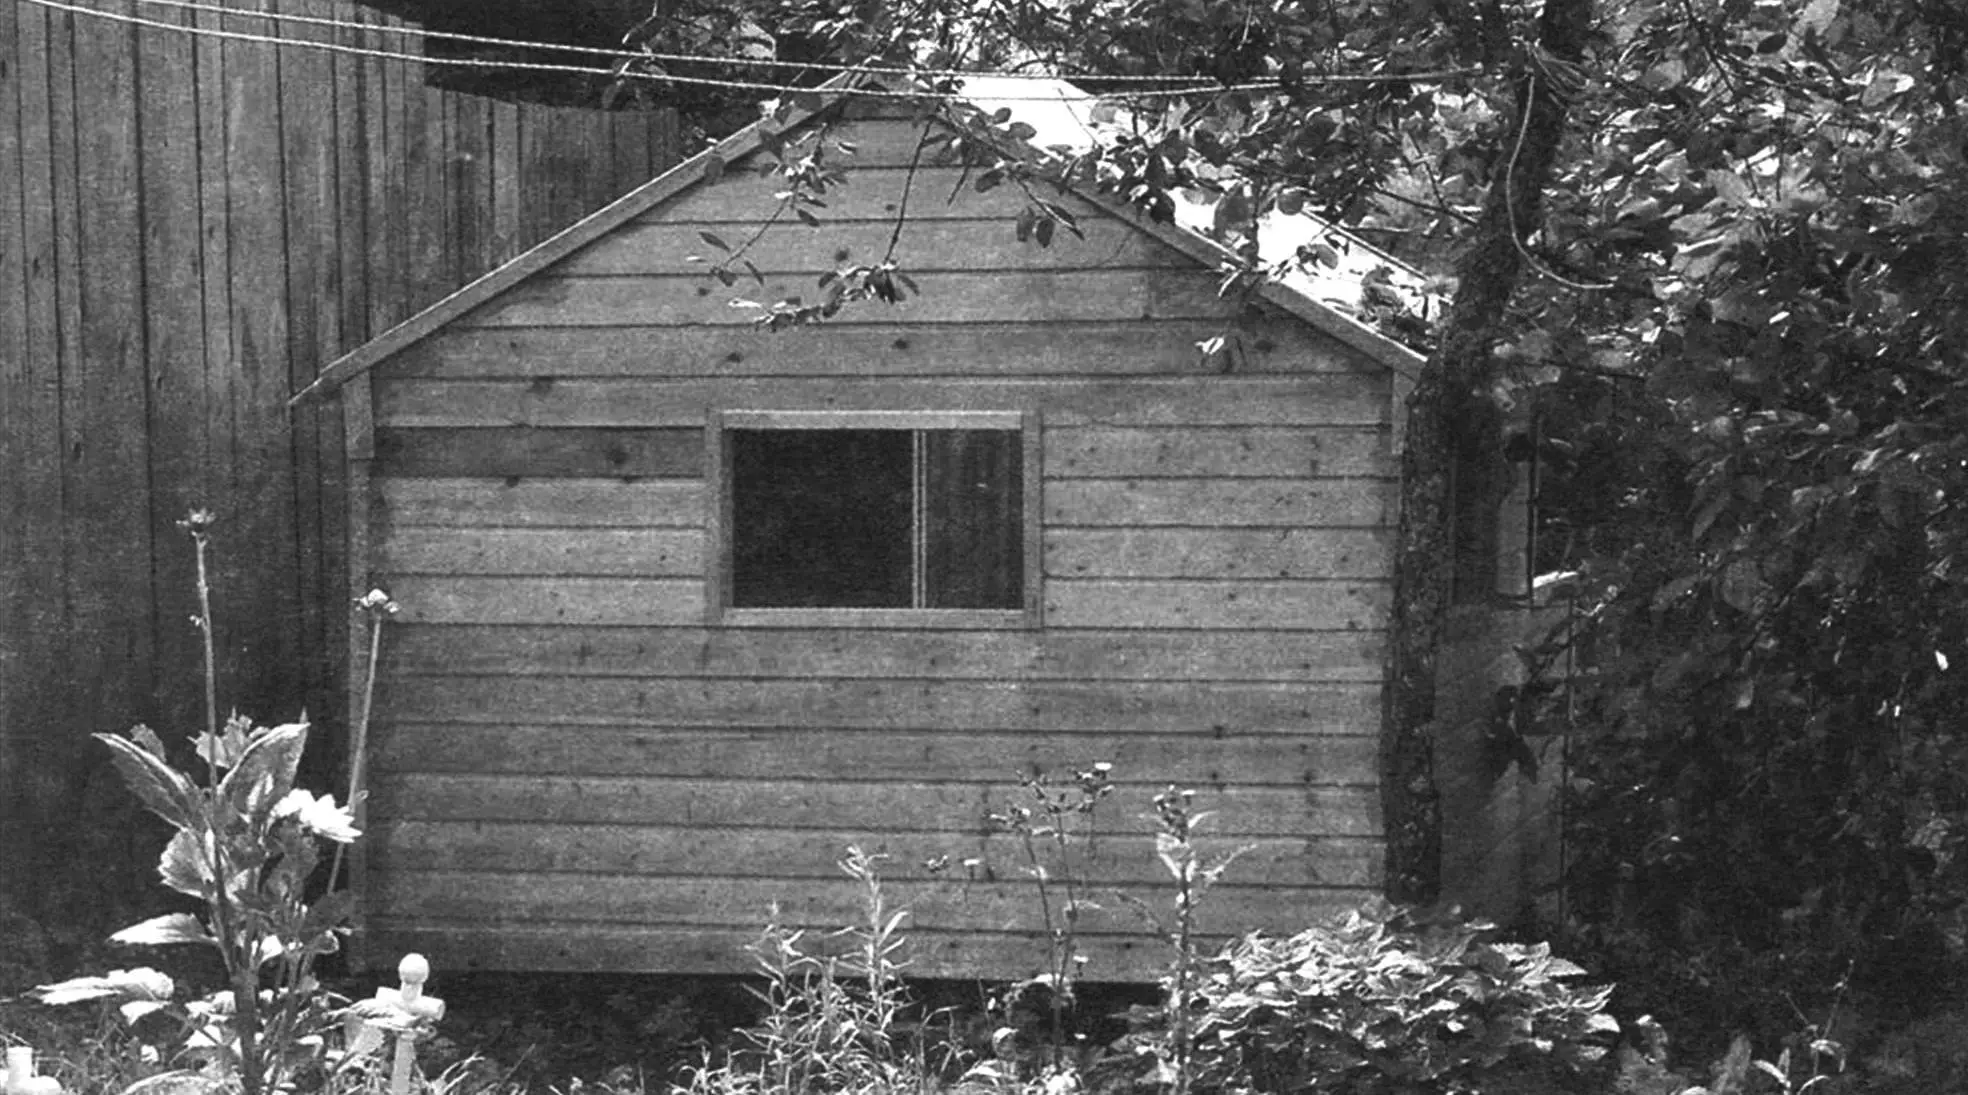
Then I moved on to the window openings. For this I screwed two short vertical battens to the upper boards of the side-wall frames with screws, and fixed them at the bottom with metal angle brackets on the timbers of the mid-height tie.
On the back wall, to make a window, I had to add two extra vertical battens, attaching them with the same angle brackets to the lower sill band and the upper horizontal timber. I have not glazed the windows yet; for now I covered them from the weather with leftover roll insulation.
After that I laid the floor and covered it with linoleum. I clad the walls outside with tongue-and-groove boarding; on the front I did it in a herringbone pattern at the pitch of the roof. Fully aware that it is better to clad a house vertically (less water gets into the gaps), I did the opposite. Because the work was done by hand, it was simpler and faster, and I sealed dubious joints with sealant.
True, there still weren’t enough offcuts and I had to buy a little more. Inside I partly clad the playhouse with plywood and tongue-and-groove boarding, fixed small shelves by the windows at the future “tenants’” request, and a bench on the porch. Next year I will probably need another bench on the opposite side — there are three “tenants,” but only two fit on the bench.
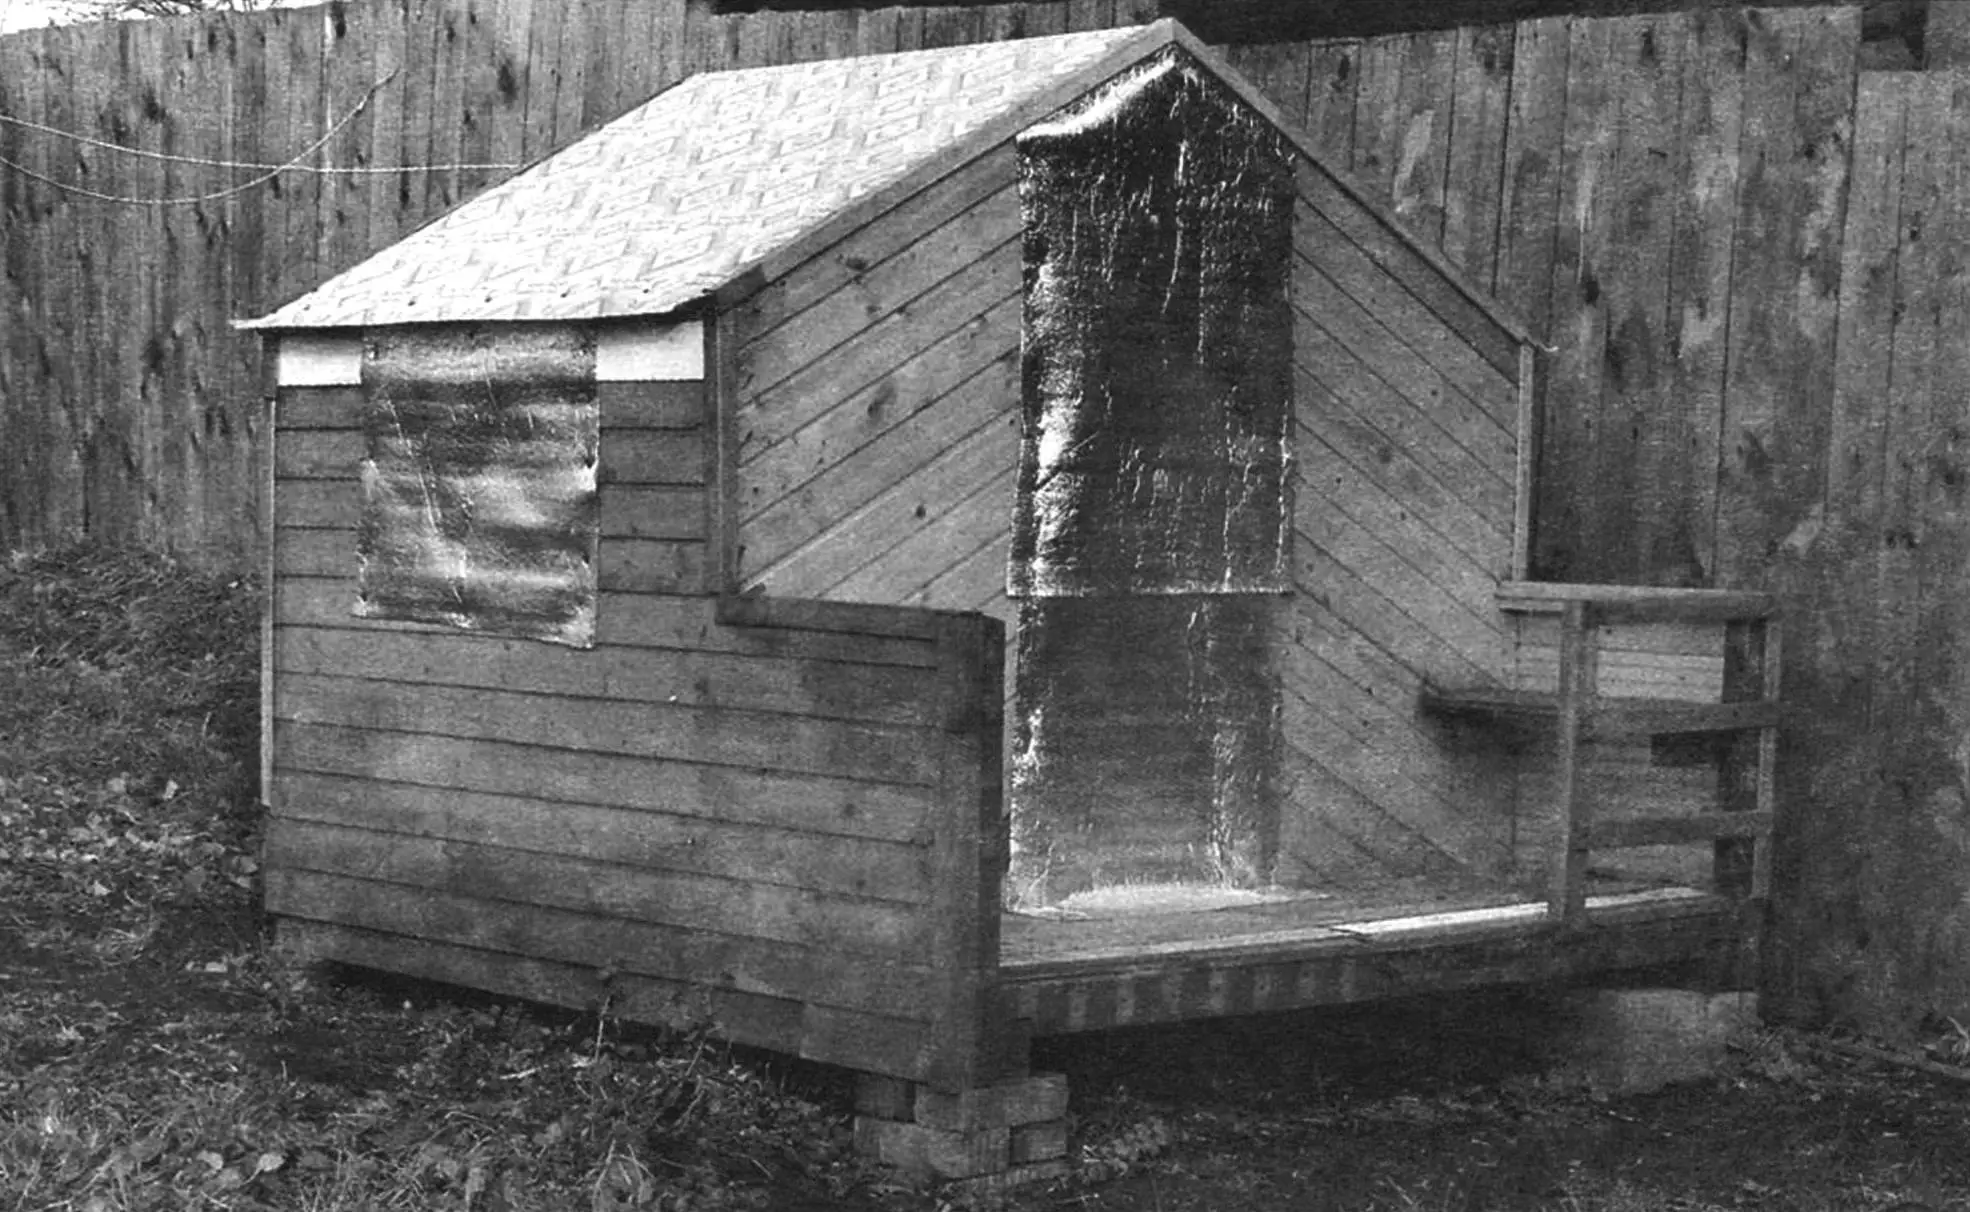
Because the structure is for children, to avoid injury I covered all “questionable” spots with planed wooden corner strips and skirting.
Note that I coated the wooden parts with pine tar inside before assembly, and outside after final assembly. Only the porch was left untreated, since next spring I still plan to finish the design, including a removable ladder.
The roofing still had to be dealt with. I did not want to leave it like that over winter and had to cover it with thin linoleum. I pressed the linoleum down the sides with 50×50 mm wooden corners and, for extra security when it turned cold (allowing for possible shrinkage of the roof in frost), I nailed decorative upholstery nails (with wide heads) in parallel rows. It looks nice, but how it will survive the winter as a children’s structure — we will see in spring.
Modelist-Konstruktor No. 8’2014, N. YAKUBOVICH
Recommend to read
 SCREWS TRANSFORMER
When a bike will travel thousands of kilometers and the spokes on the wheels spabot, tighten them — not an easy task: rust and dirt do the job just unbearable. Offer a simple way to... The all-terrain vehicle changes its shoes
The author of the article and the creator of the all-terrain vehicle discussed here is Boris Nikolayevich Ryzhov — a long-time acquaintance of our magazine’s readers. Photographs of the...
