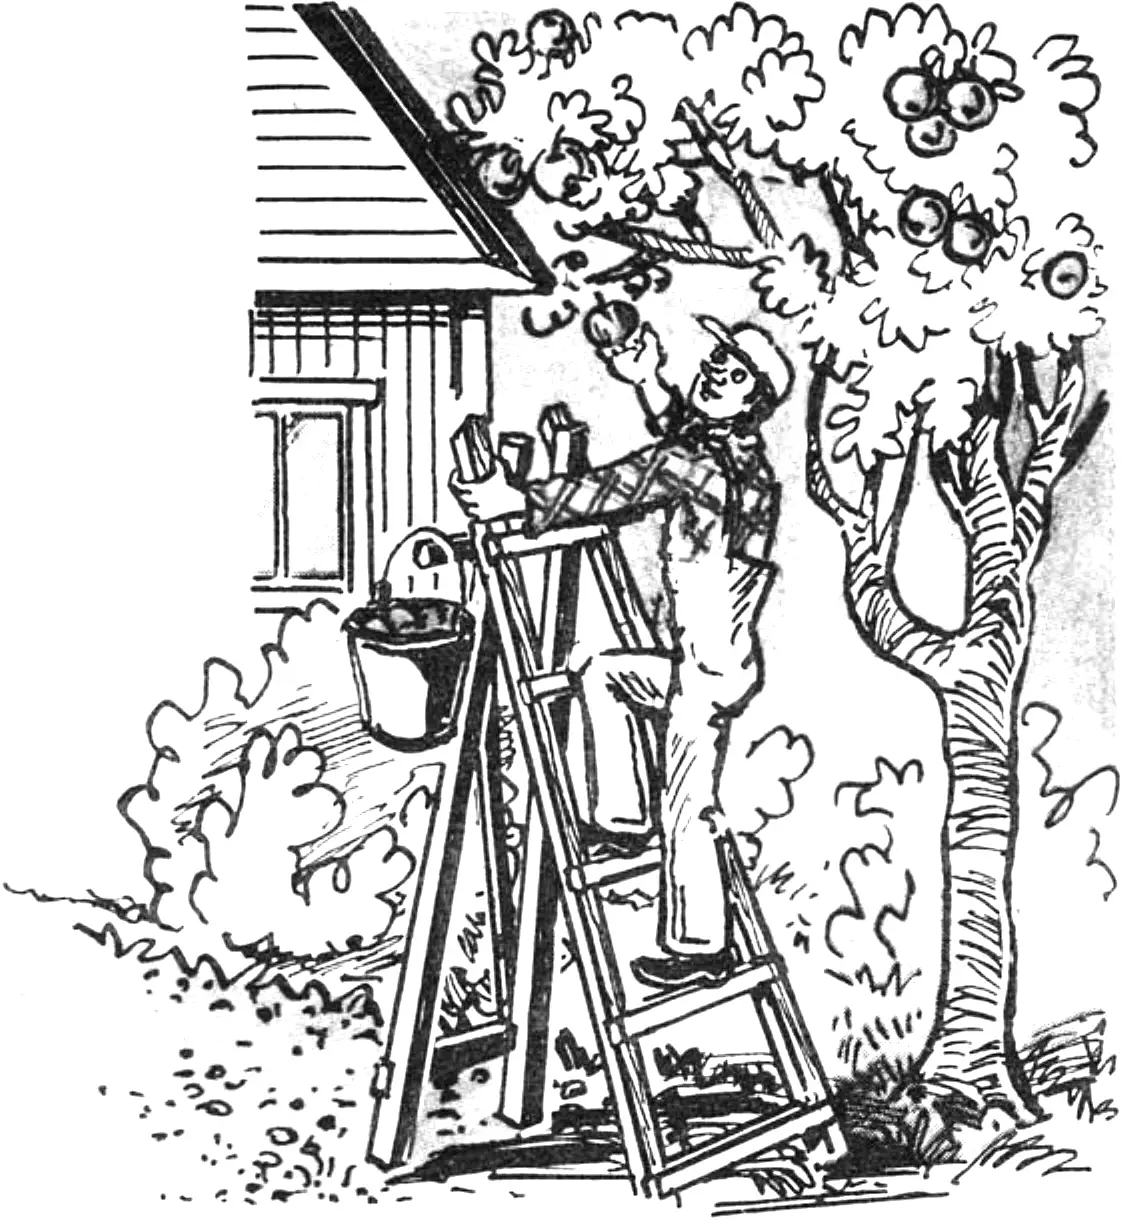
Before you know it, autumn will arrive — harvest time. Gathering what the earth has grown in the garden is no great problem. It is harder to harvest fruit from trees, especially if they are old and tall. Every gardener has to devise a way to reach fruit and berries high up. Some make all kinds of fruit pickers on pole handles, others — movable platforms.
I am convinced that the most convenient option is a light ladder that can be quickly moved and freely set under any crown. I do not make it specially; I use an existing ladder.
Ideally, of course, if you have two ladders — making a stepladder out of them is effortless, you only need to tie the tops together. But one is quite enough if you additionally make an auxiliary support that replaces the second ladder. It is very easy to make. You will need roughly the same blanks as for the main ladder (if you do not have them, substitutes such as poles or shafts will do).
At the same time, I will give recommendations in case you do not have a main ladder in your household. Making one will not cause difficulties, since with the material on hand you only need a handsaw and a hammer with nails.
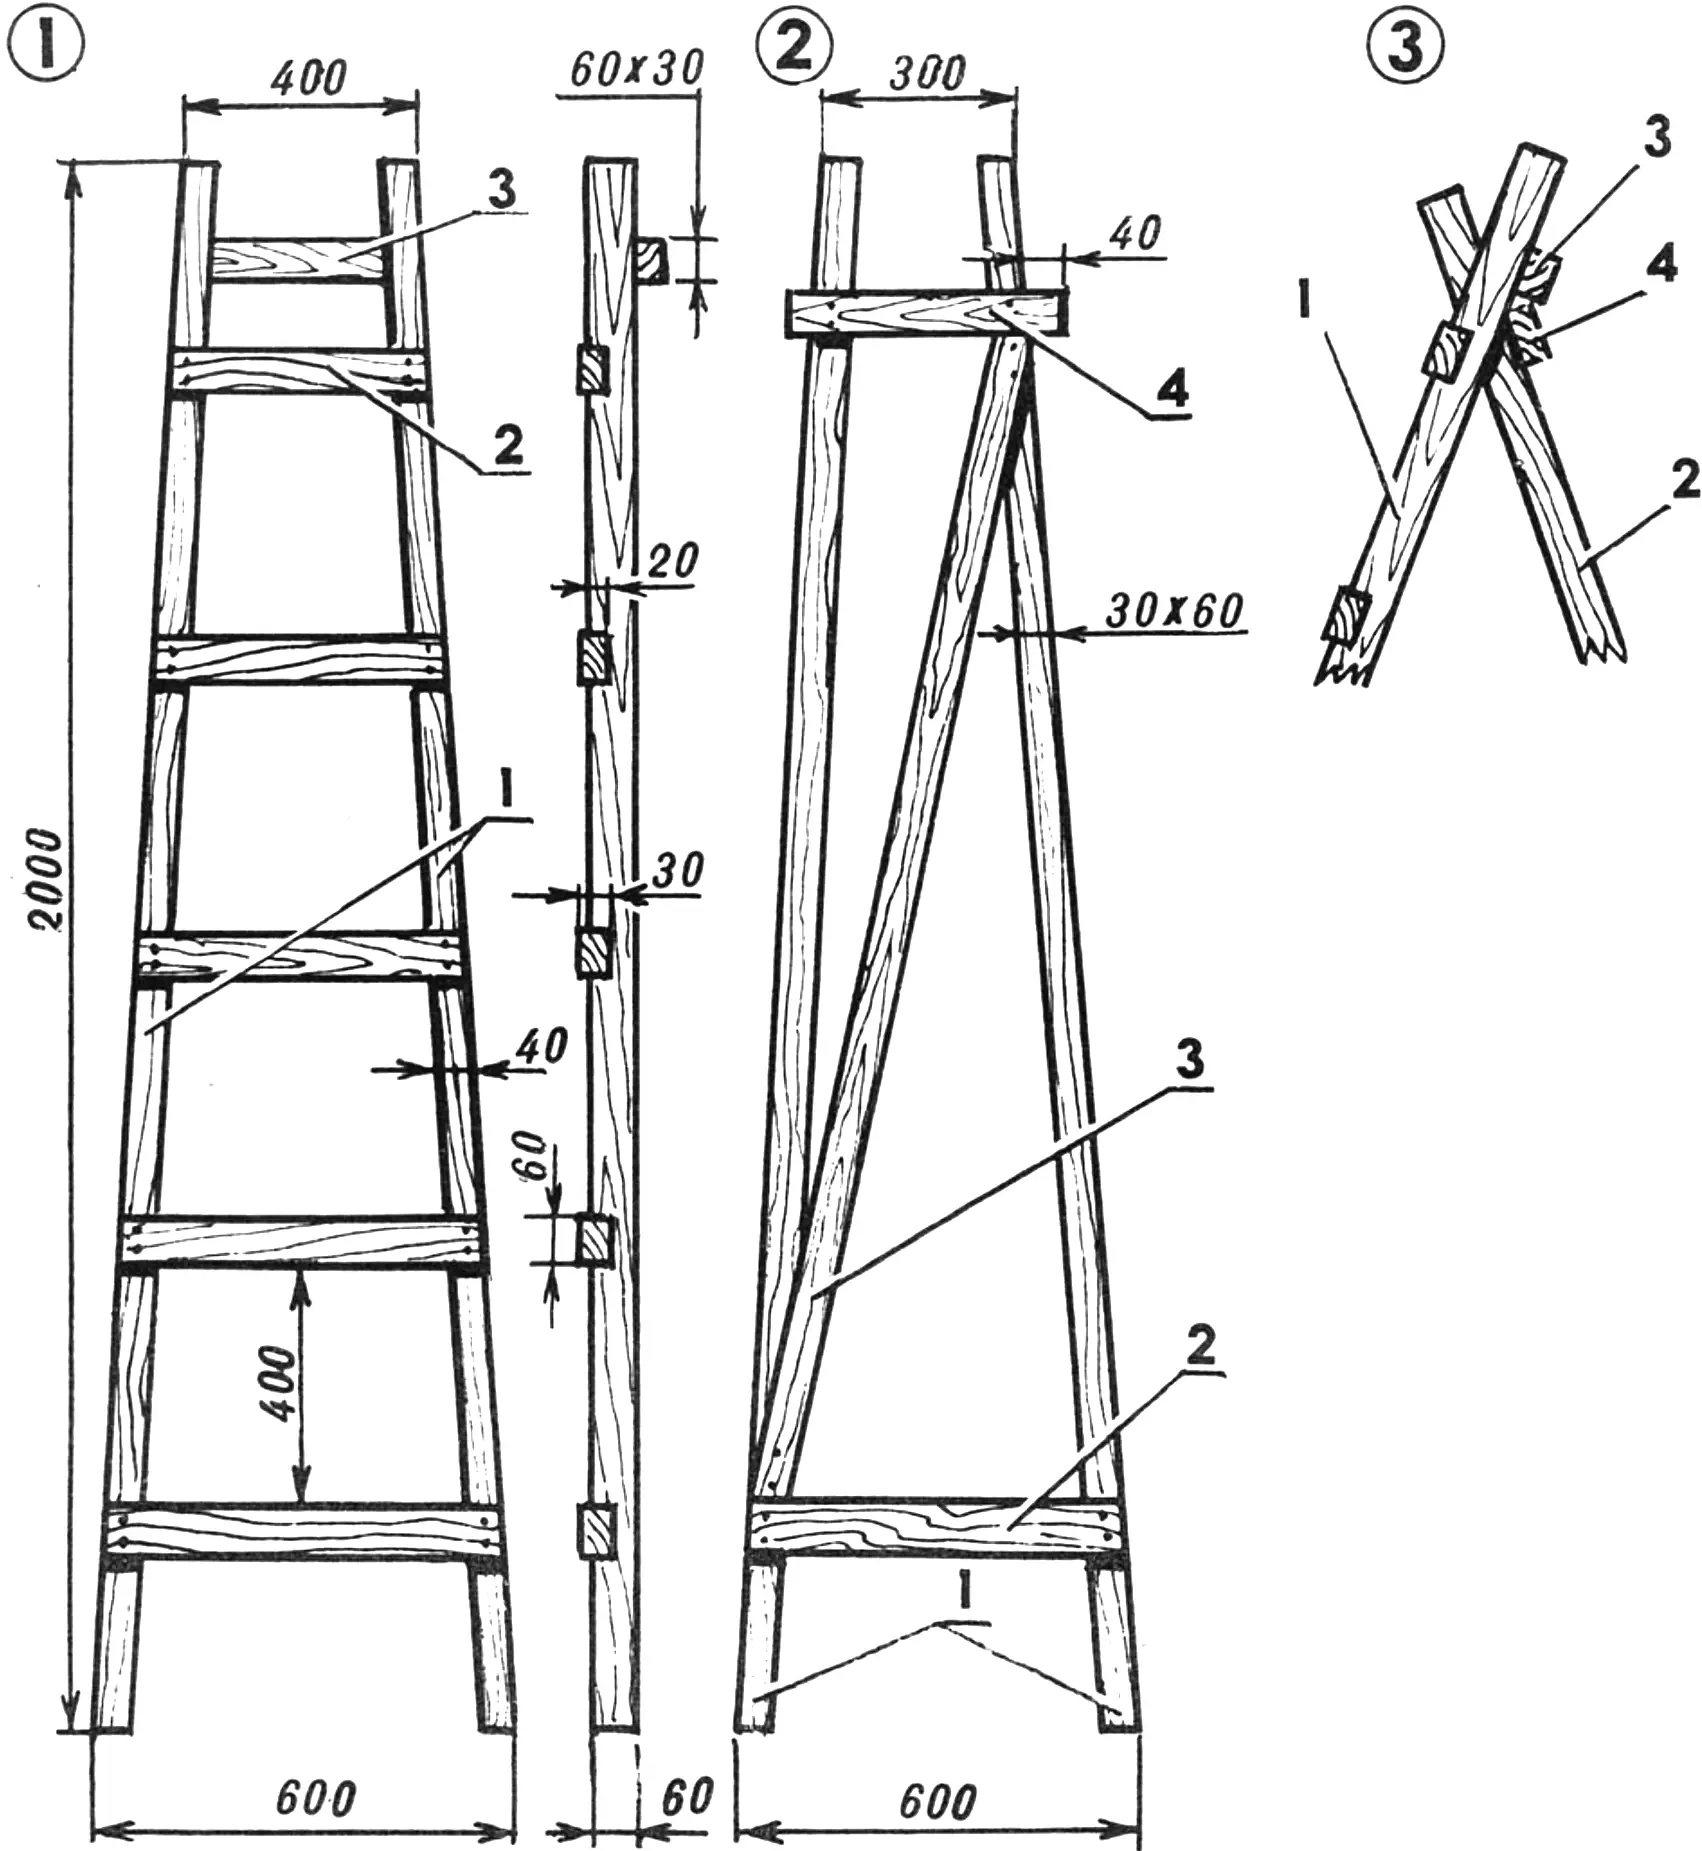
Fig. 1. Main ladder:
1 — support beams (2 pcs.), 2 — rung, 3 — additional rung.
Fig. 2. Stepladder support:
1 — support beams (2 pcs.), 2 — lower rung, 3 — diagonal brace, 4 — upper rung.
Fig. 3. Assembled stepladder:
1 — main ladder, 2 — stepladder support, 3 — additional ladder rung, 4 — upper support rung.
So, we take two wooden beams 40×60 mm in cross-section and at least 2 m long, lay them on edge on a level surface so that the distance between the lower ends of the future ladder is 520 mm, and between the upper ends — 320 mm. Moving a 60 mm wide batten along the beams in 400 mm steps, we mark the future rung sockets, which are then cut to a depth of 20 mm. For the rungs we need bars 30×60 mm in cross-section and 600 mm long. We insert them into the prepared sockets and nail them in place, starting with the outer ones; we saw off the excess ends of the rungs — and the ladder is ready.
Now we turn it over and, stepping back from the top rung by a distance equal to the width of the support beam, nail on an additional rung: it will serve as the support for the stepladder. We make the second ladder by the same scheme, and if there is no special need for it, we make a simplified structure that will serve simply as a support when using the main ladder in the “stepladder” version. But in any case, the distance between the upper ends of the support beams and their cross-section must be smaller than those of the ladder — 300 mm and 30×60 mm respectively.
In the “support” version, we nail on only the lower and upper rungs, and we do not prepare sockets for them in the support beams. And to prevent skewing, we secure a diagonal brace 30×50 mm in cross-section (length as required) between the rungs, flush against them.
Now we join the main and auxiliary ladders at the tops so that the “horns” of the latter fit between the support beams and the top and support rungs of the main ladder: we get a stepladder whose upper ends will be held firmly without additional fastening, while the lower ends can be spread closer or farther apart while remaining stable.
With such a stepladder I successfully harvest fruit from the highest branches of cherry, bird cherry, and apple trees: it stands excellently!
“Modelist-Konstruktor” No. 5’96, V. SMIRNOV
Recommend to read
 GLASS TABLE
A small table, color coordinated with the seats, carpet and the lamp, will transform one of the corners of your apartment, will add to her comfort. The top — worktop — made of glass... ETERNAL MICROVENTILATION
The ventilation needs of many suburban buildings. Without it, mold in houses and sheds, get wet cellars and basements, and only use luftblasen, where there is no fan, to put it mildly,...
