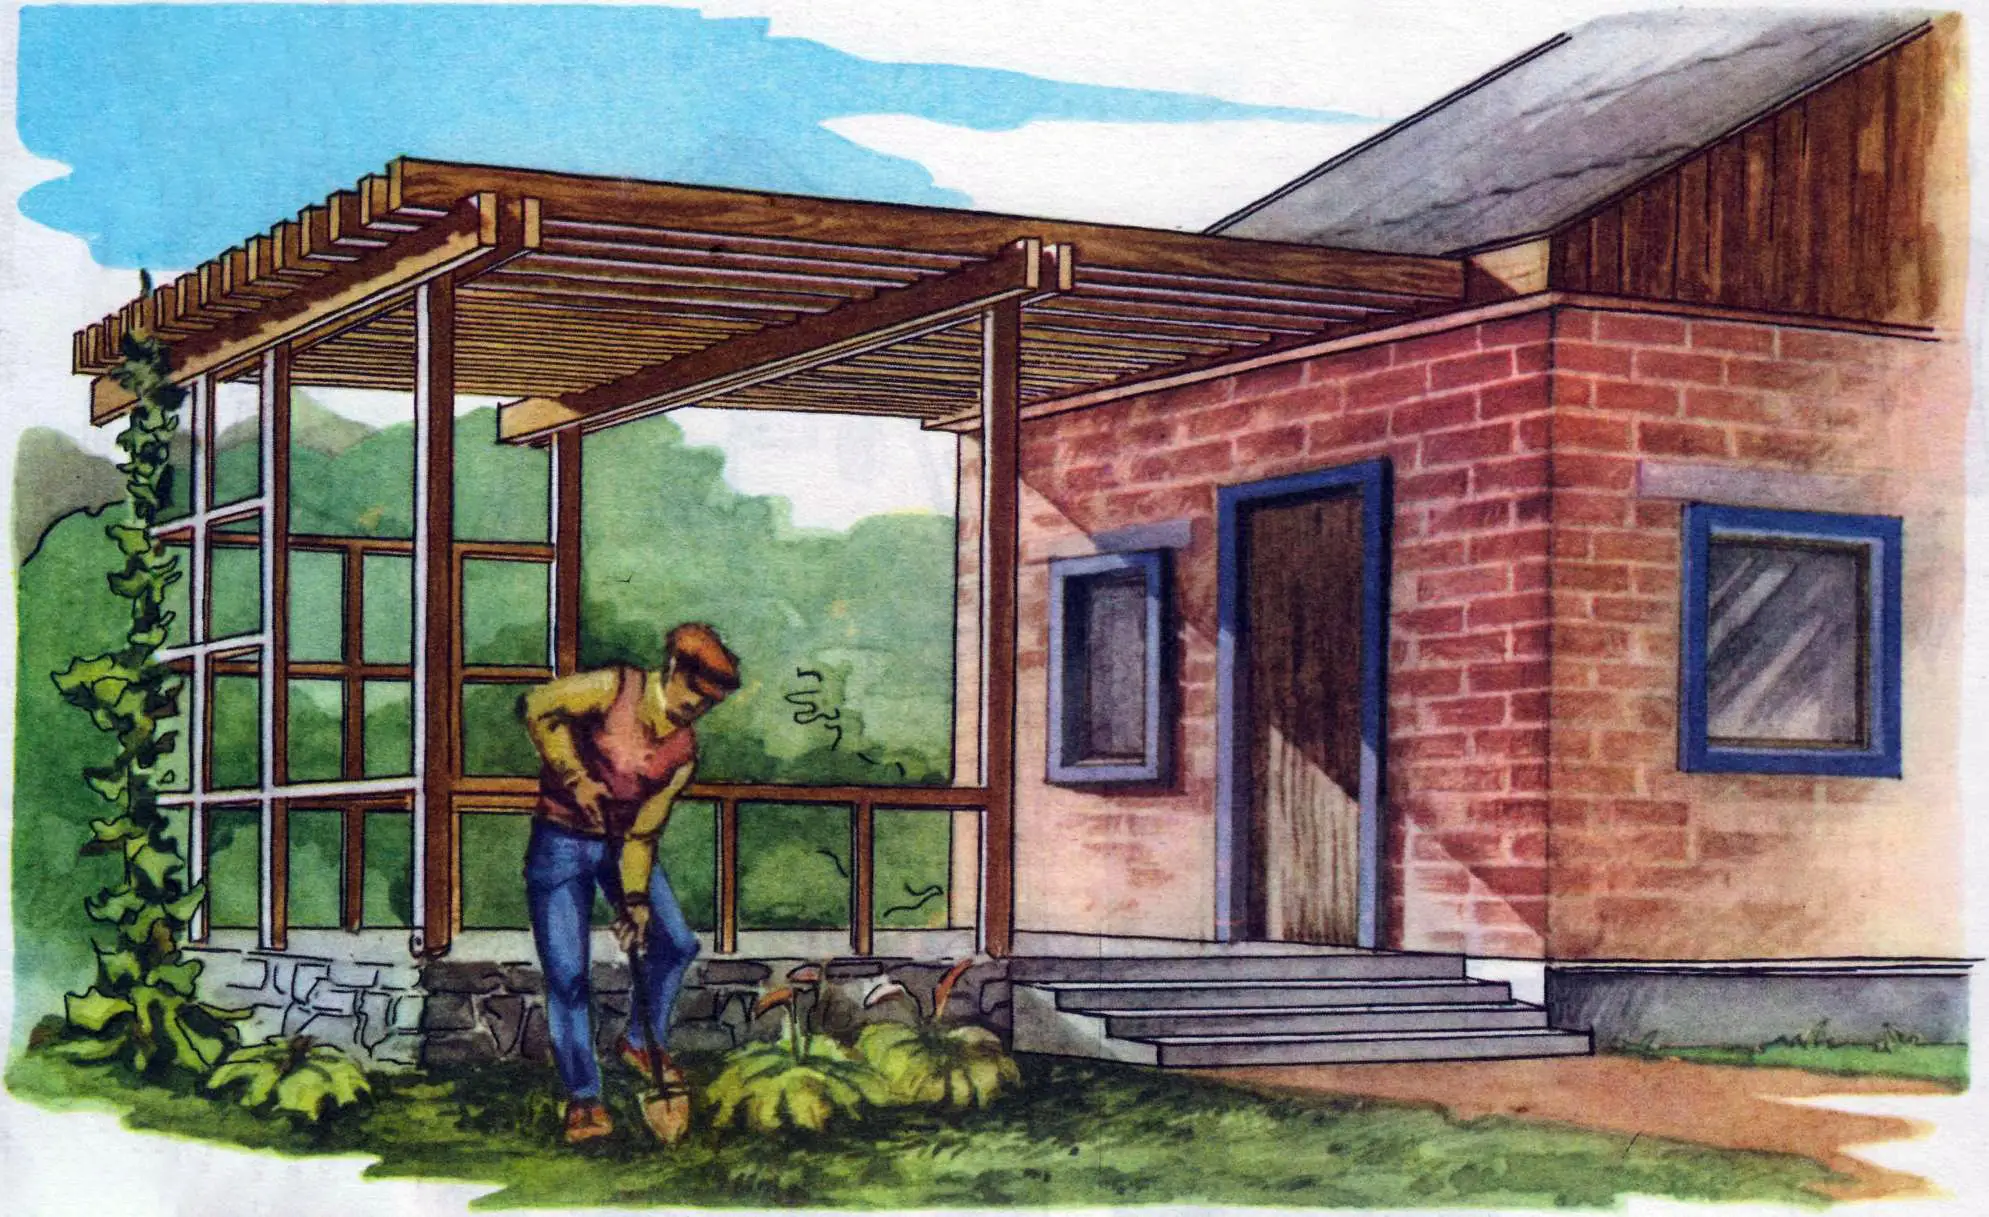
The so-called architecture of small forms is undeservedly forgotten on garden plots. For example, pergolas and trellises are light openwork structures, usually covered with plants and forming freestanding “green” walls, gazebos, or covered alleys. Blending organically into the surrounding plantings, they create cozy corners sheltered from direct sunlight.
In this KDM issue we want to tell readers how to build a gazebo and a veranda using a pergola — a lattice canopy.
The gazebo should be placed in a quiet part of the garden plot not far from the house. It should be oriented so that the pergola slats run east–west (in the latitude direction), and the wall with louvers faces south. In this position the pergola will provide the best protection from the sun. It will also cast an attractive patterned shadow.
Before starting construction, carry out earthworks: level the plot, lay out the axes, and dig pits about 1 m deep for the posts. Then fill the bottom of each pit with a 200–300 mm layer of gravel and set the posts. A string stretched between stakes on the outer side of the posts will help keep the spacing exact. In the ground it is best to set the posts in concrete, after coating the buried part with bitumen to protect against rot. Until the foundation concrete has fully cured, the tops of the posts must be fixed temporarily — tack boards on with nails. These are not removed later when installing the decking. First, notches for joists are cut in the lower part of the posts; the joists are inserted and nailed in. The joists run along the axes marked with letters on the drawings. Boards are laid on the joists for the floor. Then the entire deck is skirted around the perimeter with a base board so its top edge is flush with the floor level.
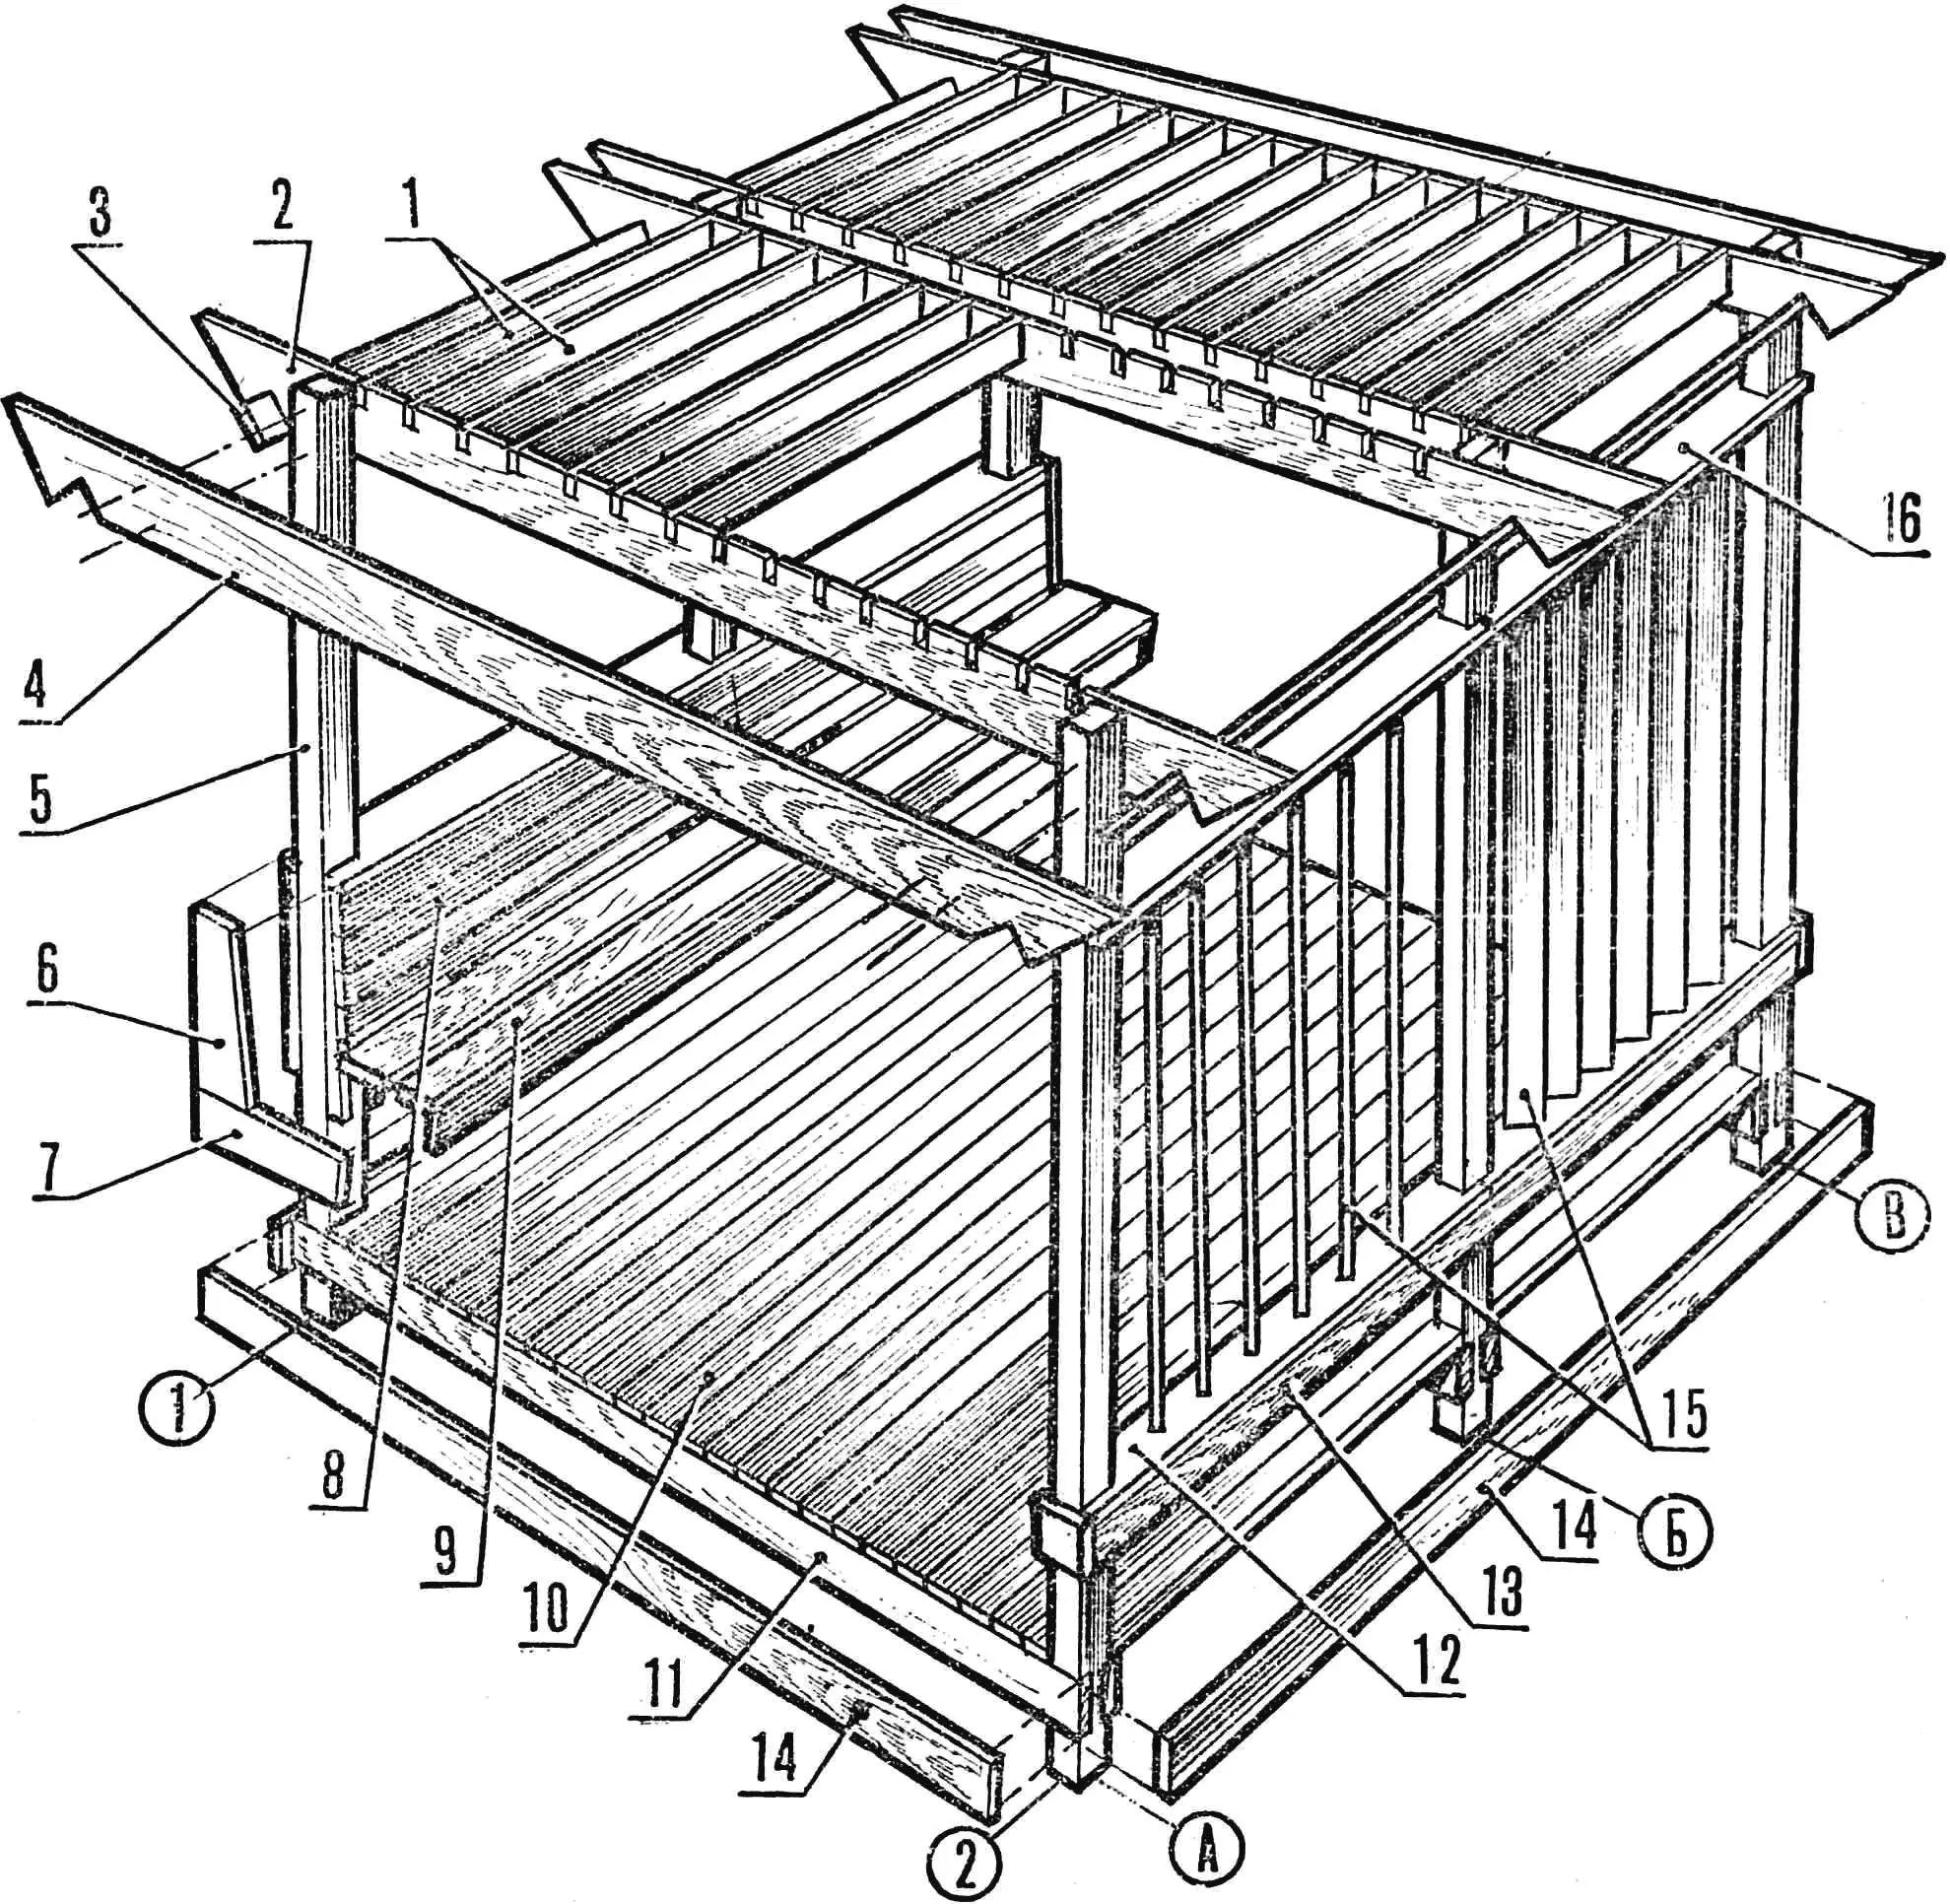
1 — pergola slats, 2 — main beam (carrier), 3 — rim board, 4 — front beam, 5 — post, 6 — bench back side piece, 7 — stretcher, 8 — folding back, 9 — seat, 10 — decking boards, 11 — joist, 12 — lower horizontal board, 13 — support board, 14 — base board, 15 — vertical louvers, 16 — upper horizontal board.
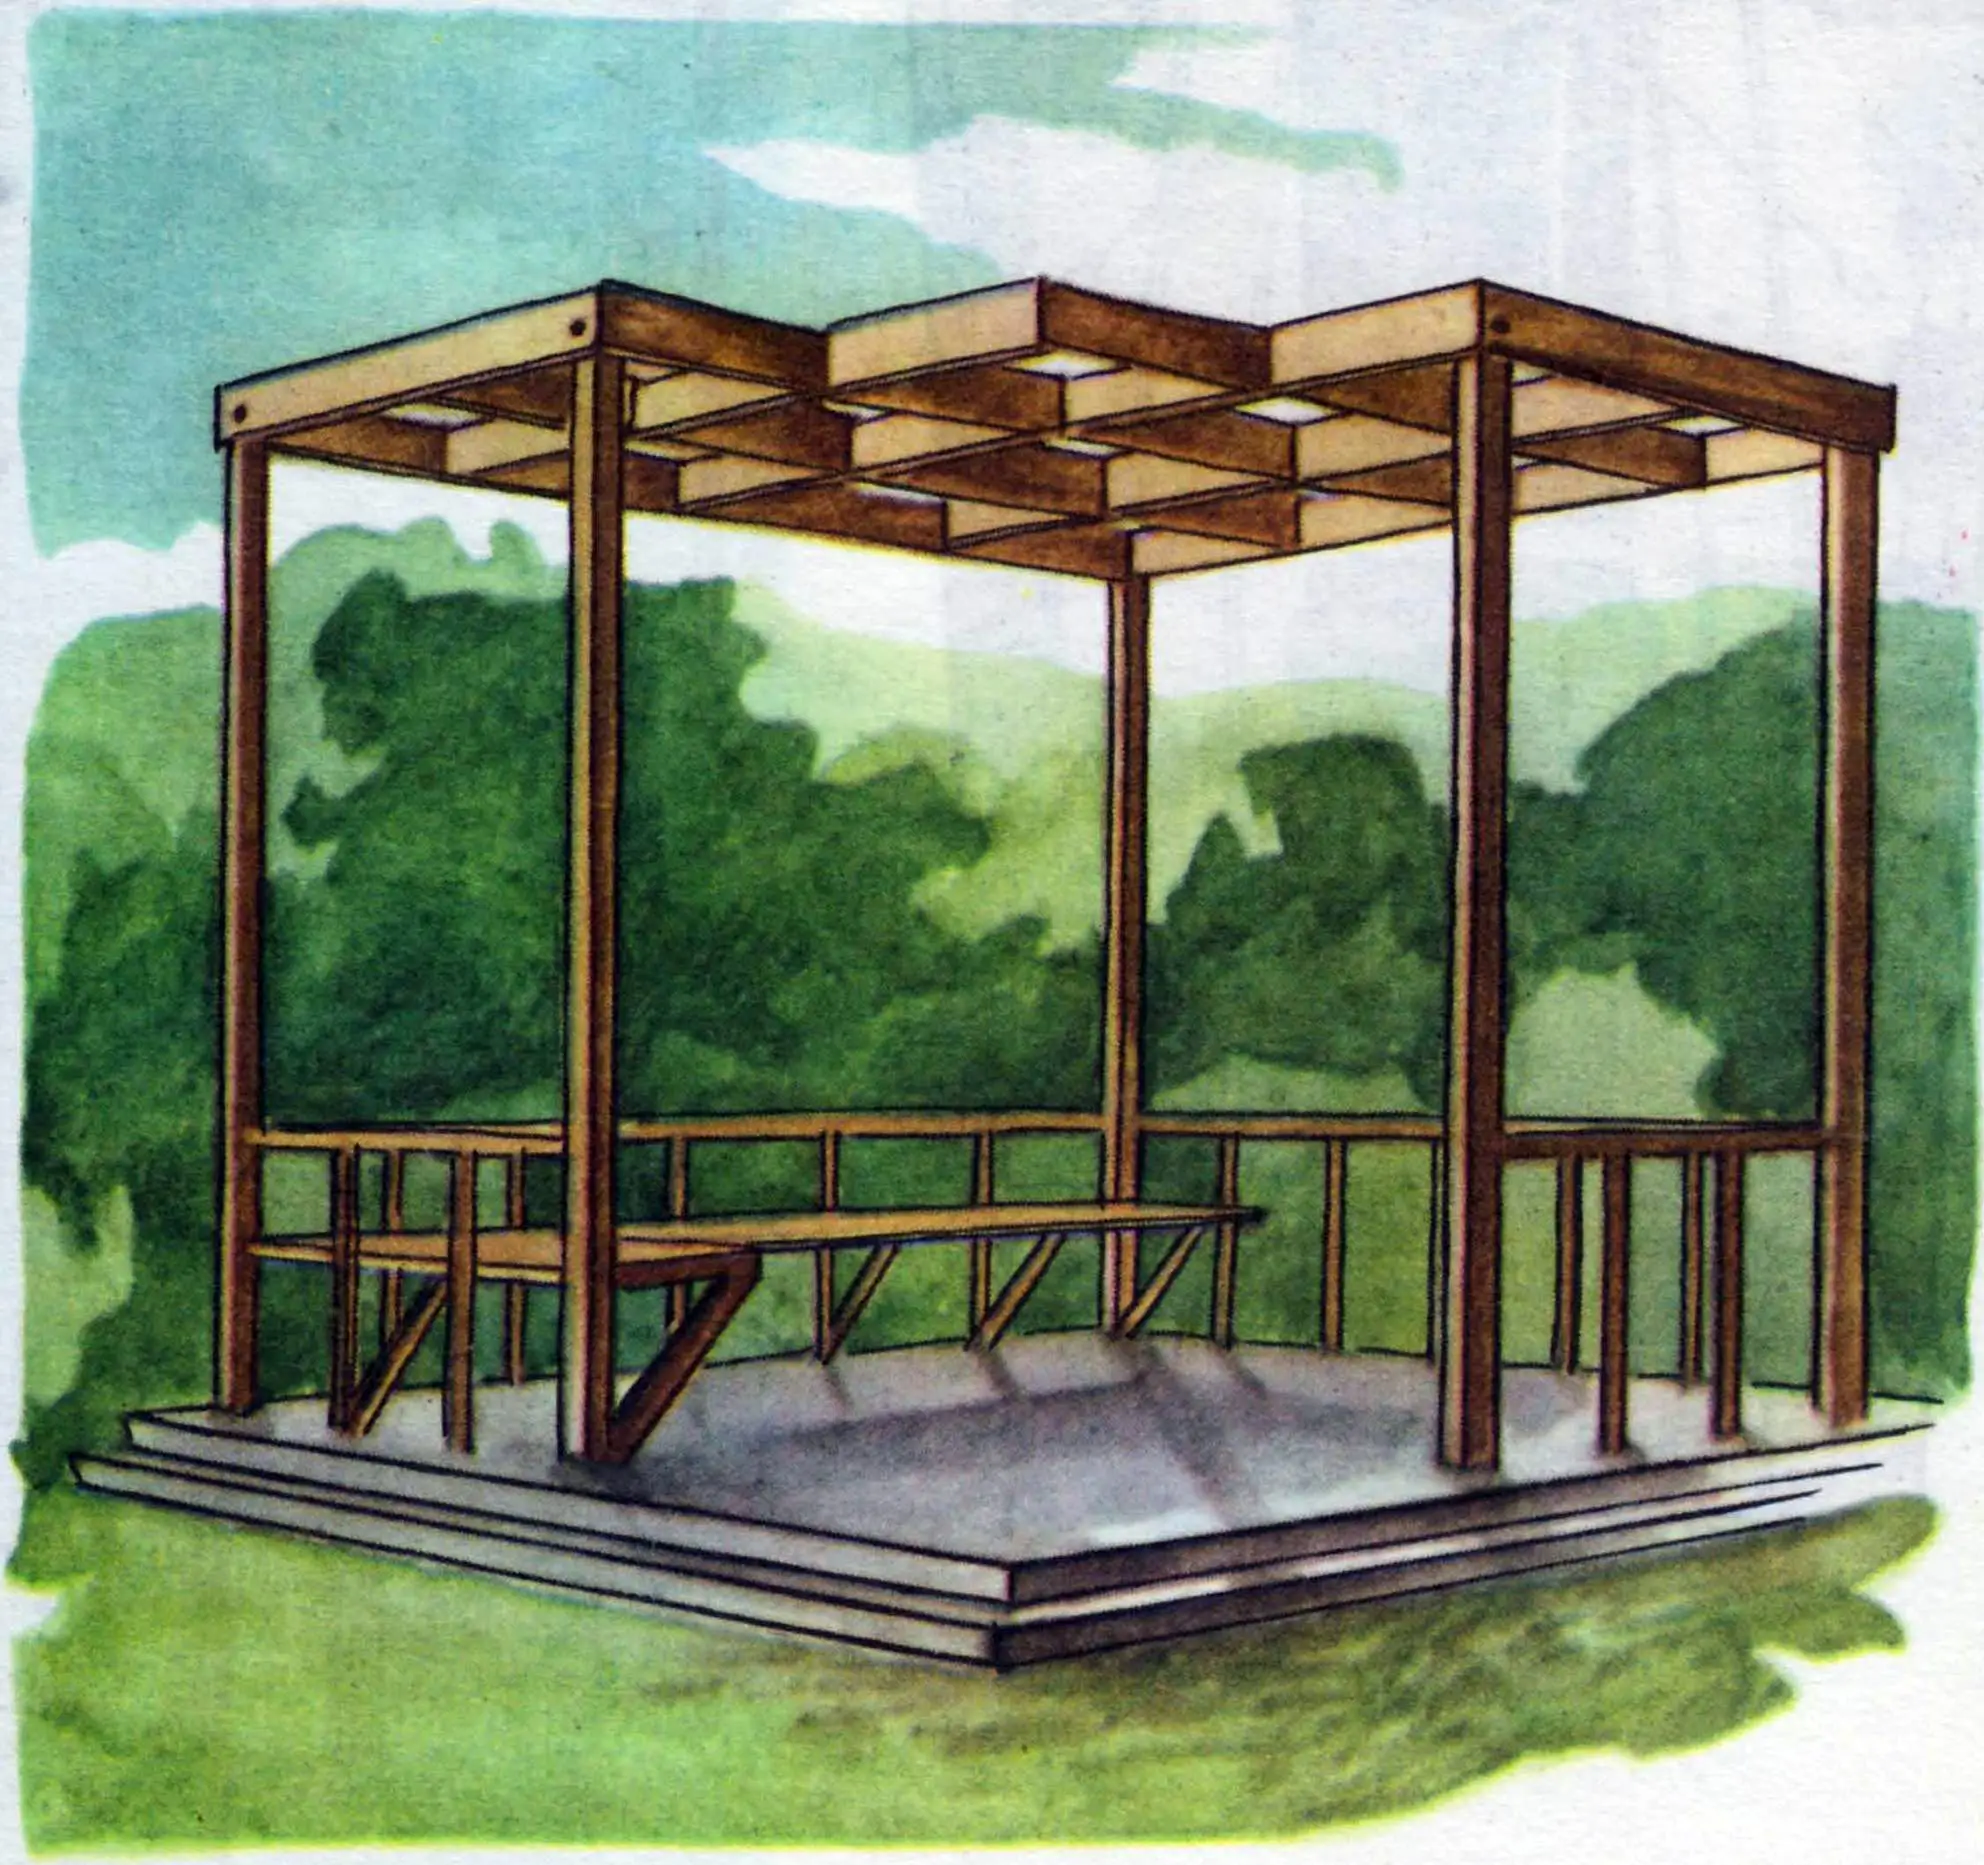
You can now assemble the roof structure — the pergola. First attach the beams — the roof members — between the posts along the axes marked with letters on the drawings. They are placed on both sides of the posts and bolted together. The main beams differ from the front beams in that they have sockets for the pergola slats. The slats cover all the joints and shape the architectural look of the gazebo front. The slats are set into sockets in the main beams and fixed with nails driven at an angle. Along the edges, along the axes marked with numbers on the drawings, all beams are tied with rim boards. All that remains is to fit out the interior — build a bench and a louver wall.
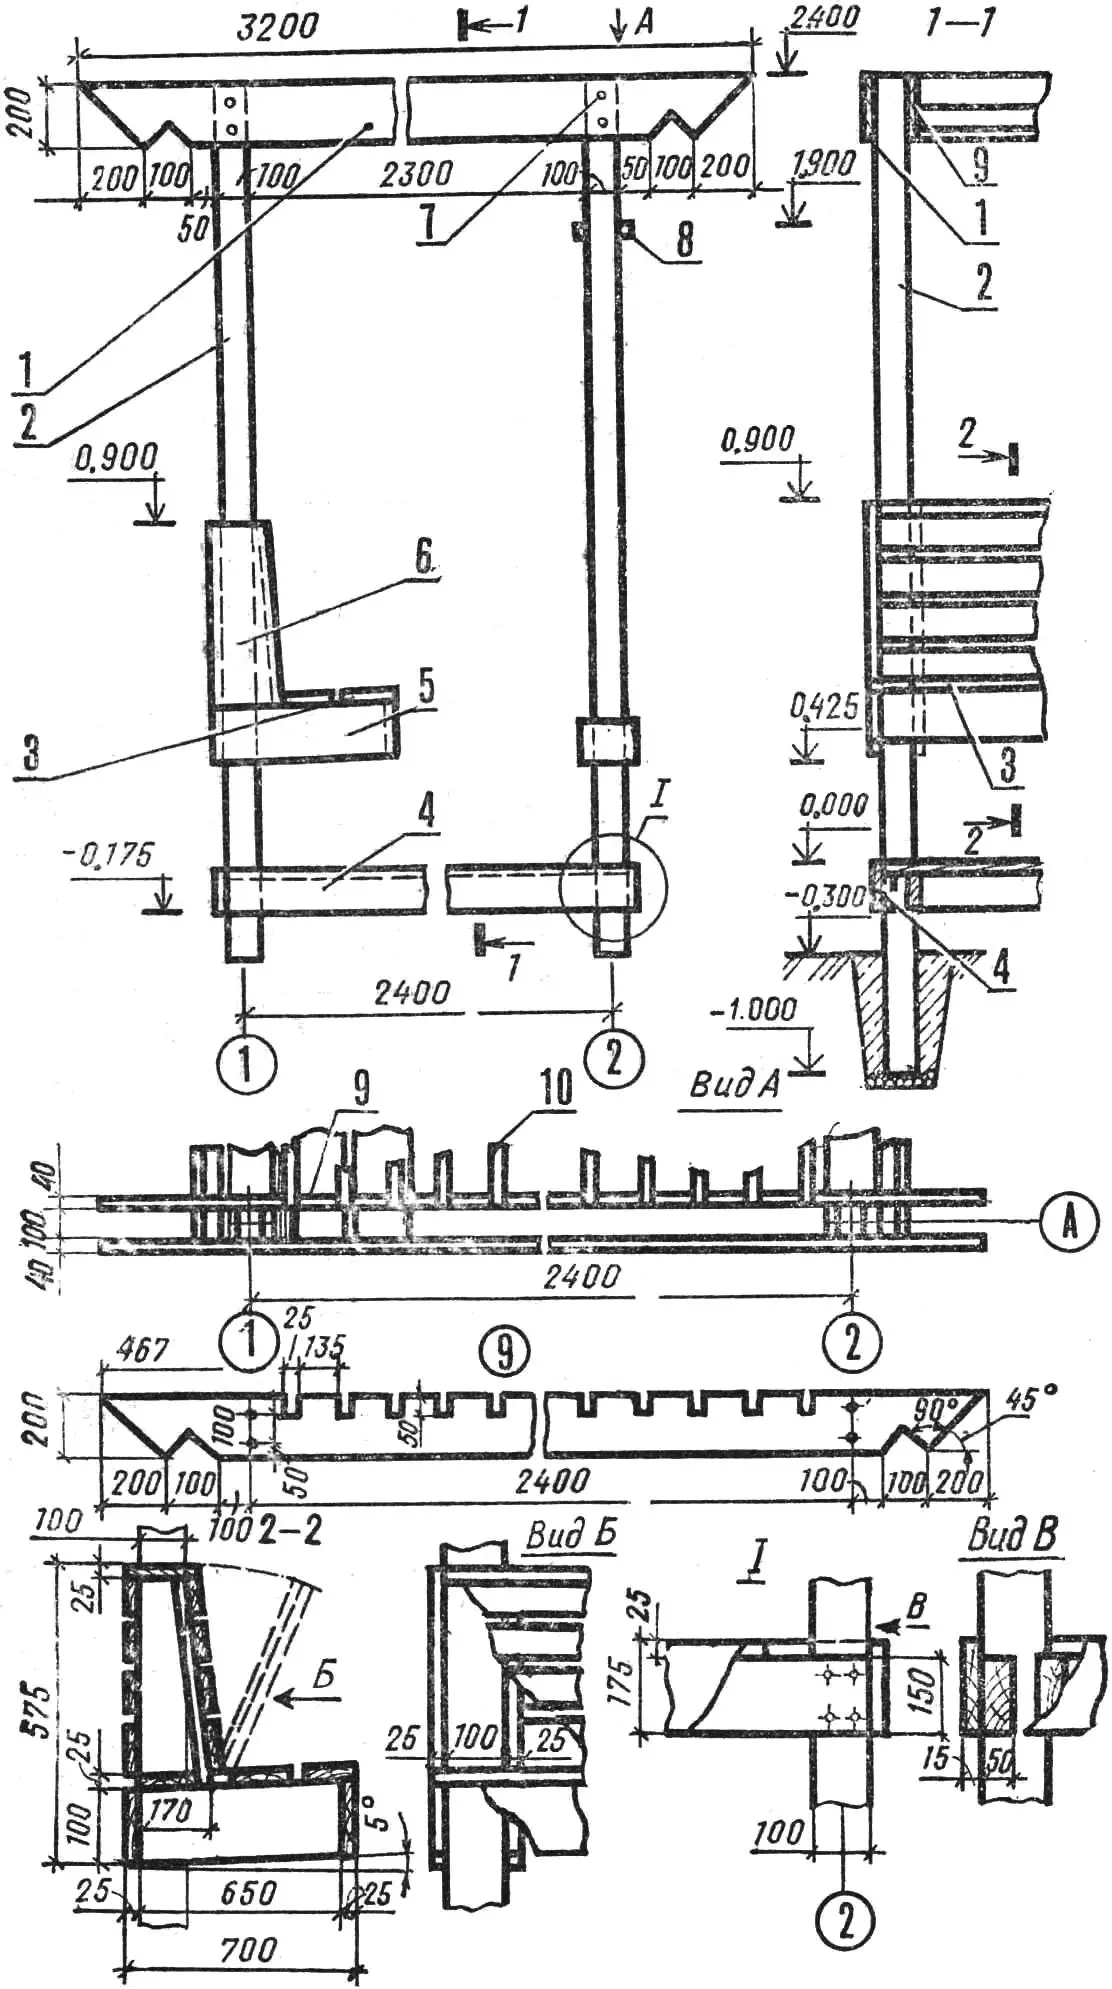
1 — front beam, 2 — post, 3 — seat, 4 — base board, 5 — stretcher, 6 — back side piece, 7 — fastening bolt, 8 — upper horizontal board, 9 — main beam, 10 — pergola slats.
The bench is assembled from back side pieces and seat stretchers, attached to each post on both sides. Seat boards are nailed on top of the stretchers; the back is made of separate panels hinged to the seat to form a door to a storage space for small garden tools. The back is clad with boards on the outside.
Then build the louver wall. Mark positions for the vertical slats on the lower and upper horizontal boards — easy to do with templates cut from cardboard or drawing paper. The prepared boards are nailed to the posts at top and bottom. To keep the wall from sagging under the weight of the slats, two more support boards are nailed under the lower horizontal board. Then the vertical slats are set in the marked positions and fixed with nails.
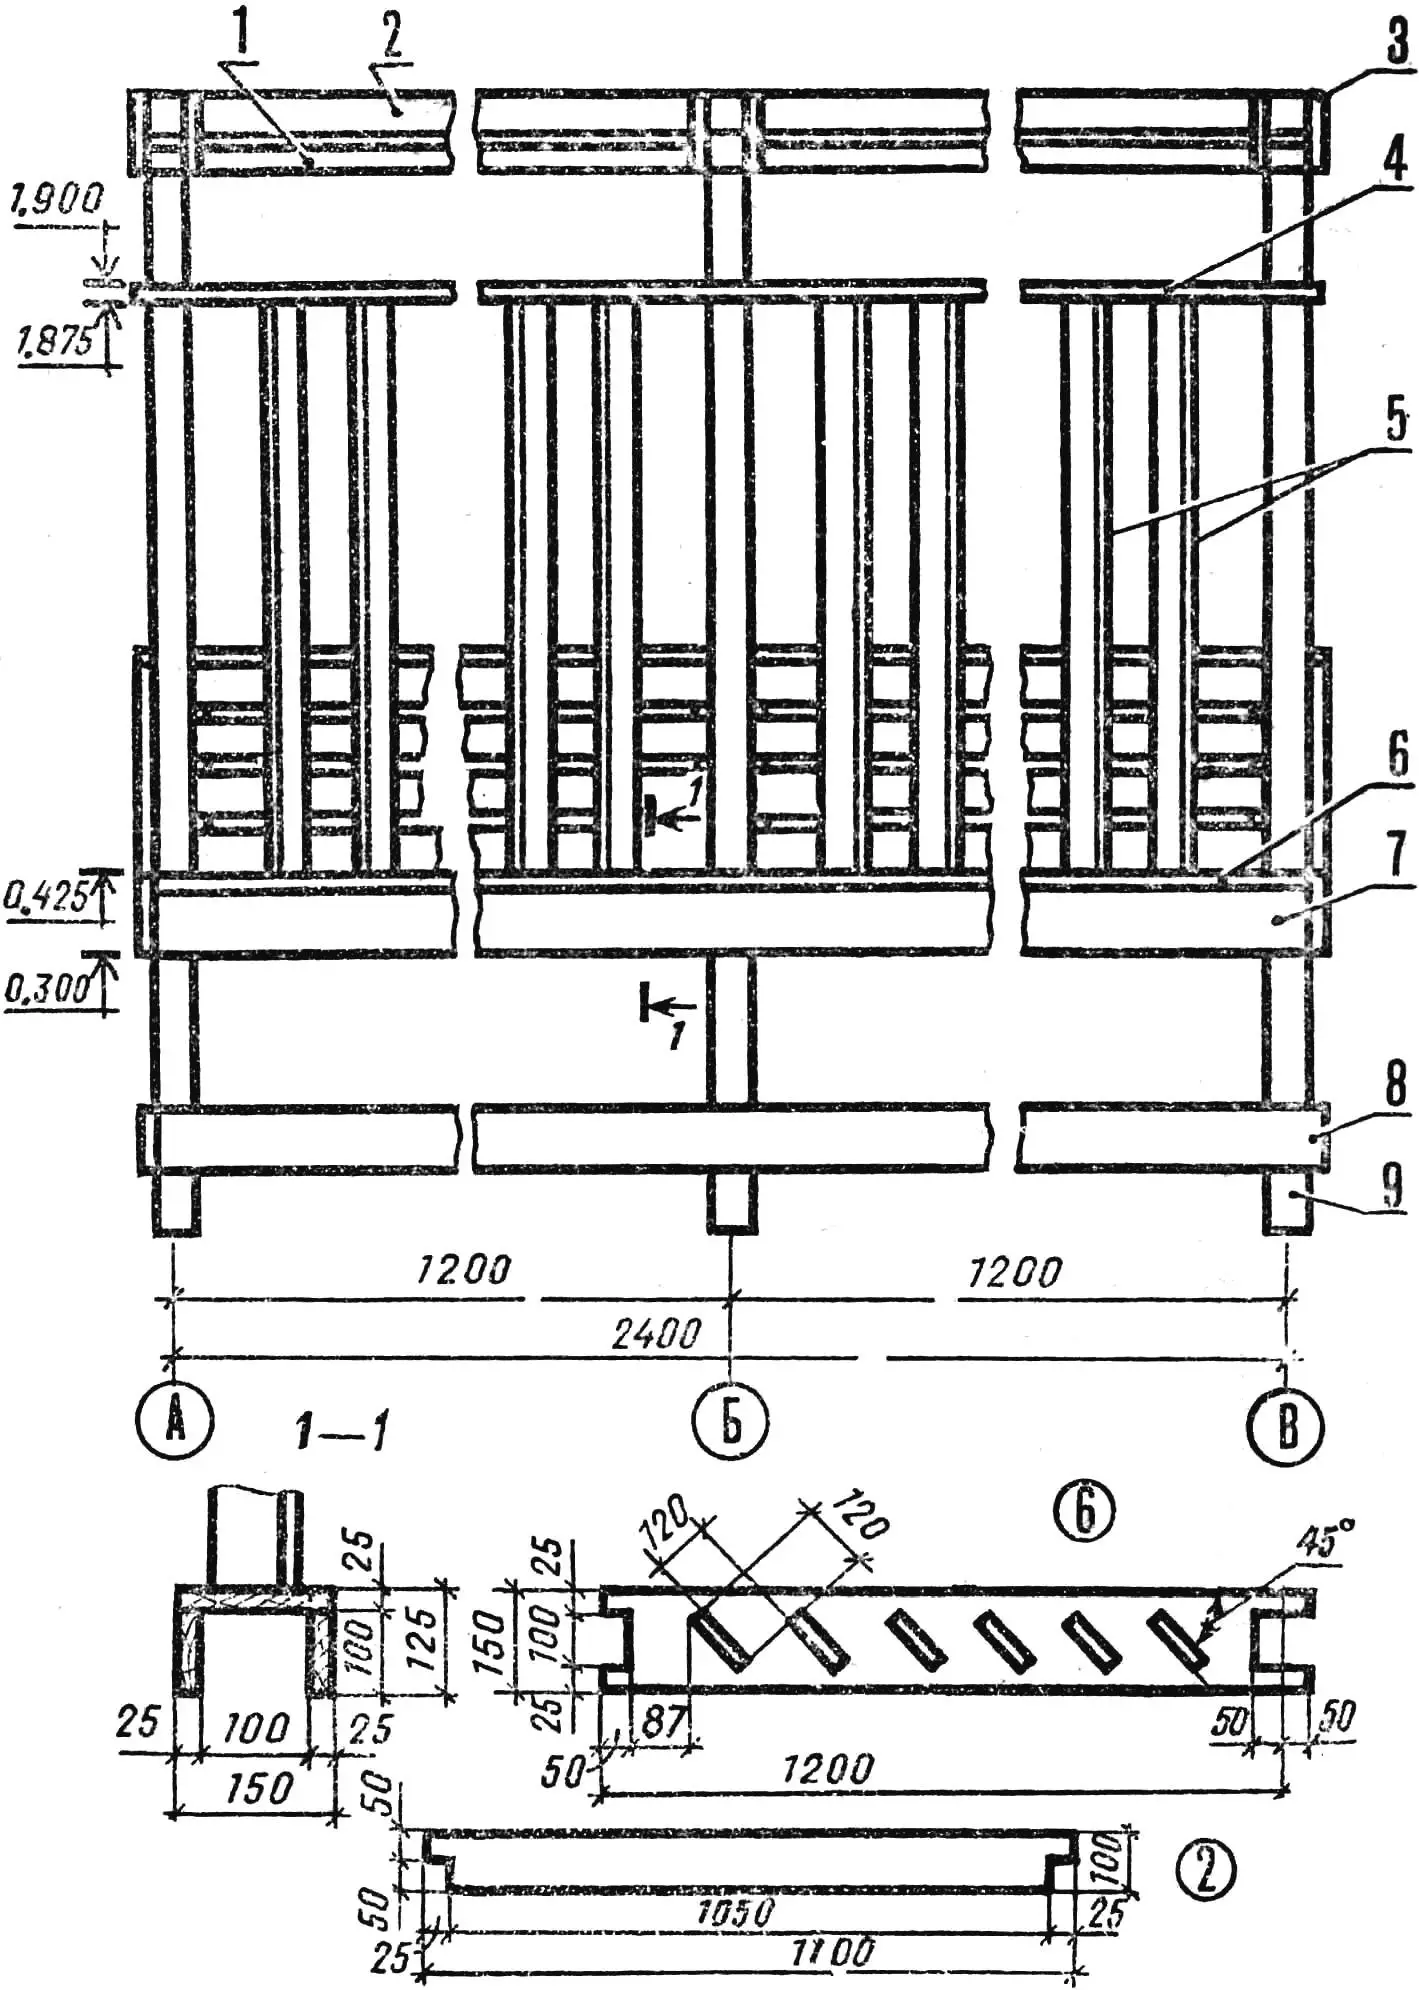
1 — rim board, 2 — pergola slats, 3 — front beam, 4 — upper horizontal board, 5 — vertical louvers, 6 — lower horizontal board, 7 — support board, 8 — base board, 9 — post.
The gazebo is ready. All that remains is to sand the board ends carefully and coat the whole structure with water-resistant varnish. The natural wood color will harmonize well with the surrounding greenery.
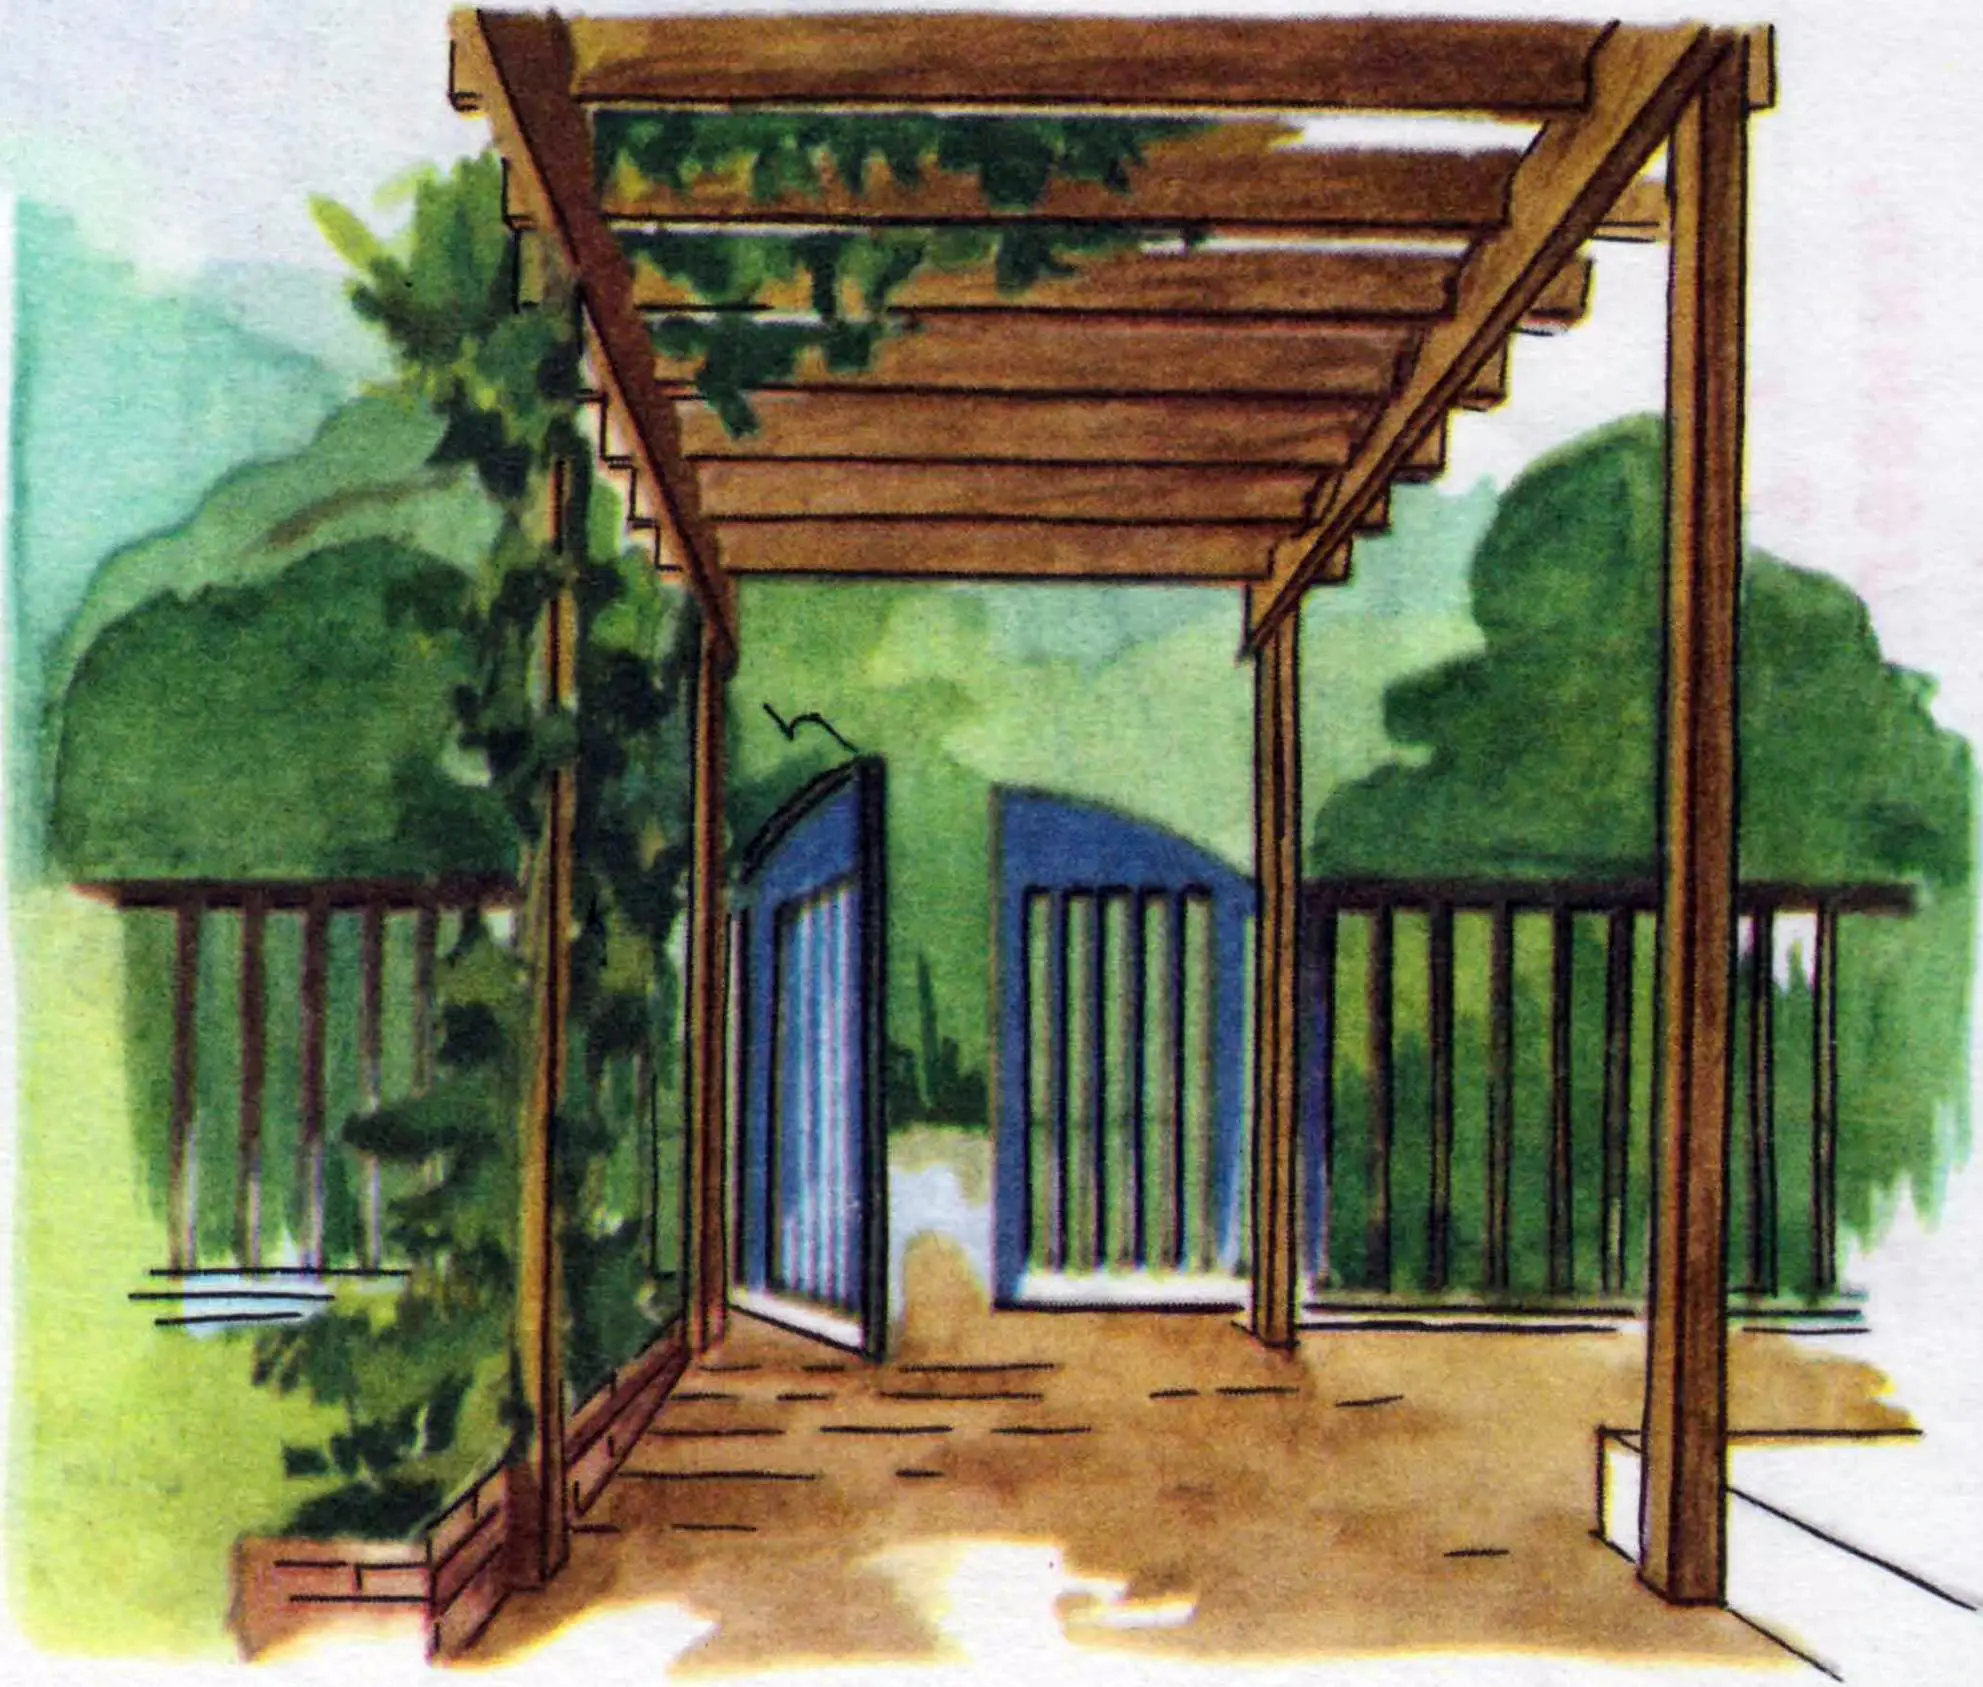
If you decide to build a veranda attached to the house on the same principle, reduce the depth of the structure by 1200 mm so the veranda does not dominate the building facade but only adds expression. It is somewhat simpler to build, because one side needs only two posts set in the ground; the house wall serves as the other support.
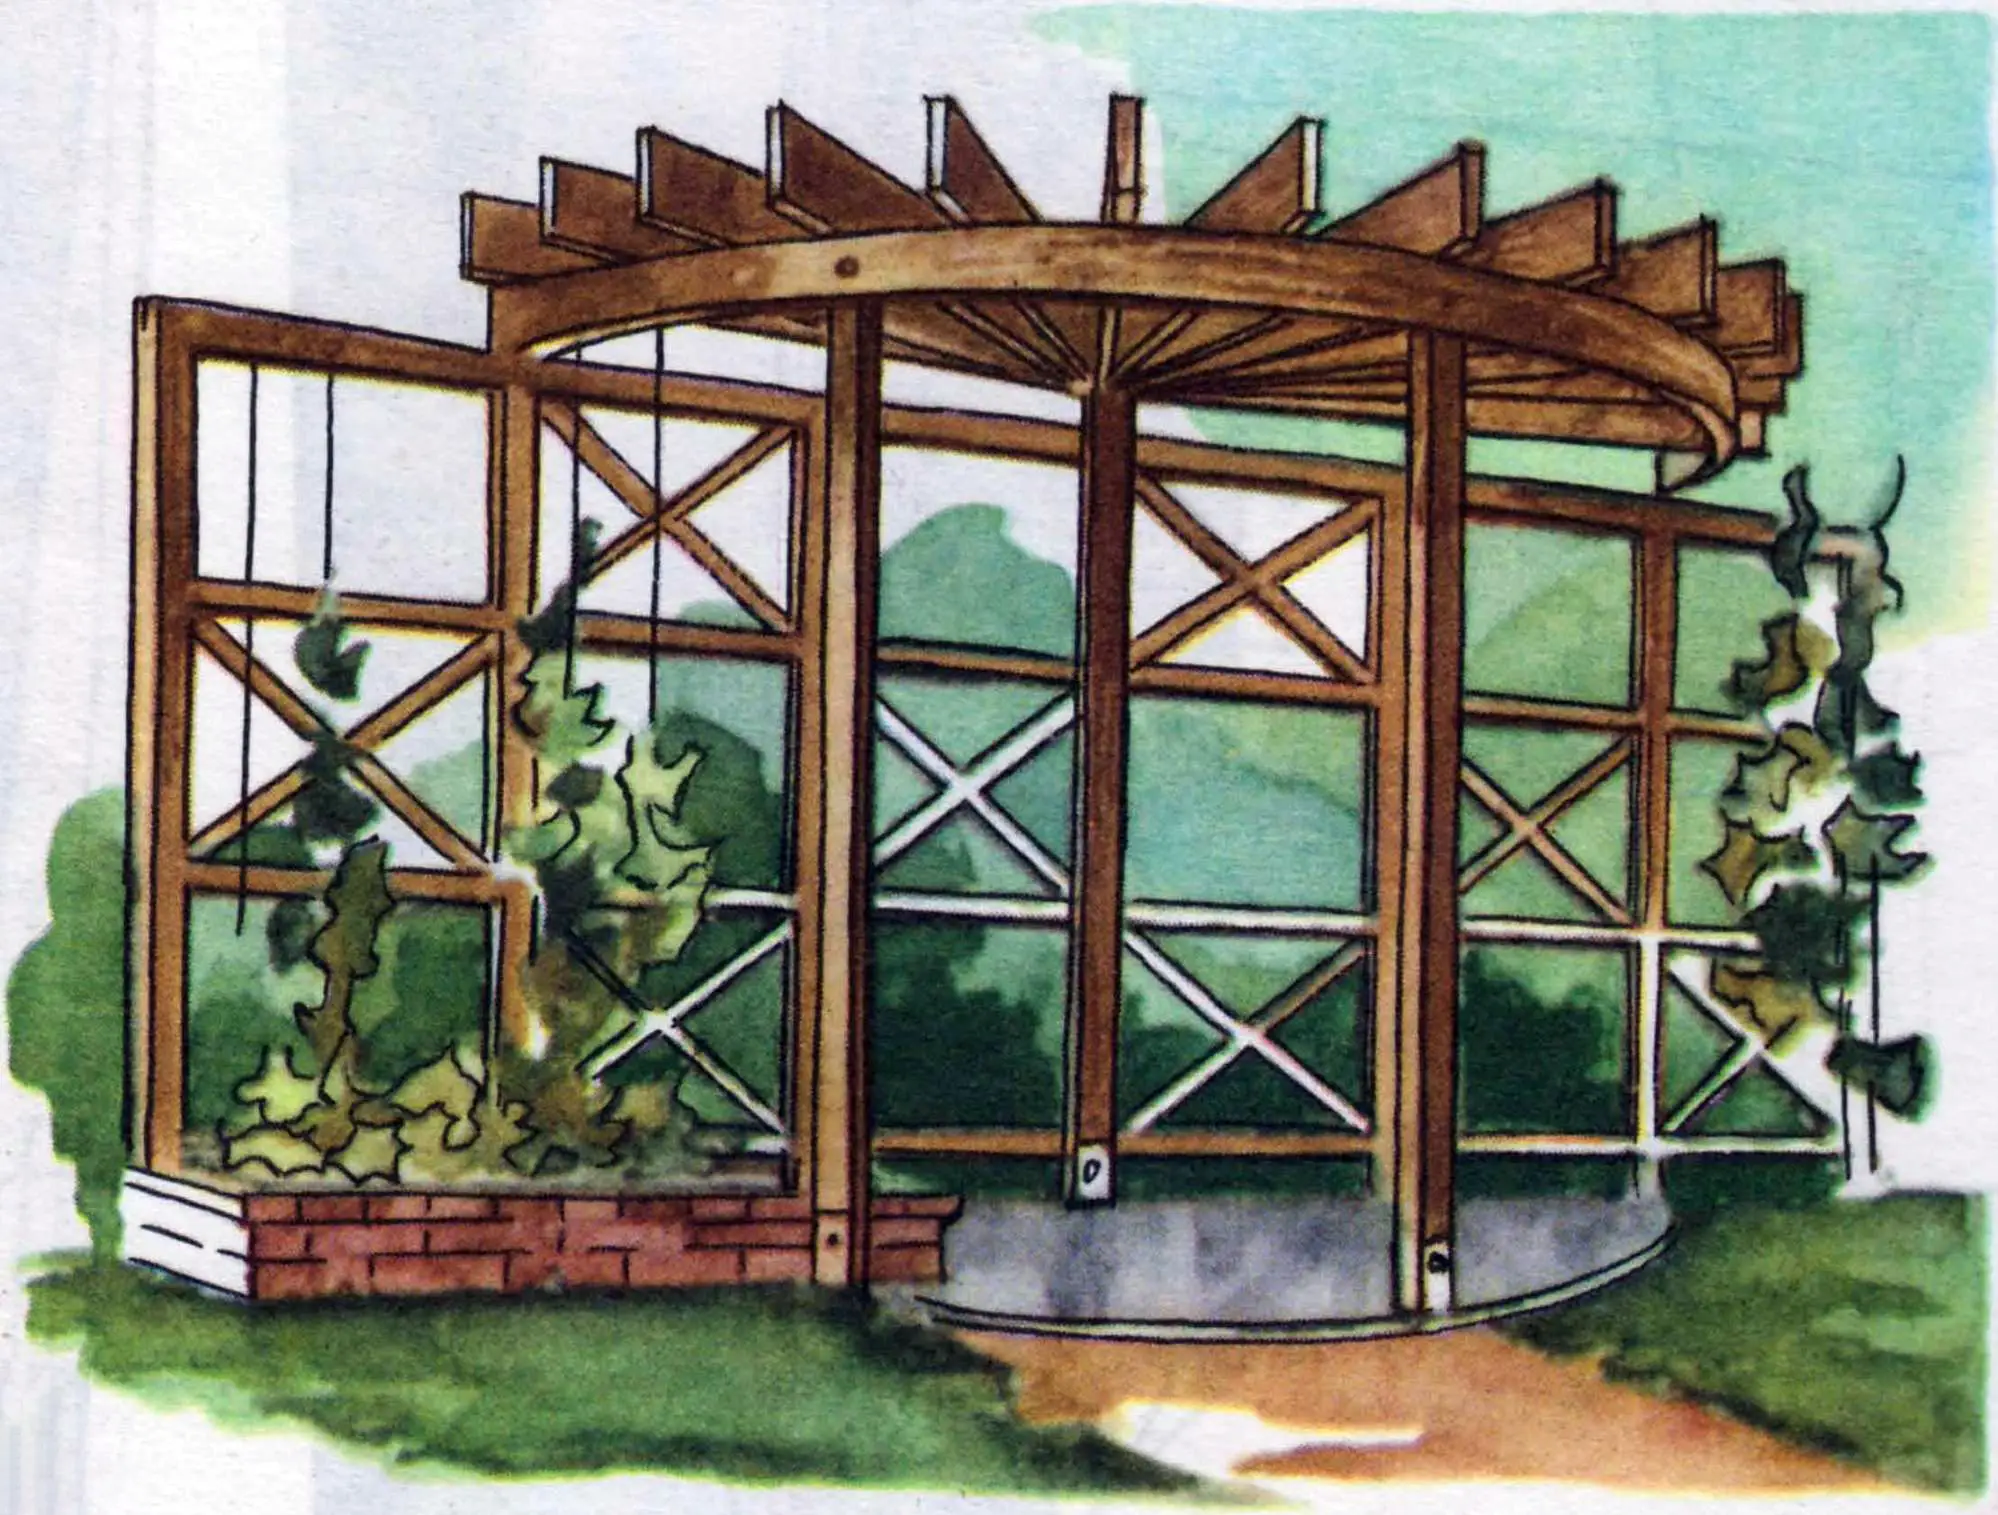
Sun-shading pergolas are light, elegant roof structures used in garden and park architecture; they blend well with the greenery of a plot.
Covered with plants, they will beautify an open veranda of a cottage, and a freestanding gazebo combined with a trellis lattice will separate the relaxation area from the vegetable garden.
Using lattice structures, you can build a kind of green canopy over the path from the gate to the house.
“M-K” 6’88, N. POMYTKIN, architect
Recommend to read
 WAS OUTER — WILL BE HIDDEN
To saw through the groove to "hide" the wiring in the plaster of the wall can be the simplest tool made from a wooden block and two fragments of the saw blade. The thickness of the... THE LAST EFFORT OF THE EMPIRE
The accession of Britain, largely against the will and in a rather unprepared state, in the war with Germany questioned the most promising projects in the field of shipbuilding, related...
