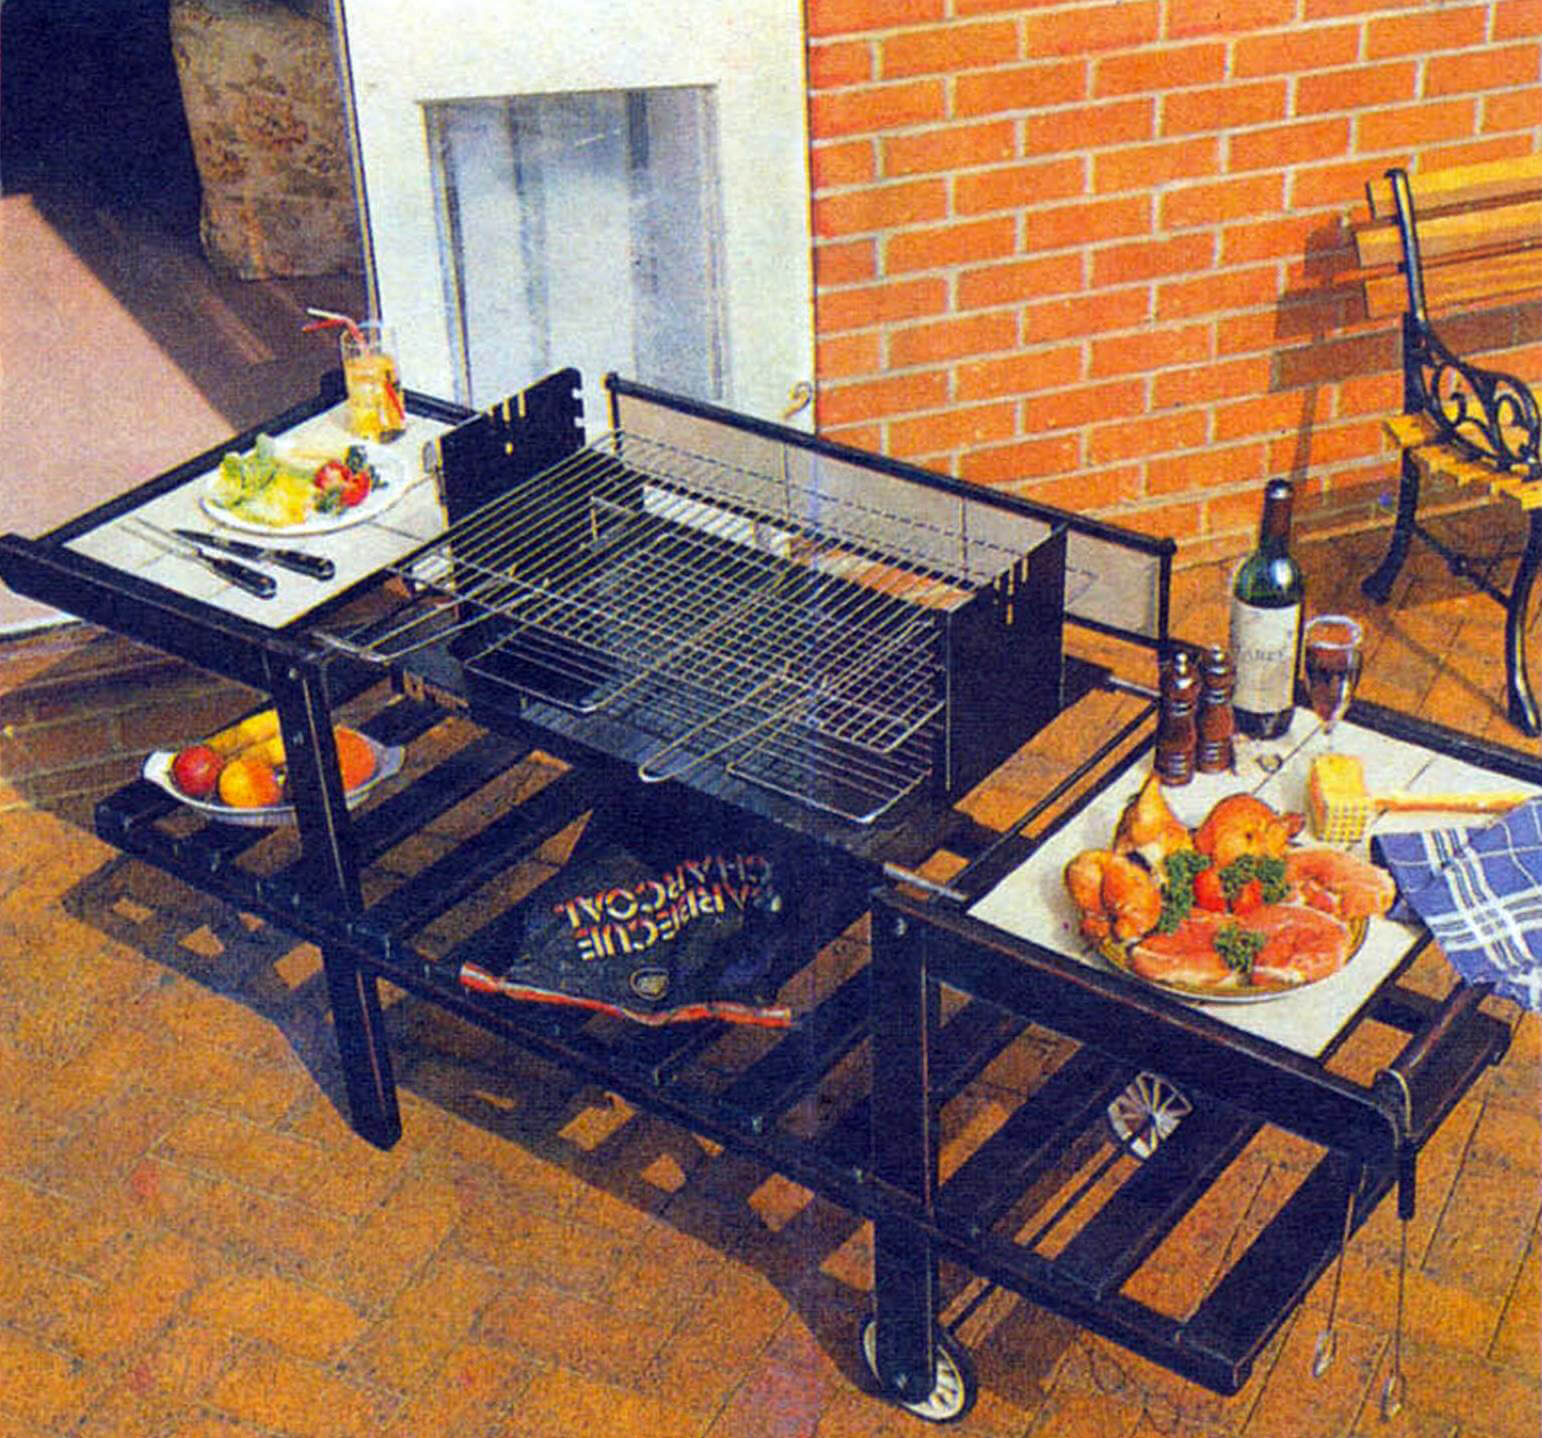
The GARDEN FURNITURE, which you will get acquainted with in today’s issue of KDM, successfully combines the qualities of a barbecue grill and an elegant garden table. Kebabs, chops, grilled chicken – all at once, in the heat of the day, and even in the open air – what could be more pleasant!
A convenient garden table on wheels with a brazier (barbecue) may appeal to garden owners. Making it for your own needs is quite simple.
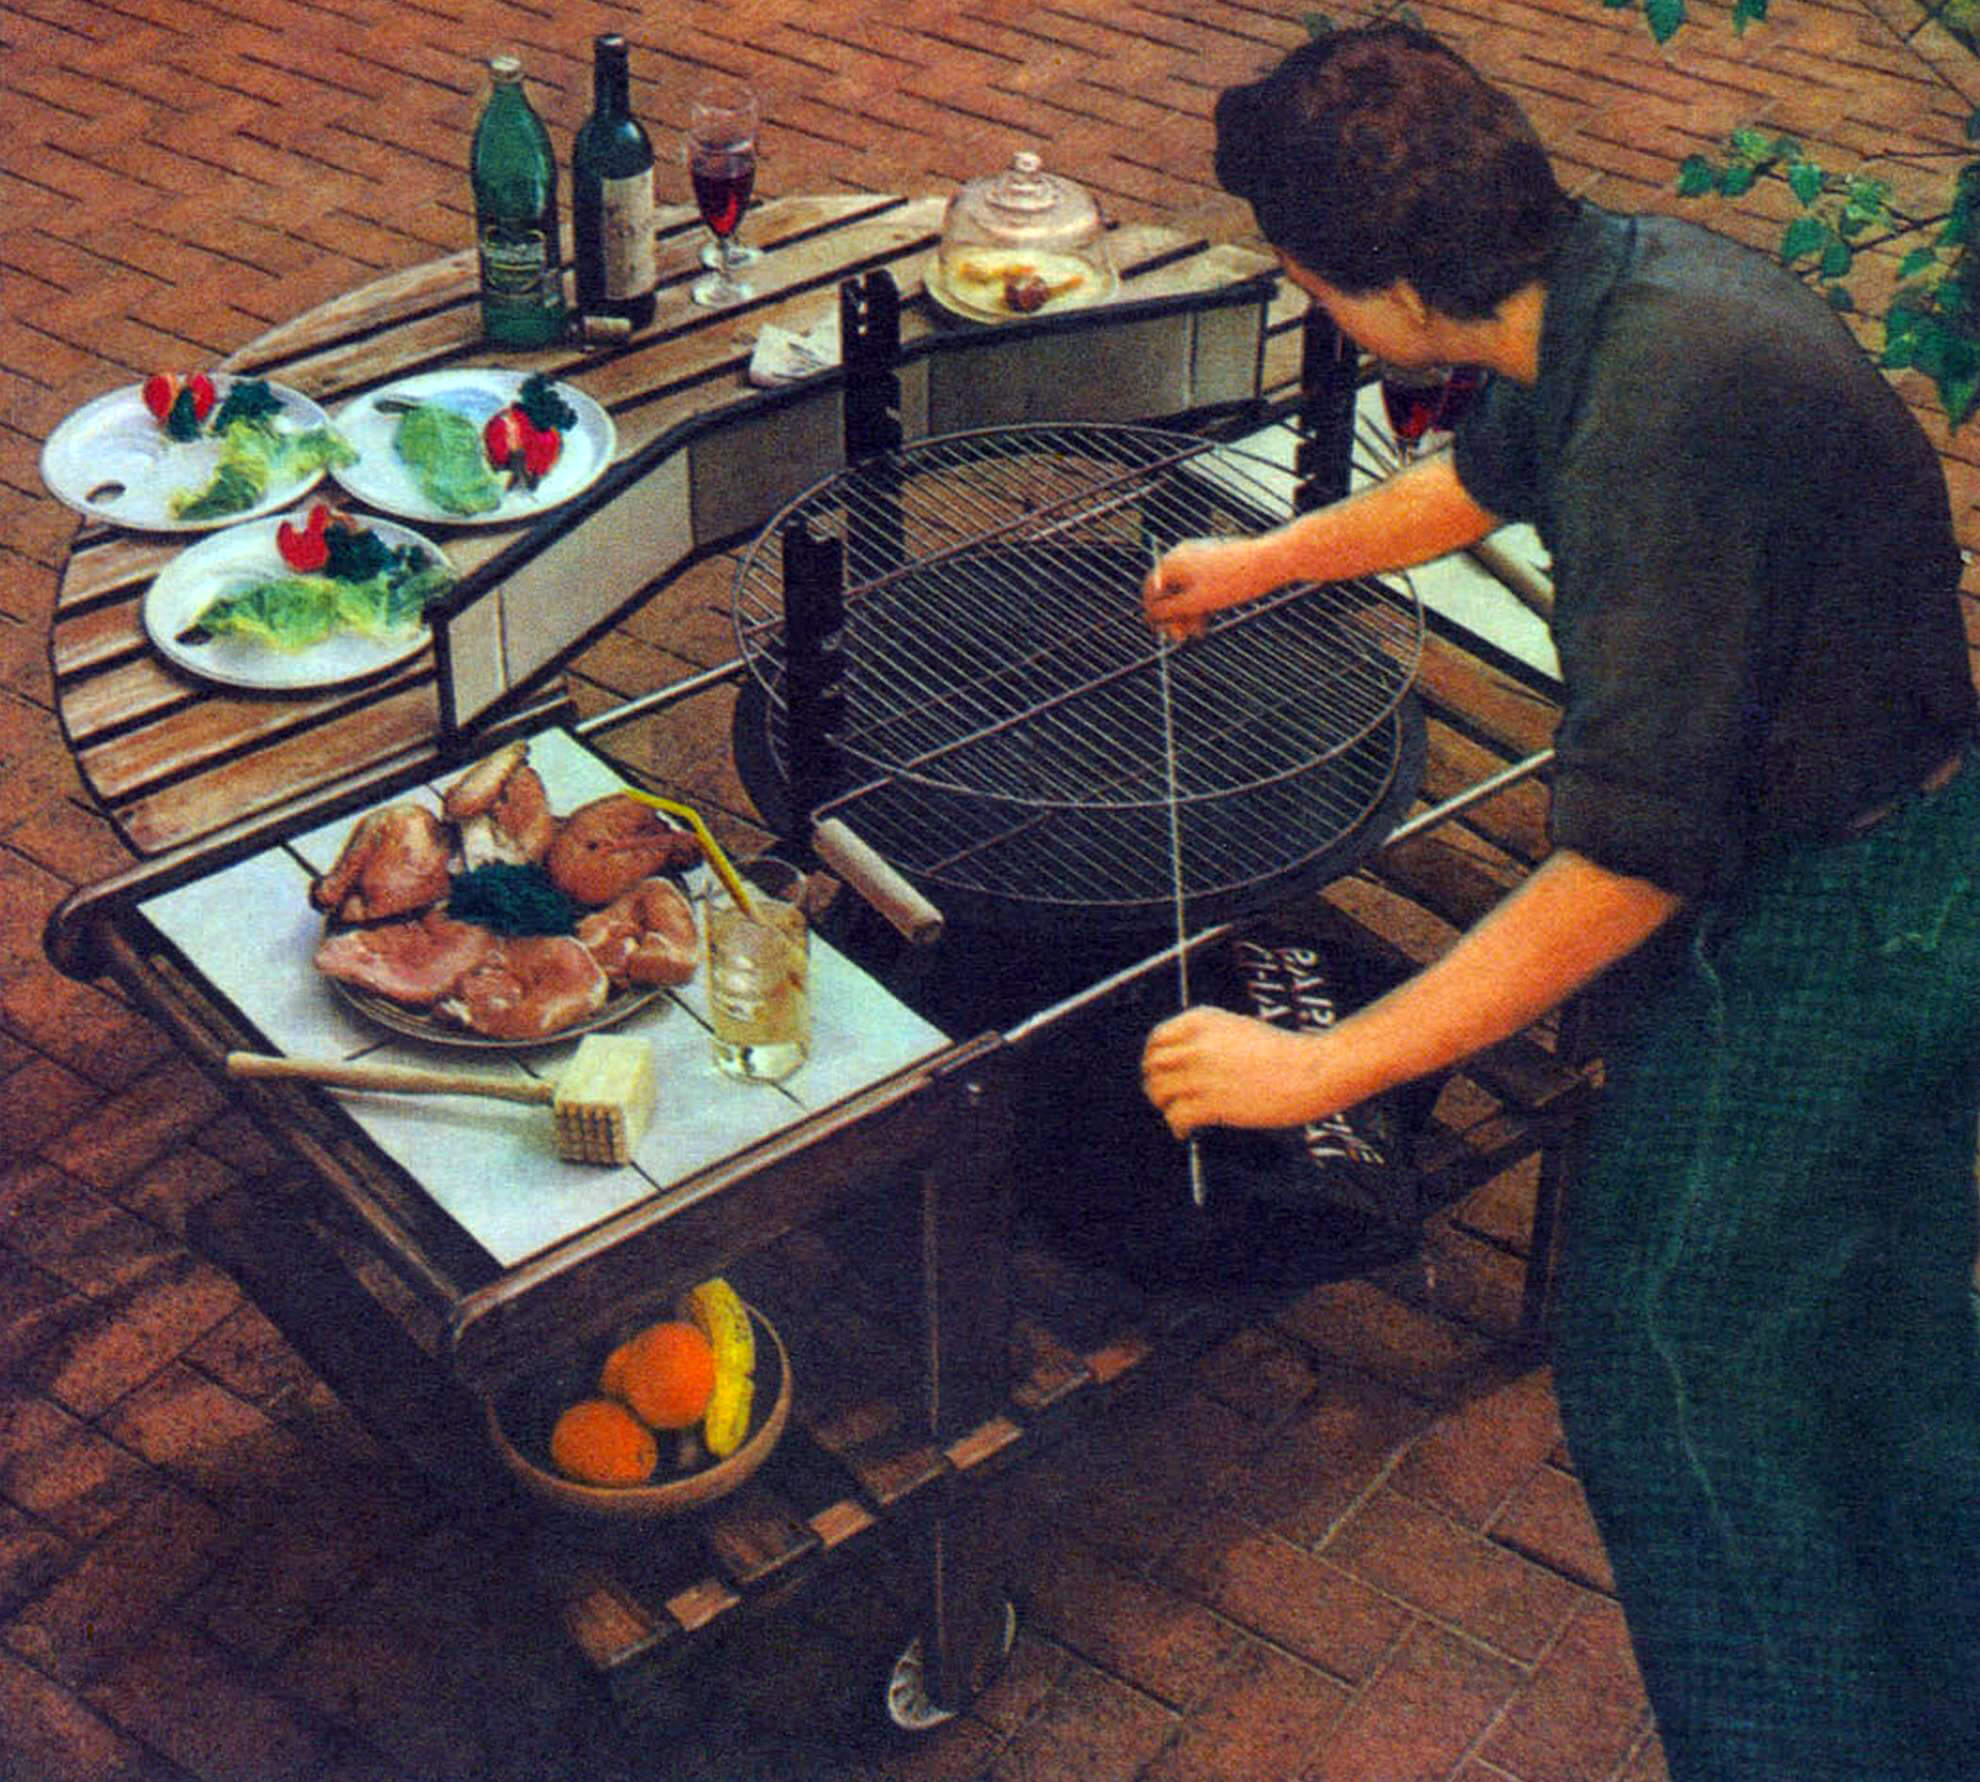
For the description, we have chosen two types of mobile barbecue tables, round and rectangular, both of large capacity and with the ability to adjust the height of the brazier grate. Mobile barbecues turn ordinary cooking into a kind of entertainment. They have a large work surface, lower shelves and rods on which you can hang kitchen utensils.
All wooden elements are planed, made of coniferous wood. The L-shaped elements of the trolley (4 pieces) are made of bars with a cross-section of 70X20 mm, connected into half a tree and glued with waterproof glue. Before you start gluing, you need to round off the free ends of the bars and drill holes in them to strengthen the rod with a diameter of 32 mm. When the glue has set, clean all surfaces with sandpaper and, to complete the finish, make a small chamfer along all edges of the wooden elements, including the rounded ends of the bars.
Cut the lower guides (2 pieces) from a block with a cross-section of 20X40 mm with grooves for connection with the L-shaped elements and slats of the lower shelf. Glue and screw the outer planks, cut from a block with a cross-section of 20X75 mm, to the longitudinal guides to form the frame of the lower shelf. Shelf strips (10 pieces) with a cross-section of 15X75 mm are cut to the appropriate length, glued and nailed to the longitudinal guides.
Before gluing and fastening the guides of the lower shelf to the L-shaped elements with screws, it is necessary to clean their surface with sandpaper. Glue and screw the rod into the sockets of the horizontal parts of the L-shaped elements.
The metal frame for the roasting pan is made of steel rods Ø10 mm with threaded ends, inserted into spacer tubes, and two longitudinal tubes Ø15 mm. Rods of appropriate length are secured between L-shaped wooden elements using a nut and washer. Cut the spacer tubes to the appropriate length and fit their ends to the cylindrical surfaces of the longitudinal pipes: after assembly, a support frame for the fryer is formed. Metal loops or clips must be provided in two places to secure the round tray to the support frame of the roaster.
To create a heat-resistant surface, tables on both sides of the roasting pan are laid out with tiles. For this purpose, it is best to use ceramic floor tiles, loosely laid on duralumin pallets, which are attached to the upper bars of the L-shaped elements. The trays are secured with round head screws to tubular clamps. Plastic wheels are secured with a locknut and washer on axles made of metal rods.
Additional folding planes of the table are constructed from wooden planks with a cross-section of 75X15 mm, connected by bars with a cross-section of 75X25 mm.
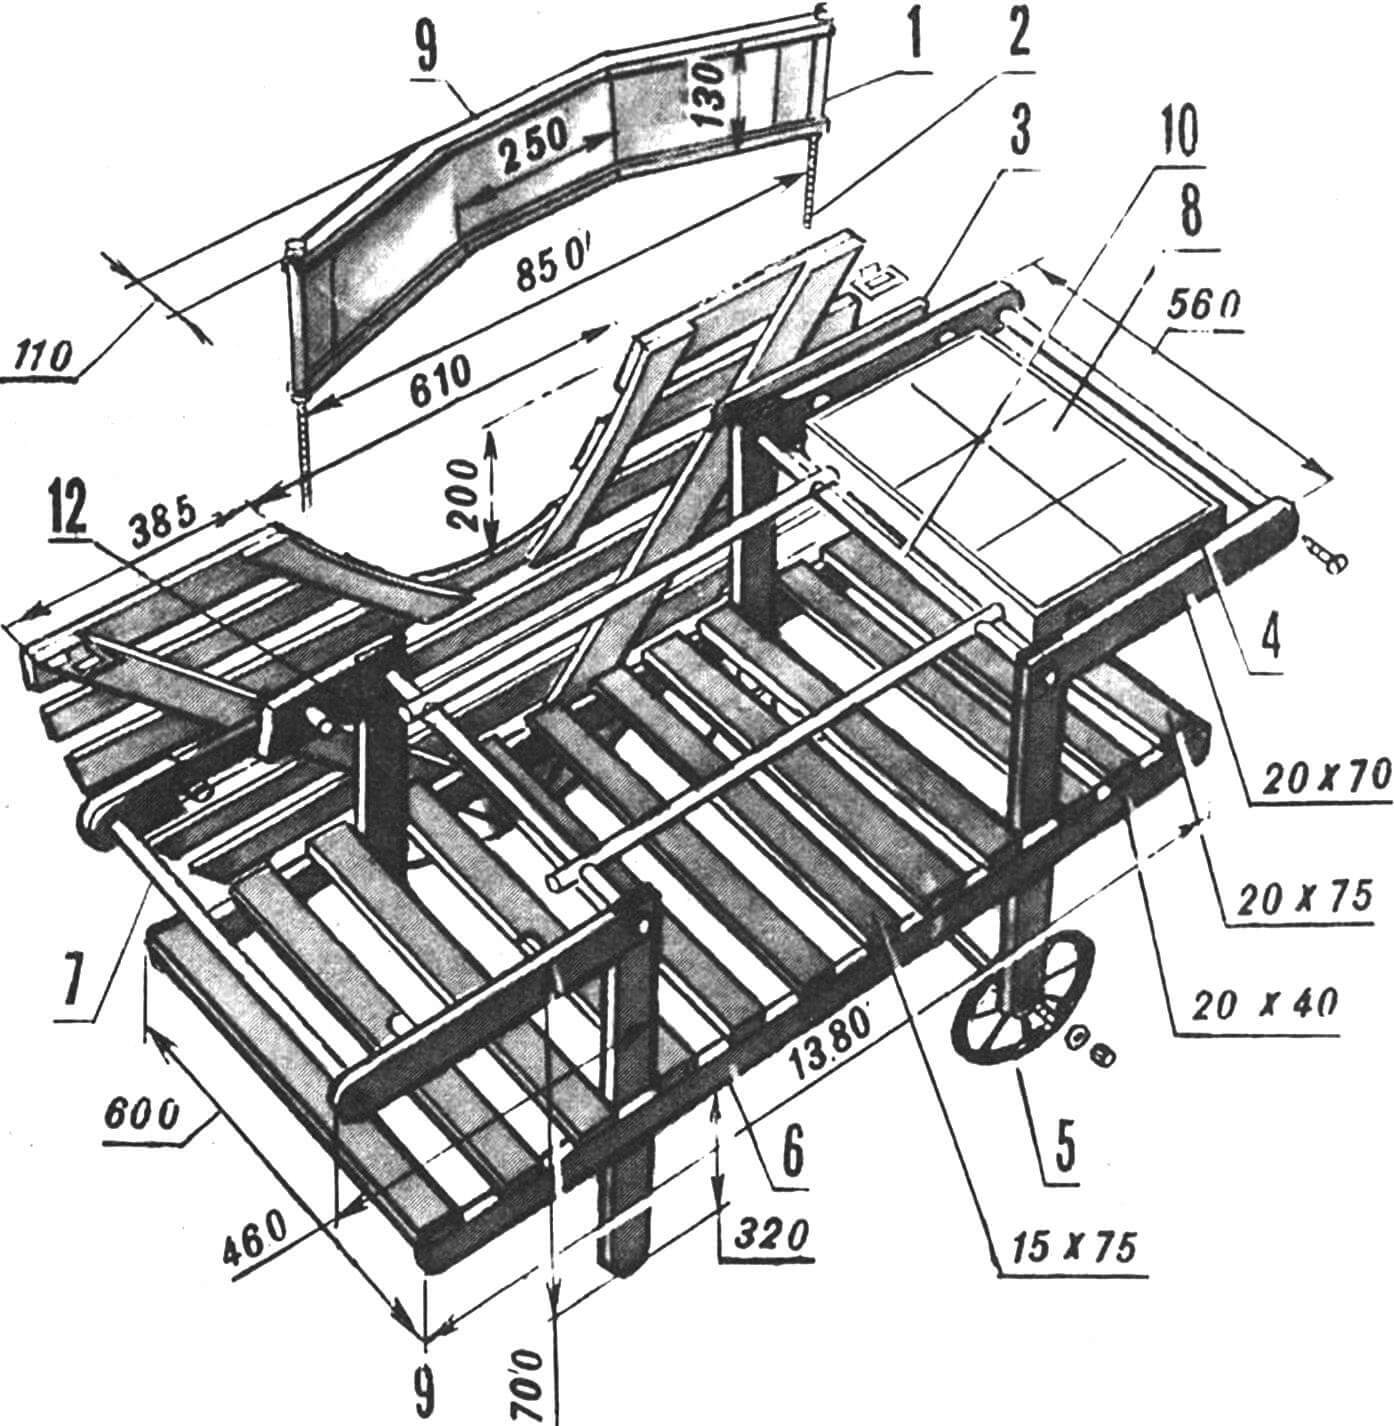
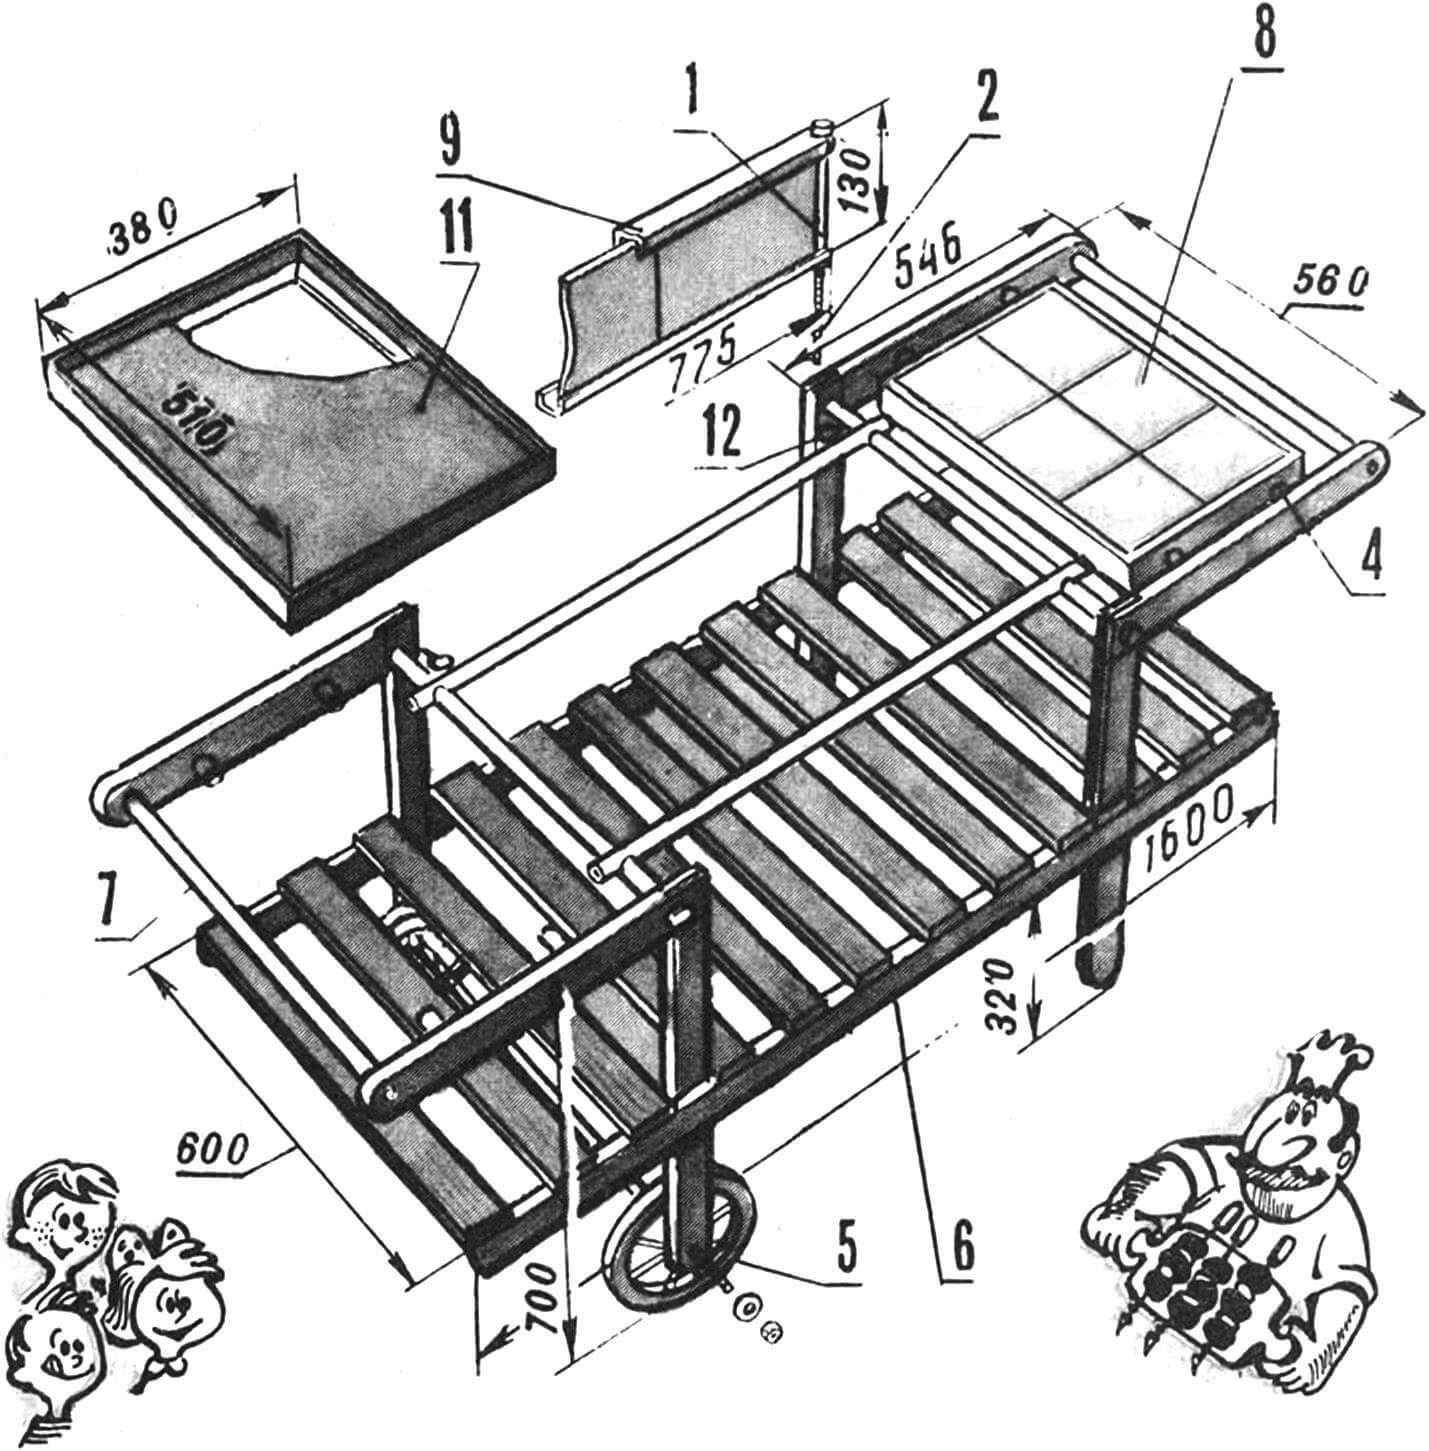
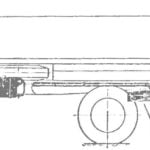
1 – support element (copper pipe Ø10 mm), 2 – stud with M8 thread, 3 – support bar (section 20X25 mm), 4 – spacer bushings (pieces of pipe Ø15 mm), 5 – wheel, 6 – lower guide (bar with cross-section 20X40 mm), 7 — handle, 8 — tiles, 9 — wind shield frame, 10 — fryer support frame, 11 — pallet, 12 — wind shield mounting eye.
Cut the bars with a section of 75X25 mm to the required length and arrange their ends for mortise connections. Place several 75X15mm planks across the bars and mark the approximate diameter of the table. Roughly cut a few planks and mark all the remaining planks. When everything is prepared, lay out the planks at equal intervals, glue and nail them to the bottom bars. Cut two short pieces of wood and use them to secure the planks together. Mark the diameter of the round table and cut each plank with a jigsaw. Mark an internal table opening (round or square) designed to protect the wooden parts from the hot pan of coals, and cut it according to the marking. Sand the cut ends and make a small chamfer on each edge. Hang the folding table on two furniture hinges measuring 50 mm on bars with a cross-section of 20X25 mm, glued and screwed to the L-shaped elements. The support triangle under the folding table is made of 75X25 mm coniferous wood blocks and is attached to a support post with a cross-section of 20X70 mm and a length of approximately 686 mm.
The frame of the windshield, into which the ceramic tiles are inserted, is made of duralumin channels. The channels are drilled at the corners in order to insert support posts 343 mm long made of steel rods with M8 threads. They are secured with nuts and washers in copper tubes Ø10 mm. The back wall of the windshield and all other metal parts except the longitudinal tubes and the fryer are spray painted matte black.
We do not dwell in detail on the design of the second barbecue table, since it is in many ways similar to what has already been described and differs only in a simpler windshield and the absence of a folding table. The technology for manufacturing parts and assembling them is the same.
Based on materials from Practice Householder magazine, England.
Recommend to read
 CAR-SAMAGRO
When the designers of trucks "taught" them of the body independently, without other auxiliary mechanisms, to pour onto the ground or into a special hopper delivered to the site loads,...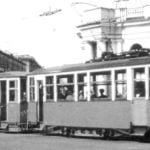 BLOCKADE TRAM
From the devastation of the civil war Petrograd began to rise by the middle of 1920-ies. Respectively, began to grow and the population of the city, considerably departing from 1918 to...
