Mankind has made and described a huge number of the most diverse garden benches. But two reasons did not allow us to take advantage of centuries of experience: the absence of special materials and the presence of suitable ones.
Almost always after the construction of a more or less significant building, scraps of pine timber and boards remain. This happened to me too. So I decided to build a garden bench from them, or rather — a small but comfortable sofa.
During sketch design, the idea of making a sofa in the style of the mid-twentieth century was considered — similar ones were installed in parks, squares, and even at train stations. On such a sofa (with smooth oval transitions in the profile between the seat and back), even a hard one, you could sit “without getting tired” for hours. Cast iron patterned side panels with legs provided them not only with beauty and strength, but also gave them a special monumentality. Unfortunately, I didn’t have exactly such side panels. Therefore, I had to redesign the structure and adapt it to the available materials.
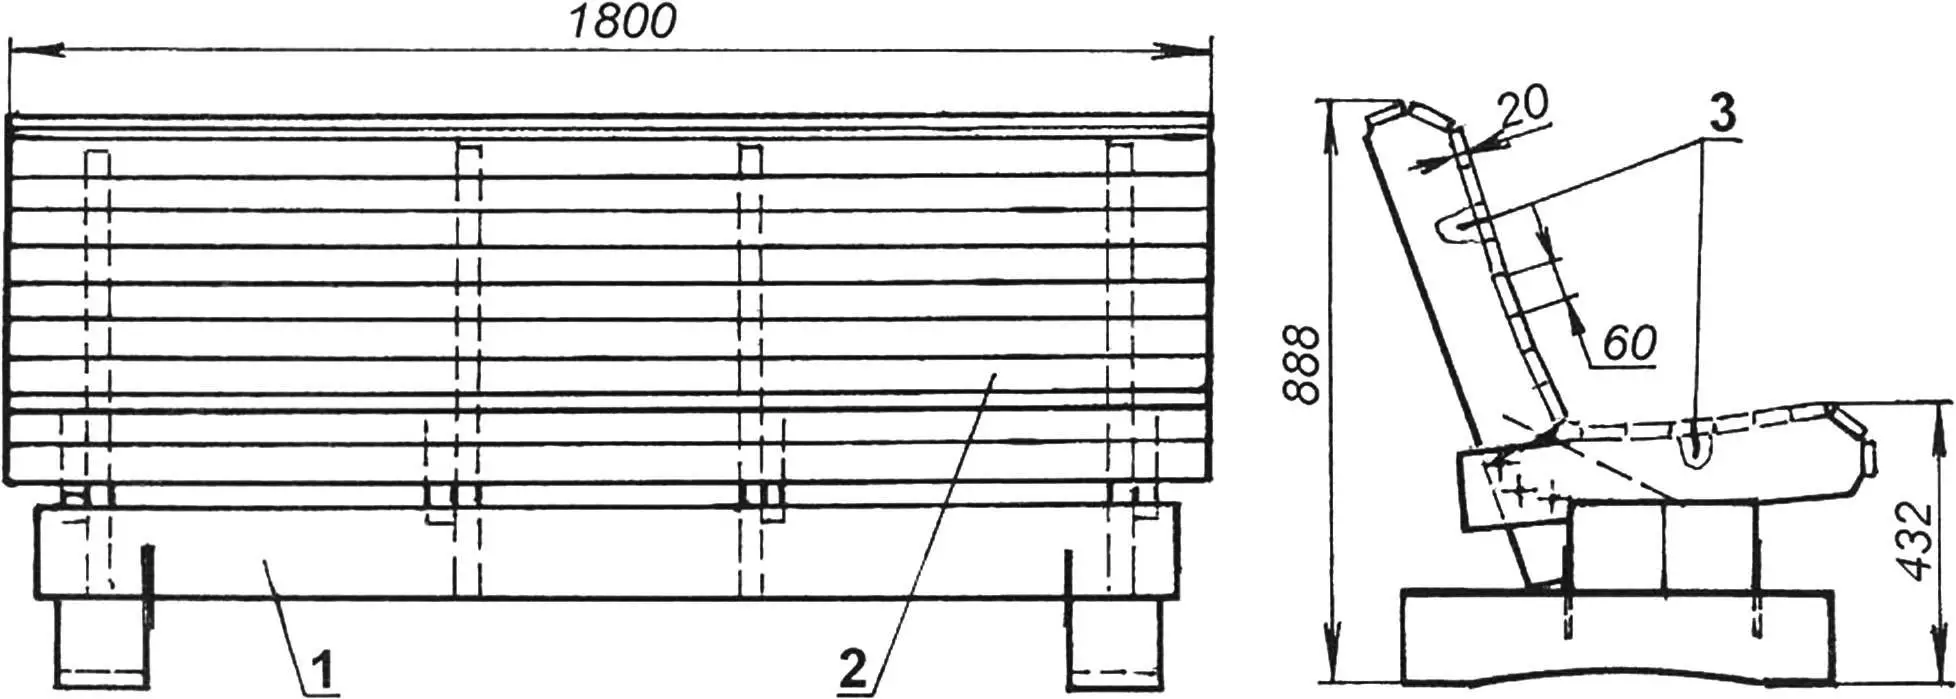
1 — frame; 2 — cladding (wooden slats 20×60, as needed); 3 — screws (as needed)
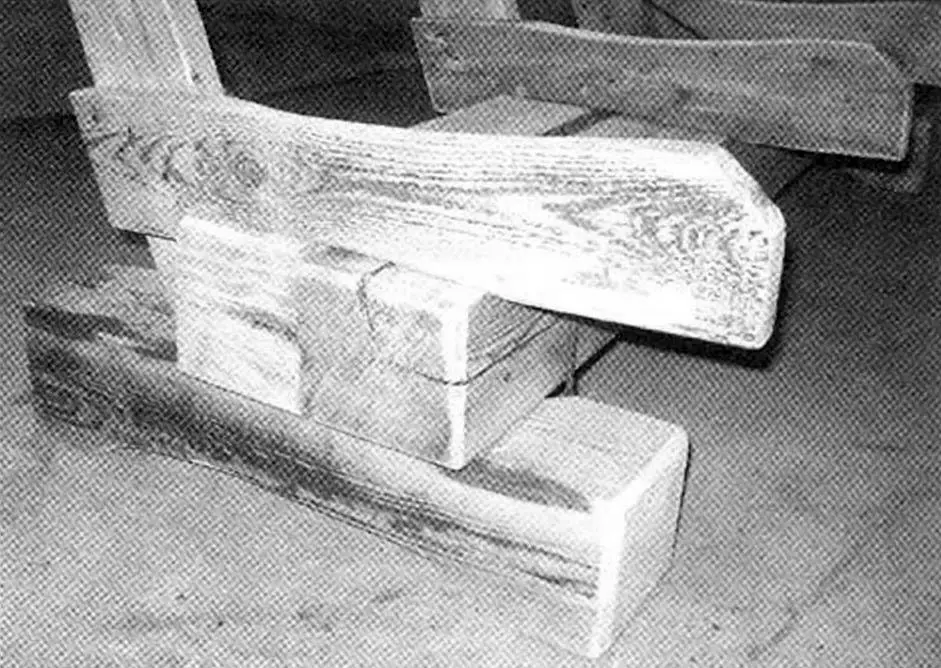
As a load-bearing beam, I used a pair of joined (butted lengthwise) pine beams with a cross-section of 140×140 mm, their ends rest on two legs made of the same, but single beam. In the soles of the legs, I cut out depressions with a radius of 850 mm with an axe, leaving rectangular heels at the ends — with such supports, the sofa will be stable even on a not very level area.
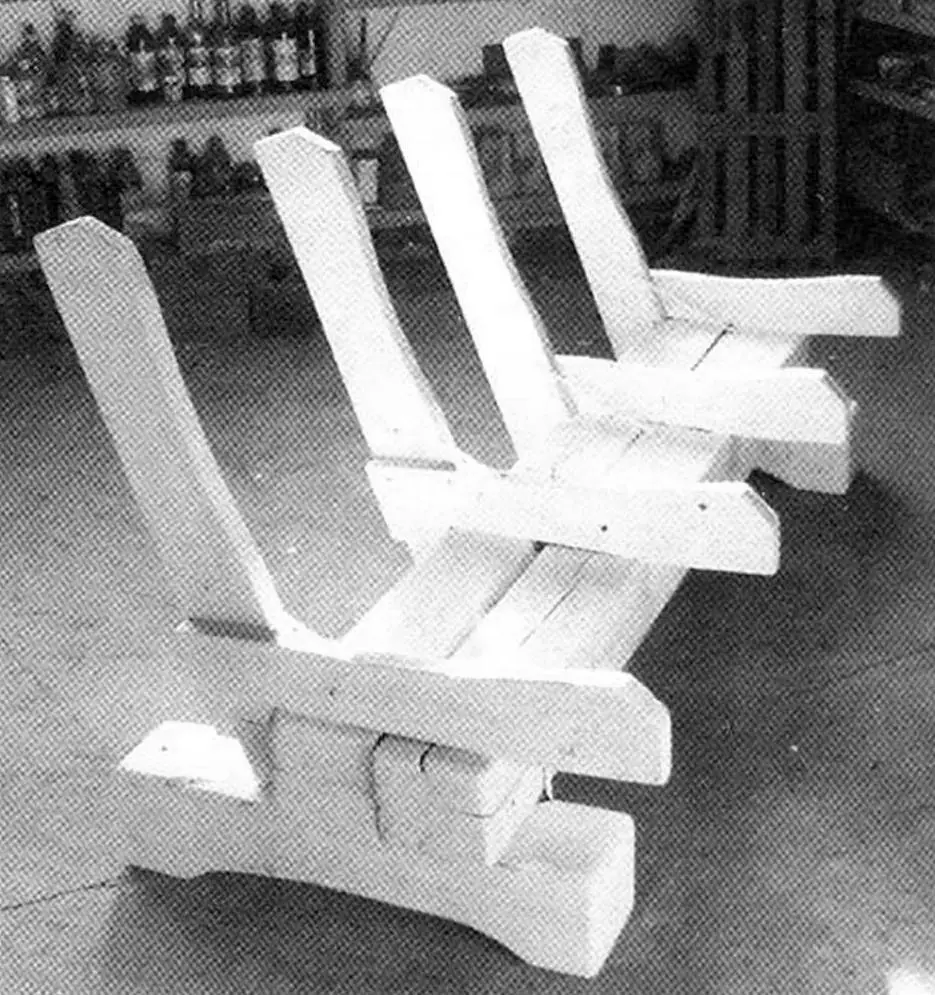
Instead of cast iron side panels, I made wooden composite elements (using forty-millimeter boards for them) and secured them with brackets on the beam not only on the sides, but also a couple — in the middle part. These elements (I’ll call them ribs) also served as form-forming elements for the seat and back of the sofa. For this, in their corresponding edges, I again carefully cut out smooth depressions along marked radii with an axe, and cut large chamfers at the corners.
I first primed the legs, beam, and ribs, and then painted them with white acrylic paint for exterior work (the color doesn’t matter, I just had leftovers available). I prepared the primer from the same paint, diluting it thinner with a solvent.
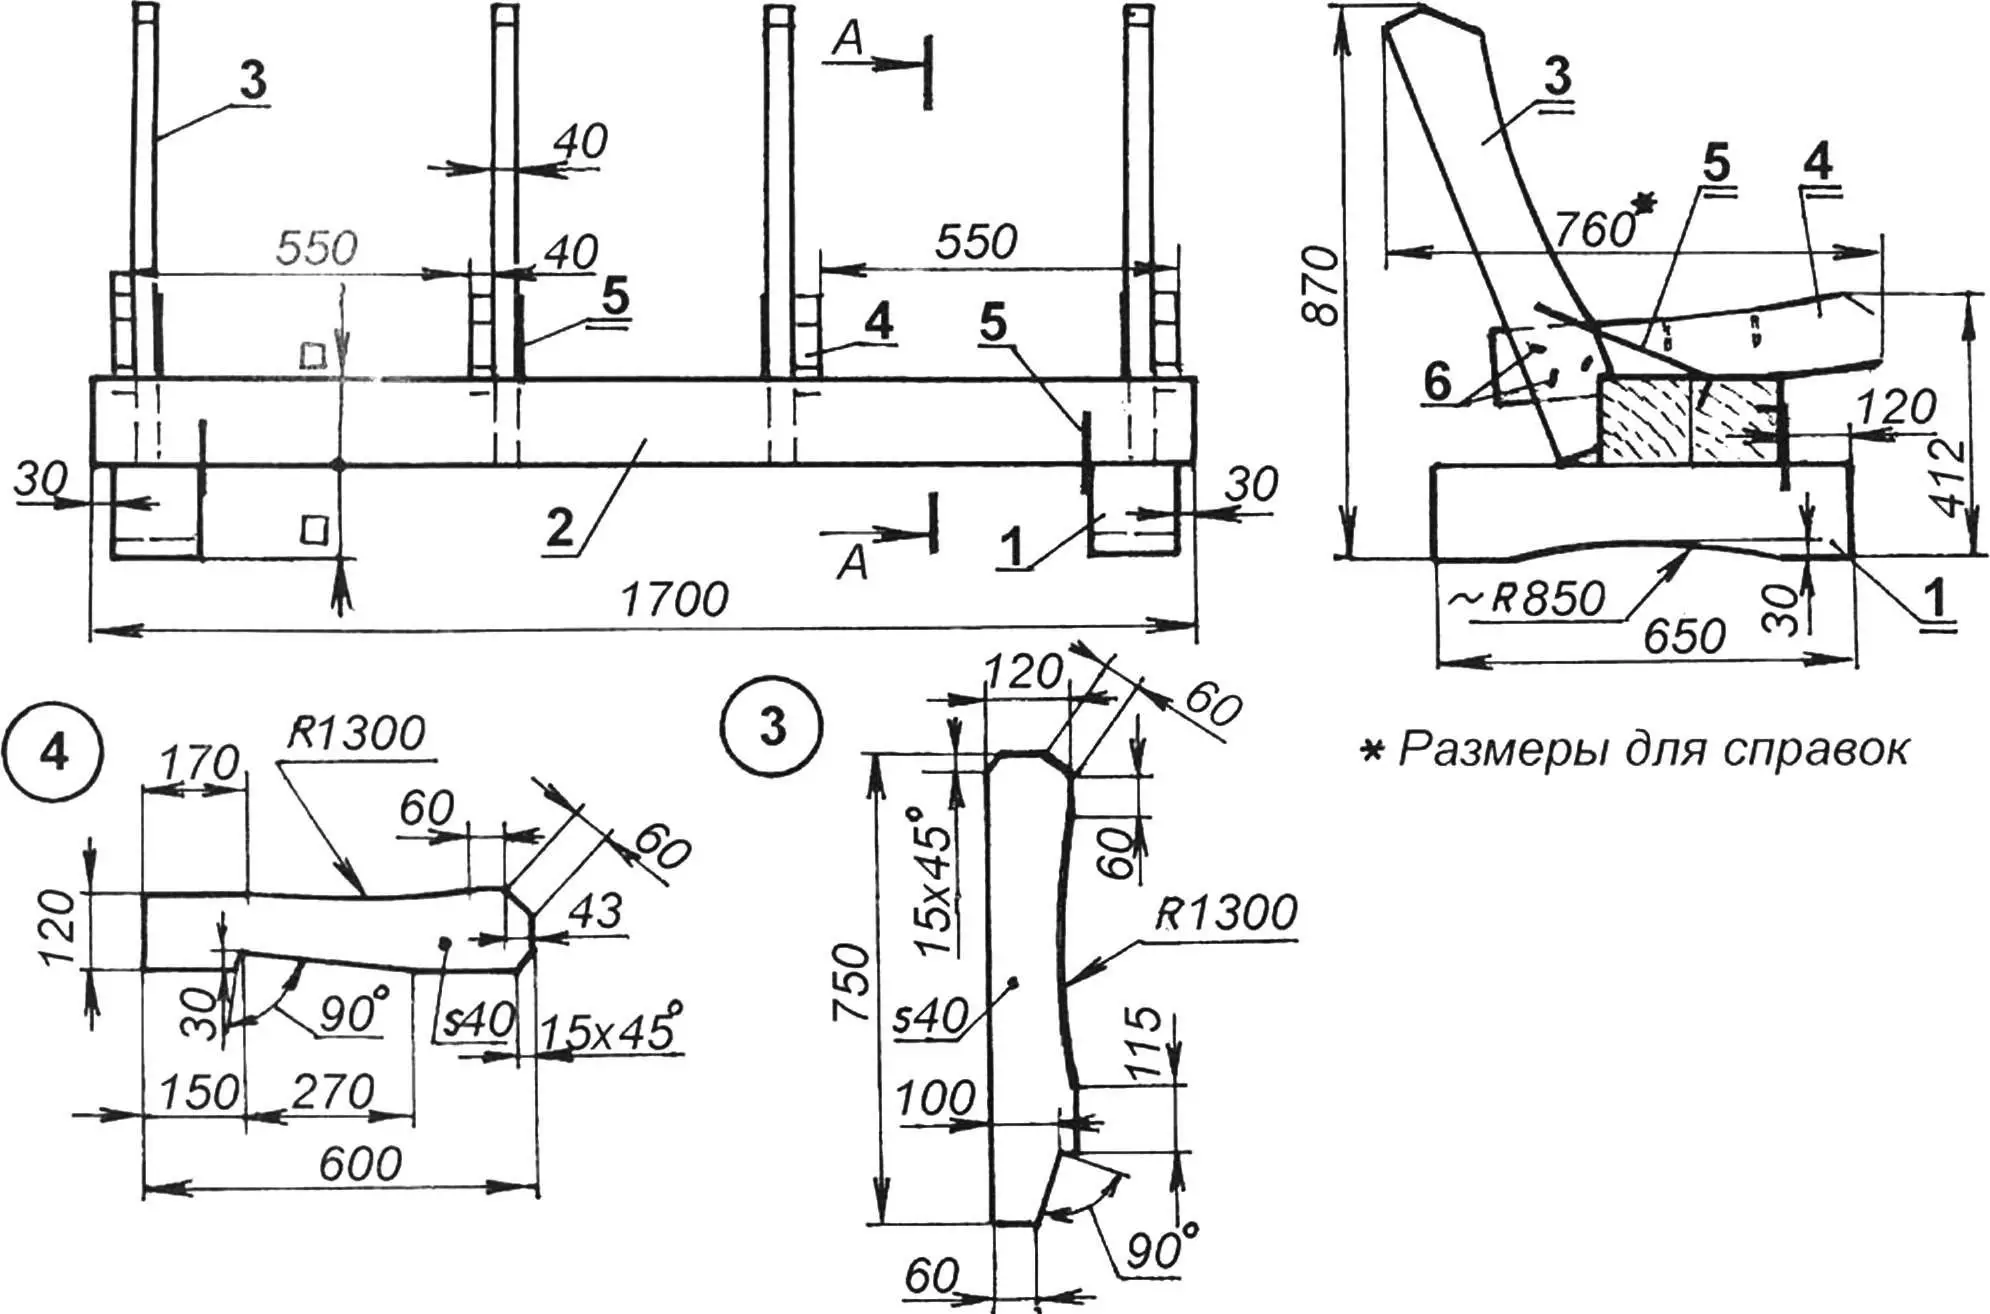
1 — leg (pine beam 140×140); 2 — longitudinal beam (pine beam 140×140, 2 pcs.); 3 — back rib (board s40, 4 pcs.); 4 — seat rib (board s40, 4 pcs.); 5 — bracket (wire 06, as needed); 6 — nails (L120, 150, as needed)
I made the seat and back of the sofa from slats with a cross-section of 20×60 mm. I made the slats themselves from twenty-millimeter boards, first carefully planing them on one side, and then sawing them lengthwise into several parts 60 mm wide (as many as would fit). I also planed the edges of the slats, and blunted the upper edges. I painted the bottom of the slats with the same white paint with preliminary priming, and the front surface and edges I first impregnated with hot yacht transparent varnish, and then (after drying) covered with another layer of varnish at “room” temperature. Final assembly is not only not difficult, but even a pleasant activity — after all, a new product is being born!
Assembly procedure
I laid the beam on the legs and fastened the parts with nails and brackets. I made the brackets from smooth reinforcing wire with a diameter of 6 mm with dimensions “on site”. I also determined the direction of the bracket whiskers “on site”: in this case, I turned them 90 degrees relative to each other.
I performed pairwise assembly of the seat and back ribs into a common part with L120 nails and secured them on the beam bars with L150 nails and brackets.
I attached the slats to the “orthopedic” edges of the ribs with hardened screws (self-tapping screws).
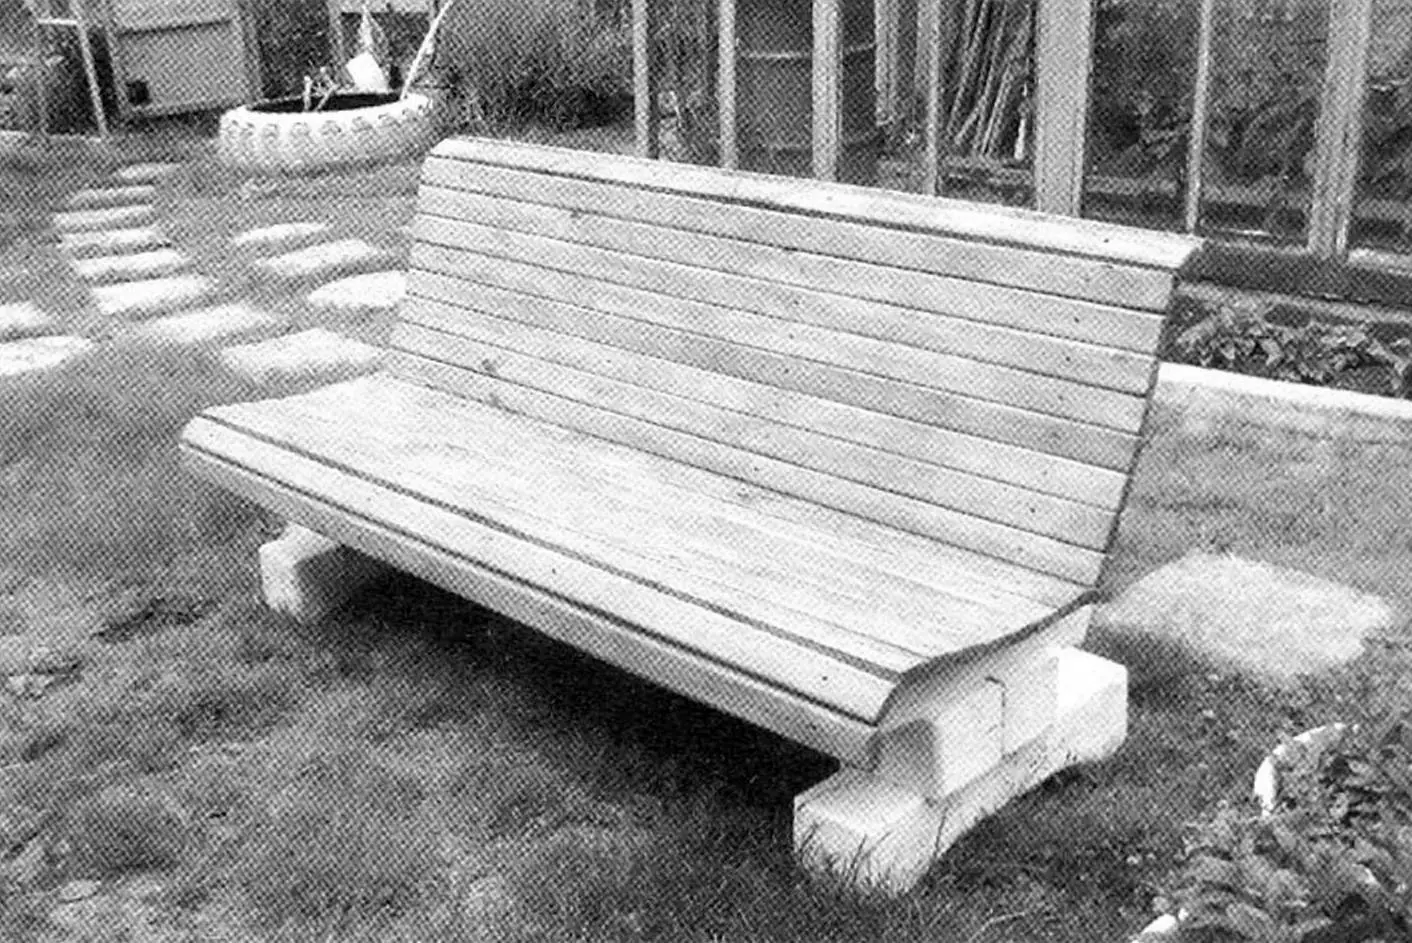
The finished sofa is installed in a beautiful and cozy corner of the garden or in a gazebo.
There are no special requirements for the quality of the source materials: sufficient length would be enough (by the way, one of the beam bars is composite, and the other is glued along a longitudinal crack), and it would be good to have fewer resinous knots on the front surfaces of the cladding slats of the seat and back. By the way, it would be nice to make the slats from hardwood.
The first tests — resting on the sofa — confirmed the ergonomics and convenience of the design. Even some massiveness is beneficial — the sofa doesn’t move from an accidental push and doesn’t break under a heavy sitter.
By laying a rug (and in cool weather — covering yourself with a blanket), it’s useful and pleasant to spend a quiet hour in the shade of the garden.
«Modelist-Konstruktor» No. 2’2010, A. MATVEYCHUK
Recommend to read
 THE LOG SPLITTER OF MY DREAMS
In the well-known encyclopedia even the last century "Industry and technology" in volume on "the treatment of fibrous substances", which is a tree, it is said that "in the works for the... NOV OLD RELAY
Of course, thyristor power switches in household appliances is very compact and convenient, but... КУ201, КУ202 and familiar to all cheap copies, unfortunately, tend unjustly to fail....
