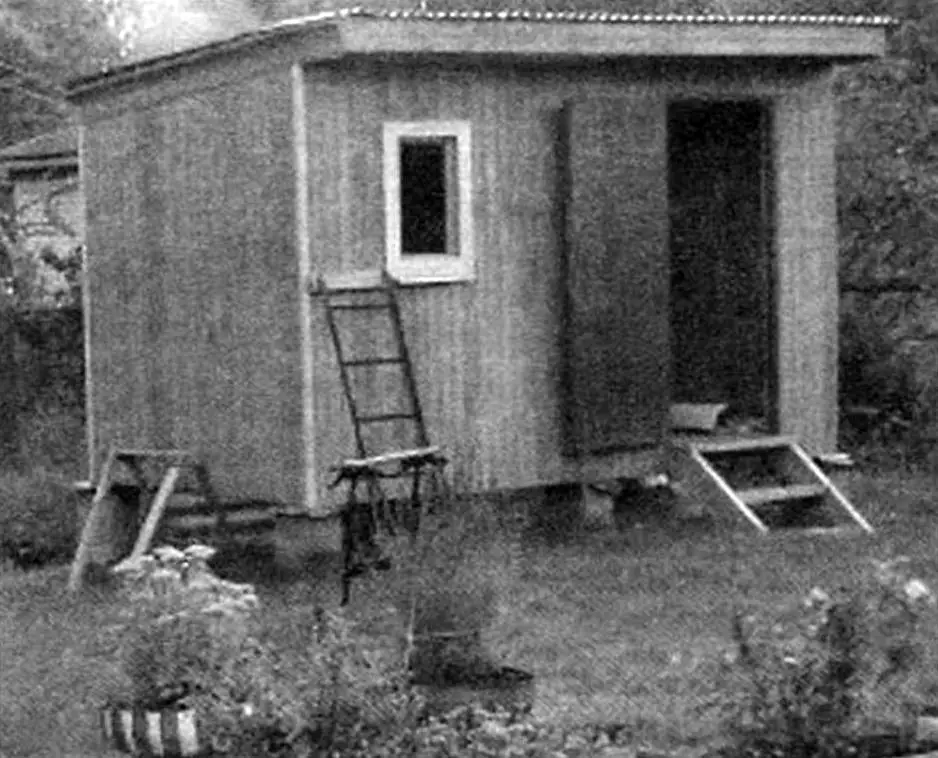
In a small utility block on my garden plot, I had a storage room measuring only 2.2×2.7 m. One hot day, the idea came to convert it into a mini sauna and also add a shower section. I installed a 100 mm thick partition wall in the center of the storage space along its entire length — and ended up with two rooms, each measuring 2.2×1.3 m. I installed a linden wood door and began constructing the sauna.
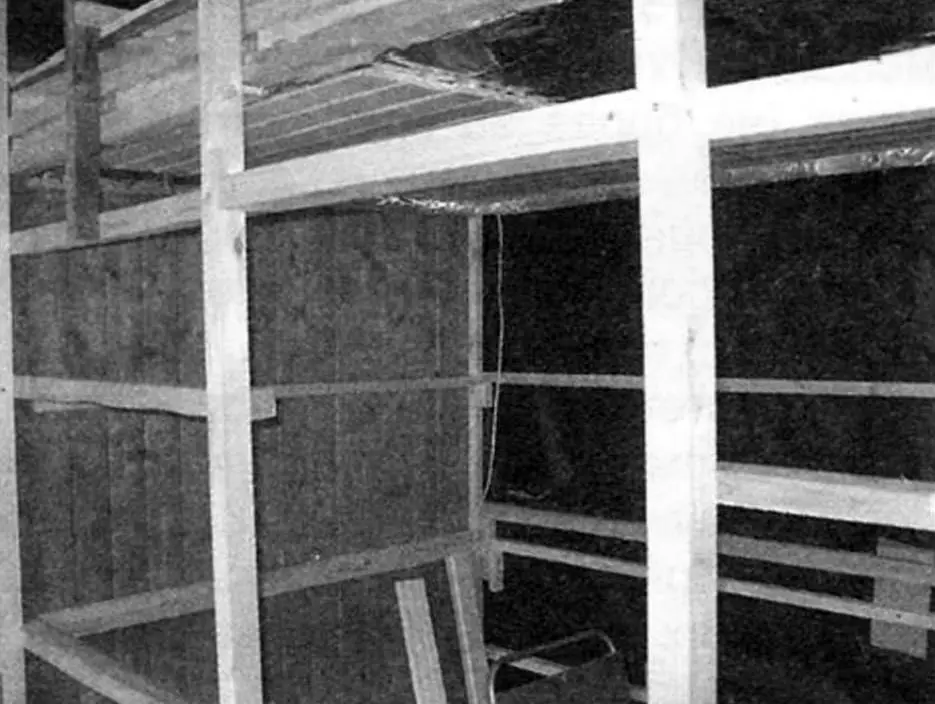
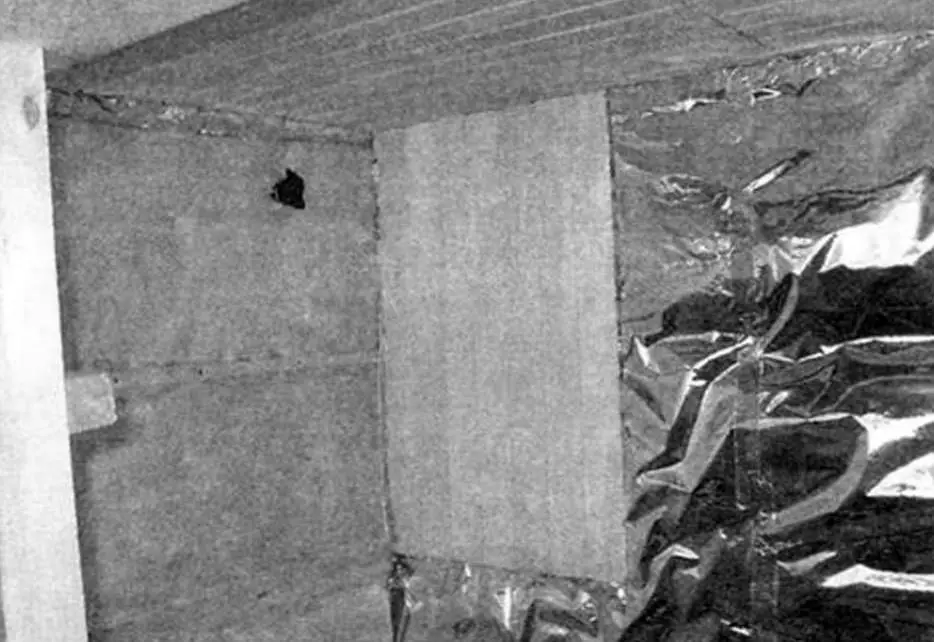
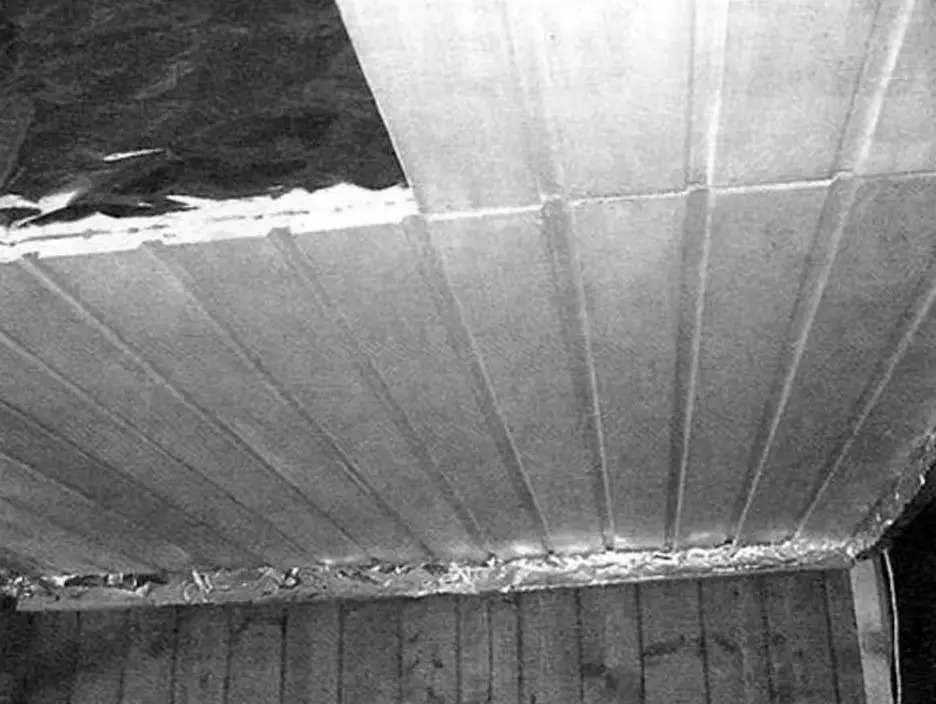
First, I removed the old wall paneling (“vagonka”) and then attached horizontal 30×30 mm timber battens to the walls with a spacing of 50 cm. Between them, I placed 5 cm thick ISOVER KT 40 insulation, and on top of the battens — secured a special foil (called “thermal-protection foil”). I sealed the joints with foil tape. Then, I covered the walls with linden paneling and closed the seams with trim made from the same wood.
The room height of 2.5 m seemed excessive. So, I decided to lower the ceiling to 2 m. I did this using 40×40 mm timber battens: nailed them along the perimeter with 40 mm spacing, and stretched thin wire across with 15 mm spacing to support the insulation — same as on the walls — which I laid in two layers. Then I covered the insulation with foil and paneled the ceiling.
The original floor was wooden, but I decided to cover it with ceramic granite tiles — a reliable, waterproof, frost-resistant, and durable material.
But first, I laid a 10 mm thick cement-particle board (CPB), cut to size and screwed to the floor; in the joints, I placed strips of metal sheeting underneath. Then — tile installation using adhesive.
Thus, the entire room was finished in wood, with only the bottom part tiled. I installed baseboards along the floor perimeter and a cornice under the ceiling.
The paneling was coated with a special compound — Tikkurila Supi Sauna.
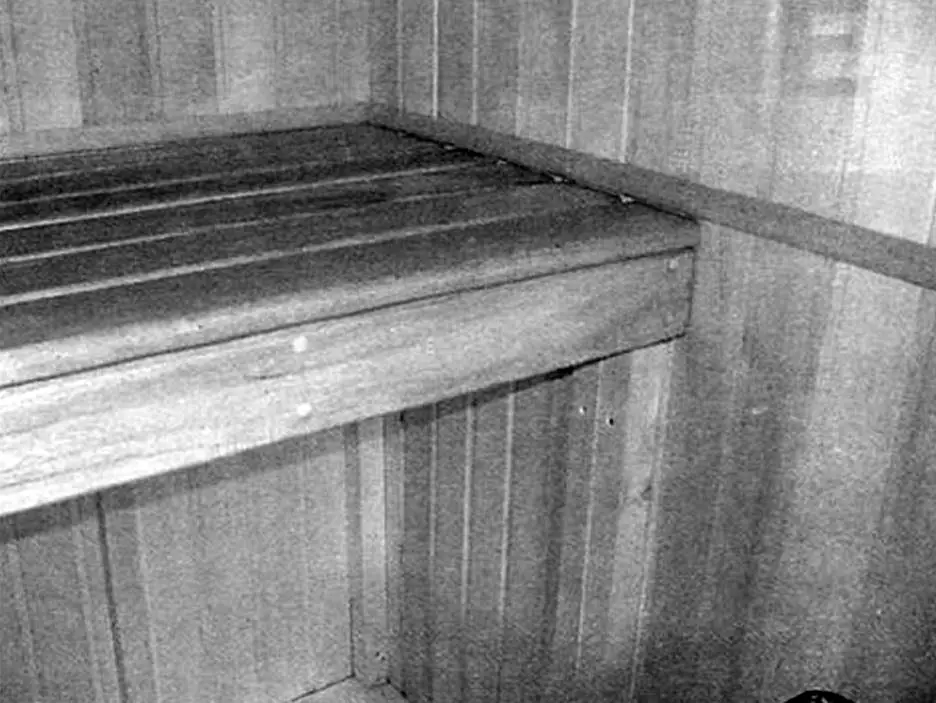
The bench was made from abachi wood planks. Abachi is commonly used in saunas for benches, steps, backs, etc. It’s valued because, unlike common local woods like aspen or linden, it does not heat up even at high temperatures. That’s why it’s so popular among sauna lovers. It’s also lighter than aspen or linden.
The bench was mounted on one side to a 50×50 mm timber and supported on the other side by additional vertical posts. Along the front of the bench, I installed a 50×80 mm timber and covered it with another abachi plank. All the wood was coated with Supi Laudesuoja antiseptic lacquer — a protective treatment specifically for sauna bench surfaces. I also used it on the floor tiles.
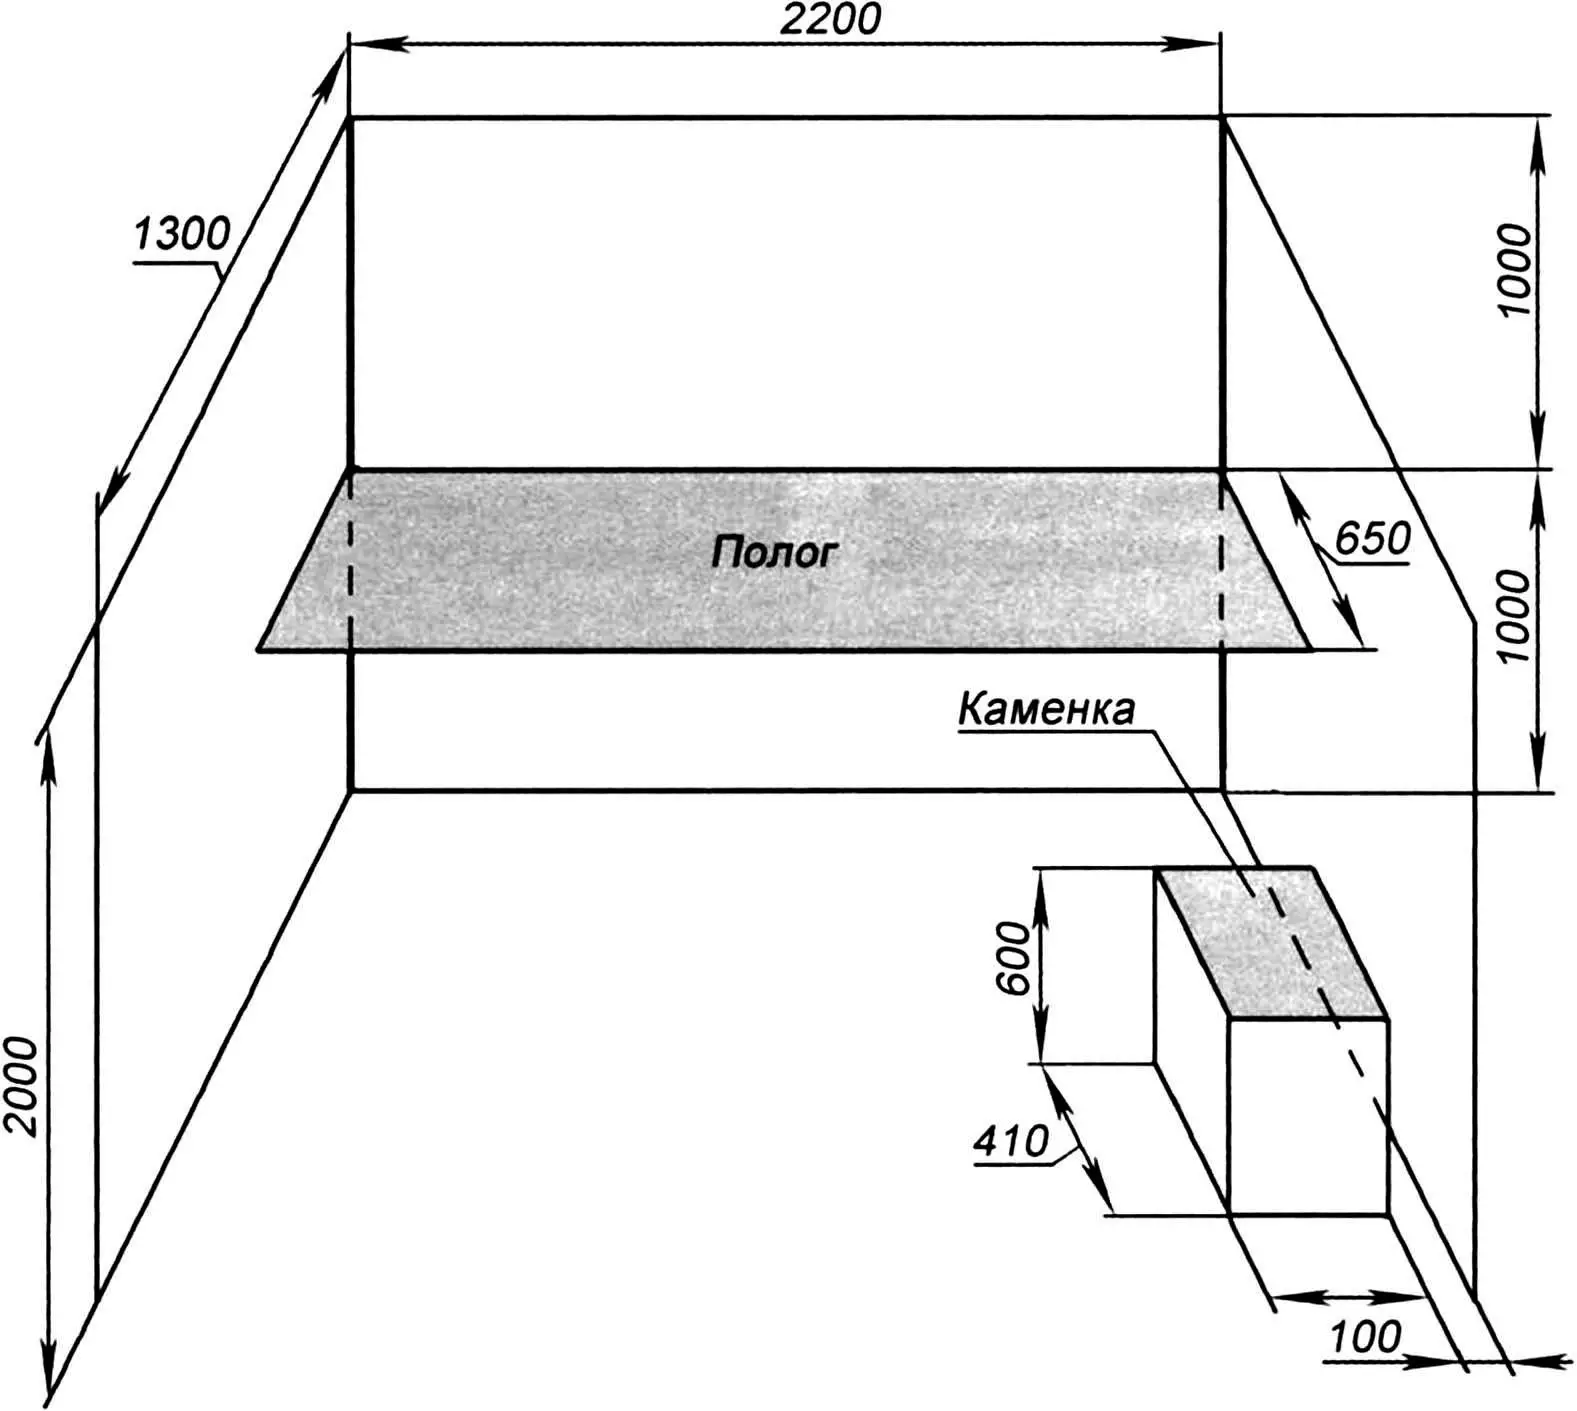
From experience, the bench width should allow for comfortable sitting or lying — typically 0.5 to 0.7 m (mine is 0.65 m, based on plank width). The recommended height is at least 1.0 m, which is what I used. The gap between the planks is 5 mm.
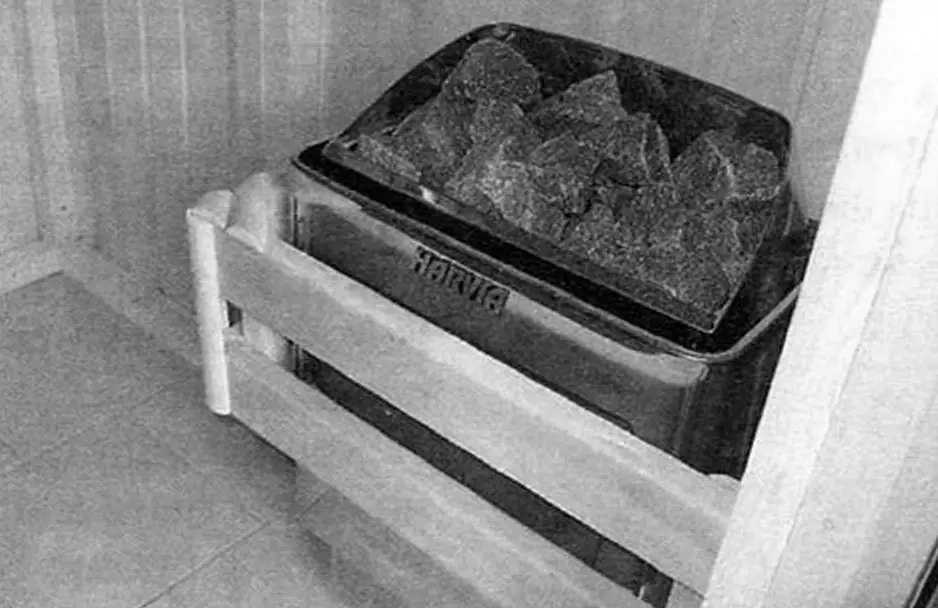
I didn’t build the stove myself — I bought a Finnish electric heater sized 410x280x600 mm. Its 4.5 kW power is enough to heat a 3–6 m³ room to over 80 °C. I connected it via a circuit breaker using a 4 mm² cable laid in advance and hidden under the insulation. The sauna easily reaches above 80 °C.
As required, I placed 20 kg of sauna stones on top of the heater. When choosing stones, the main focus should be the rock type, then the size, and only then the shape. The best stones for saunas are quarried basic igneous rocks. Crushed stones sized 40×80 mm are considered ideal for electric heaters. Naturally rounded stones (pebbles) are inferior in thermal capacity and resistance to thermal loads compared to crushed ones.
The heater was enclosed with a “vagonka” wooden grill, set only 10 cm from the wall. Usually, no special thermal insulation is needed between a sauna wall and an electric heater. Manufacturer guidelines often state: “Top global electric sauna heaters require only minimal safe distances to wooden elements, just a few centimeters.” That’s why they are space-efficient.
Ventilation is crucial. Finnish sauna experts say the best sauna experience is achieved with six air exchanges per hour. If the sauna is in a well-ventilated room, this can be achieved with proper placement of air intake and exhaust vents. I made a small intake opening near the heater from an adjacent room, and two exhaust vents above the bench — covered with a grille. From the outside, I connected them with a duct and a damper.
The result is a cozy and functional sauna where three people can sit comfortably, or two can enjoy a proper steam session with a birch whisk. No need for firewood. The temperature is adjustable, and there’s no need to monitor it. The aroma is amazing — I hung sachets with herbs on the walls.
Now a bit about the second room — the so-called shower section. Despite its modest size — 2.2×1.3 m — it fits everything you need for a proper shower without feeling cramped. It includes a 0.9×0.9 m shower cabin. A horizontal THERMEX 80 L water heater was installed under the ceiling, saving floor space. In the attic, I placed a pumping station with a surface pump and a hydroaccumulator — placed on a 10 mm rubber sheet to reduce noise and vibration. Outside — two connected 220 L barrels with a float valve and ball tap to prevent overflow. The plumbing uses 1/2” multilayer pipes.
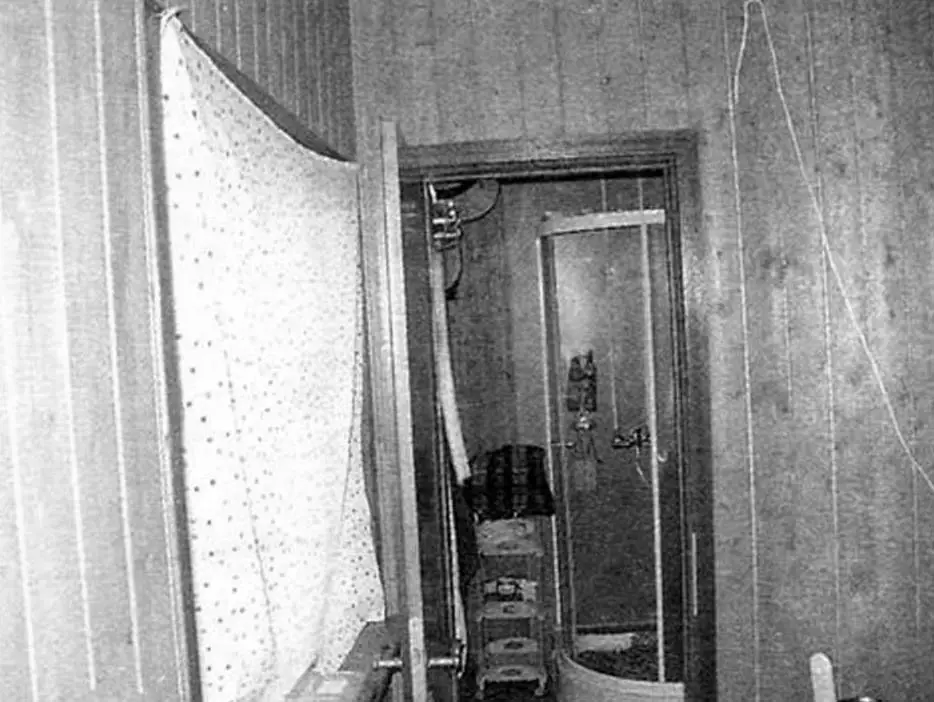
The floor in the shower section is covered with linoleum, and where the shower meets the walls, I used PVC panels. However, that proved insufficient against splashes, so I screwed linoleum strips along the entire perimeter.
The sauna has been running for four years — with zero maintenance issues. It’s a pure pleasure!
V. YANKELEVSKY
Recommend to read
 MINI CHOPPER
Handy little pollinic it is easy to make your own. You will need to segment blade bars of an agricultural mower. If you add the steel plate 2 mm thick — get a bilateral instrument,... VALVE FROM THE SMELL
Unfortunately, ventilation in our homes sometimes works so that it is easy to guess what is cooked for dinner at the neighbors. This means that in your apartment from the ventilation...
