For most days of the summer vacation, people enjoy carefree family rest, often spent at a country house, on a homestead plot, or in a garden. It is during this time that everyone tries to make up for the fresh air and sunshine they did not get enough of during the year, enjoying them to the full. And not only in the chores of garden beds or plantings.
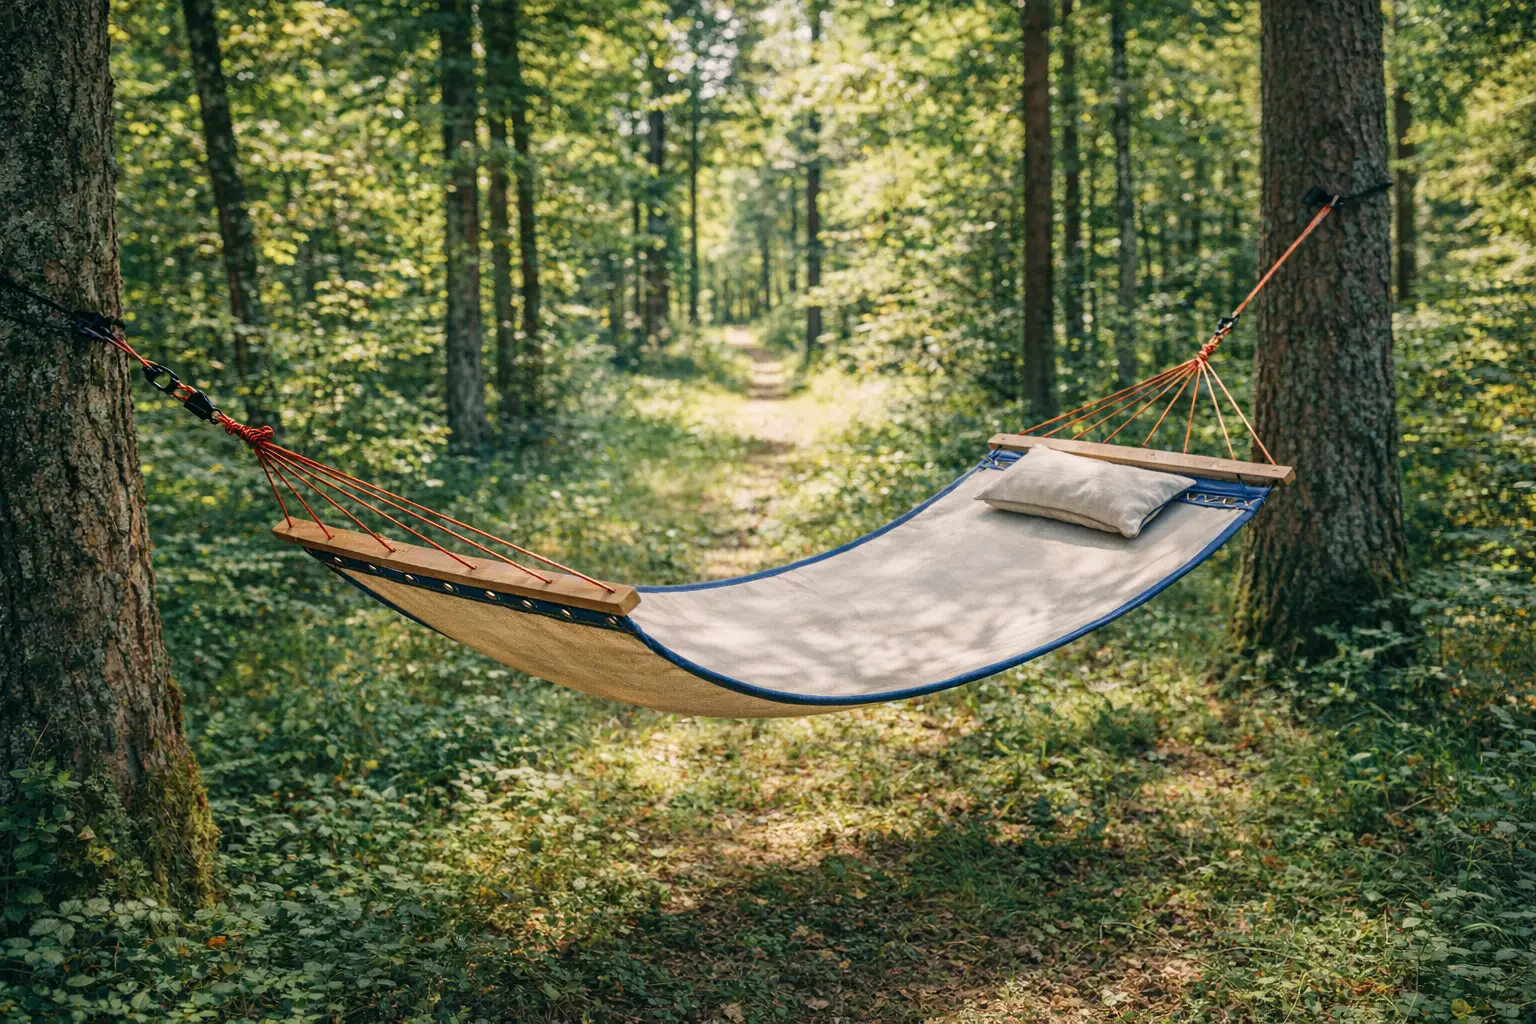
For convenient outdoor rest, it is a good idea to hang a hammock — between two garden trees, posts, or the supports of a children’s swing set. After all, it is “multipurpose”: suitable for simple relaxation, reading, and even sleeping. And most importantly, it is not difficult to make yourself, as the Hungarian magazine “Ezermester” reports.
The starting point in this work can be the average weight of a person. Since people of advanced age, not only young families with children, also rest at the country house, this value will be fairly large, so it is important to ensure the necessary reliability of the structure.
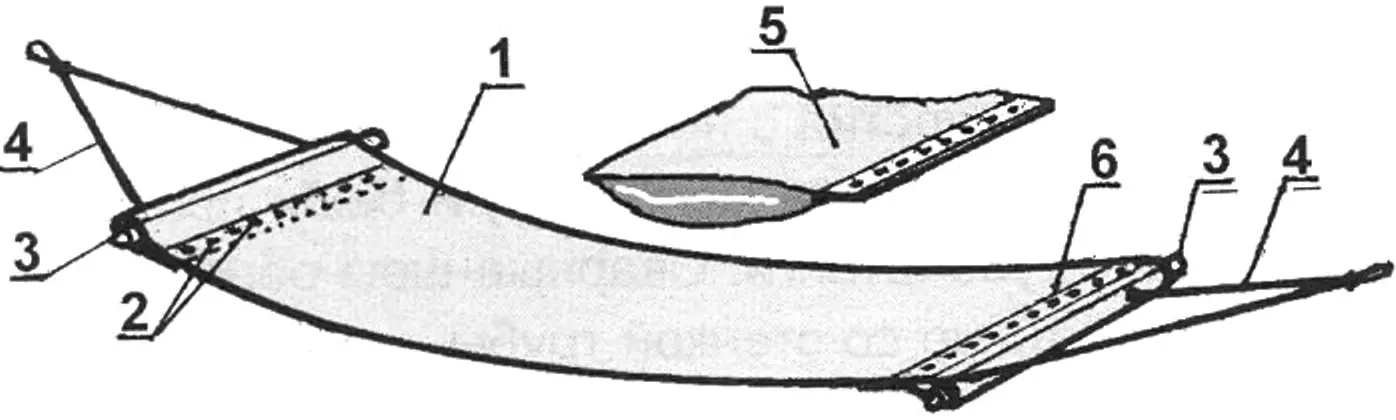
1 — bed (canvas); 2 — grommets; 3 — spreaders (wooden rod); 4 — tie ropes (rope, belts); 5 — pillow; 6 — stitching
To make the hammock, you will need a piece of strong canvas 900 mm wide (so-called mattress canvas). A narrower fabric is not recommended, because in that case the person resting may roll out of the hammock in the middle of a sweet sleep in the fresh air. So that both children and adults can use the hammock, the length of the fabric for the bed should be at least 2600 mm.
For rigidity, the ends of the hammock are reinforced with two spreaders — wooden rods 930 mm long and 30—40 mm in diameter. The fabric must be attached to them securely. For this purpose, the ends of the fabric are folded over and sewn, and the resulting transverse “sleeves” receive the rods. Tie ropes are attached to them, preferably nylon, about 8 mm in diameter (automobile seat belts can be used for this purpose instead). The length of the hammock tie ropes takes into account its length and the distance between the supports.
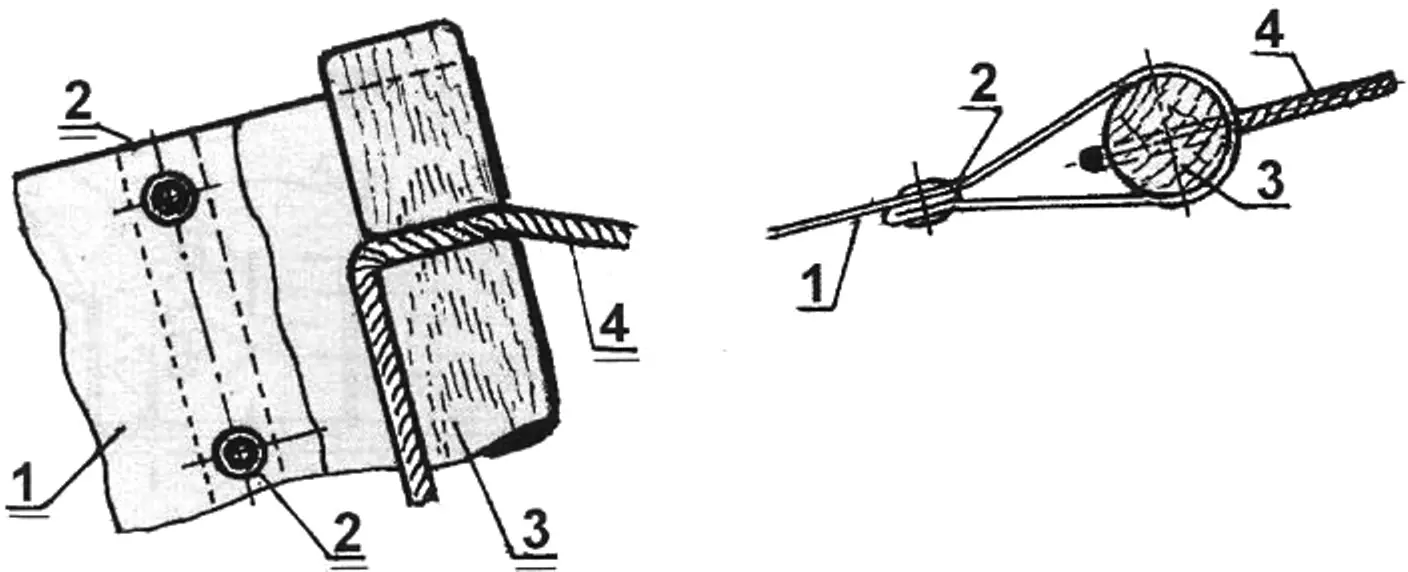
1 — bed; 2 — stitching with grommets; 3 — spreader; 4 — tie rope
The edges of the fabric must be overlocked before stitching. This can also be done on an ordinary sewing machine. At each end, the fabric is folded over by 150 mm (thus, the length of the hammock will be 2300 mm).
Since simple stitching of the hammock fabric cannot ensure reliable seams for the “sleeves” under the spreaders, it is recommended to additionally use metal grommets 10 mm in diameter for this purpose. They are installed in the middle of the sewn fold. There should be at least nine grommets on each side, that is, 18 in total. This is also a critical part of the work. Both rows of grommets should be located approximately 20 mm from the edge of the fabric seam.
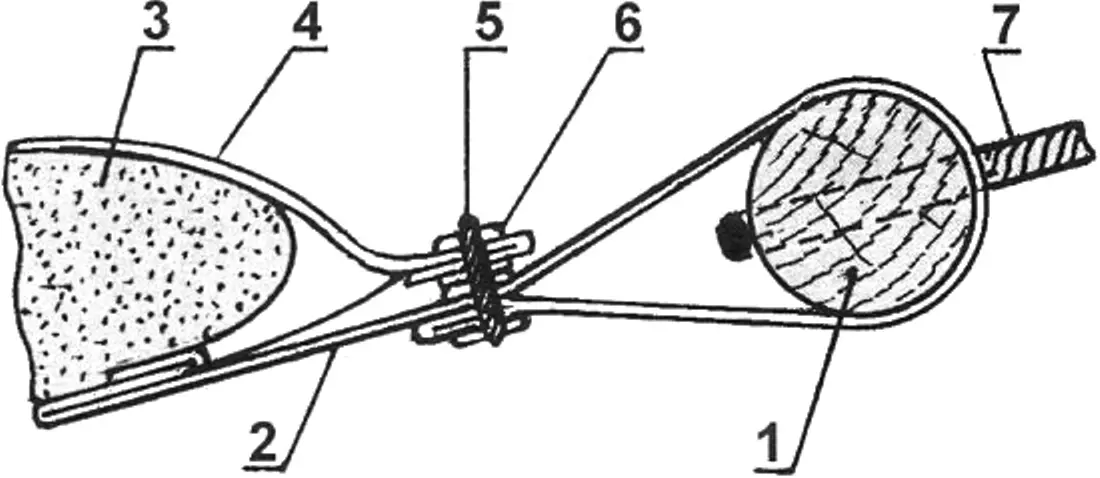
In each wooden rod inserted into a “sleeve,” two holes about 10 mm in diameter must first be made 75 mm from the end — for passing the tie rope through them. The ends of the rods should be rounded, and then both spreaders should be coated with varnish.
With the rods placed against the “sleeves” of the bed, the locations of the holes for the rope are marked on them. After the holes in the canvas are cut, they must be stitched and reinforced with grommets.
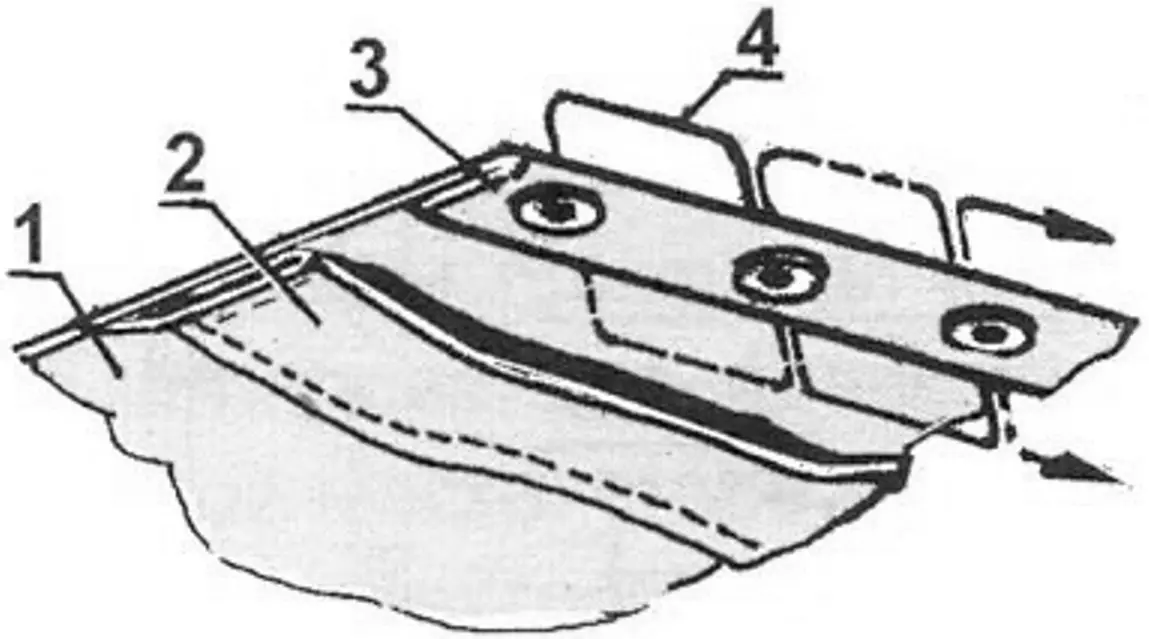
1 — canvas “pillowcase”; 2 — fold and stitching of the “window” edge; 3 — fold and stitching of the fastening strip with grommets; 4 — lacing
As shown in the drawing, the tie rope is passed through the holes in the rod, and the length of the outer ends must be at least 1000 mm. Then both ends of the rope are tied so as to form a loop for hanging. In fact, the hammock is ready.
If there is leftover canvas (about 800 mm long), it is possible to make a pillow cover for the hammock. For this, the fabric is folded in half, and, in accordance with Figure 4, one end of the cover fabric is folded over and sewn (holes are made in this strip and grommets are installed); the other is also folded over and sewn, laid with an offset from the first (to form an opening for the pillow), after which the side edges of the cover are sewn together. Thus a “bag” is obtained, into whose opening a pillow can be placed.
The pillow cover is attached through grommets to the hammock by means of a cord threaded as shown in Figure 4. A foam or cotton pillow is placed in the cover opening beforehand.
1 — spreader; 2 — bed; 3 — pillow; 4 — pillow cover; 5 — lacing; 6 — grommet; 7 — tie rope
All that remains is to hang the hammock and test its strength. It is advisable to put PVC tubing on the loops of the tie ropes intended for hanging the hammock: this will protect the ropes from premature wear.
The height at which the hammock is hung should not be too great, so that children can also use it without the danger of falling.
It is pleasant to rest in such a hammock, especially if it is made with your own hands.
“Modelist-Constructor” No. 5’2011
Recommend to read
 THE ENVELOPE OF METAL
Its really easy to bend the tin, and even better — from a thin sheet of colored metal, but of course not for sending by post. Make at the top, not a bent valve, the opening and... PAPER… “WOOD”
In our time, the quantity of waste paper has sharply increased, and mainly at the expense of "disposable" literature in addition to Newspapers and magazines in mailboxes is many...
