How can you build a house for half the price? Build it with your own hands! Builders come to this conclusion when they look at cost estimates for individual residential house projects by expense items, from which it becomes clear that only half of the costs go directly to materials and their transportation, while the other half goes to paying for construction services. And when the builder is a handy person who, in a difficult moment, can call on relatives and friends for help, then building a house on their own becomes a matter of honor.
Once the decision to erect a house with your own forces has been made, it is necessary to think through the technology of construction work, and first of all — the organization of the construction site, especially when the plot is located among already built houses.
The flow method, in which delivered materials and structures are put to use immediately, is hardly possible when construction work is carried out by the builder themselves, so in this case materials will have to be stockpiled in advance. The question of their rational placement at the construction site in accordance with needs and the order of use near the building area, and moreover with the provision of necessary driveways and walkways, is an equation with several unknowns. The correct solution largely determines labor productivity as well, since useless re-handling of materials is eliminated. And ensuring occupational safety, when the builder has taken the entire construction process upon themselves, acquires special meaning.
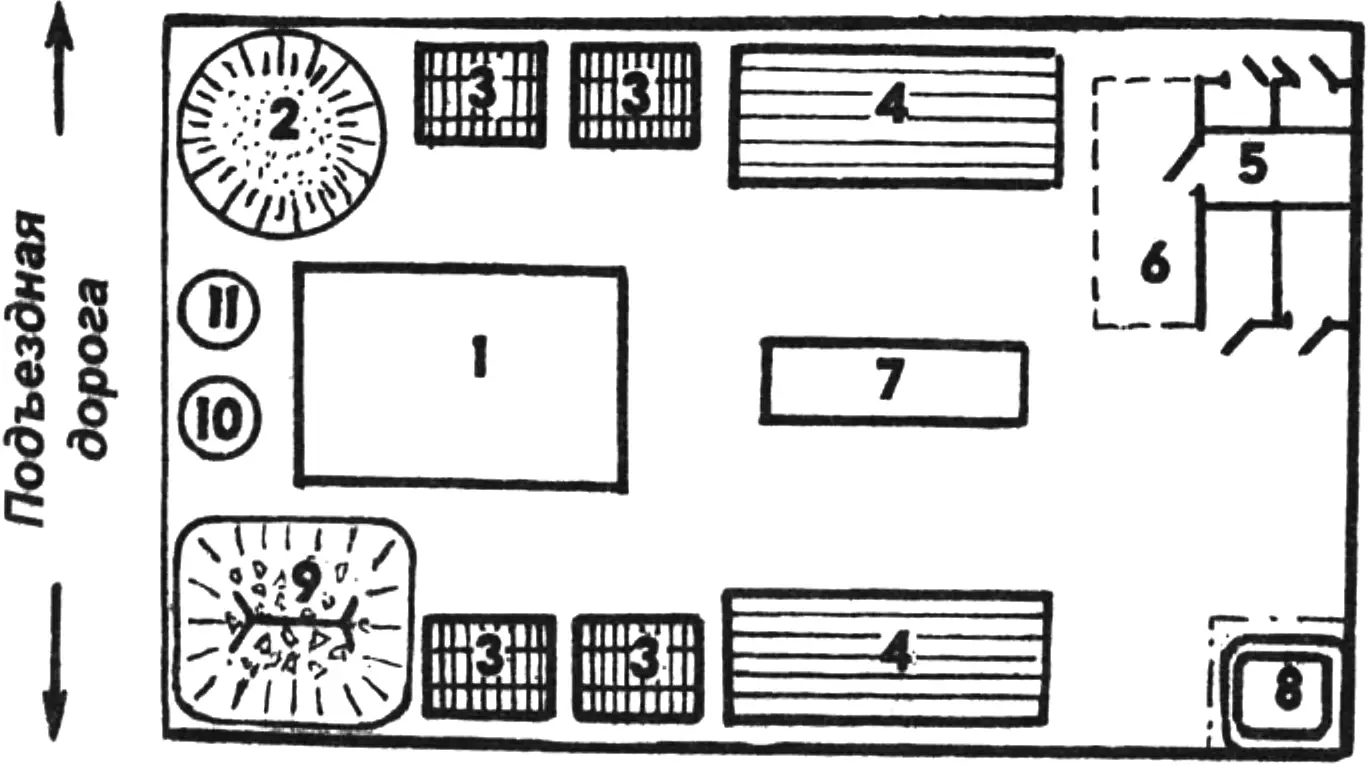
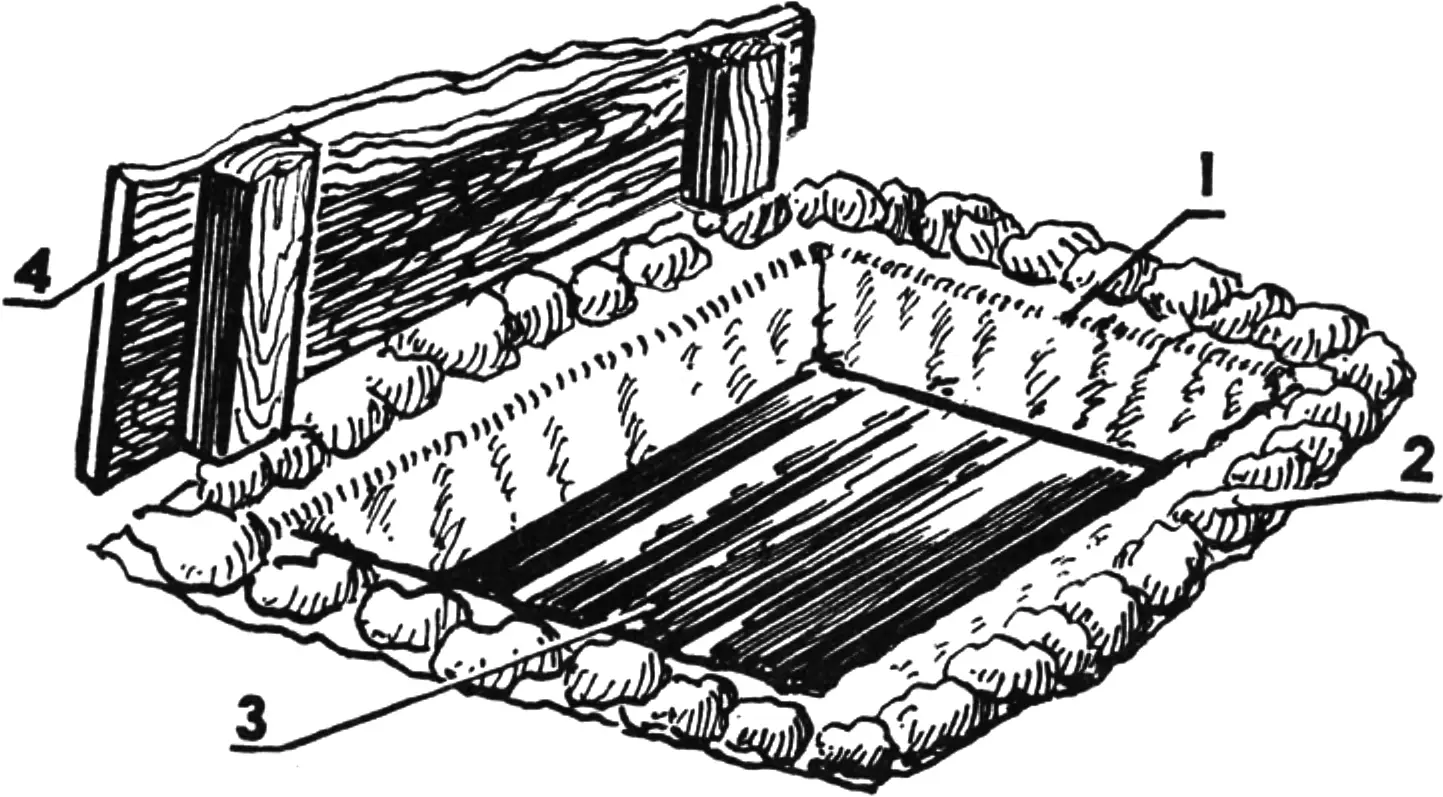
1 — house site; 2 — pile of sand; 3 — pallets with brick or blocks; 4 — stacks of lumber and sawn timber; 5 — utility block; 6 — canopy; 7 — workbench; 8 — mixing pit; 9 — pile of crushed stone or gravel; 10 — concrete mixer; 11 — water container
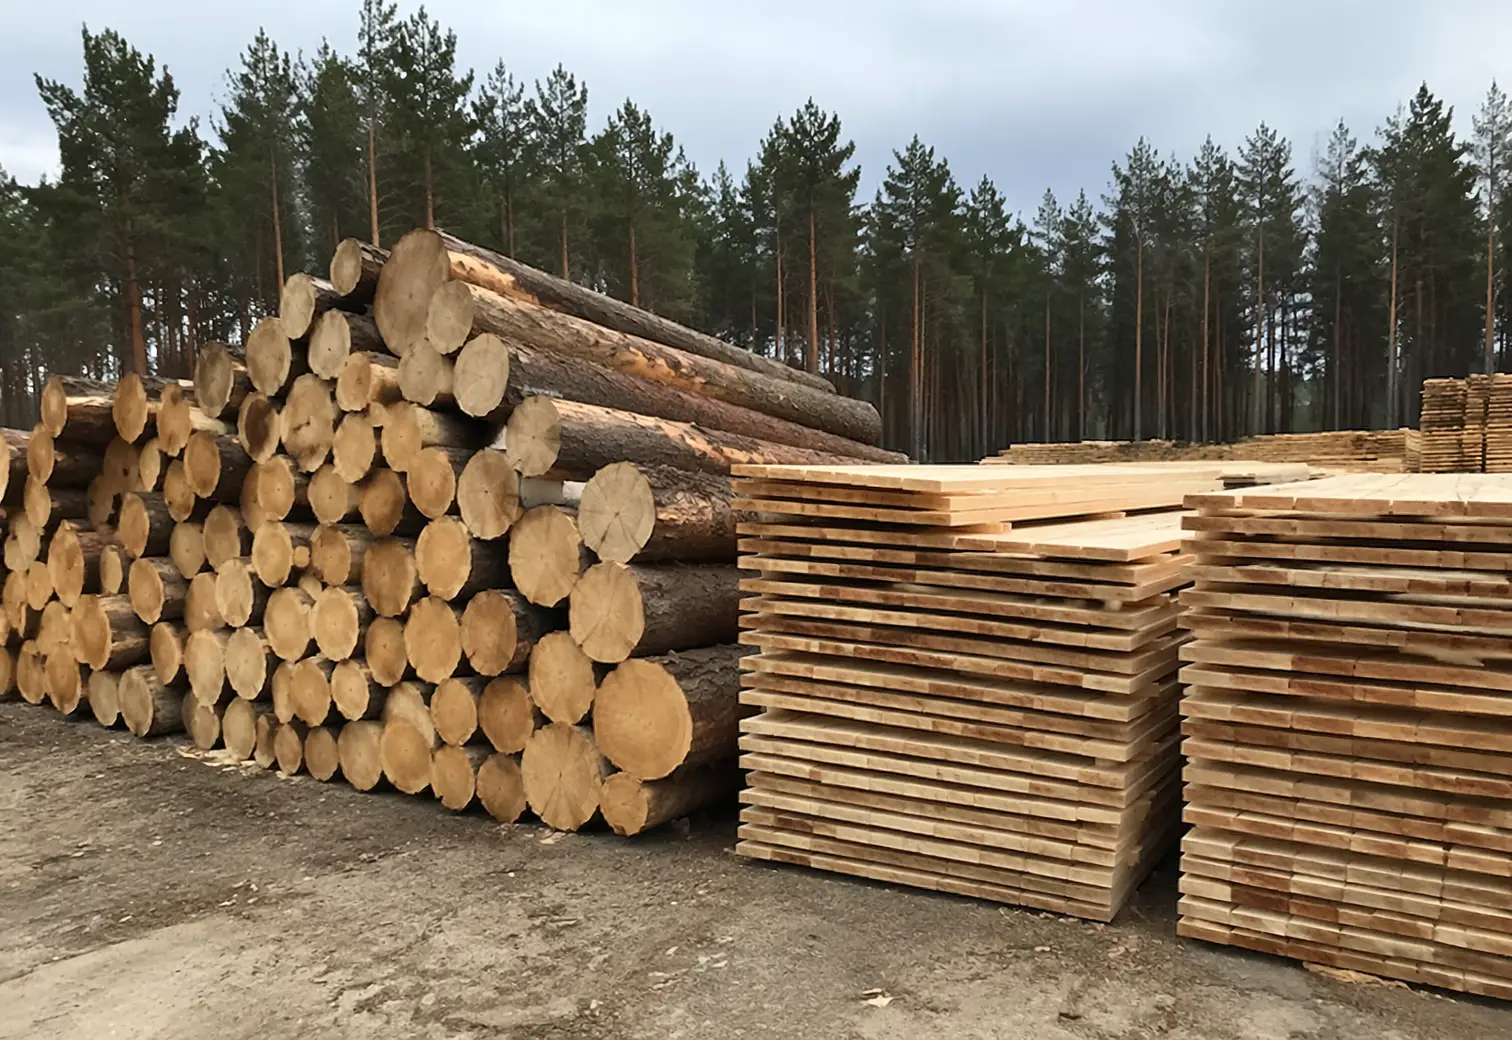
Lumber and sawn timber must be stacked so that they are not only protected from moisture, but also dry during storage, especially if wood of increased moisture content has been purchased. For this purpose, it is better to stack materials in a pile on a leveled horizontal area with ensured drainage. First, on the ground, stepping back 200—300 mm from the ends of the stack, sleepers 200—250 mm high are laid every 1.2—1.5 m, with strips of roofing felt (rubberoid, cellophane film) spread under them, and on them — a row of boards with gaps of 30—50 mm between them. On this row over the sleepers, crosspieces 30—50 mm thick are placed, and on them — boards of the next row, overlapping the gaps between the lower boards (in a staggered pattern, as brickwork joints are bonded). On the last row, longer crosspieces are laid, and on them — without spacers and with overhangs at the ends, several layers of unedged, defective boards or slabs, overlapping the lower longitudinal joints and reducing the boards of the upper row by half from each edge so that they form a gable surface on top of the stack. Such stacking will ensure good ventilation of each board in the pile. In rain, the stack is covered with film, which is pressed down on top and at the edges with slabs or board offcuts. For stacking round timber (logs, trunks, merchantable wood), small cups should be cut in the sleepers and crosspieces, or the round timber should be fastened together and to the crosspieces with staples. Each row of logs in the stack is laid with reversed ends (after thick ones — thin, and vice versa).
The width of the stack should be commensurate with its height, and the latter should not exceed 2 m.

1 — sleepers (timber h200…250) on waterproofing; 2 — spacers (strip h30…50); 3 — lumber and sawn timber; 4 — extended cross spacers; 5 — unedged slab boards; 6 — polyethylene film; 7 — pressing boards
When storing, one must take into account that sawn timber dries faster than logs, edged boards faster than unedged, planed faster than unplaned, and remember that wood is hygroscopic, that is, capable of absorbing moisture even from the air, and dry wood after prolonged stay in a damp room will become moist again.
Wood is divided into three categories by moisture content: up to 10 percent — dry (for furniture), from 10 to 15 percent — room humidity (for interior structures), and from 15 to 23 percent — air humidity (for exterior structures). Wetter wood, as a rule, is not used in construction.
Loose inert materials (sand, crushed stone, gravel) are mostly used for foundation structures and put to use first. Therefore, they can be stacked in piles even on the approaches to the building area. These materials do not require protection from bad weather, but to exclude their mixing into the soil layer, it would be good to lay steel sheets or concrete slabs on the ground before stacking: inert materials mixed with soil cannot be used for construction. And processing soil mixed with gravel or crushed stone will bring no joy to owners (gardeners, vegetable growers, dacha owners), and cleaning the soil of these impurities will require considerable time.
The area that a pile of inert materials will occupy is not difficult to calculate using known geometric formulas, knowing the required volume and assuming an average natural slope of the piled material equal to 45°.
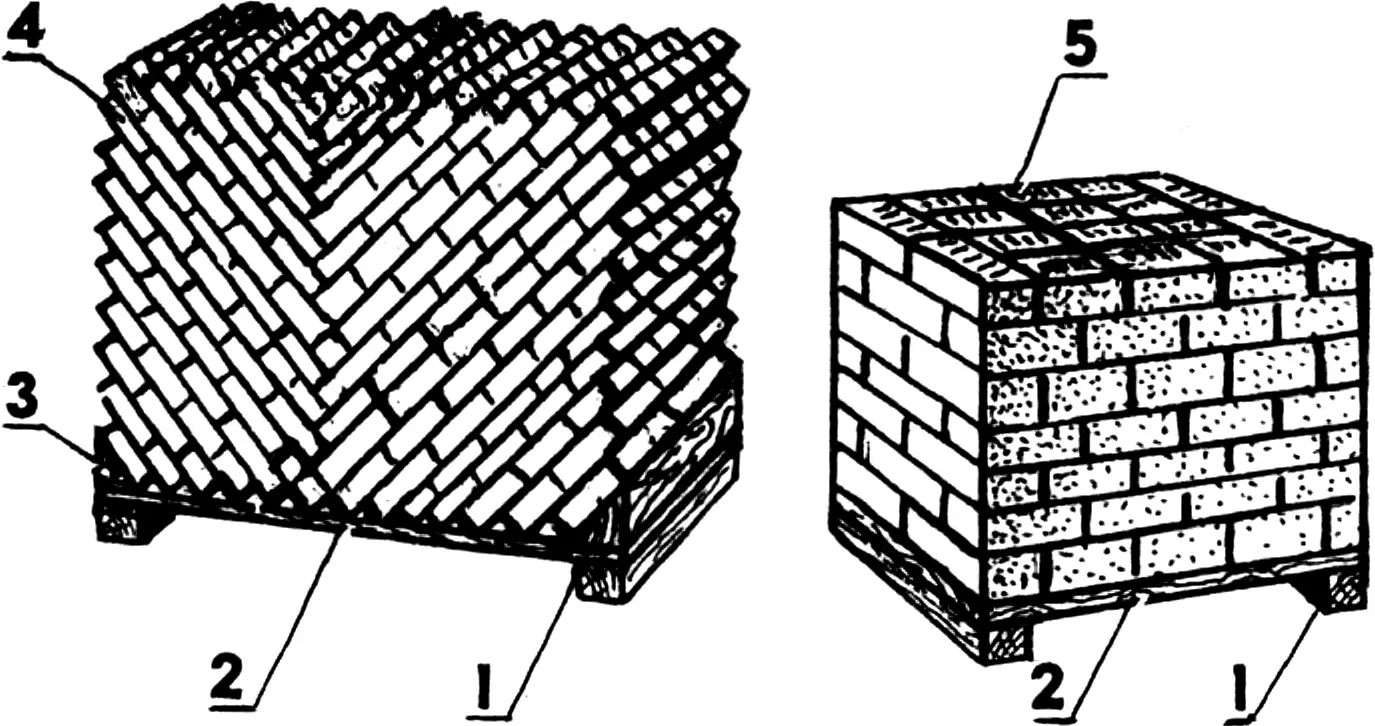
1 — supports (timber 100×100); 2 — bottom (board s25…50); 3 — brace (triangular timber 100×100); 4 — bricks; 5 — blocks
If prefabricated concrete or reinforced concrete structures (foundation blocks, floor slabs) are used in the construction of a brick, block, or monolithic house, it is impractical to stockpile them in advance, because a lifting crane is needed for their installation as well as for unloading. It will be more rational to prepare the work front (dig a pit for the foundation, erect foundation or load-bearing walls for the floor), order the products together with a lifting crane, and install them “from the wheels.” If such organization of work is impossible, then structures must be stored at such a distance from the building site that they can be reached without relocating the crane. Supports and spacers during storage are installed across the structures at a distance of 250—300 mm from their ends, and the spacers must be of such height that the mounting loops of the products are not damaged (not crushed).
Piece wall materials — brick, stone, or blocks — are placed on pallets: brick — in a “tree” pattern, sloping inward, and stone and blocks — in rows with cross bonding. Pallets are board panels with transverse support beams and side triangular-profile timbers or without them. If silicate brick (blocks) are placed on a pallet, they must be covered from precipitation with tarpaulin or film. Passages 0.5 m wide must be left between packages. If space is insufficient, packages (pallets with brick) can be placed in two tiers, increasing the passage to 0.8 m.
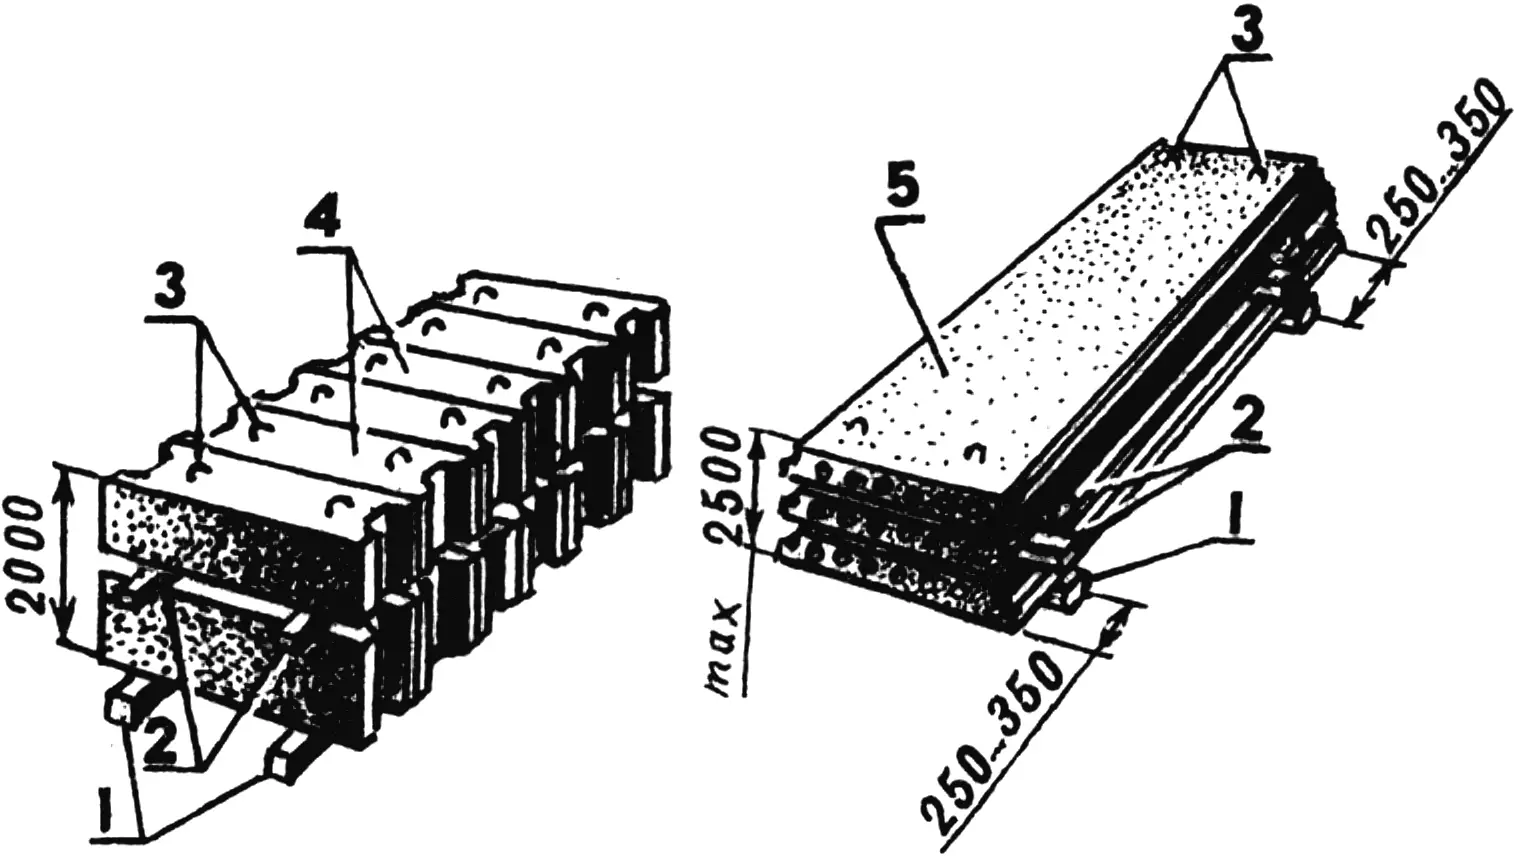
1 — sleepers (timber 150×150); 2 — spacers (timber 100×80); 3 — mounting loops; 4 — foundation blocks; 5 — floor slabs
Some building materials (binders) and joinery products must be stored in enclosed premises and even in airtight packaging (for example, gypsum or parquet strips).
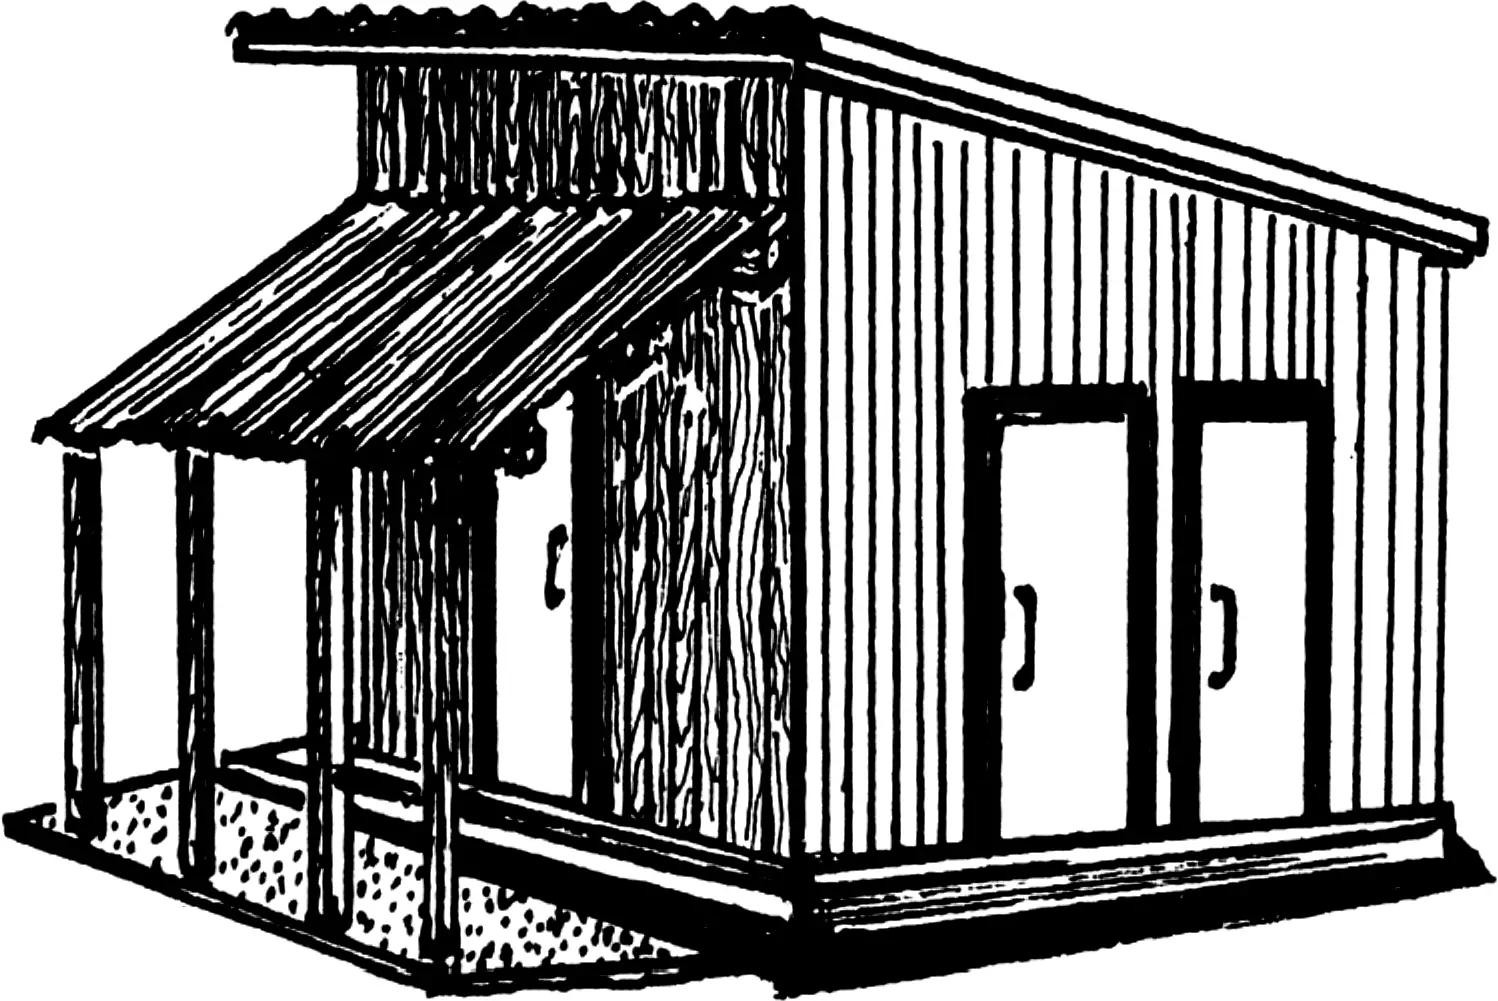
And here one cannot do without preliminary construction of auxiliary premises that could be used as warehouses: temporary (sheds, storerooms with canopies) or permanent (utility blocks, site cabins, bathhouses) — this is for the builder to decide.
Permanent auxiliary premises are usually built from the same materials as the main house (to ensure a unified architectural appearance), “lightening” the structures: reducing wall thickness and height and, accordingly, foundation depth and cross-section, as well as simplifying other elements. Construction of these structures at the same time provides the necessary skills that will be useful when erecting the house.
Temporary warehouses and sheds are arranged according to the simplest structural schemes, using even substandard materials. However, this should not affect the stability and strength of the structure.
Such buildings can be made without foundations, on sleepers laid through a layer of waterproofing material directly on a ground platform slightly raised above the surface of the earth, with drainage from it ensured. In this case, sleepers are used in the structure as the lower frame tie. A clay floor extending 100—200 mm beyond the area of the shed can also serve as a base. To make such a floor, humus is removed, the underlying soil is additionally compacted, and beaten fatty clay with additives of chopped straw or stubble is laid on it in two layers up to 100 mm thick each. After laying a layer, the clay is thoroughly tamped, leveled, and allowed to dry. The floor is covered on top with a lime-clay or cement mortar 20—30 mm thick. The coating can be made from a layer of gravel or crushed stone, or it is better to use some local flat stone, embedding it in the floor by tamping.
1 — film; 2 — earth embankment; 3 — wooden flooring; 4 — cover
To prepare beaten clay and slake lime, a mixing pit must be dug in the “far corner” of the construction site, lining it with thick polyethylene film. If the pit walls crumble, formwork must be made. A board flooring is laid on the bottom, and the pit is covered with a lid.
The walls of a shed (warehouse) are often made frame-type with one-sided or two-sided cladding of flat slate or other panel materials, waterproof on the outside. Intermediate posts in this case are installed according to the width of the cladding material.
Board walls are made without intermediate posts, connecting boards in longitudinal joints with dowels. Using boards 30—50 mm thick with a rabbet or tongue-and-groove without dowels, airtight rigid enclosing structures without gaps are assembled. If necessary, double board walls with an air gap or a layer of thermal insulation are also made. In this case, thinner boards are used — 20—25 mm thick.
When deciding on the wall structure, the one that will be easier to dismantle without damaging the material should be considered the most acceptable.
The roof of a shed is usually made single-pitch with slate roofing or covering from roll materials (rubberoid, pergamin), but in the latter case a solid sheathing is necessary. The rear wall of the shed should not be lower than 2 m.
Inside the shed, several compartments are made by installing partitions for the full height of the structure. The fact is that some binder materials, for example, cement, gypsum, lime, require separate storage. It is desirable to make doors in each compartment opening outward.
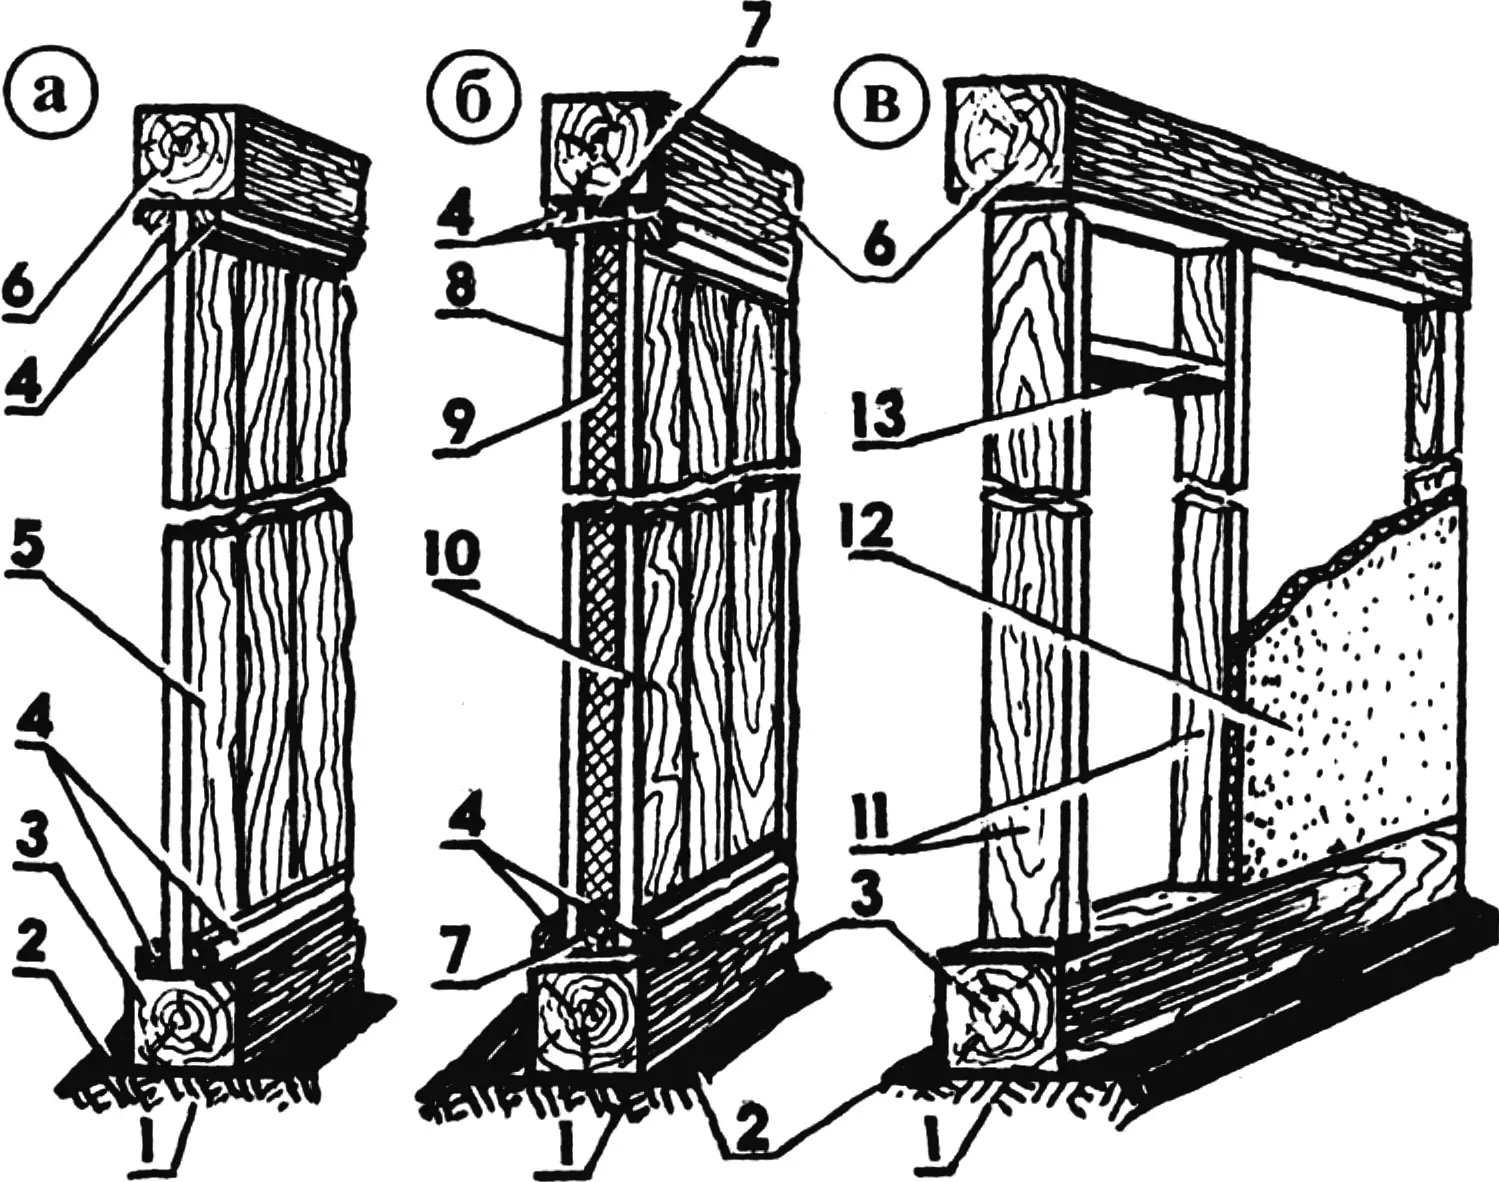
a — single board; b — double insulated board; c — frame with external cladding; 1 — ground or floor; 2 — waterproofing; 3 — sleepers (lower frame tie beams); 4 — curbs (timber 40×40); 5 — wall (board s35…50); 6 — upper frame tie beams; 7 — spacer timber; 8 — outer wall (board s25); 9 — thermal insulation (s30…40); 10 — inner wall (board s15); 11 — frame posts; 12 — external cladding (slate); 13 — door lintel
It is advisable to attach a canopy to the shed. It will require little material, but the need for it will always remain. If the height of the lower wall allows, the canopy can also be mounted behind the shed, under a common roof. But even if the canopy is mounted in front, its roof, as a rule, is arranged like the roof of the shed. The canopy frame is usually assembled without a lower tie (sleepers), and the ends of the posts, previously protected from rotting, are embedded in the ground to a depth of 800—1000 mm. The holes around the posts are backfilled with crushed stone or gravel and compacted.
And finally: almost all binder materials lose their activity during long-term storage. Cement can lose 50 percent of its binding properties in a year. Gypsum will lose the same percentage of its activity in just three months, and unslaked lime — in a month. So, when stockpiling such materials, it is necessary to determine their reasonable volumes.
«Modelist-Constructor» No. 4’2002, A. POLIBIN
Recommend to read
 MISSILE “PATRIOT”
Launched in 1963, work on the creation of Zenith rocket complex of average range "petriot" had as its main objective the replacement was on the US Army anti-aircraft missile complex... BUILD A COTTAGE
Plots...Only six acres. As in this tiny place and the house, and a separate kitchen-dining room, and utility area, bathroom, and garage. But you want something to put... we Offer to...
