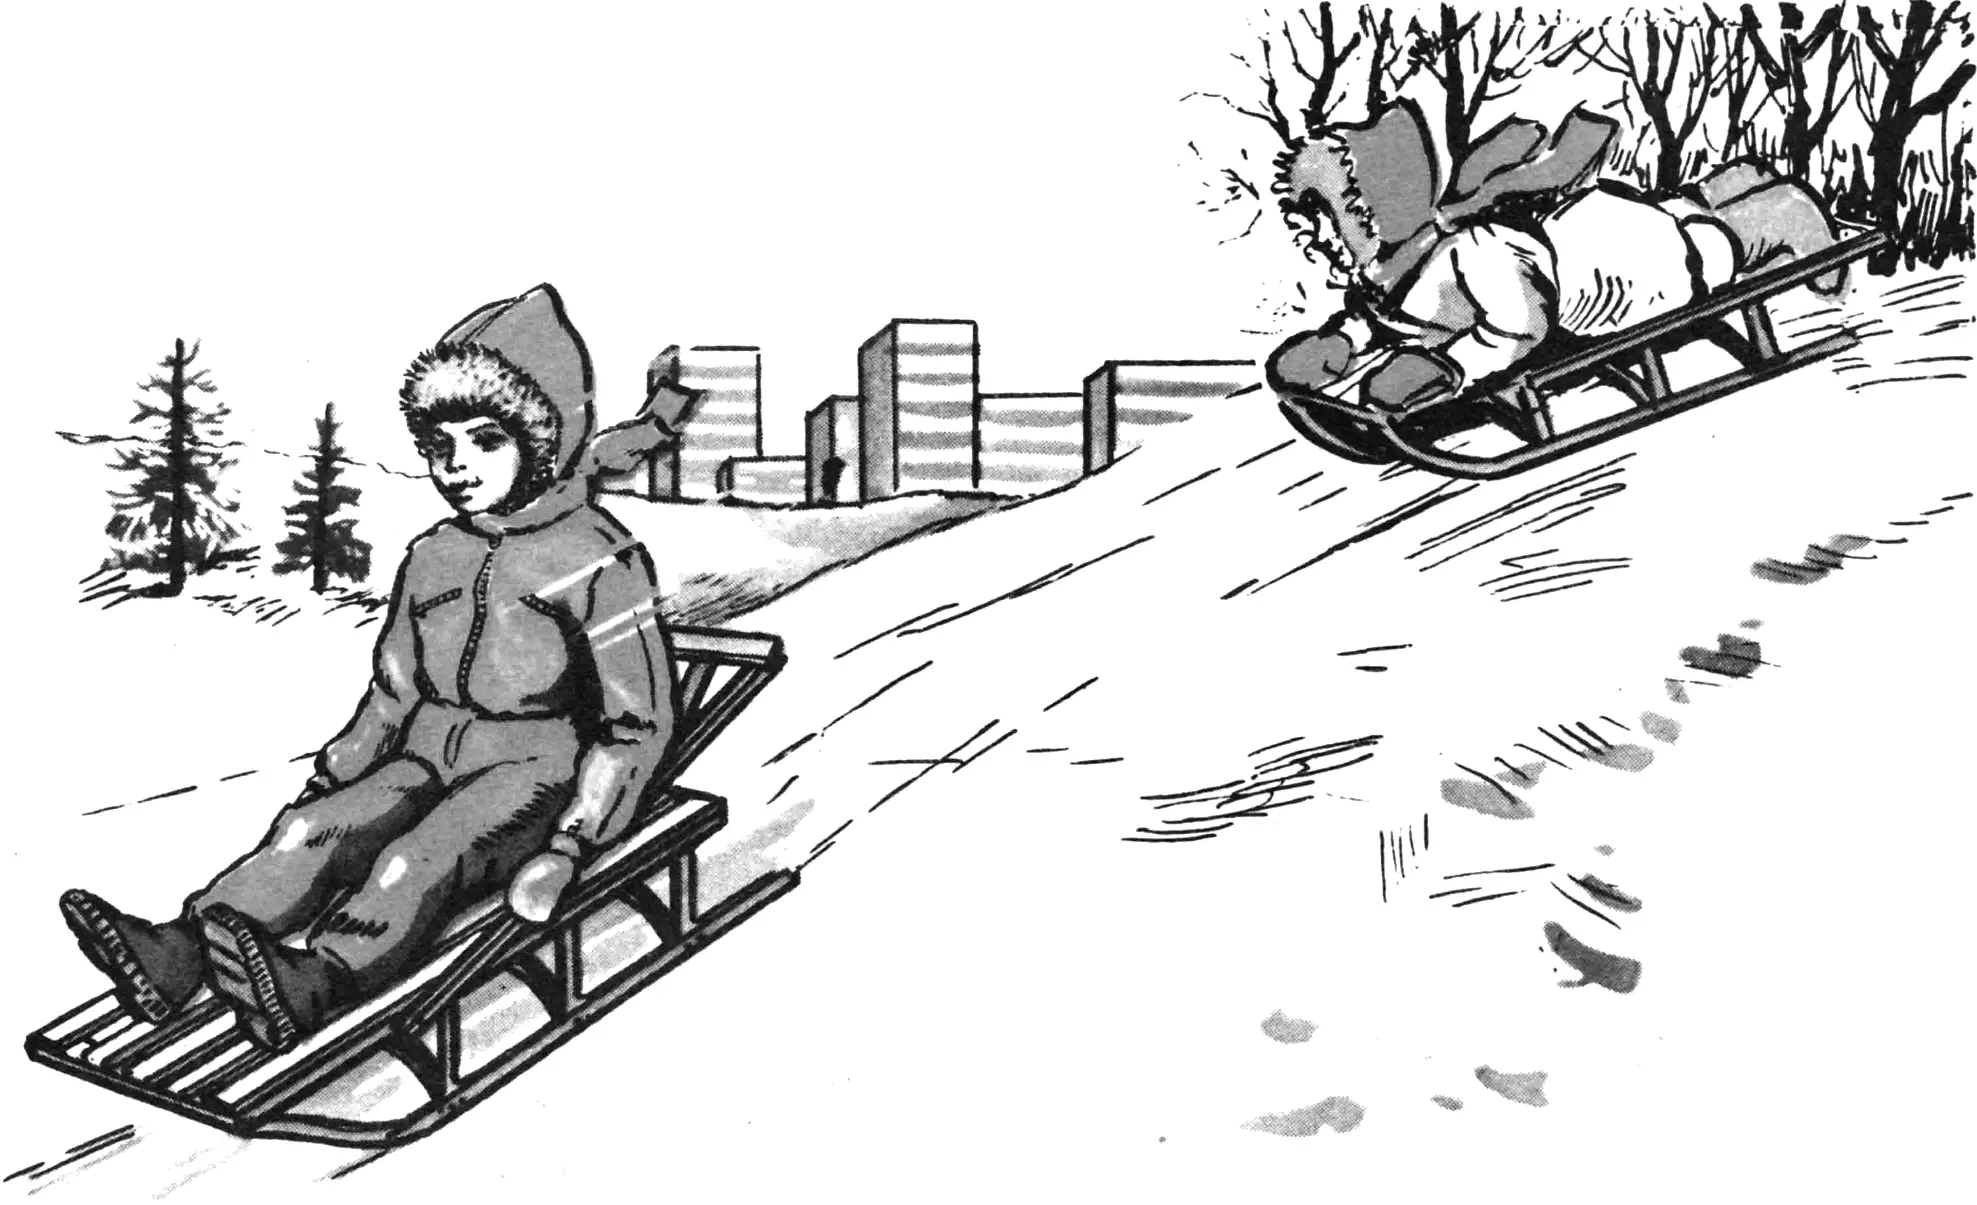
Perhaps in every adult’s memories, childhood winter fun is inevitably linked with sleds. And one can say with confidence that even today you will rarely find a home without them: they still serve children, and adults too — to take a toddler to kindergarten, or to carry a small load from or into the house over the snow.
And despite the variety of designs, this simple piece of equipment has much in common that is well established and traditional in construction and use. For example, as a rule they are moved with a flexible lead — a rope or a strap. This is inconvenient already because the sled is always behind the person pulling it. If he moves quickly, snow from his footwear gets into the sled; besides, one has to look alternately forward and back, and because there is no rigid control the sled may tip over.
True, there are also designs with a rigid handle fixed at the rear. This is much more convenient: travel is more stable, and obstacles are overcome more easily and confidently. Still, there is a drawback here as well: when pushing from behind, you cannot see the passenger’s face. Let us keep these inconveniences in mind for our further thoughts, and for now also consider the requirements for sleds used for downhill riding.
Here a different design is needed — without a backrest and handrails: after all, it is more convenient to race down a hill lying face-down on the sled. In this position the center of gravity is lower, air resistance decreases, and therefore speed increases. And the closeness to the snow flying under the runners sharpens the emotional experience.
All these conditions can be met by introducing simple design changes into the sled.
“PULL-PUSH”
The “pull-push” sled, intended for children aged 1.5–3 years, is designed on the basis of a wooden construction from the Riga Carriage Works. Its improvement amounted to rounding the rear ends of the runners like the front ones and modernizing the rigid lead-handle so that it can be easily flipped from the front of the sled to the rear to allow movement “backwards.”
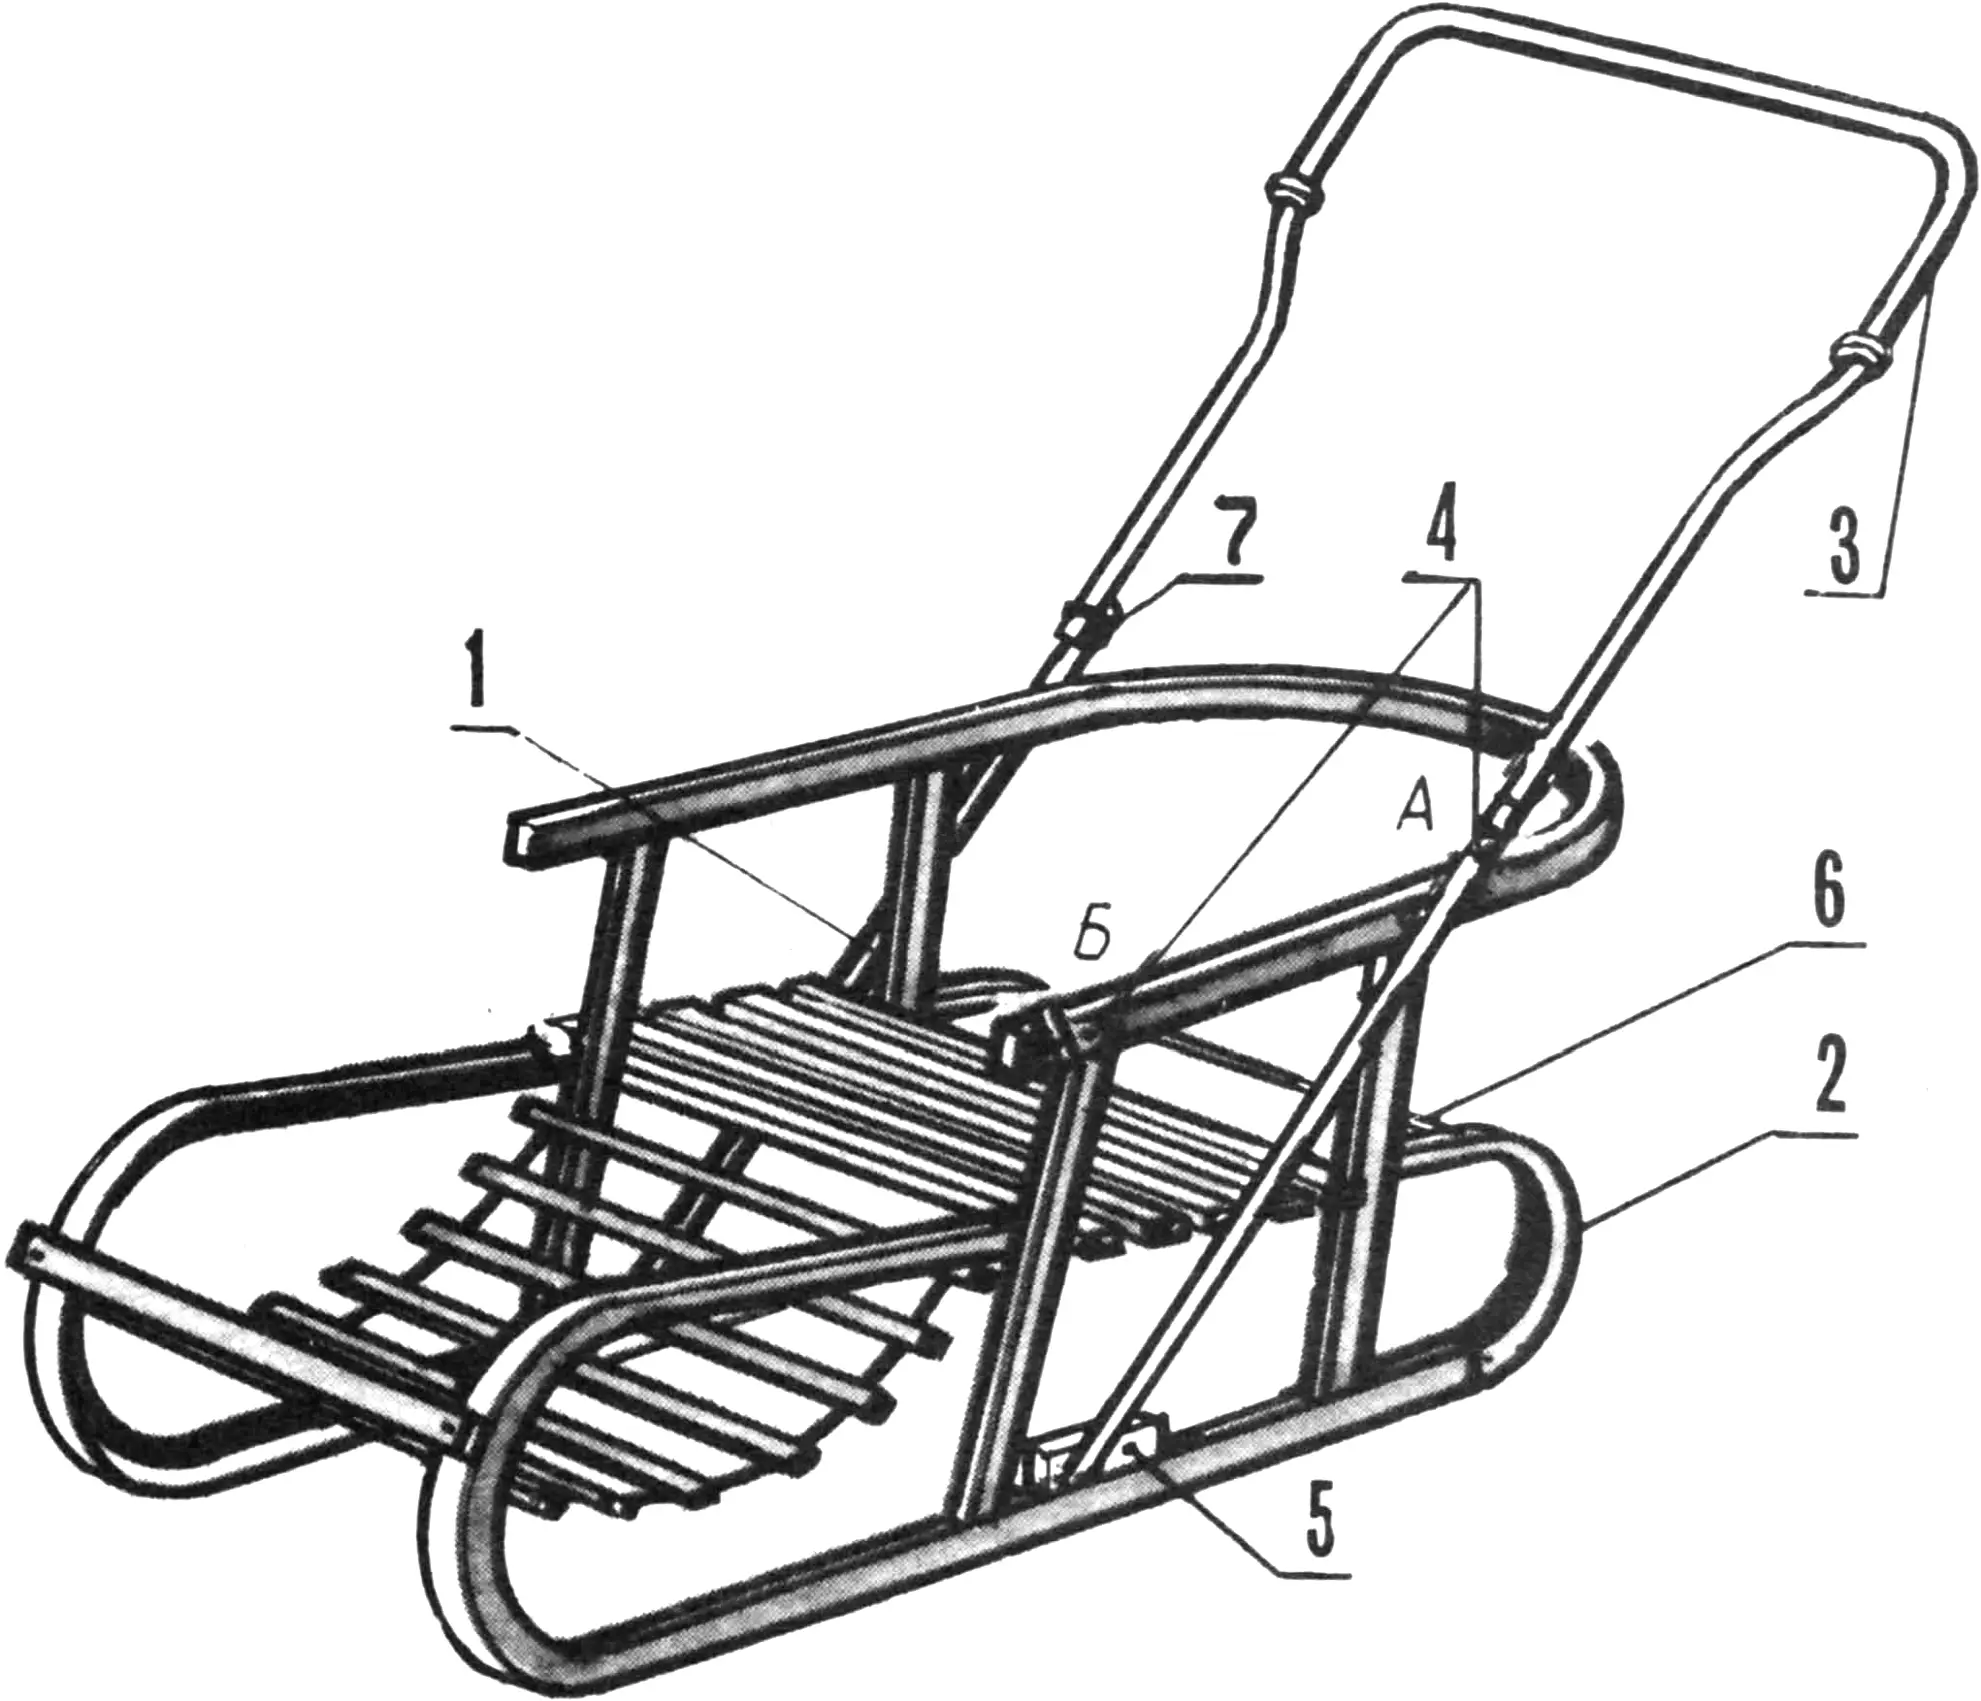
1 — handle upright, 2 — rear runner roundings, 3 — handle crossbar, 4 — handle position lock, 5—bracket, 6 — stud, 7 — handle folding lock.
It should be noted that using a flip-over handle makes the sled easier to control, allows you to see obstacles and keep the little passenger in view. And the rounded ends of the runners make the sled indifferent to the direction of travel. It becomes possible, when needed, to seat the child with their back to the wind or, when you want to talk with them, to turn them to face you.
1 — base, 2 — threaded upright.
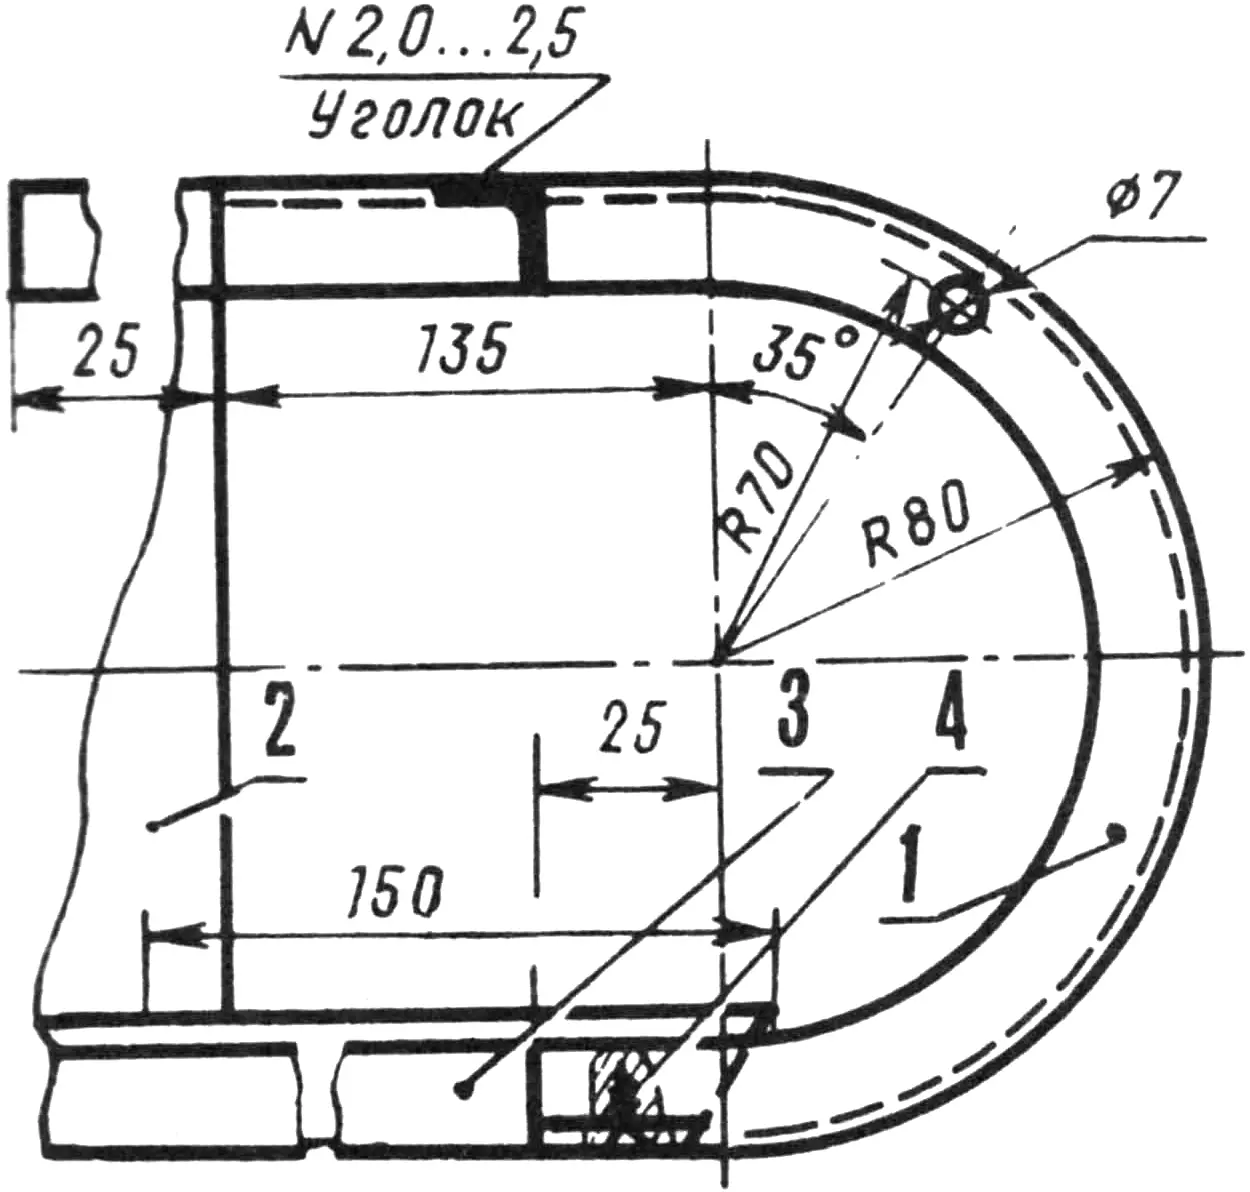
1 — angle piece, 2 — rear sled upright, 3 — sled runners, 4 — screw.
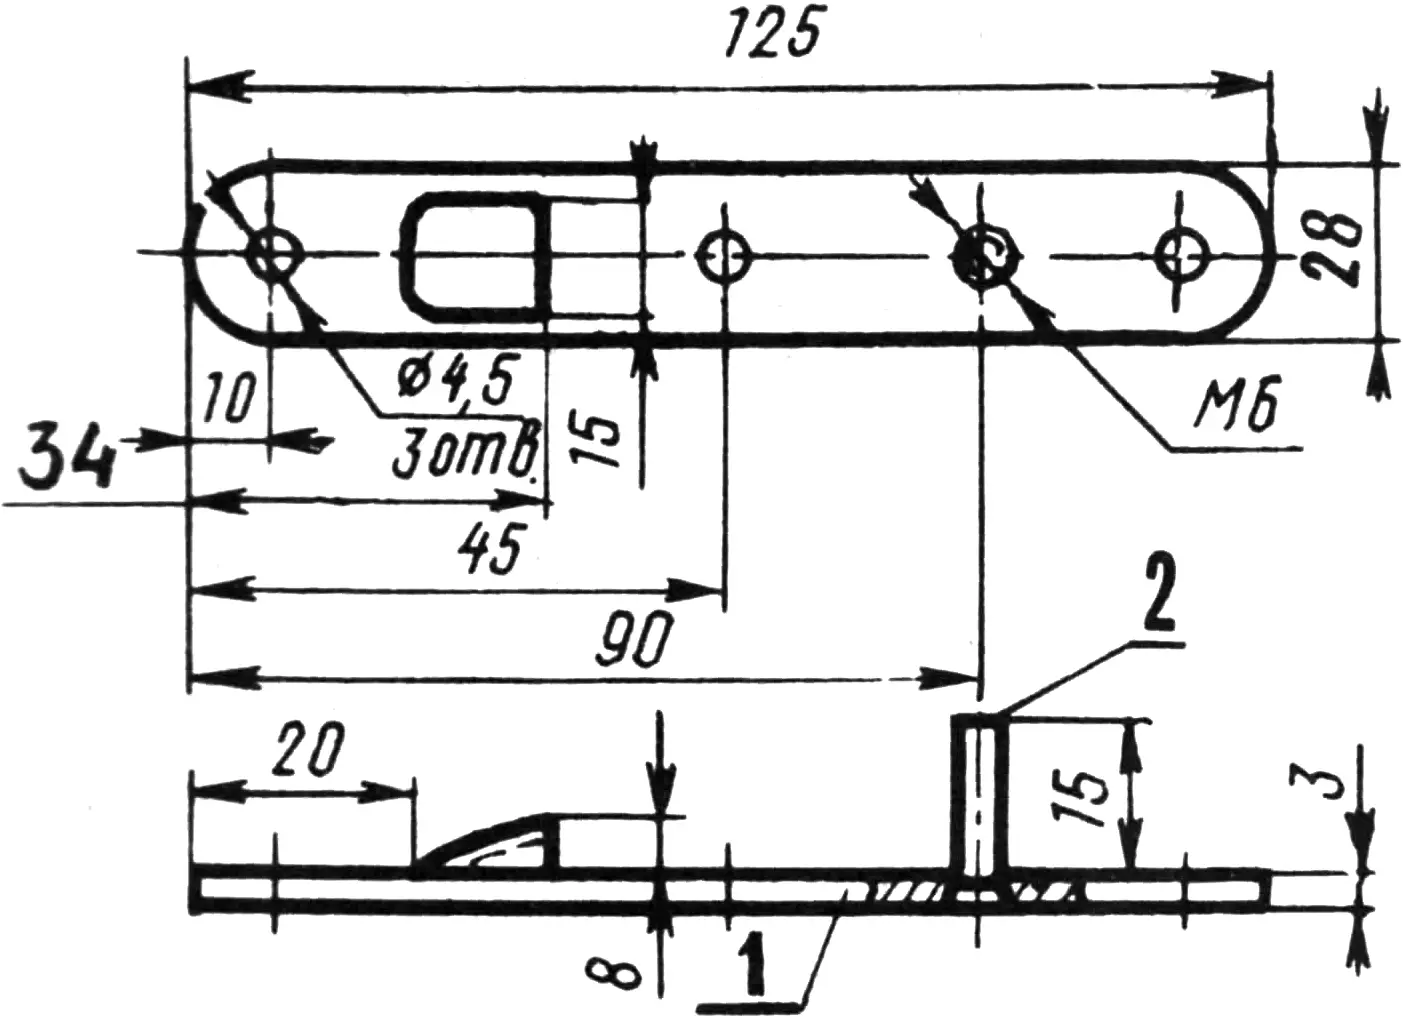
The simplest way is to modernize the stock handle. You need to make (according to the drawing) two plates from sheet steel and install them horizontally on the sled handrails so that they lock the handle in position B. Each plate is fastened with three screws.
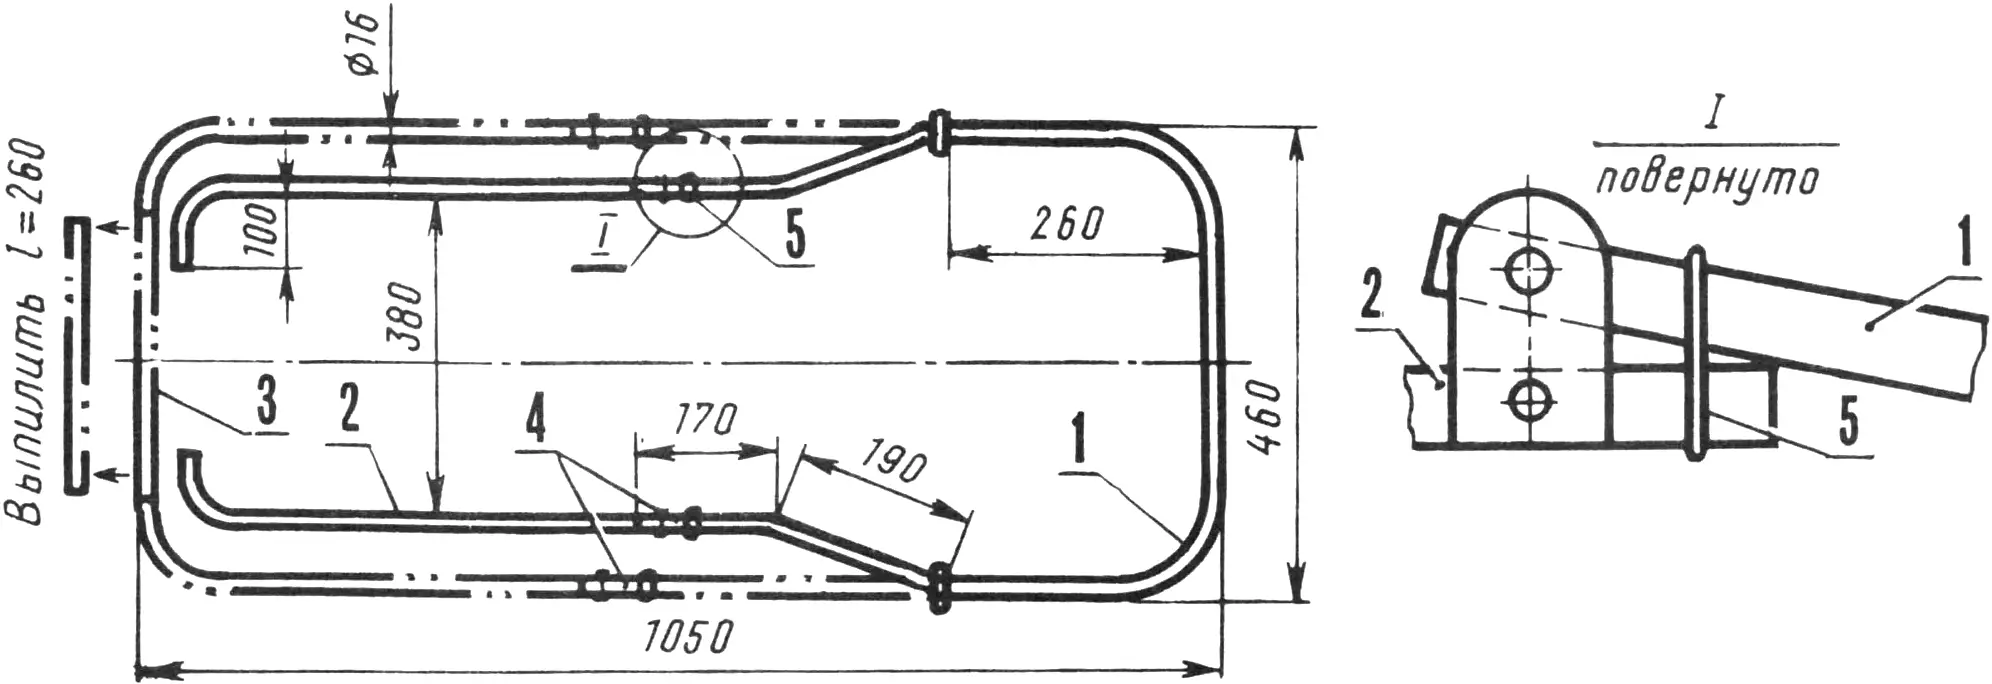
1 — handle crossbar, 2 — handle upright, 3 — crosspiece (cut out and removed), 4 — handle folding lock, 5 — locking ring.
The runner roundings are made with steel angles No. 2.0 or 2.5, bent while heated on a mandrel 160 mm in diameter. Fastening holes for screws are marked and drilled in place, after which the arcs are attached to the sled with screws or, if the runner wood is not very strong, with M4 countersunk-head bolts. To increase the rigidity of the joint between the arc ends and the sled, they can be fastened with a transverse stud.
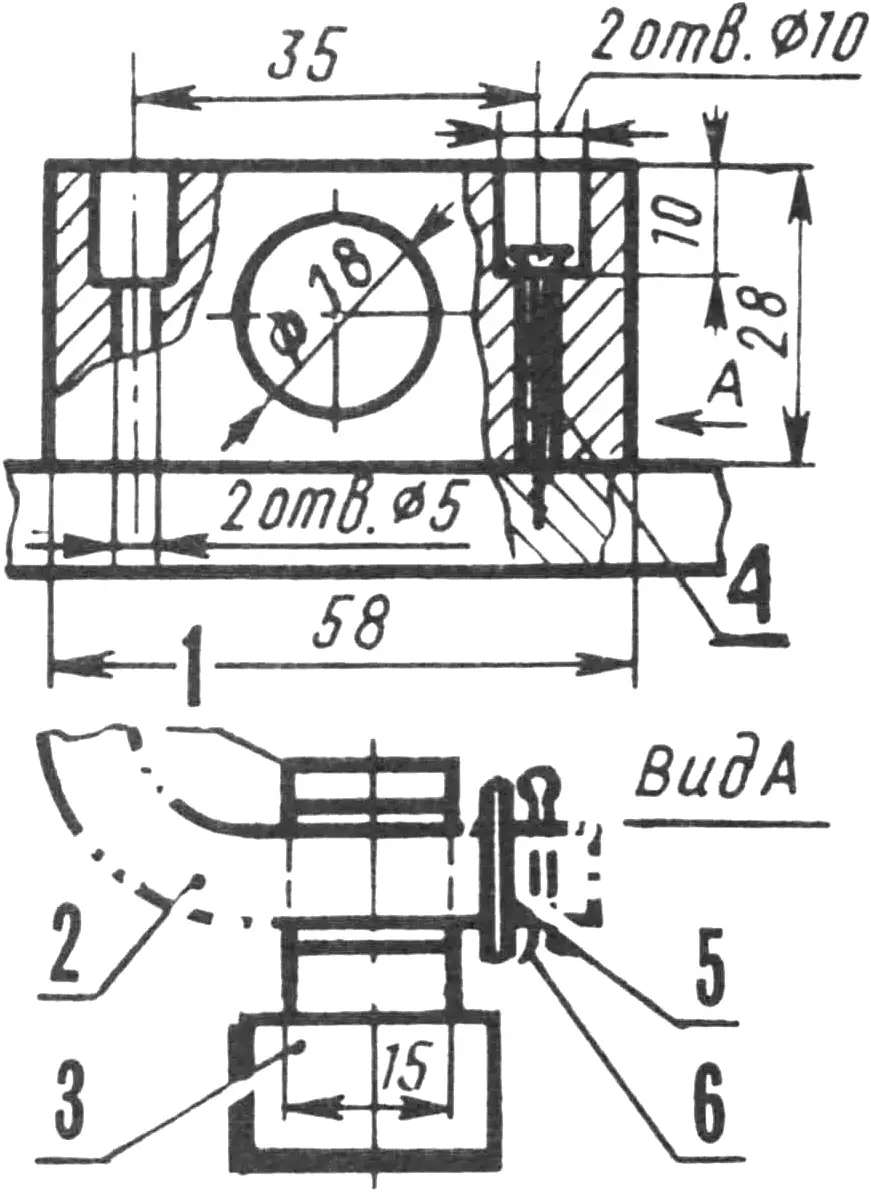
1 — bracket, 2 — handle upright, 3 — sled runner, 4 — screw, 5—washer, 6 — cotter pin.
Much more convenient, though somewhat more complicated, is a folding metal handle from a baby carriage. Its modification consists in cutting a 260 mm length of tube out of the lower part of the upright, while the handle itself is bent so that the distance between the uprights at the bottom equals the sled width (about 380 mm). Their lower part is fixed in a bracket which, in turn, is screwed to the wooden part of the runners.
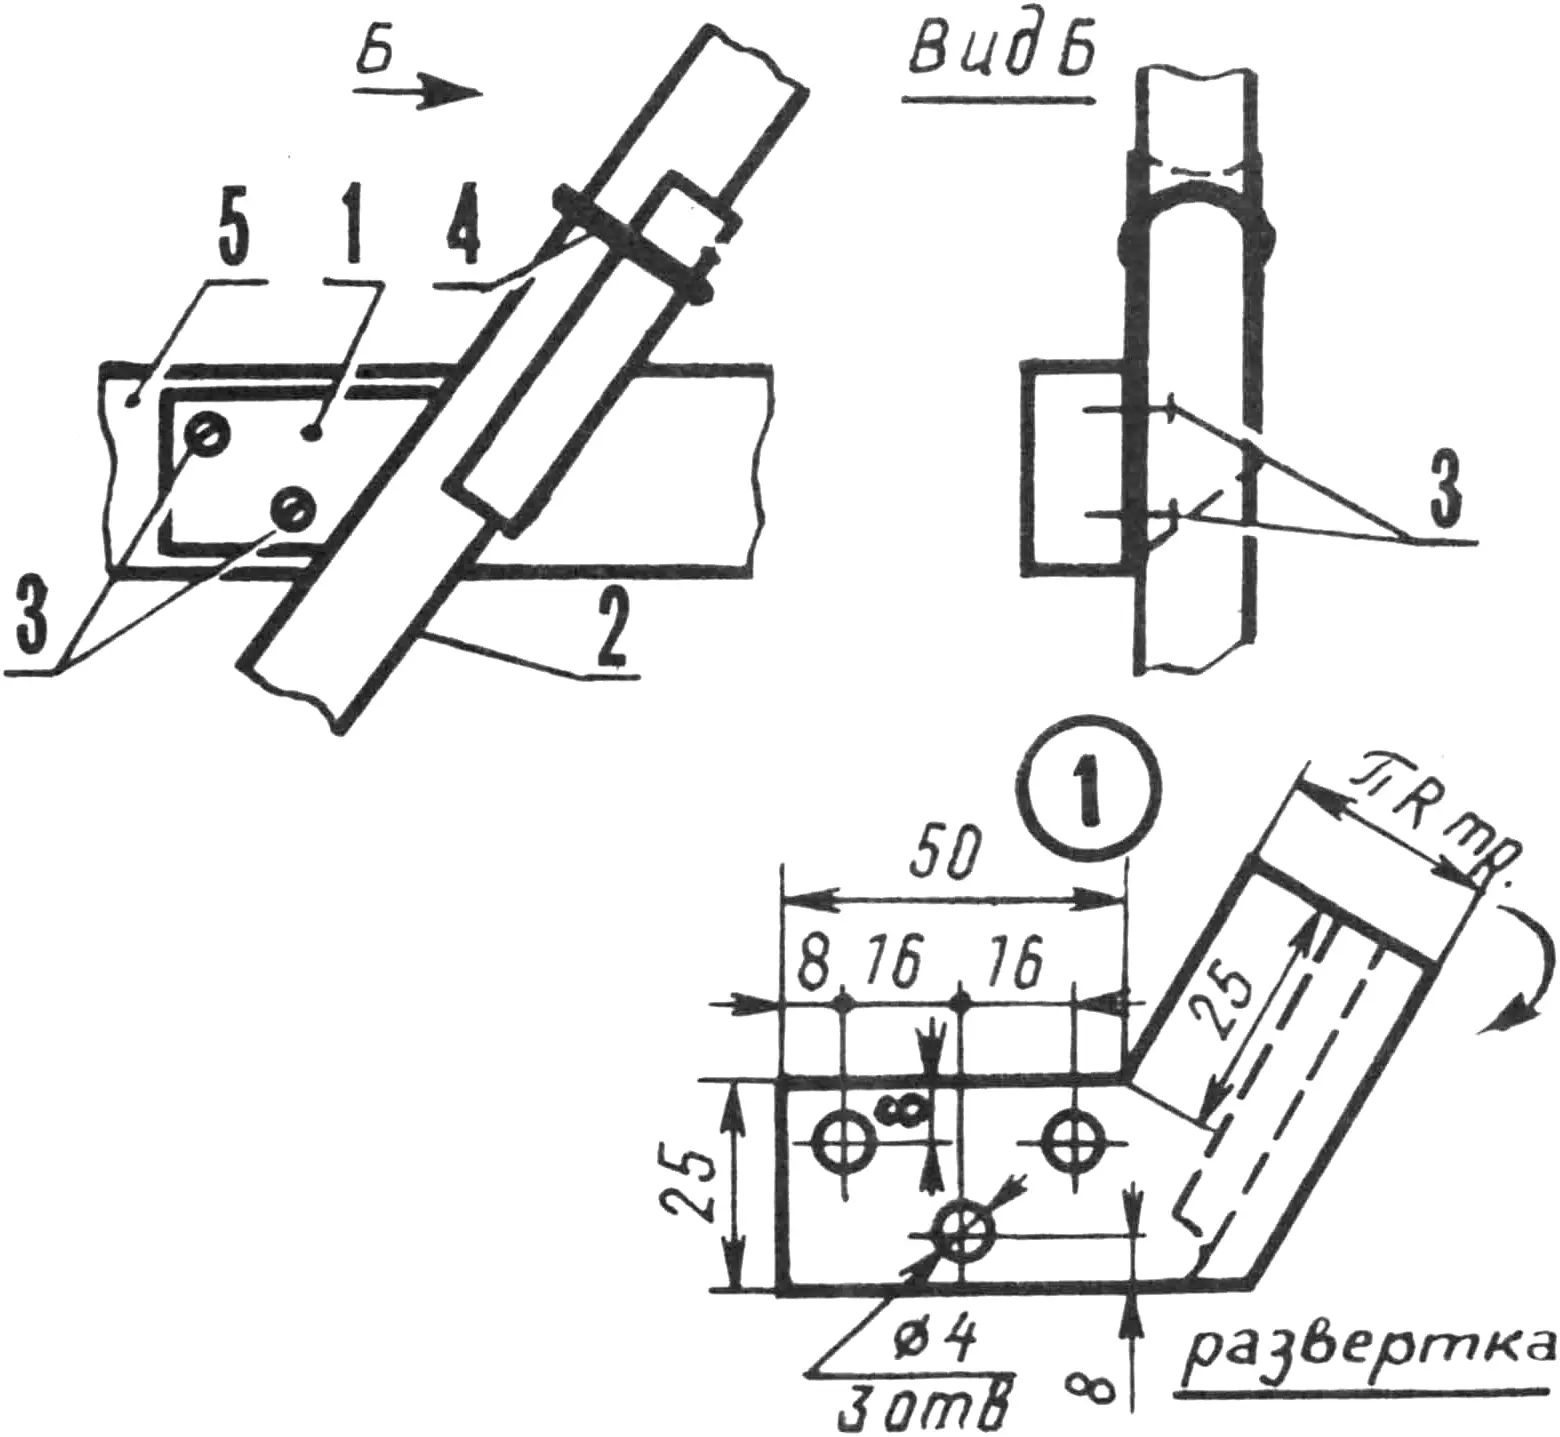
1 — lock base, 2 — handle upright, 3 — screws, 4 — locking ring, 5 — sled handrail.
The handle is secured in positions A and B with locks fastened to the handrails with screws. The shape of the seat of the bent part of the base ensures a snug fit of the handle upright against it; the seat and the handle upright are joined by a locking ring. The place where the locks are installed is determined by the required height of the handle crossbar.
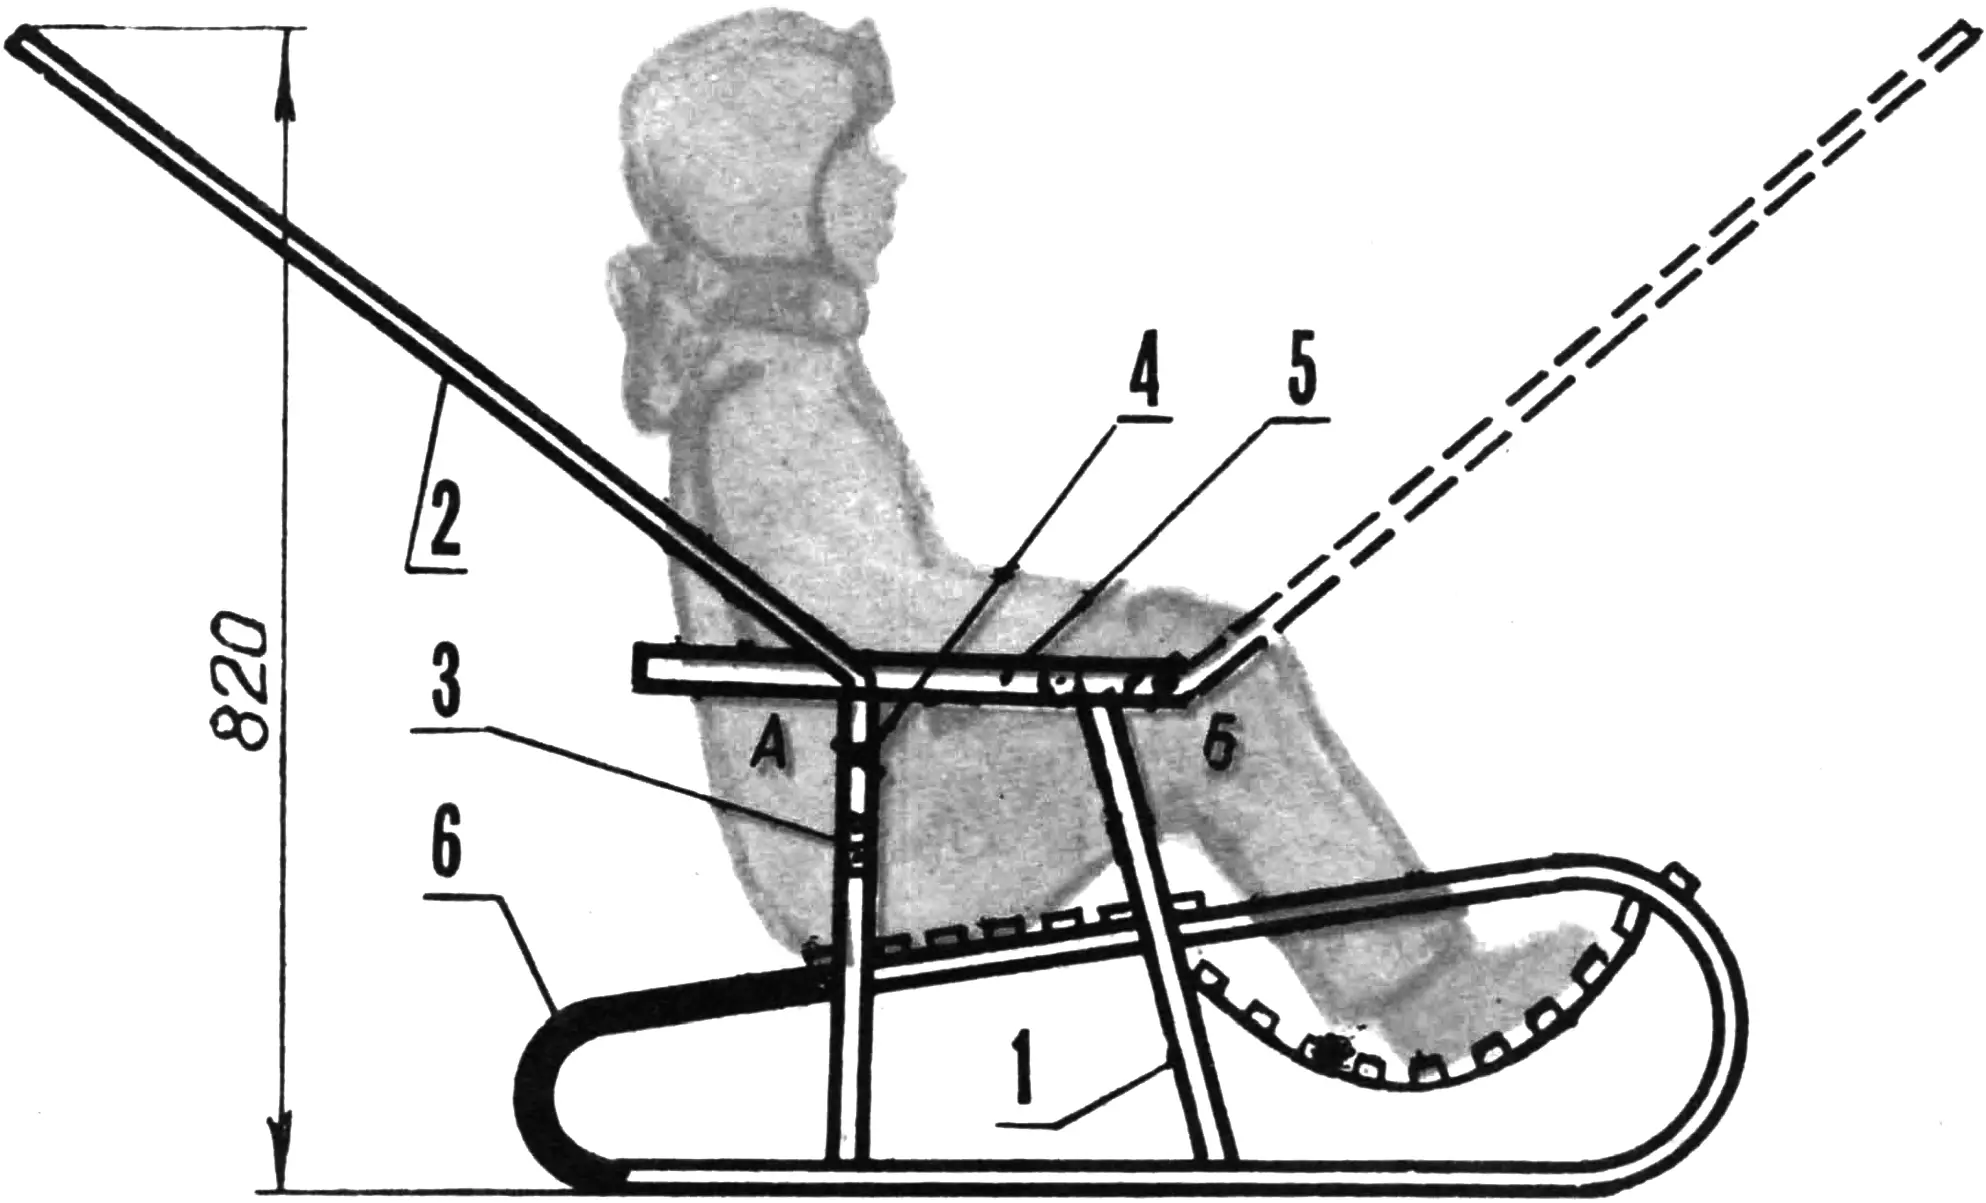
1 — front upright, 2 — handle, 3 — plate, 4 — wing screw, 5 — handrail, 6 — rear runner roundings; A — stock handle position, B — additional.
How to shift the sled lead from the “forward” position to the “backwards” position is clear from the sled design. It remains to note that such a sled is convenient to store, carry up stairs, and transport in an elevator and on city transit.
FOLDING SLED
Its special feature is a retractable backrest and handrails: the former becomes an extra seat grating, while the handrails widen the sled deck, and their crosspiece turns into a foot rest for riding while lying down.
The design is based on widely used duralumin sleds with longitudinal deck slats.
The sled backrest is a grate of wooden slats, the same as the deck planks. It is attached to the seat deck by an axle that passes through the ends of the planks across the full width of the sled. For the axle you can take wire 4–5 mm in diameter. It is best to drill the through hole for the axle in several steps: first with an ordinary drill from both sides of the deck to the length of the bit, and then with a homemade spoon bit made from wire of the required diameter, one end of which is peened and sharpened like a spoon drill. In the backrest slats it is simpler to make the axle holes before assembly.
The upper ends of the backrest slats are fastened with screws to a crossmember that can be made from a duralumin angle.
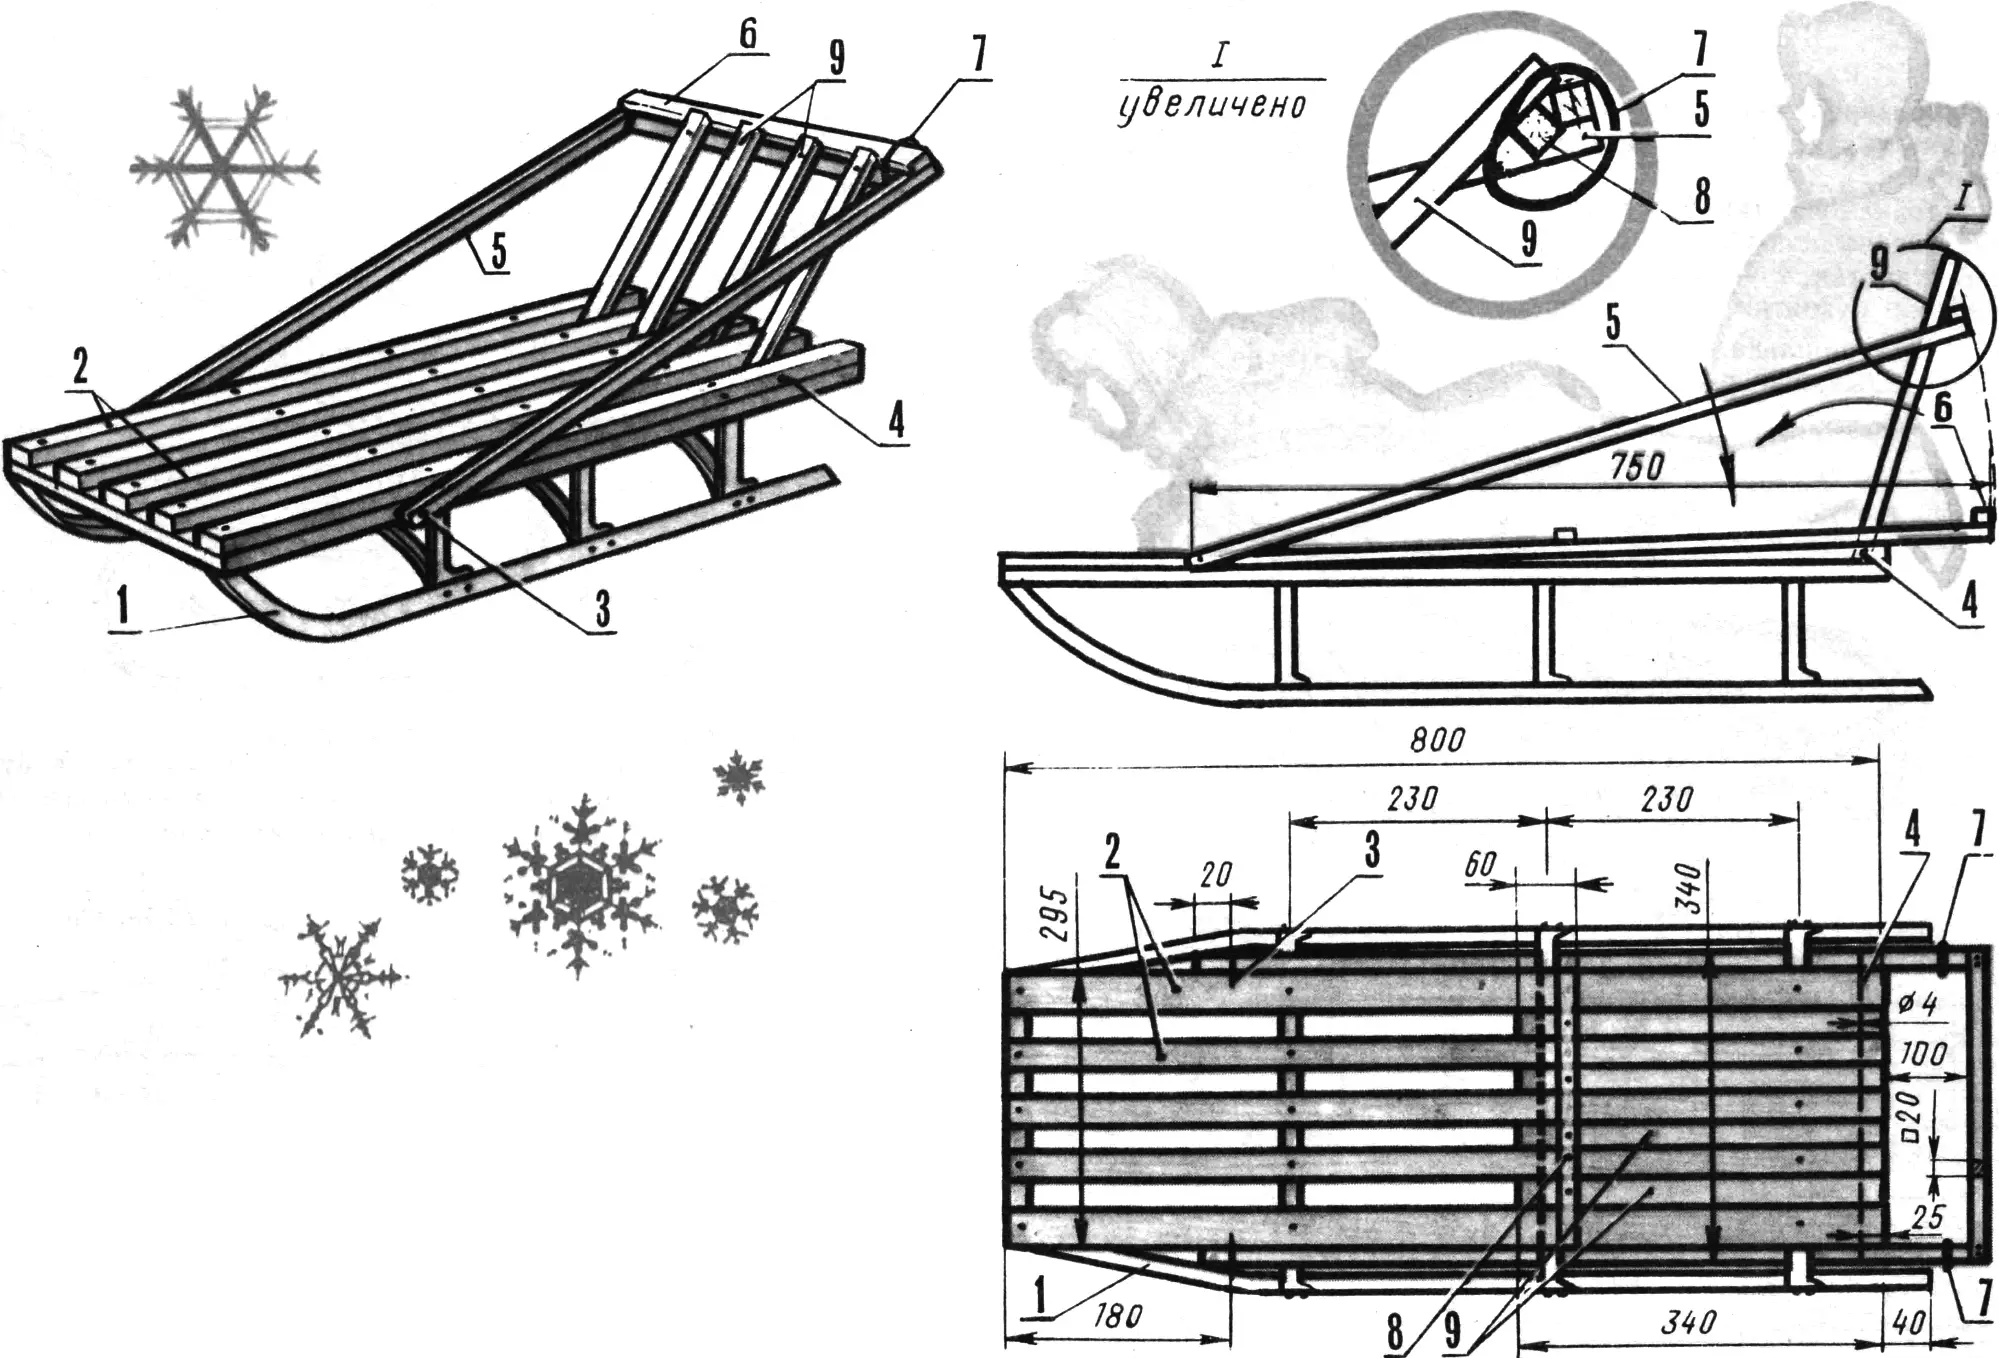
1 — base (from a production sled), 2 — deck planks, 3 — pivot axle of the U-shaped frame, 4 — stop axle, 5 — U-shaped frame handrail, 6 — crosspiece, 7 — locking ring (rubber), 8 — backrest crossmember, 9 — backrest planks.
The handrails are part of a U-shaped frame. The ends of the latter are attached to the side deck rails so that the frame can pivot in a vertical plane. For greater reliability and strength these deck rails are thickened. The fastening point on them is chosen so that the frame crosspiece stands 100…200 mm back from the ends of the sled.
In the sitting position the handrails and backrest of the sled are raised: the child then sits leaning against the backrest, with elbows resting on the upright-handrails.
The sled backrest and handrails are brought into this position as follows: the frame crosspiece is lowered onto the sled backrest crossmember, and clamping rings are slipped over them. Instead of such rings you can use ordinary straps, tying the U-shaped frame crosspiece to the backrest crossmember.
The sled is shifted into the lying-down riding position as follows. The clamping rings (to the left and right of the backrest) are slid onto the frame handrails; the backrest then drops onto the deck, and the U-shaped frame onto the projecting axle ends fitted with stops. The backrest rail then ends up flush with the sled deck.
Lying on the sled, the child braces their feet against the U-shaped frame crosspiece and holds onto the outer deck rails with their hands. This position is both comfortable and stable for them.
“M-K” 1’90, S. KOVALEV
Recommend to read
 NEVSKAYA “ARROW”
(SPEED CONTROL LINE MODEL CLASS 5.0 CM3). The name of the master of sports of international class Mykola Troneva from Leningrad familiar to automodellista. Since 1970, Nicolai permanent... GLIDER-GYROPLANE “BUMBLEBEE”
The design and construction of the "Bumblebee" creative team "Rise" was based on microalloy design V. Barkovsky, V. Vinitsky and Y. Rysuke described in "MK" (see: 1969, № 6, 1970, № 3,...
