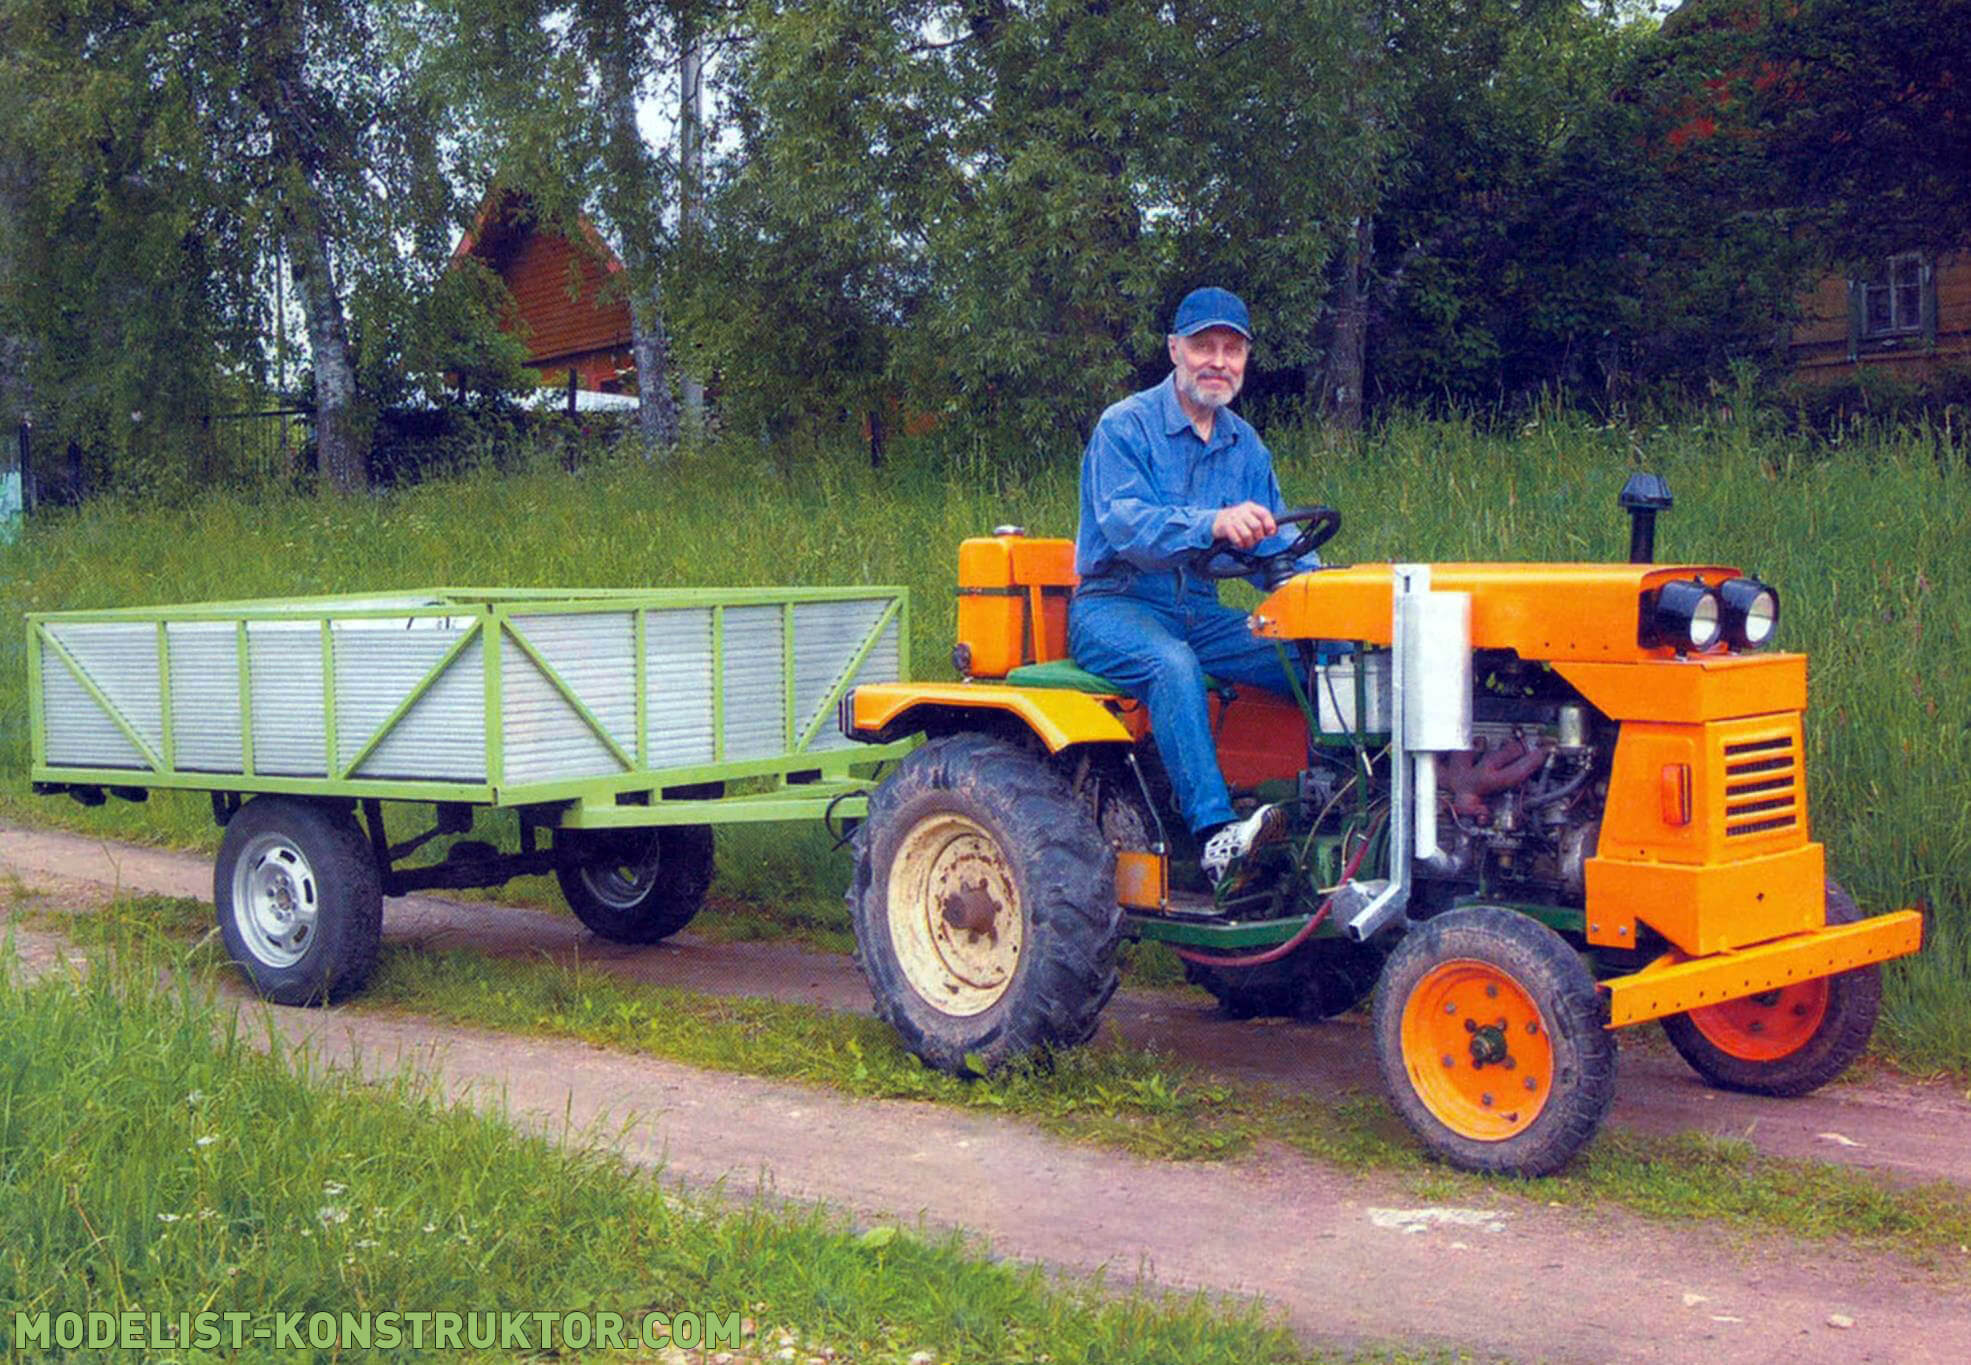
When the need arose for a trailer for transporting household goods, the problem of choice arose – which trailer to buy, fortunately there was this choice. But the difference in price was not very noticeable, although the price itself was quite high. In the end I thought – is it worth buying it at all? This device is not so complex that it would be impossible to make it yourself. And the money will be useful for something else. Of course, with such a trailer there is more hassle during registration, but the savings are worth it.
The trailer is two-wheeled, single-axle, with a payload of up to 1000 kg. Wheels with a landing diameter of 13″ are the same as those of previous editions of Lada and Moskvich cars. By the way, even the rear axle of the Lada was used as an axle (or rather a beam): the main gear with the differential was removed, and the axle shafts were left (their inner ends are installed in bearings 305). The hole, which was previously covered by the main gear shank, was plugged with a 2 mm thick steel sheet, attaching it to the beam with standard screws. The beam itself was turned 90° so that the convex protective cap of the crankcase was at the top, thus increasing the ground clearance.
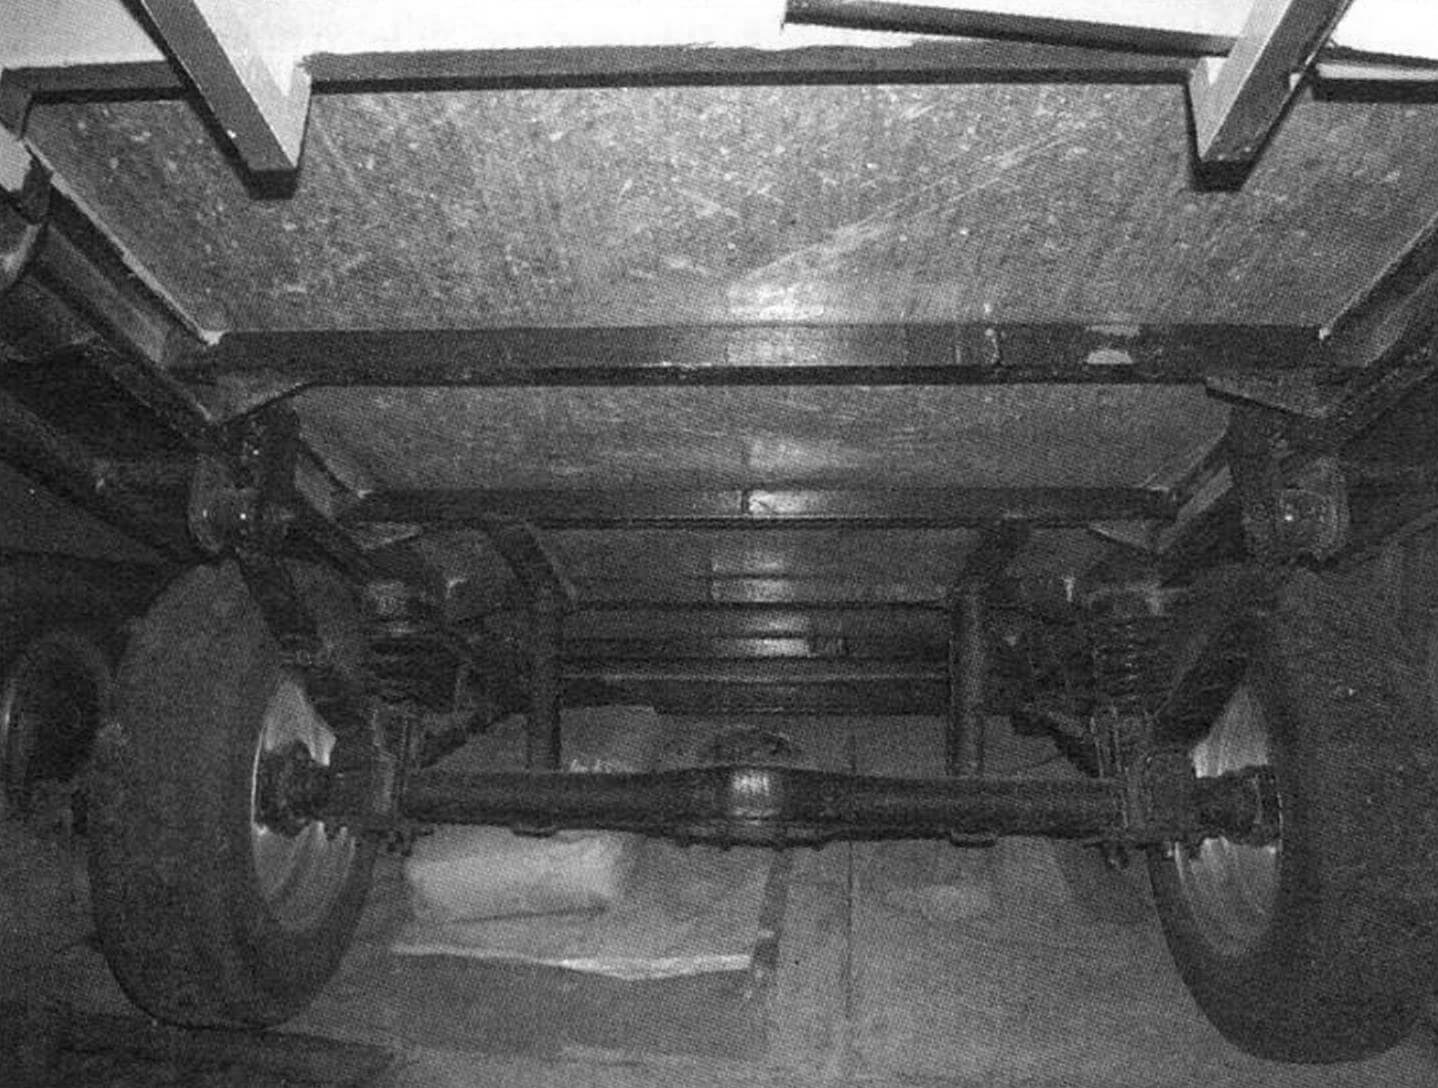
The trailer suspension is combined. In trucks, to “soften the ride” when running empty and to increase the load capacity, shock-absorbing pairs are installed in the suspension: springs with suspensions. In my trailer there is another pair: a spring and a spring from a Moskvich car. Moreover, the springs begin to work at full strength only when the springs can no longer withstand the load and sag greatly.
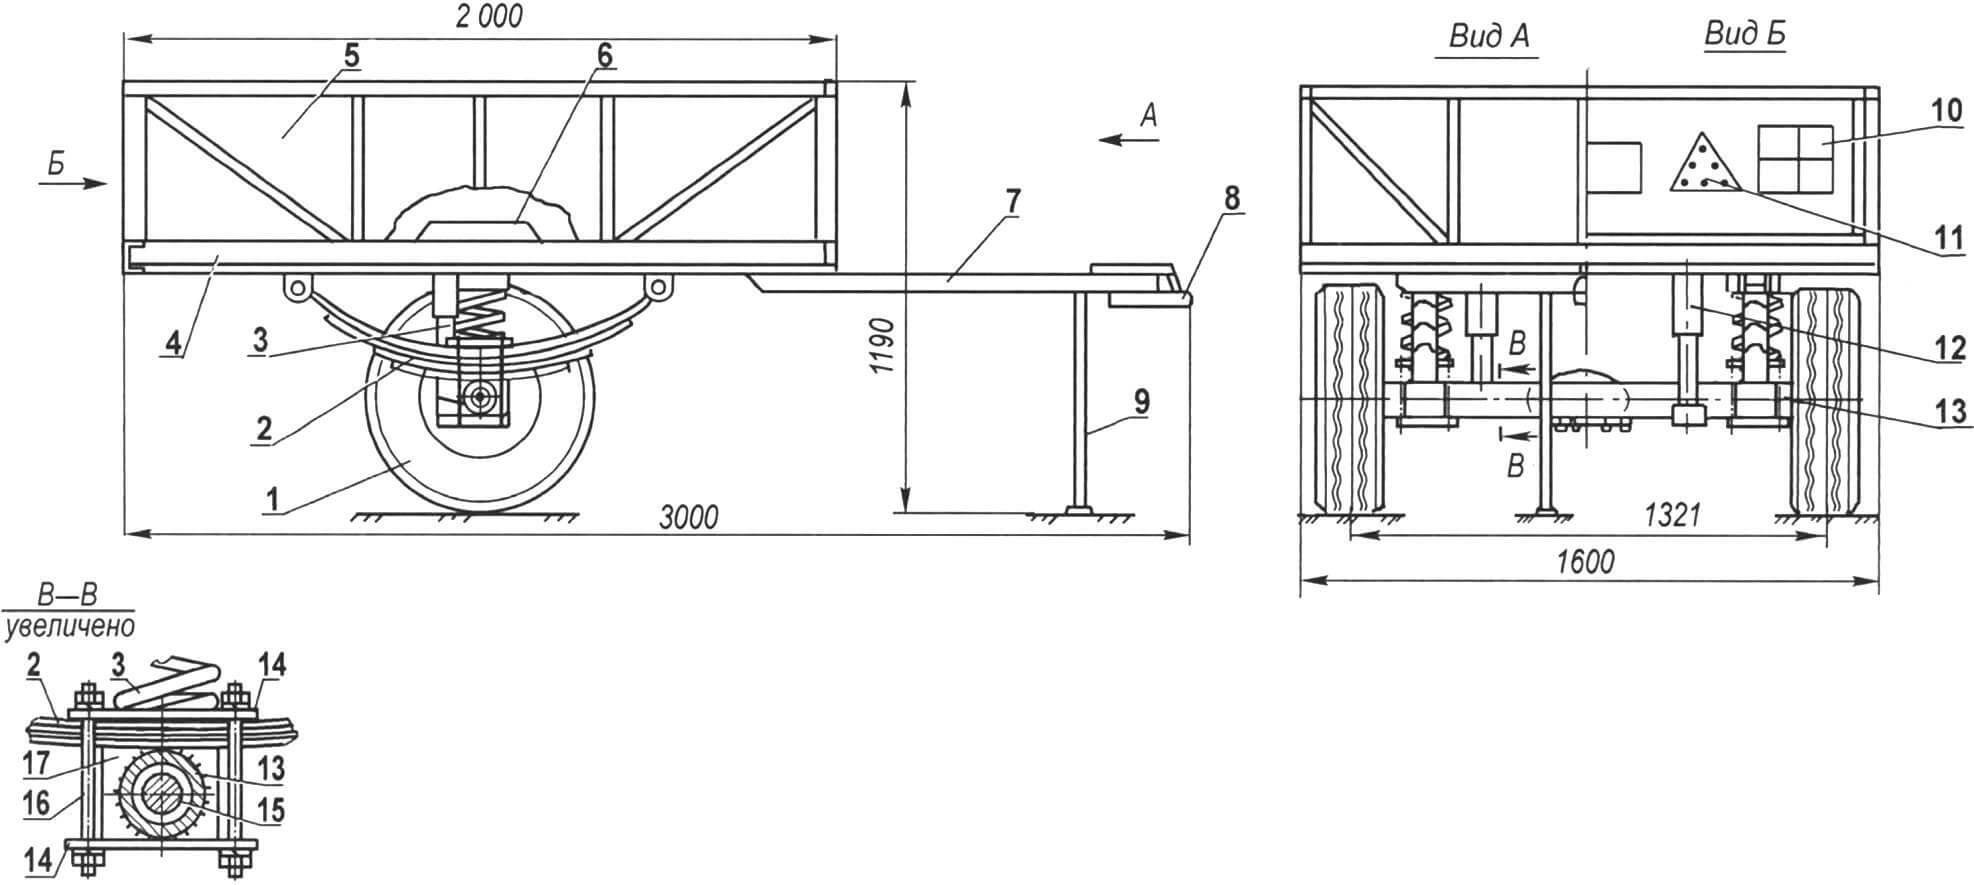
1 — wheel (from a Zhiguli car, 2 pcs.); 2 — spring (from the Moskvich car, 2 pcs.); 3 — spring (from the Moskvich car); 4 — body frame; 5 — body side trim (duralumin sheet s2); 6 — wheel niche in the body floor (steel sheet s1, 2 pcs.); 7 – drawbar; 8 — coupling device (industrial production); 9 — leg (steel pipe Ø16); 10 — signal light (2 pcs.); 11 — warning triangle (2 pcs.); 12 — shock absorber (from a Zhiguli car, 2 pcs.); 13 — beam (rear axle from a Zhiguli car); 14 — upper and lower plates (steel sheet s5, 4 pcs.); 15 — axle shaft (from a Zhiguli car, 2 pcs.); 16 — M12 stud with spring washers and nuts (8 sets); 17 — shoe (steel sheet s3, 2 pcs.)
To mount the springs, platform shoes are welded to the beam, and fastening is carried out with four M12 studs using two plates: one installed at the bottom of the shoe, and the other on top of the spring. The latter serves as a support for the spring, the upper part of which is fixed in a cup welded to the spar. The front ends of the springs are rigidly fixed through silent blocks in brackets, also welded to the side members. The rear ends are connected to the side members pivotally – through earrings.
To ensure a smooth ride of the trailer, the suspension is also equipped with Zhiguli shock absorbers. I used standard supports on the beam for them, but welded them in a different place.
The skeleton (skeleton) of the trailer body is a frame structure: it is formed by the strength elements of the bottom of the body and the side frames. The first are two spars made of stamped steel channel 80x40x3 mm. In the places where earrings and cups are installed, the channels are reinforced with overlays (not shown in the drawing), welded to the opposite edges of the shelves. Suspension attachment points are also welded (or bolted) to the side members: springs and springs.
Four cross members made of a 40×20 rectangular pipe are welded between the side members. The connections are reinforced with gussets made of 2 mm steel sheet (they are not shown in the drawing – they are clearly visible in the photo). Another pair of short longitudinal elements are welded between the two middle cross members – they serve to attach the upper shock absorber supports.
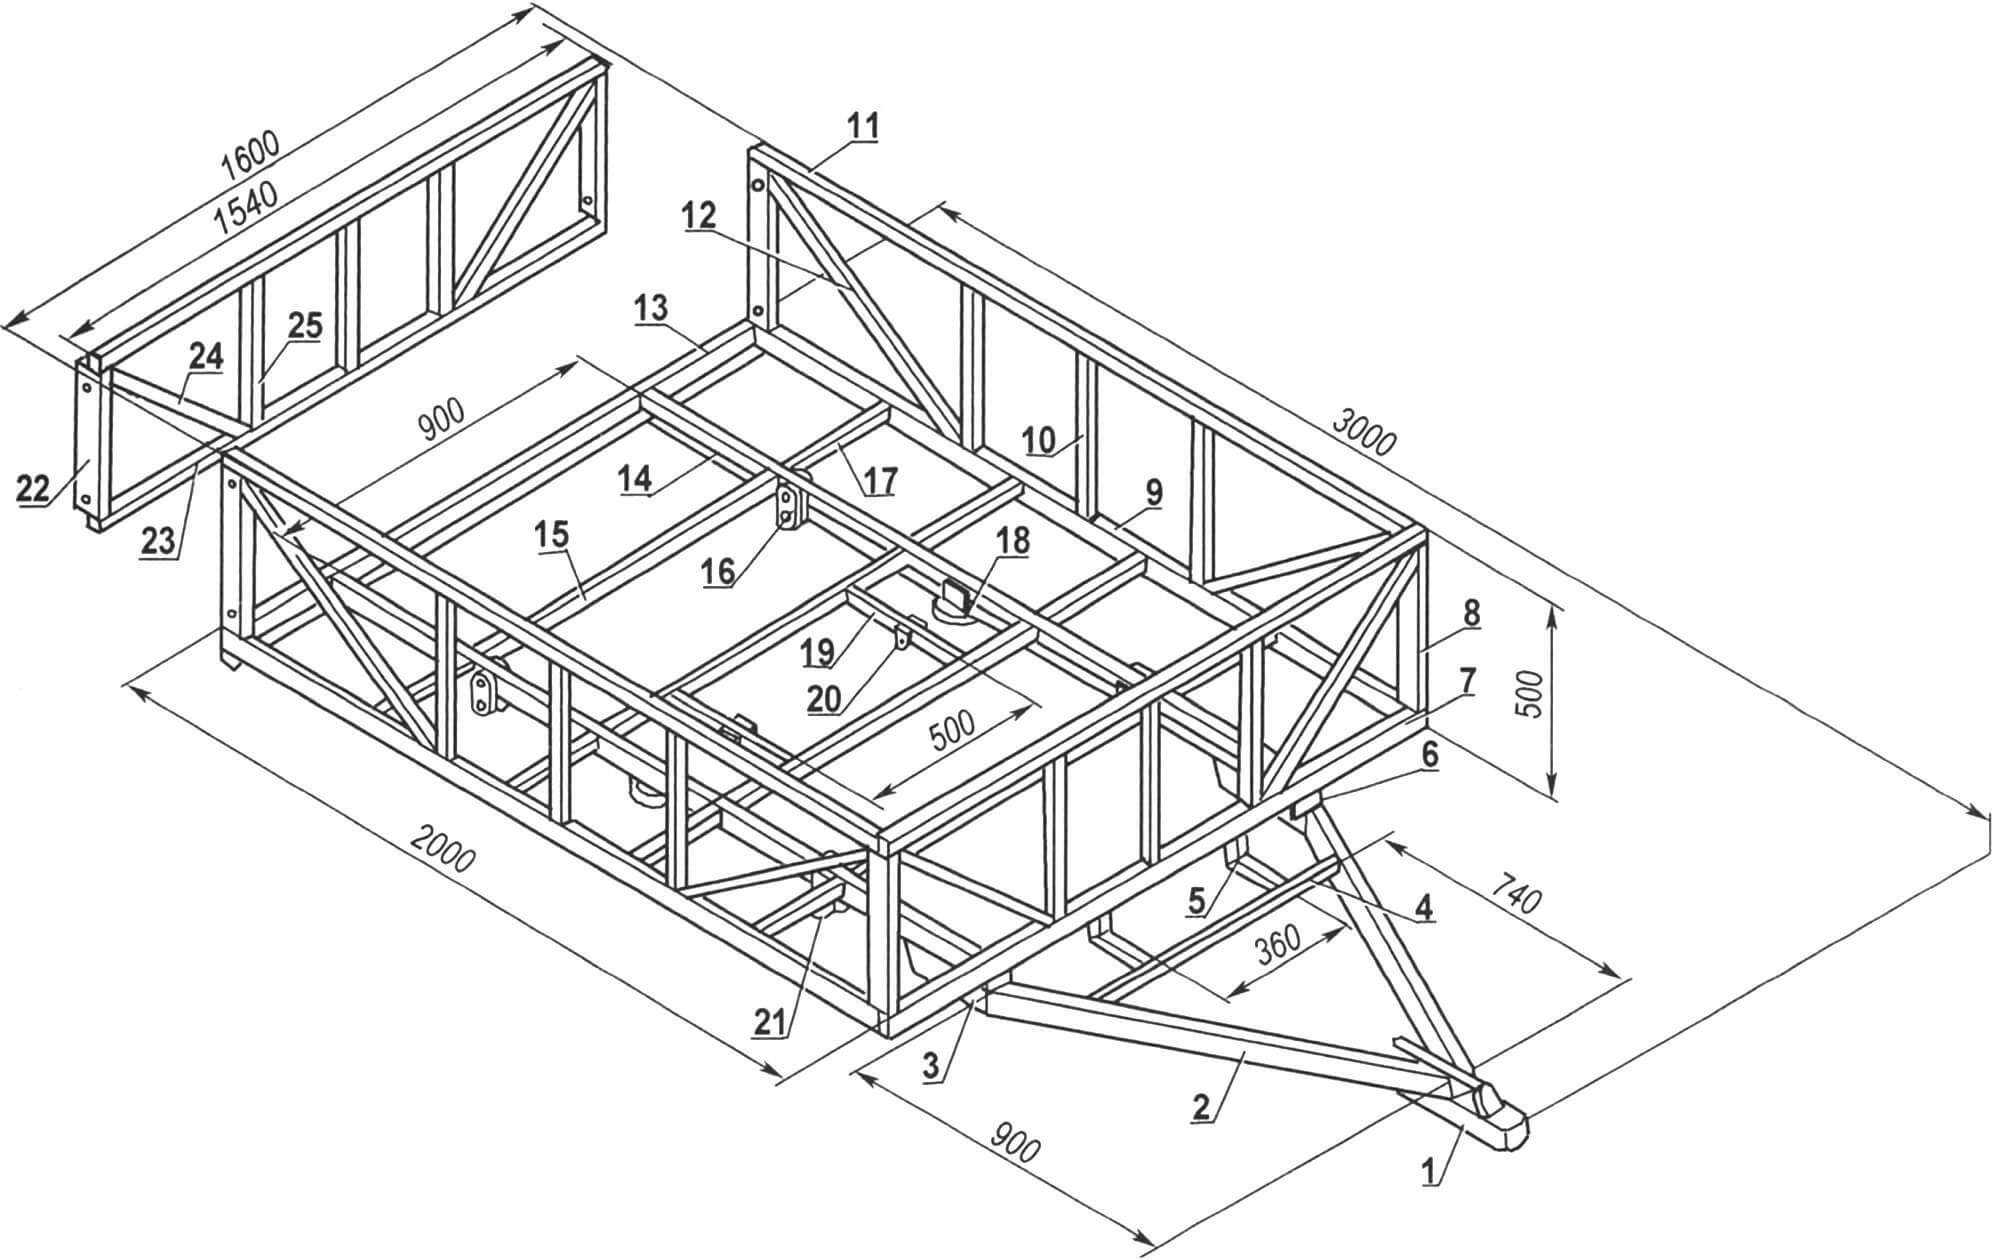
1 — locking device (industrial production); 2 — drawbar beam (pipe 50×25, 2 pcs.); 3 — end of the drawbar beam (pipe 50×25, 2 pcs.); 4 — drawbar cross member; 5 — spare wheel cradle (2 pcs.); 6 — overlay (steel sheet s3, 2 pcs.); 7 — front traverse (pipe 40×20); 8 — corner post of the side (pipe 40×20, 4 pcs.); 9 — longitudinal beam (pipe 40×20, 2 pcs.); 10 — row rack (9 pcs.); 11 — upper connection of the side (3 pcs.); 12 — corner post brace (6 pcs.); 13 — rear traverse (channel 80x40x3); 14 — spar (channel 80x40x3, 2 pcs.); 15 — bottom cross member (pipe 40×20, 4 pcs.); 16 — spring earring (steel sheet s5, 4 pcs.); 17 — side cross member of the bottom (8 pcs.); 18 — spring cup (from the Moskvich-412 car); 19 — shock absorber stop (2 pcs.); 20 — shock absorber mounting eye (steel sheet s5, 4 pcs.); 21 — spring bracket (steel sheet s5, 4 pcs.); 22 — side pillar of the rear side frame (pipe 40×20, 2 pcs.); 23 — rear side frame trim (2 pcs.); 24 — rear side strut (2 pcs.); 25 — tailgate pillar (3 pcs.)
Several more short cross members made of a 25×25 mm square pipe are welded to the side members on the outside. The free (outer) ends of the crossbars are connected by longitudinal beams (made of a rectangular pipe 40×20 mm), which are also the lower frames of the side boards, and the resulting gratings are the basis of the platforms that expand the bottom. Corner posts made of a 40×20 rectangular pipe, with struts (from a 25×25 pipe), are welded to the ends of the longitudinal elements (at the corners of the site), and between them are several row posts made of the same pipe as the struts. Along the perimeter (except for the rear side) the racks are connected at the top by strapping made of the same 25×25 mm pipe.
At the front side, the lower trim of the frame is the front traverse. The tailgate is folding and removable; it has a separate frame.
The drawbar is made of a steel rectangular pipe 50x25x3 in the form of acute angle beams, the ends of which are rigidly connected (by welding) to the side members through extensions at a distance of about 250 mm.
At the point where the rays of the drawbar converge, a coupling device is welded to it (it is industrially made – homemade devices are prohibited by technical requirements). Here, a leg is hingedly attached, on which the drawbar rests at “rest” and the electrical wiring connector for the rear signal lights mounted on the rear side (since this side is removable, there is another connector at the back under the bottom).
The bottom of the trailer is covered with galvanized steel sheet 1 mm thick. There are small niches with a height of 80 mm for the wheels.
All sides are sheathed with profiled duralumin sheets 2 mm thick.
The trailer was actually made to work in tandem with a Zhiguli car, and now its tractor is a mini tractor. But the trailer did not require any modifications – I just installed a car hitch with a ball on the tractor.
V. Kolyaskin
Recommend to read
 MODEL OF RIVER PASSENGER SHIP
River passenger ships — a very numerous class of vessels. Small flights of ships to last several hours. Passengers are protected from the weather and can relax in the soft comfortable...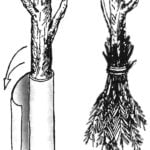 SHIELD FROM RABBITS
Winter in the gardens fruit trees often suffer from cleft raids — slash is not averse to eat their sweet crust. To protect trees can be simple but effective ways-for example by wrapping...
