 Iron refers to those appliances, which seem to all have long known… Inside the case, near the massive base (sole plate) heating element is a tungsten spiral. The warmth of her through the soles heats the tissue. It would seem that I can come up with is new? Is it just to try something to change the design. But already there are more than two dozen varieties of irons. There is even a separate 307-75 GOST, according to which domestic irons are produced with a power of 250, 400, 750 and 1000 W, with weight from 0.8 to 2.5 kg with a temperature of 60-90°, 100-130°, 160-200°. Moreover, the heating time ranges from 3 to 10 min. And whether you ever get the idea to stroke… light? Yes, it is light. All know how hard it is to turn out of the cartridge burning lamp with your bare hands: you can burn yourself. And what it is stronger, the more difficult the task. The culprit — the so-called heat radiation. That used iron a new type of photon (author’s certificate No. 538074).
Let’s start with the fact that sole he had not done as usual, of cast iron or aluminum, and glass. Over it is mounted a reflector. His focus is heat — heating the tungsten filament. The case of photonic iron sealed cavity with a heater filled with inert gas — a mixture of xenon and iodine vapor. Wait, when the Ironing surface will become hot, there is no need: fabric heats up due to radiant energy of a hot tungsten filament. And like a ray of sunshine brings the warmth without affecting the window glass, and glass photonic sole of the iron remains cold. So to iron them as soon as possible after inclusion in the network.
But to build this iron is not easy. So we offer to start a simplified design.
The basis is the ordinary electric iron brand a short at 375 watts so that its body could easily accommodate pivotal bulb КГ220-1000-3. The filament serves as a heat radiator (see illustration).
Using two M8 bolts with a length of 18 mm and nuts on the body of the iron set the clip handles and asbestos gasket from the reflector. The latest cut from aluminum foil and give it a concave shape.
The back side of the connector to one of the current collectors are attached two contact plates from brass or tinplate, thickness 0,25—0,3 mm, and on the other copper wire Ø 0,8—1 mm. From the other end it soldered to the same plate installed in the “nose” part of the iron on a ceramic insulator, for example, a trimmer capacitor PCs 4/15. It is attached to the housing by means of two screws or universal epoxy glue EAF. The two pairs of contact plates located at a distance of the length of the shaft of the lamp, and they and the wire should not touch the reflector.

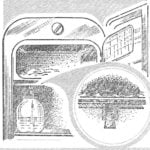
Design of photonic iron:
1 — pen, 2 — clip, 3 — collector, 4 — screw-lock, 5 — gon, 6 — contact plate-holders, 7 — nut collector, 8 — housing, 9 — sole, 10 — rod, light bulb, 11 — filament 12 — clip sole, 13 — lamp socket, 14 — blade, 15 — insulator, 16 — bolt, 17 — nut bracket, 18 — lens 19 — guide 20 — insulator 21 — reflector, 22 — a wire of PEV of 1.0, 23 — epoxy adhesive.
Install the lamp and making an adjustment: to achieve that the filament coincides with the focal axis of the reflector. If the adjustment is made correctly, the light flux density from the entire emitting surface is uniform.
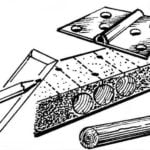
The sole is cut from window glass with a thickness of 3-6 mm, but better to do it from heat-resistant glass, for example, cover fire Cabinet gas stove. The iron put on a glass sheet and draw the outline with colored pencil. Then hold the cutter at the target curve and nallamala extra glass, gradually separate the sole from the workpiece. Now it remains only to smooth sharp edges on a grinding wheel.
Ready sole fastened by means of brackets and two angles, are located at its corners. Three clamps made of sheet steel 1 mm thick and glued with epoxy glue (see section on AA and BB in the figure). Thus, the movement of the soles relative to the housing is possible only forward and down. And to move it enough to slightly loosen screwed into the corners of the screws.
Now our iron lacking only the on indicator lamp. The bolt clamps the handle drill a through hole of Ø 8 mm and insert the light guide is machined from transparent Plexiglas, are carefully polished rod. At the top of the flare to bolt Ø 9 mm and paste there the lens from colored Plexiglas. If the filament of the lamp falls into the “sight” of the light guide, Indy| cator flashes a bright light.
Photonic iron works well in the infrared region of light emission, the lamp should be lit with “nadoela”. The role of the damping resistor in the circuit of the appliance performs diode Д231 included with the lamp consistently. With the help of the autotransformer or thyristor speed controller the temperature of the filament can be changed within wide limits.
KURIHIN V., candidate of technical Sciences, Kaliningrad, Moscow region.


