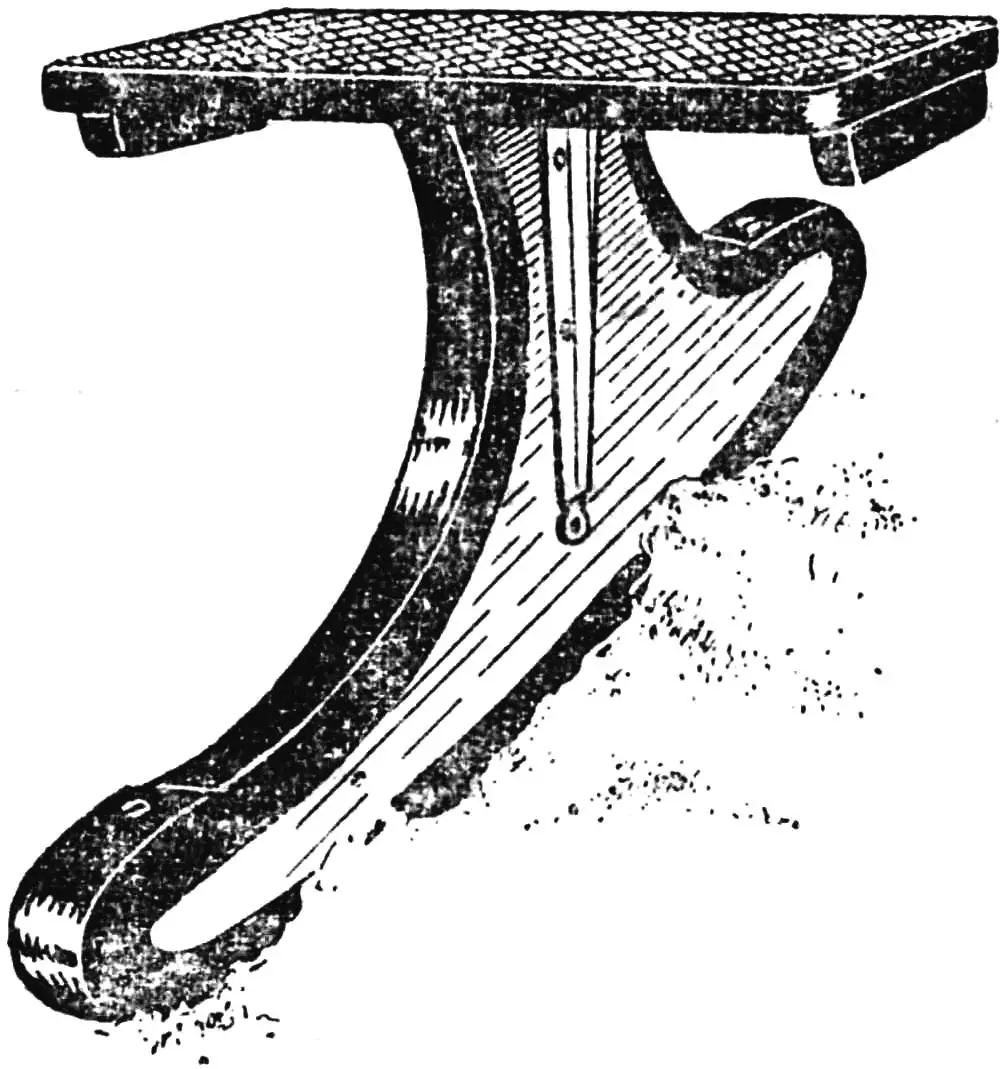
that we invite you to build are quite safe and stable, despite having a single runner.
The basis of the design is a spruce or pine board measuring 40X300X650 mm. It is even better to take several boards 30—35 mm thick, joint them to each other and glue them together, applying plywood cheeks (4—6 mm thick) on both sides.
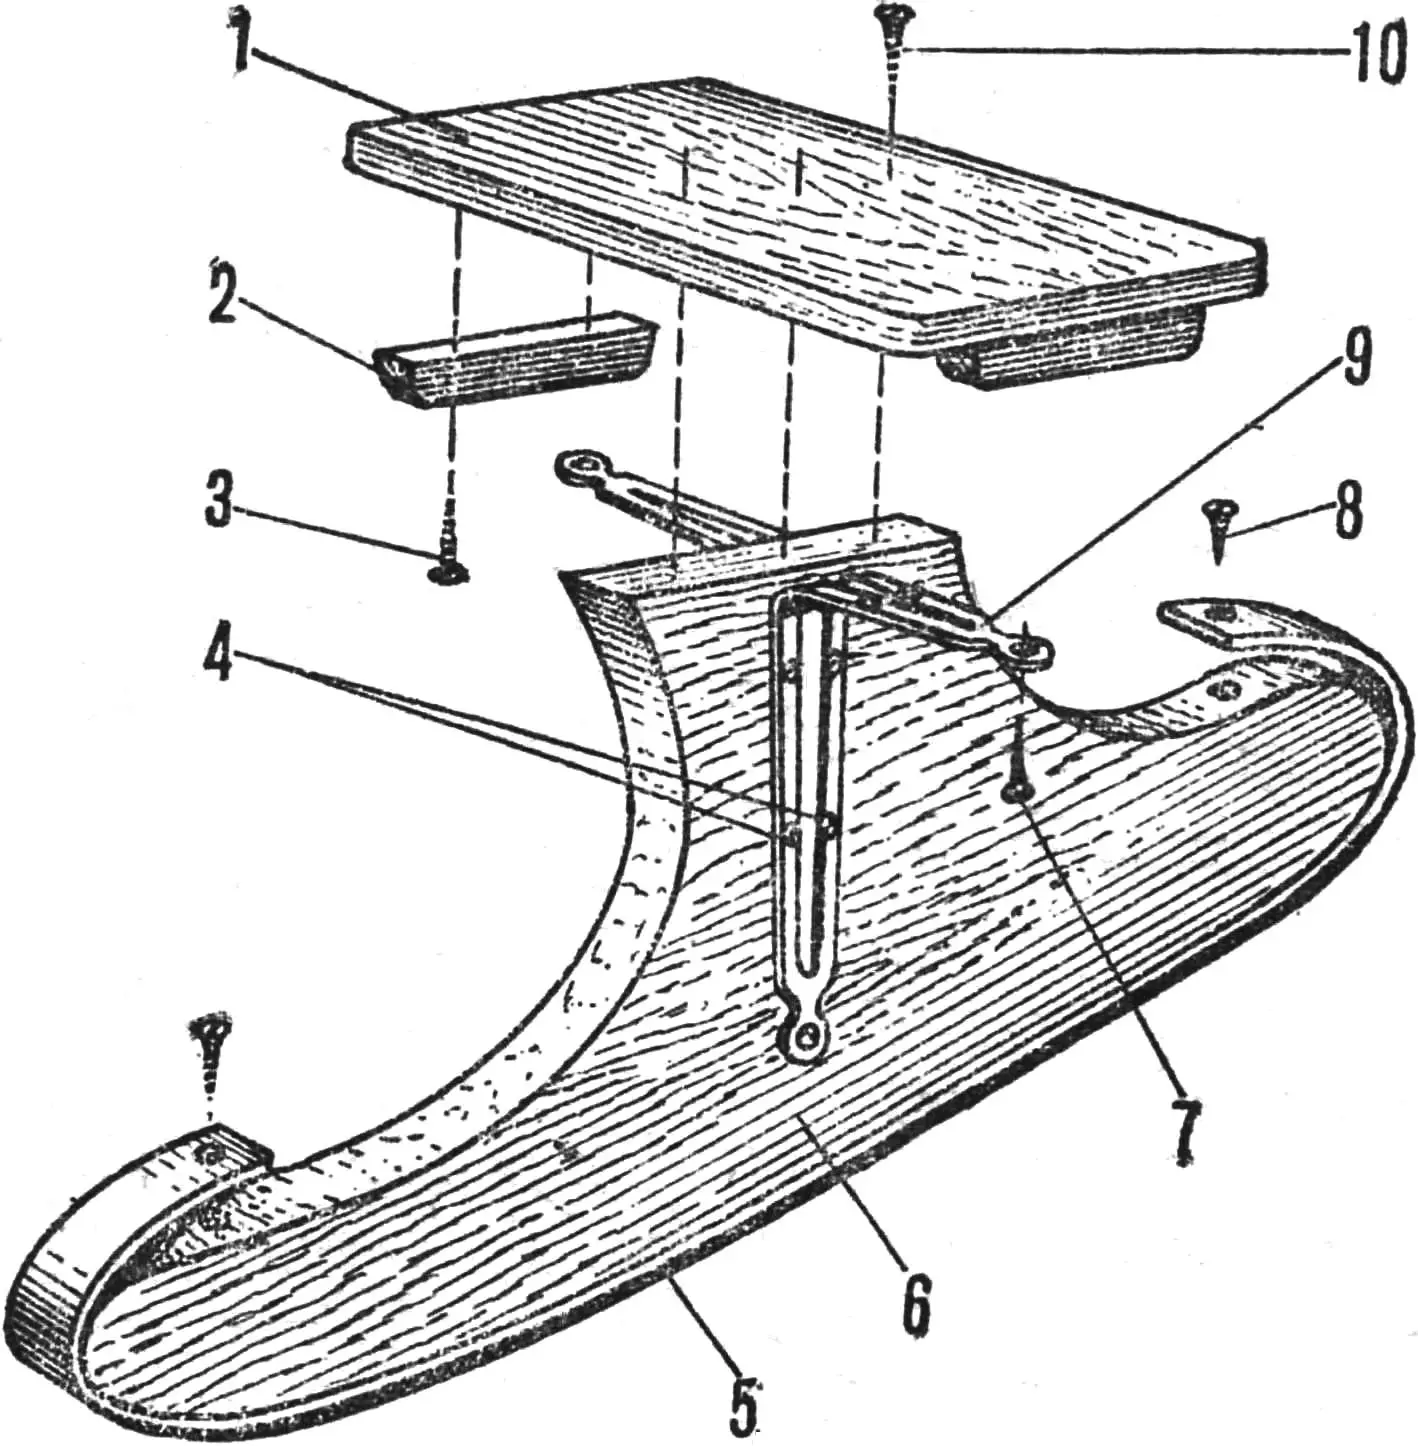
1 — seat (plywood 15X200X375 mm), 2 — handle, 3, 4, 7, 8, 10 — screws, 5 — shoeing (steel strip 1.5X40X900 mm), 6 — runner, 9 — brackets (steel strips S = 3 mm, 15X200 mm)
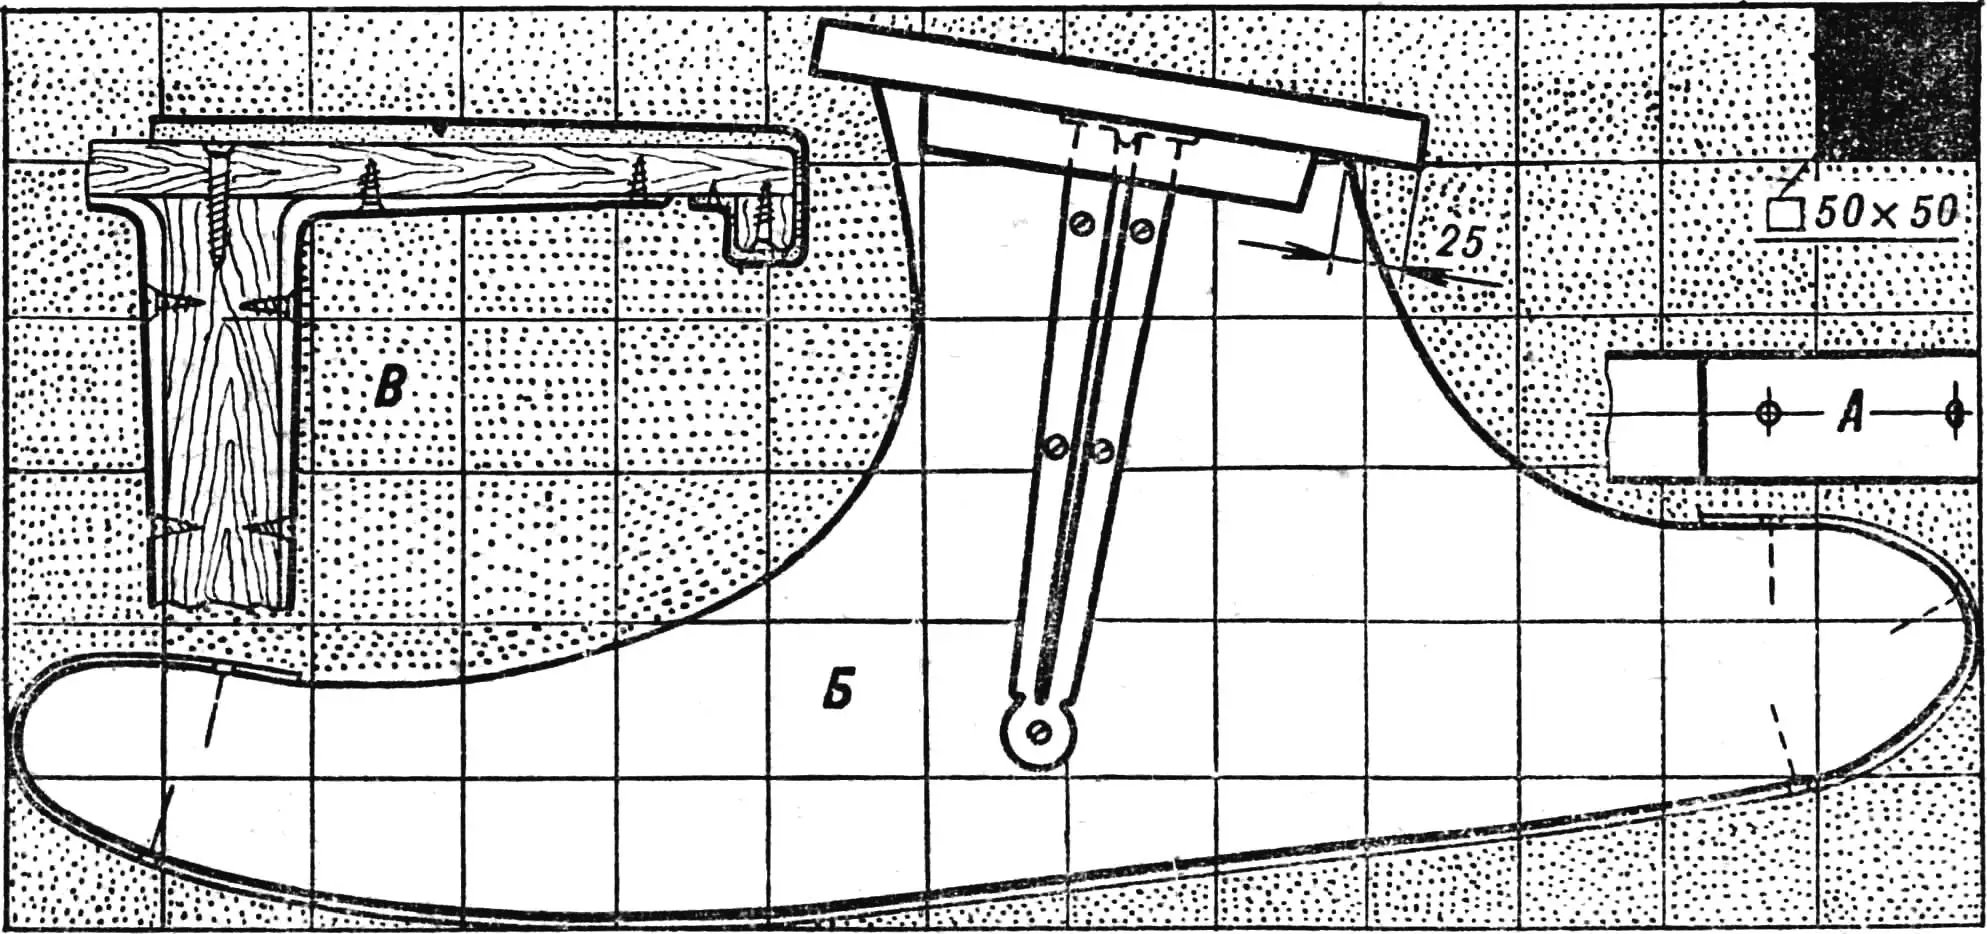
On the runner blank (Fig. 2), draw a grid with a square side of 50 mm and carefully transfer the runner outline onto it. Cut out the part with a jigsaw and clean up the edges.
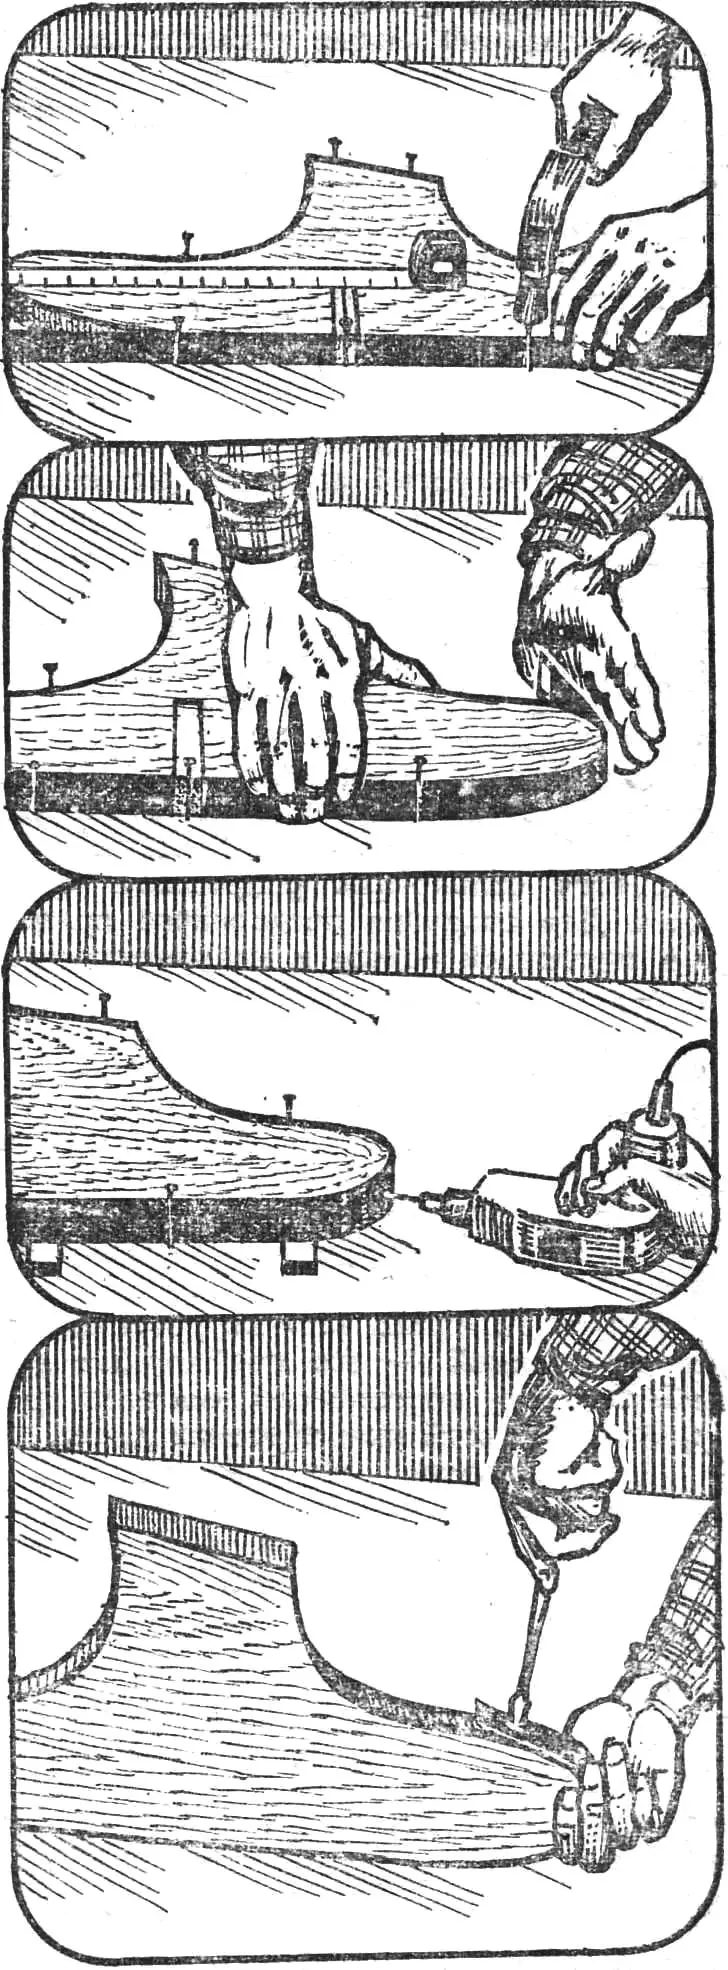
The runner shoeing is a steel strip 1.5X40X900 mm. The center of the strip should coincide with a point 325 mm from the nose of the sleds. To seat the shoeing firmly in place, use the following method (Fig. 3). Secure the runner on the workbench (this can be done with ordinary nails driven along the outline of the blank); the shoeing should fit tightly against the base. Next, drill five holes in the shoeing to match the screws you have (Ø 4—5 mm) and countersink them. Drive the screws starting from the middle outward to the left and right, bending the strip as you go. The sharp edges of the shoeing should be rounded and thoroughly cleaned.
Cut the seat from a plywood sheet 15—18 mm thick and clean the ends. Fasten the covering — artificial leather with a foam pad — with furniture nails. The seat is attached to the runner with four screws: two directly into the runner and two into brackets bent from steel strip. Handles — two wooden bars 20X20X125 mm — are screwed to the underside of the seat.
“M-K” 1’80, based on materials from Popular Mechanics magazine, USA
Recommend to read
 Jewelry box
Of course, it is not a safe: it does not need to be built into the wall and the spot disguised by hanging a painting, as often shown in films and what becomes fashionable in the homes of... Energy is for nothing
Water, wind and sun are the most accessible and inexhaustible sources of energy that nature gives to humans. It is no coincidence that in recent years they have again received the closest...
