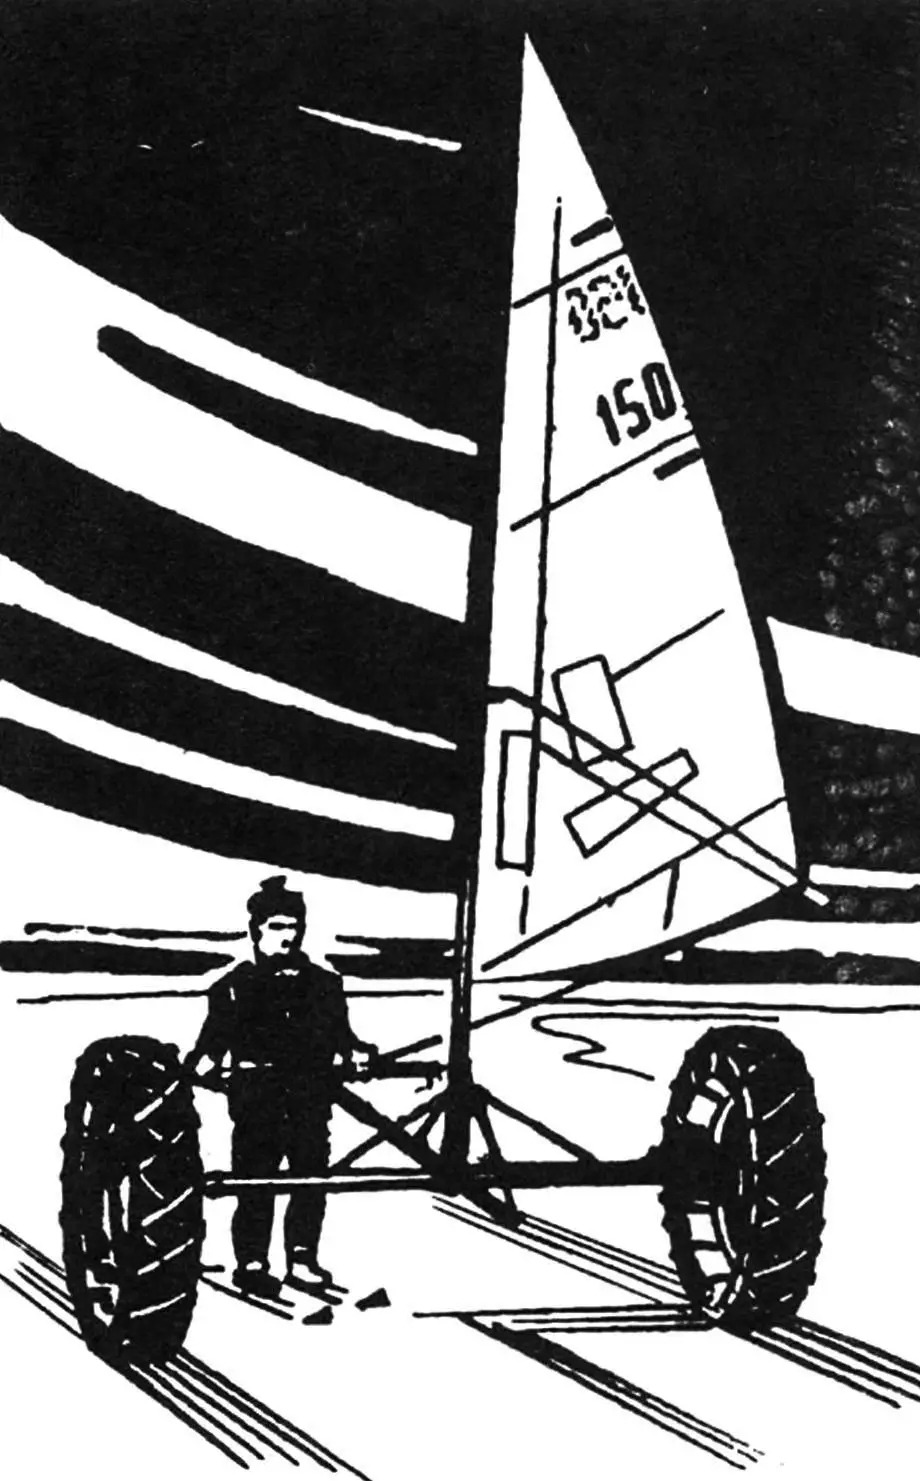
When setting off on a long journey, a skier typically relies only on their own strength. However, it’s quite possible to call on the wind for help by building a sailing tug for this purpose.
Assembling such a tug is quite simple, using rigging from a sailboard — a mast, wishbone boom, and sail with a set of battens. However, all of this can be made independently.
It’s most convenient to start work with the wheels, having first selected a pair of inner tubes from a truck or wheeled tractor — their dimensions will determine the size of the wheel hubs and rims.
The hub is a section of steel pipe with an external diameter of about 40 mm, to which two flanges are welded — steel disks with a diameter of about 200 mm and thickness of 3 mm — and into which sliding bearings (bronze, fluoroplastic, or textolite bushings) are pressed.
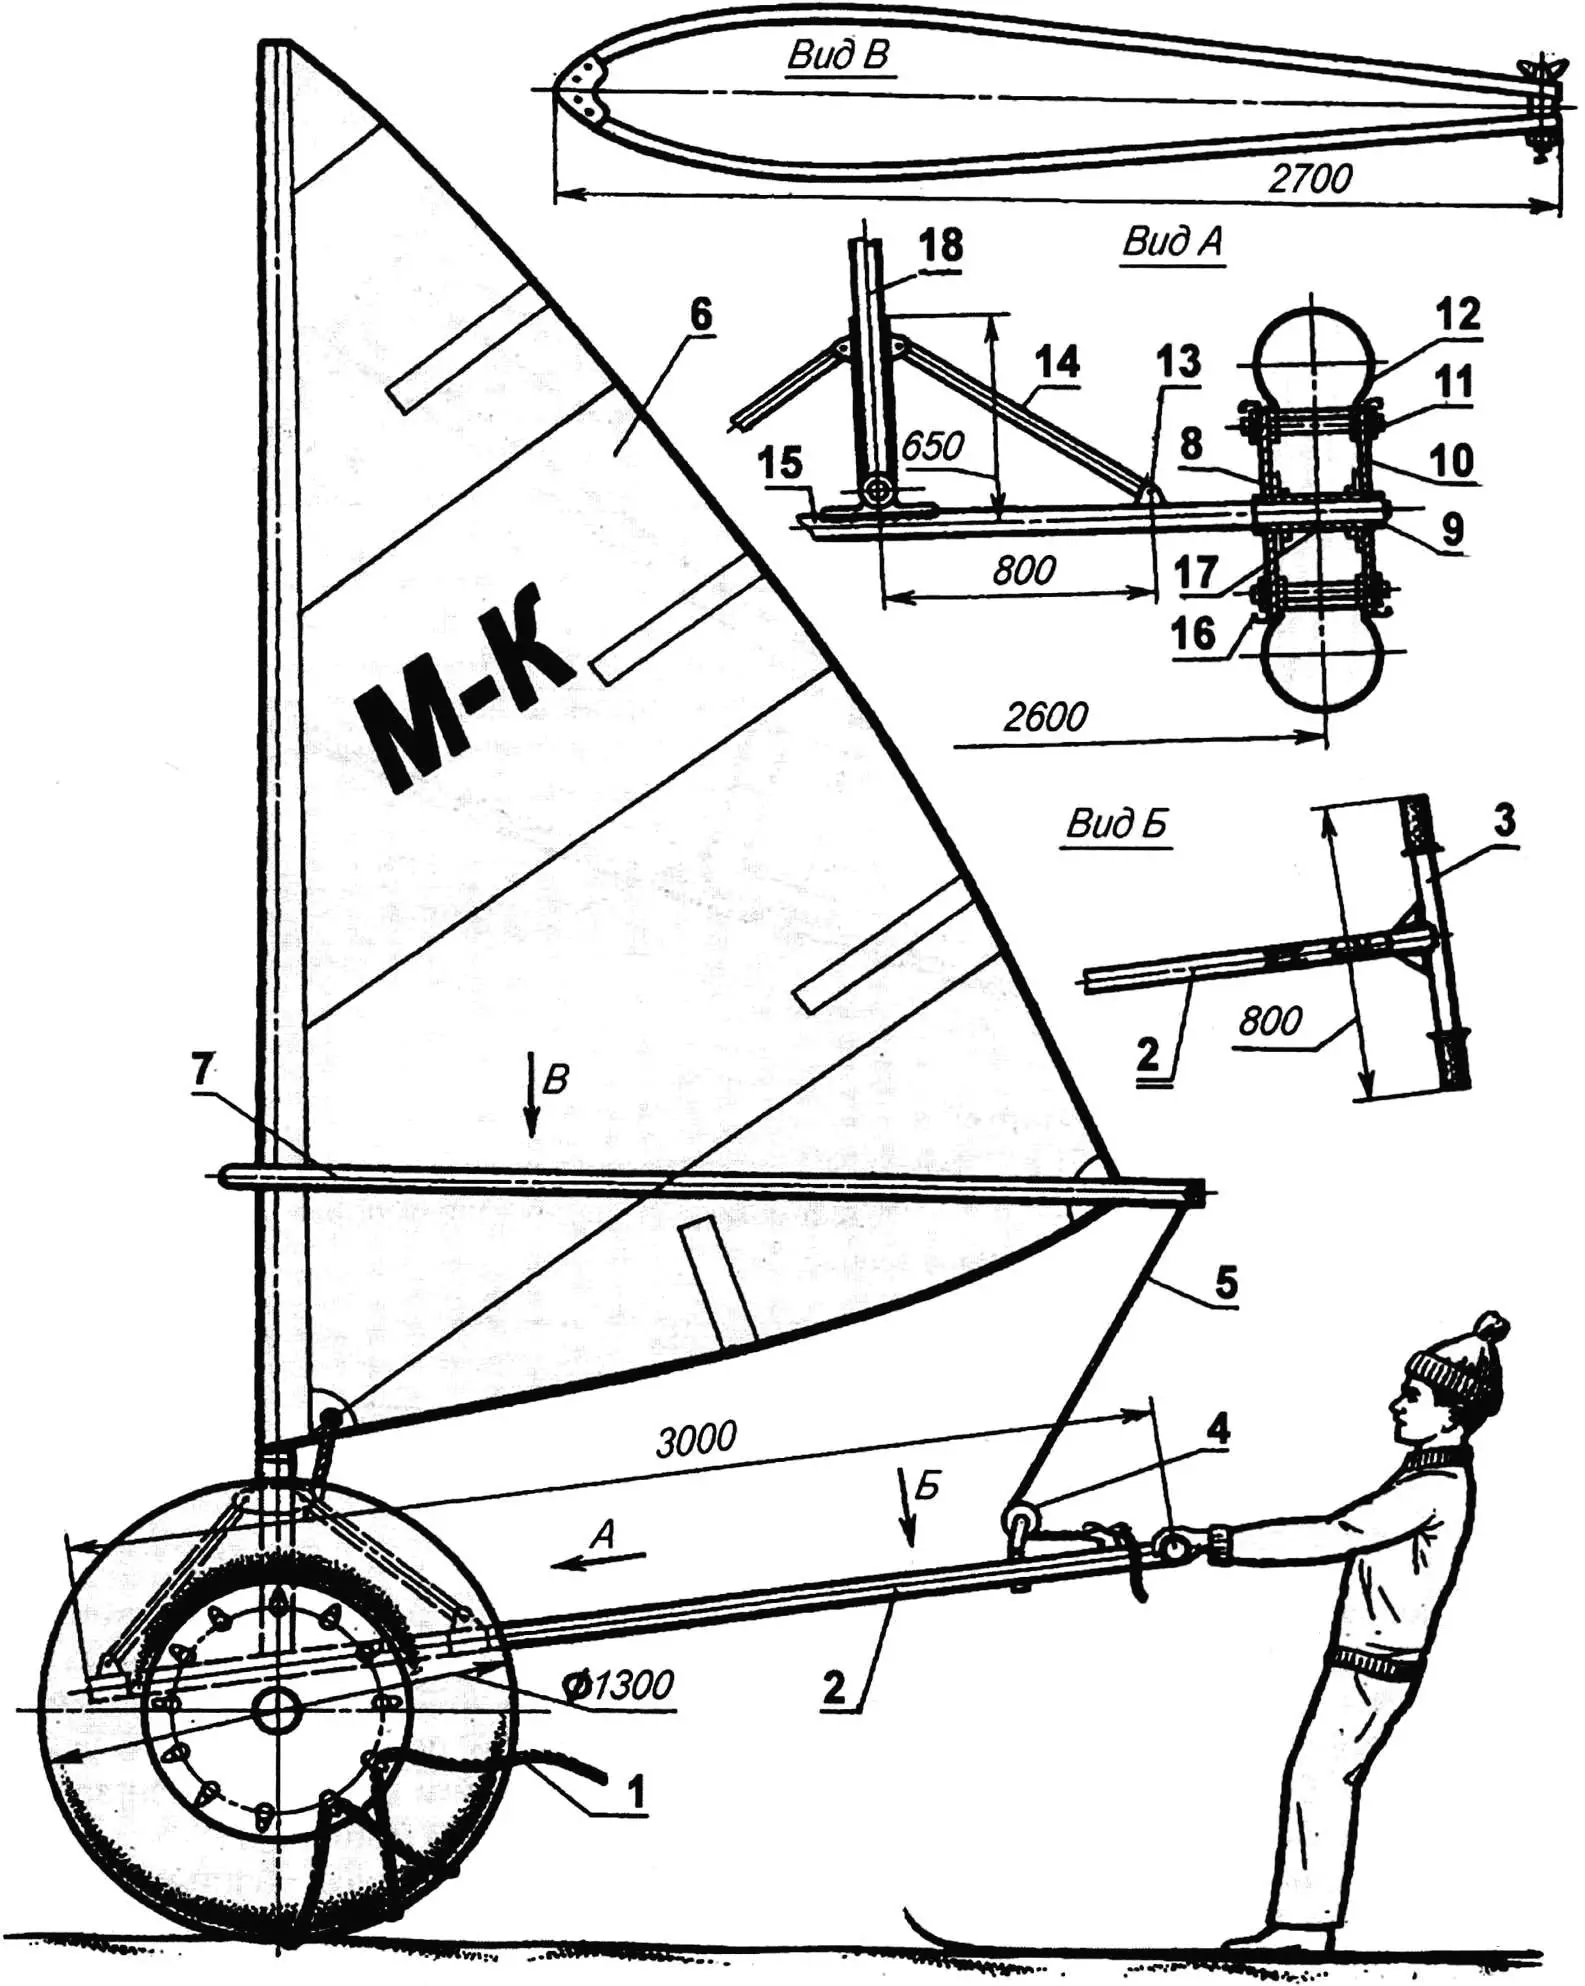
1 — nylon cord for securing the inner tube on the wheel; 2 — drawbar; 3 — handle; 4 — block on swivel; 5 — sheet; 6 — sail (area 4.8 sq.m.); 7 — wishbone boom; 8 — wheel hub flange; 9 — sliding bearing; 10 — wheel rim; 11 — tie with nuts and washers; 12 — tire-inner tube; 13 — fork; 14 — strut; 15 — axle; 16 — hook; 17 — wheel hub; 18 — mast
The wheel rims are cut from plywood 8 — 10 mm thick; their diameter depends on the inner diameter of the inner tube. The rims are fastened to the hub flanges with M6 bolts with nuts and washers, and joined together using long threaded studs with M8 thread, nuts and washers. To secure the inner tube on the outside of the wheel, hooks bent from a steel strip 2.5 mm thick are placed under the nuts instead of washers.
It’s most convenient to install the inner tube in three stages. First, the inner tube is stretched onto the wheel and slightly inflated, then it’s laced to the hooks with a nylon rope, and only after that it’s fully inflated. An inner tube installed in this way holds perfectly on the wheel.
The tug’s wheels rotate on half-axles, which are threaded studs fixed in the axle — a duralumin or thin-walled steel pipe with an external diameter of about 40 mm. The half-axles are secured using a textolite or even wooden bushing clamped between two nuts.
In the middle of the axle, perpendicular to it, a drawbar is mounted, made from a pipe (thin-walled steel or duralumin) with a diameter of about 30 mm. Steel pipes are best joined by electric or gas welding using plates (shown in the drawings), while duralumin ones — using U-bolts (steel threaded studs bent in the shape of the letter U) and duralumin plates with holes.
At the junction of the axle and drawbar, a mast step is installed — a section of pipe secured using four tubular struts (pipes with an external diameter of 18 — 20 mm).
The mast is easiest, of course, to take ready-made — from a sailboard (windsurfer), which can be purchased at a sports store together with the sail and wishbone boom. However, a good mast can also be made from a thin-walled duralumin pipe with an external diameter of about 40 mm. A wooden mast can also be planed, selecting a straight (without knots and cross-grain) pine block as a blank. The lower diameter of a wooden mast should be about 55 mm, the upper — about 25 mm.
A sail for the tug is not difficult to cut and sew independently from Dacron or Mylar. Dense pillow ticking, nylon, as well as any dense non-porous synthetic fabric will work. Some enthusiasts glue quite durable sails from polyethylene film, joining sail elements with adhesive tape-scotch, reinforcing the joints with a zigzag stitch on a regular sewing machine.
Sail making begins with constructing a full-size sail plan. First, the main triangle (marked on the drawing with letters ABC) is laid out. From the tack corner of the sail (angle A), a perpendicular is dropped to the leech and parallel to it, the remaining seam lines are drawn. Note that if the width of your fabric doesn’t match that shown on the drawing (panels 1100 mm wide are shown), the seam placement and their number will be different.
On the main triangle — on the luff, leech, and foot — the “roach” values are marked, and smooth curves are drawn through three points on each side of the sail.
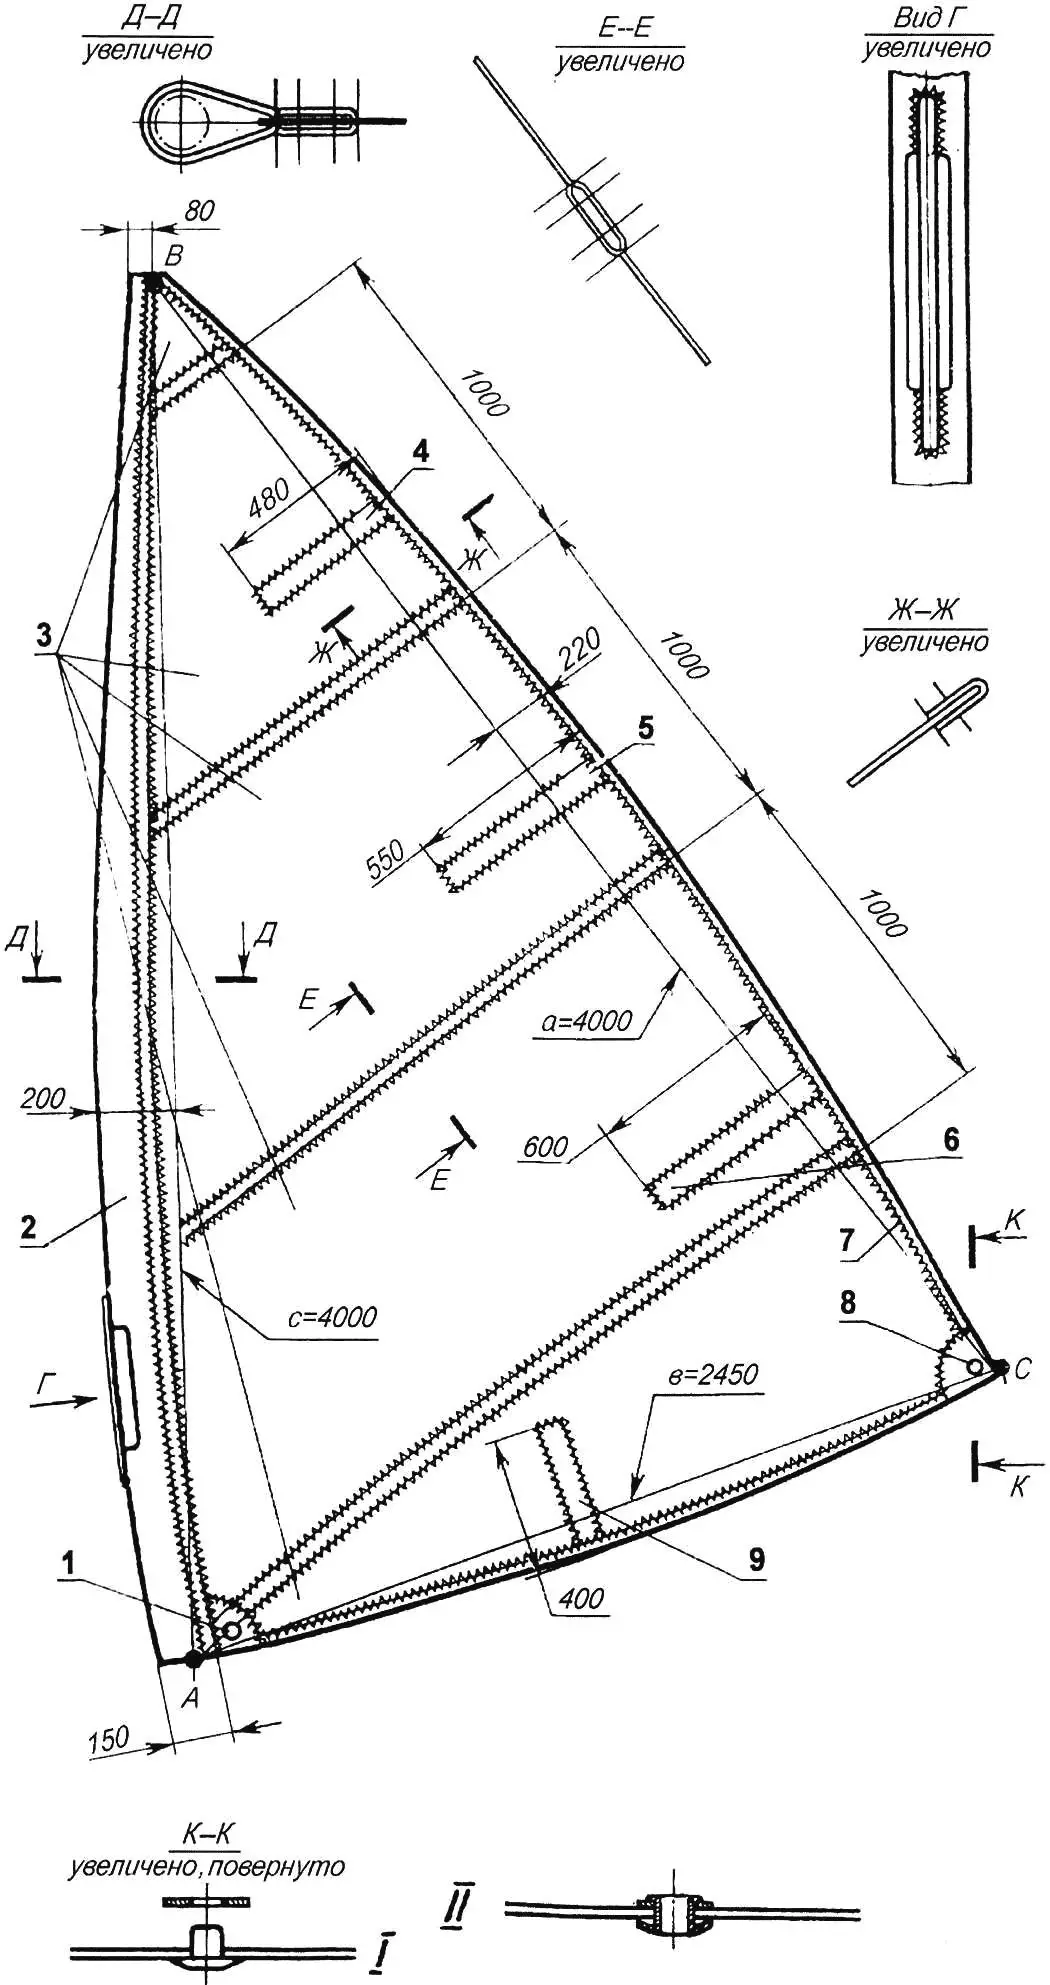
1,8 — grommets; 2 — luff sleeve; 3 — sail panels; 4,5,6,9 — batten pockets; 7 — leech. I and II — grommet installation stages
Panels are cut from the fabric, laid out according to the plan, and basted or, better yet, joined with glue (rubber or “Moment”), after which they’re sewn on a sewing machine with a zigzag stitch. Then the blank is trimmed according to the plan, the leech and foot are edged with tape or nylon ribbon, and a so-called luff sleeve is sewn to the luff, with which the sail is secured to the mast. Batten pockets are sewn on the side of the foot and leech, into which flexible wooden or plastic plates 2 mm thick and 50 mm wide are inserted, allowing the “roach” shape to be maintained.
The tack and clew corners of the sail are reinforced with fabric patches and grommets are installed on them — copper or brass bushings through which luff and leech lines are passed. Instead of grommets, small rings can be sewn into the sail and holes cut inside each.
And one more element of the sailing rig — the wishbone boom. It can be made from duralumin pipes 20 — 22 mm in diameter, joining them using a pair of duralumin plates. In the rear part of the tube, they’re connected with a bolt with a wing nut.
It’s easiest to rig the sailing tug by tilting it forward. First, the sail is hoisted on the mast, the wishbone is installed and secured with a nylon line, then the sail is “set” using the luff and leech lines at the clew and tack corners. It remains to insert the battens into the batten pockets, secure one end of the sheet to the wishbone, and pass the second through a block installed on a swivel at the rear of the drawbar — and you can set off.
For the first outing, it makes sense to choose a day when a fresh, not too strong wind is blowing. The tug should be positioned so that the wind blows from the side or from the side-rear — sailors call this position of a sailboat relative to the wind direction a beam reach. Now you should adjust the sheet until the sail stops luffing, push off harder, taking two or three steps — and forward.
Mastering the sailing tug is not difficult. Well, if an unexpected gust of wind creates a dangerous situation, it’s enough to release the tug’s handle — it will immediately capsize forward with the mast and stop.
«Modelist-Konstruktor» № 12’2010
Recommend to read
 FOR ANY SOIL
Thanks to the "Modeller-designer" I'm still at school became interested in technical creativity. Three-wheeled all-terrain vehicle is one of my latest designs. It used the engine from a... In a single pass
In one of the issues of previous years, your magazine published a note — “Again — a dowel”. It should be said that the suggested versions of a metal combined dowel are rather complex to...
