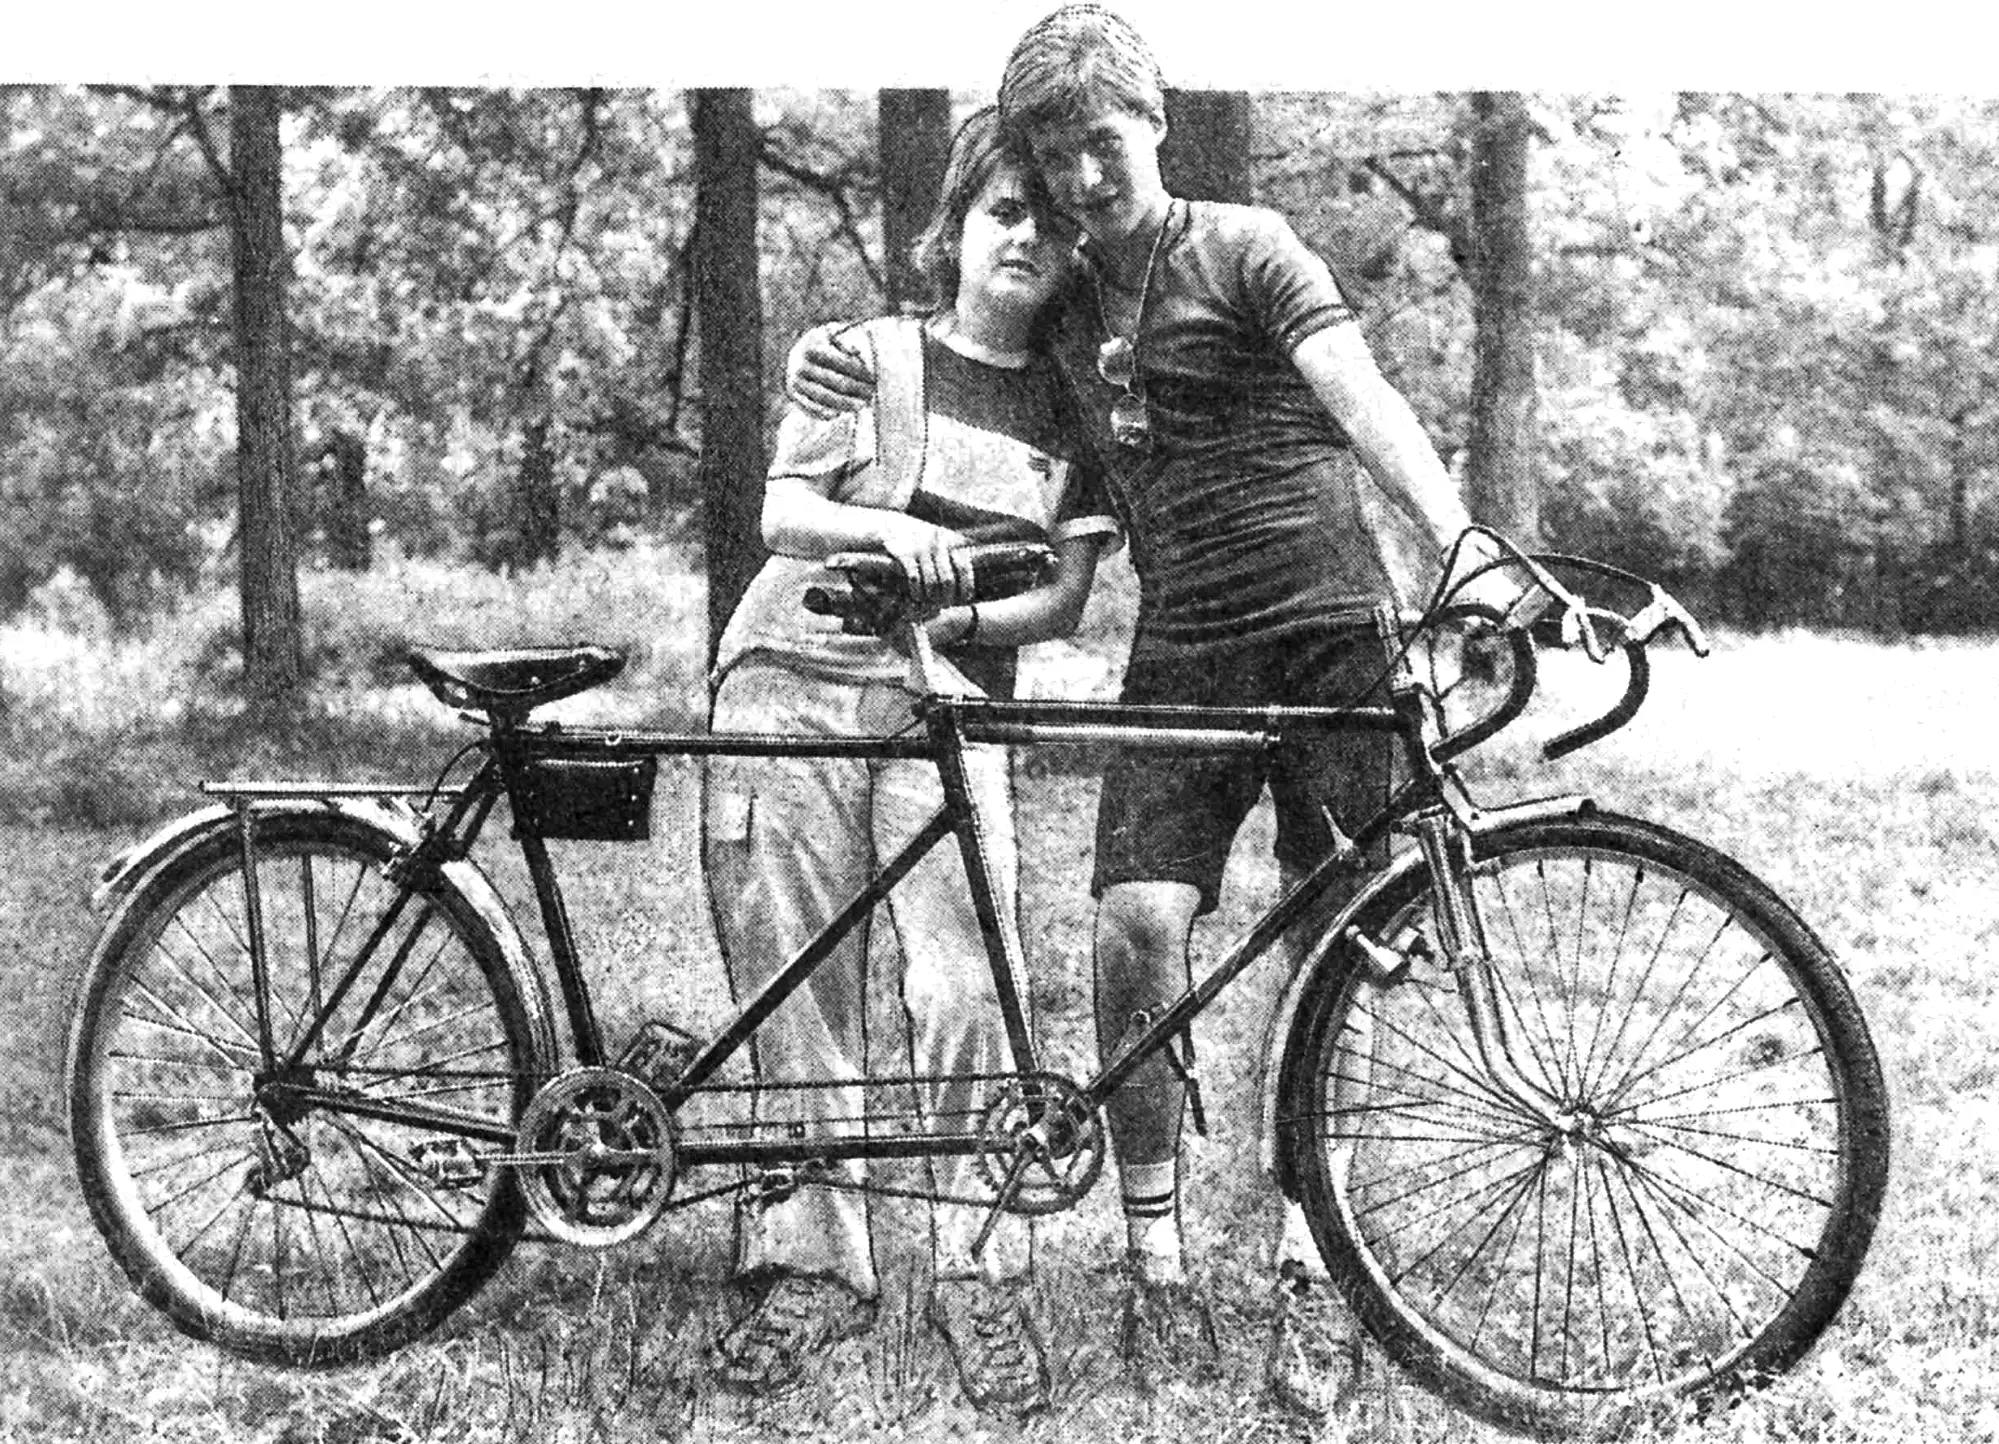
For many years I have been a regular subscriber to “M-K” and find in it a great deal that is interesting and useful. I hope my experience will also be of use to other readers: I want to share my thoughts and practical recommendations on making and operating a tandem bicycle. I built such a machine myself five years ago and have already covered more than one thousand kilometers on it.
So, first about the advantages of a two-seater bicycle. First, it allows riding at high speed, comparable to the speed achieved by racing bicycles. Second, a tandem is convenient when two people of different strength ride together: each can turn the pedals with the effort they are used to, and automatically the stronger rider “pulls” the weaker one. This is one of the advantages that makes it possible to recommend such bicycles for tourism, especially family tourism. And having a lead rider in the pair who keeps the steering in their hands reduces risk and psychological tension when moving on roads with heavy traffic.
But “there is no such thing as a free lunch”: a tandem also has some drawbacks. These are lower maneuverability, a longer braking distance, poorer cross-country ability on uneven, bumpy terrain, and harder riding alone because of the greater weight of the joined machine. Therefore, before taking up tools and starting to make a “long” bicycle, think about the purposes and possibilities of its use and whether you have a place to store it. If you decide that you need a tandem, I suggest you take a closer look at my version, although there may be many solutions.
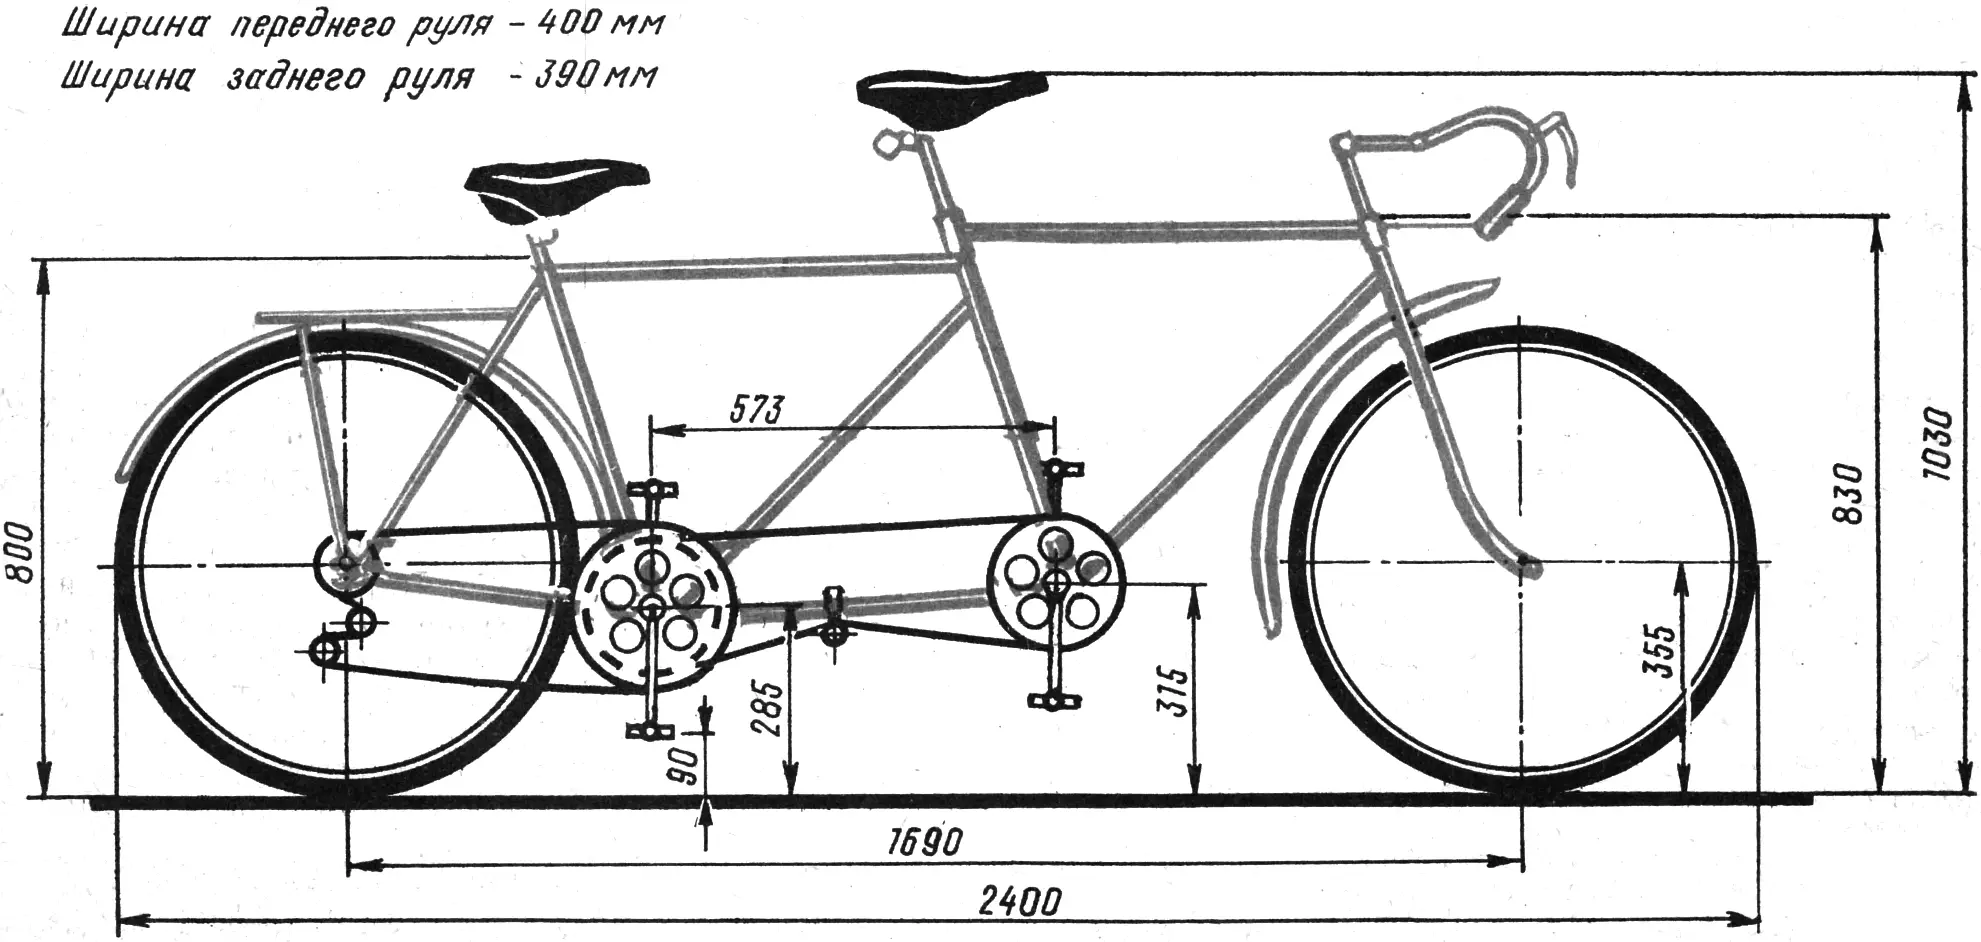
The frame of my bicycle, as can be seen in the photographs, is welded from two frames of “Sputnik” sports bicycles. Its dimensions allow it to enter a standard freight elevator without removing the wheels, and a passenger elevator without the front wheel. Using frames from road bicycles rules out using a passenger elevator. I also advise against buying frames from racing machines, because there will almost certainly be difficulties with fitting 40X622 wheels. And since the loads are quite high, it is desirable to fit a fork with thicker blades.
The frame can be made in various ways. Based on my capabilities, I chose the following. The chainstay is sawn off the front frame. The rear fork of the second frame remains without any changes (this, by the way, is one of the advantages, because if necessary — for example, in the event of an irreparable breakdown on a long trip — you can use a hacksaw to convert the tandem into an ordinary single bicycle in literally half an hour).
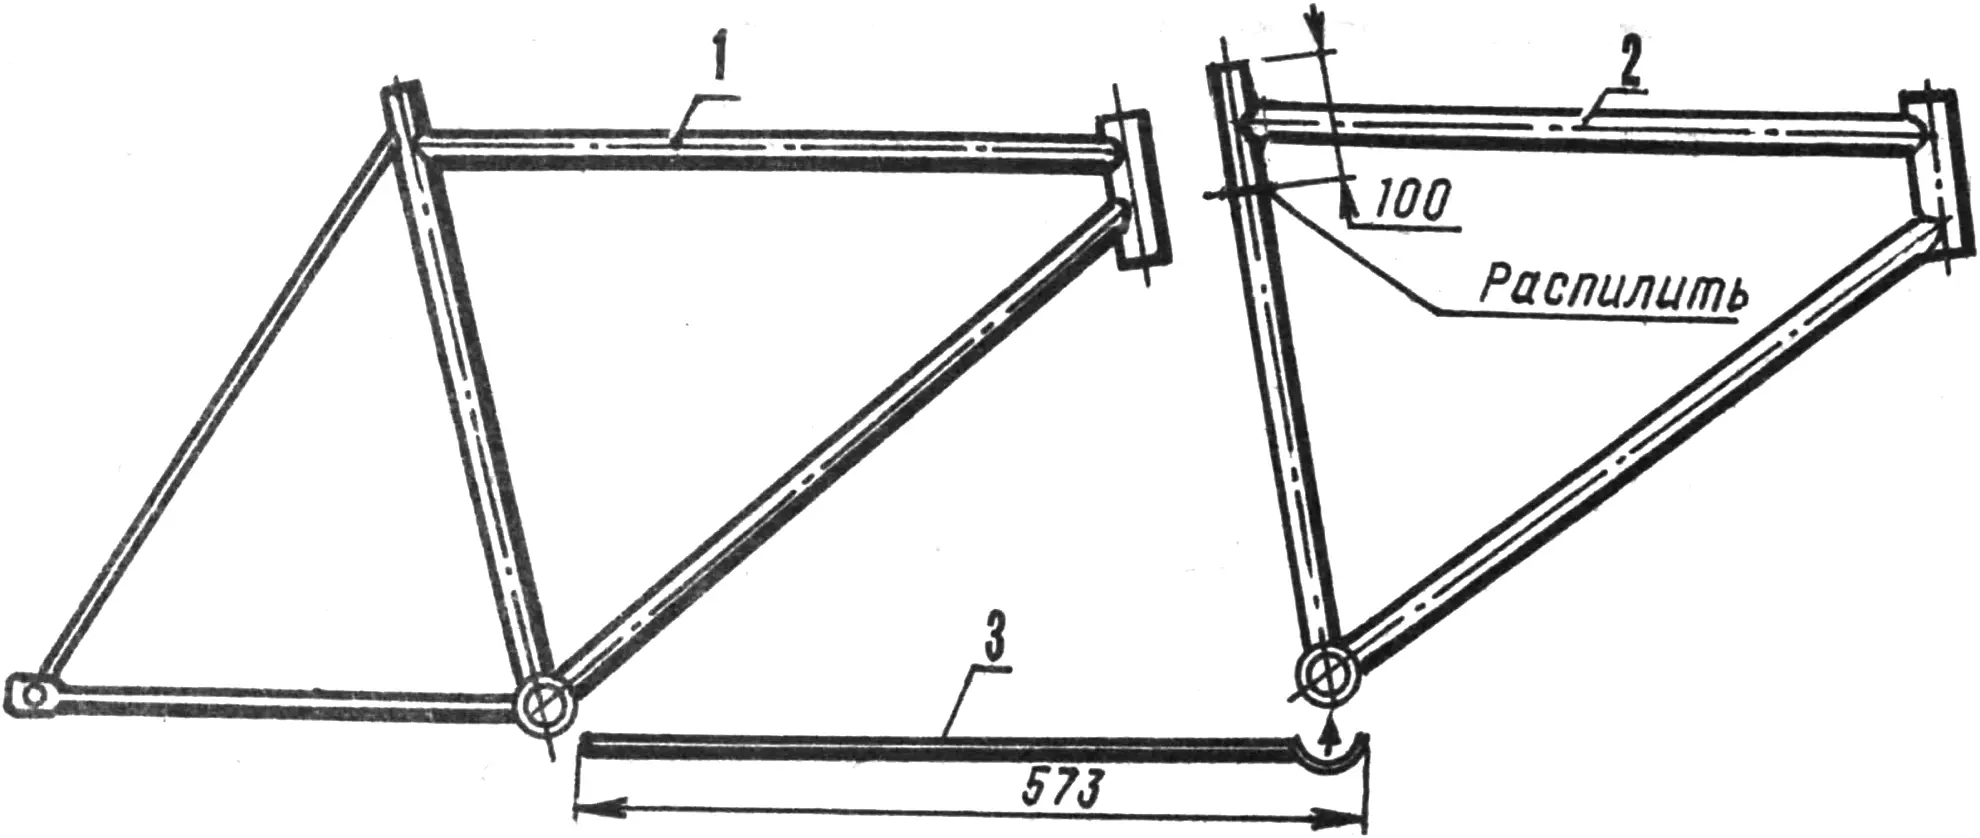
1 — rear frame, 2 — front frame, 3 — additional brace between the bottom brackets of the front and rear frames.
Now it is necessary to saw across the seat tube of the front frame at a distance of 100 mm from the top and spread the resulting parts to the right and to the left. After that, the steering column of the rear frame is “put on” the lower part, and a bushing is inserted into the inner cavity of the seat tube (a tube from a saddle can be used); the spread parts are aligned and welded with electric welding. From a third frame (an additional one; any broken scrap frame will do) the lower tube with half of the bottom bracket is sawn off and inserted between the bottom brackets of the front and rear frames. At the front, the attachment is made as an overlay with temporary technological M6 bolts, and at the rear by welding; after that the joint at the front bottom bracket is welded and the bolts are removed. The frame is ready. On this design I have ridden on all kinds of roads, and the weight of the passengers with luggage approached 200 kg — there were no breakdowns.
Having several gears on a tandem is highly desirable. And although the kinematics of the design become more complex, this has to be accepted, because the ability to use different gear ratios more than pays off on varied terrain with both flat and mountain roads.
Torque is transmitted to the rear wheel by means of two chain drives: one between the pedal sprockets, with a gear ratio equal to one, and a second standard drive from the “Sputnik”. The chains can be placed on one side or on different sides of the bicycle’s axis. In many sources the second method is recommended as the simplest to implement. I strongly advise against doing so, because the strength margin of bicycle parts is not great, and wherever possible one should use solutions that do not increase the loads on standard units. When the chains are placed on different sides, the load on the rear bottom bracket increases many times over, so the axle, bearings and cups fail very quickly. Added to this is the fact that “right-hand” cranks are fitted on the left side, and all pedals except the rear right one, which is in its “native” place, constantly tend to unscrew.
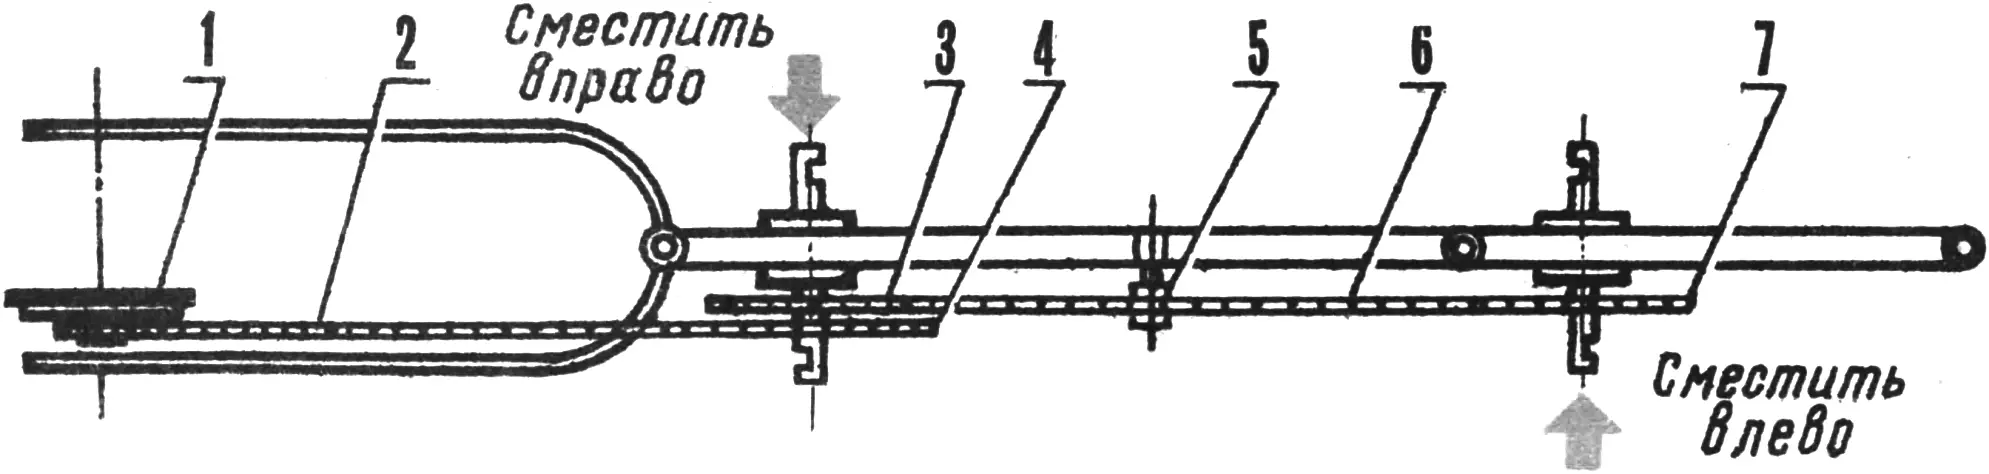
1 — rear sprocket cluster assembly (from “Sputnik” or “Start-shosse”), 2 — rear chain, 3 — rear sprocket of the front drive (Z=40), 4 — rear driving sprocket (Z=51), 5 — tension roller, 6 — front chain, 7 — front driving sprocket (Z=40).
Putting the chains on one side — the right side — is more difficult, but then there will be no problems later. Technically it is done as follows. On the axle of the front bottom bracket a groove for the wedge is filed so that the crank can be shifted as far to the left as possible. The 40-tooth sprocket is attached to a cut-down center from a 50-tooth sprocket, and additional washers also shift it as far left as possible.
For the rear bottom bracket an axle with the greatest right-hand overhang is selected, and a similar procedure of cutting a groove on the axle is repeated in order to shift it as far to the right as possible, but in this case it helps only slightly, because the groove is already rather close to the edge. Another way to shift the axle is to file the wedge from the side.
To keep the chains from catching on each other, the thickness of the spacer washers between the sprockets in a normal assembly is increased. If the rear chain catches on the fork, a small recess can be carefully made in the latter.
Long-term use of the tandem has shown that neither synchronous nor perpendicular installation of the cranks provides the required evenness of motion. An optimal angle between them must be selected experimentally: this will ensure jerk-free motion and convenience when mounting and starting off.
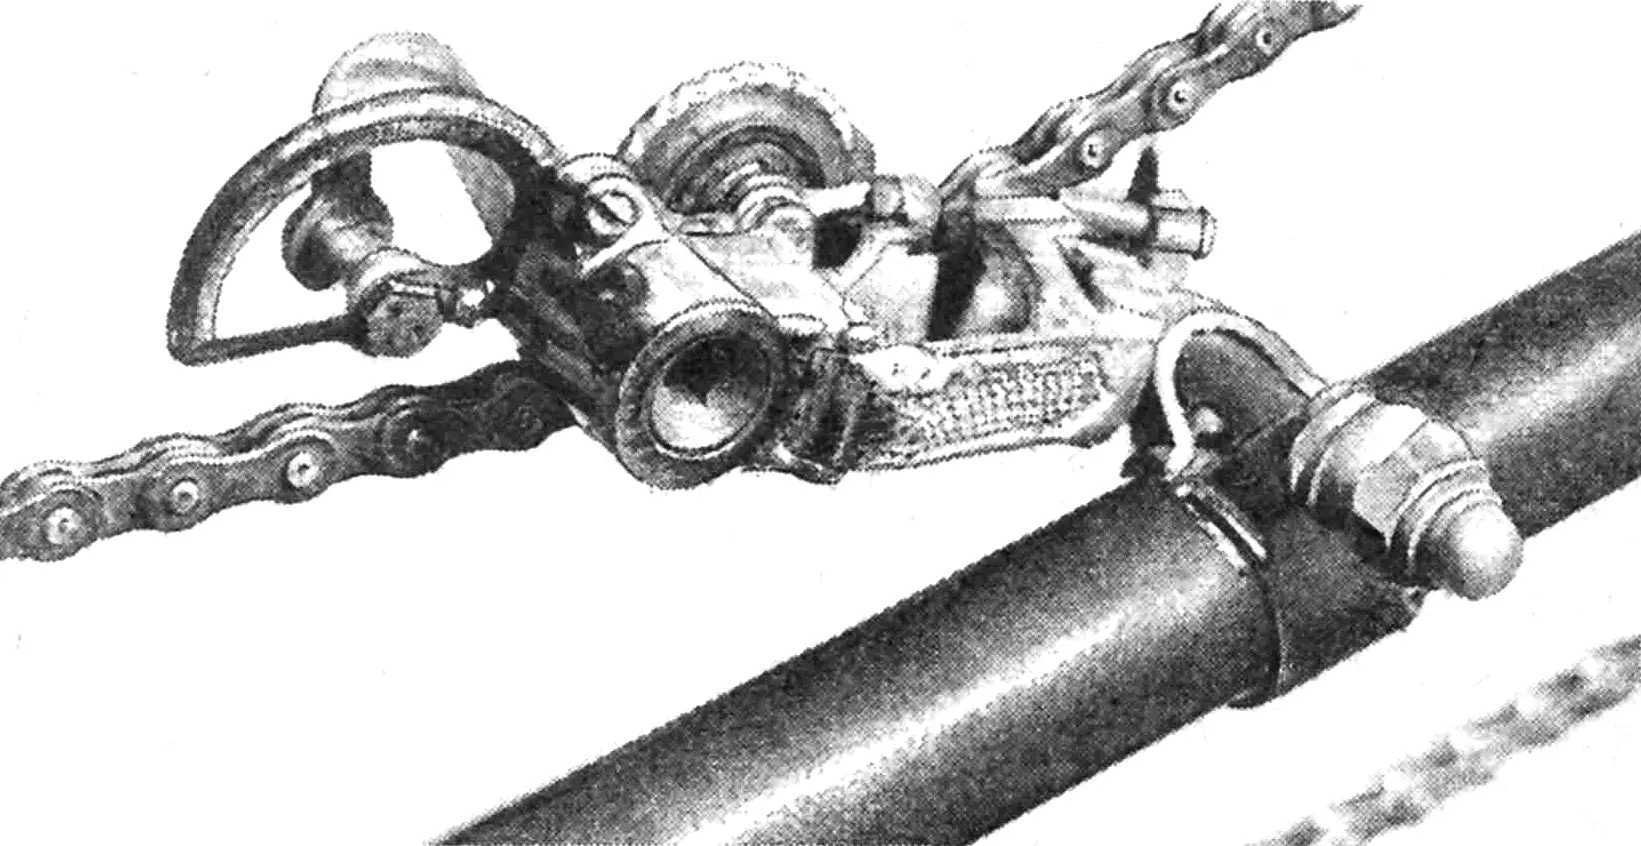
Tension of the front chain is provided by a single roller from an old derailleur. It is attached to the frame with a clamp. Since the parallelogram spring has been removed from the derailleur and only the tension spring left, the roller self-aligns laterally.
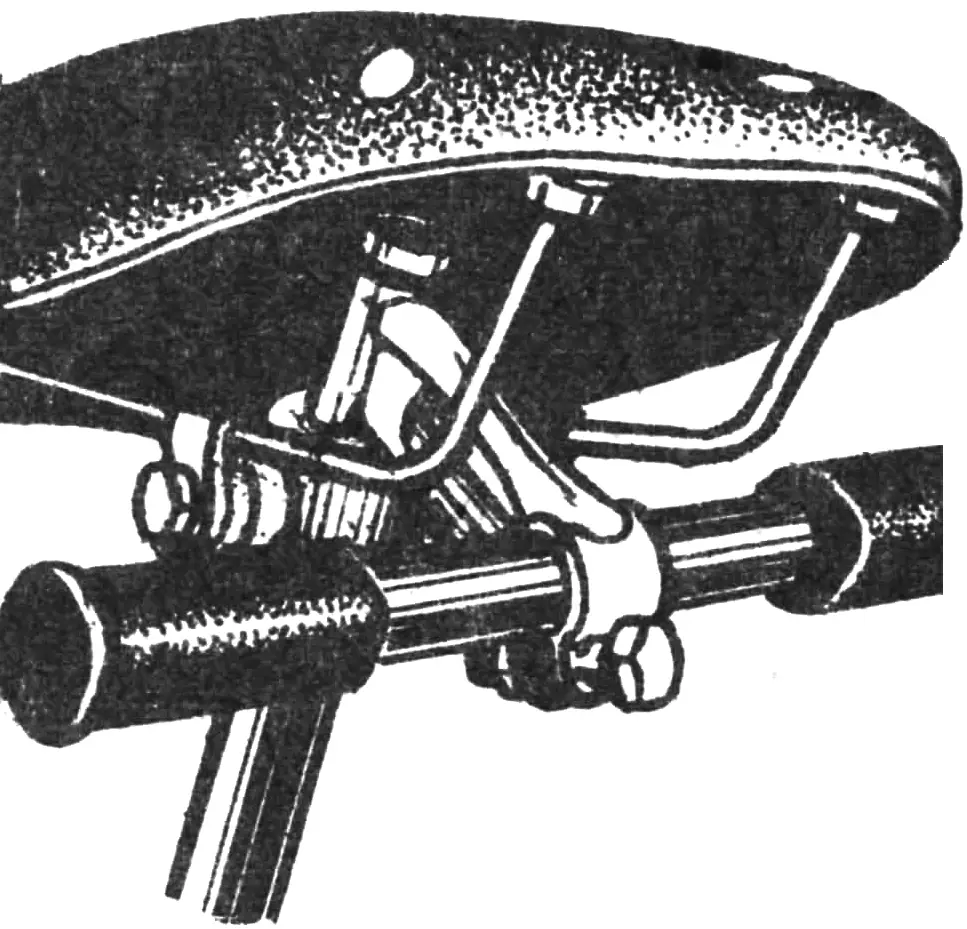
The front handlebar and saddle have no special features: ordinary ones are used. The rear handlebar is homemade, from tubing from a broken bicycle frame (it is light and strong). The handlebar is attached with a standard clamp and a long bolt to the front seat tube. Additional convenience in use is provided by an eccentric clamp from a folding bicycle on the rear seat tube — this makes it possible to adjust its height quickly, which has to be done quite often.
The rear, driving wheel is built on the basis of an aluminum rim from a road bicycle, and the hub is taken from a “Start-shosse” with a five-speed freewheel 13-15-17-19-21 or a stock one from a “Sputnik” (in the latter case the smallest sprocket has 14 teeth, so the maximum speed will be somewhat lower). The front wheel is also better fitted with a rectangular-section rim from a road bicycle, because “Sputnik” ones are rather weak. As a last resort they can be “shod” with road tires — this softens impacts and reduces the likelihood of “blowouts” down to the rims.
It should be remembered that the rear wheel takes heavy loads, and on my tandem I have already had to replace two rims and two tires; the front one is still fine. Therefore one should develop a careful riding style from the start and also regularly check the pressure — it should be from 2… 2.5 kg/cm2 to 3…3.5 kg/cm2. It is also important not to forget about constant and strong spoke tension. Following these recommendations can extend the service life of the wheels.
On a two-seater bicycle the reliability of the braking system is of great importance. To improve it when using a free hub and caliper brakes, notches on the rims that increase the friction coefficient are desirable.
A sporting version of the tandem can be fitted with toe clips on all pedals. However, for everyday or touring use this should not be done — toe clips on the front pedals only are enough, because not all partners know how to use them; moreover, when riding alone they catch on the ground.
To keep the rear mudguard from interfering when rolling the tandem into an elevator, it is trimmed slightly. It is attached at the rear to the rack.
“M-K” 9’92, A. LETKIN
Recommend to read
 THE FORMULA “GT”, SCALE 1:8
In recent years avtomodelisty closely watching the development of a new direction for technical activities and sports design of high-speed radio controlled model with internal combustion... NO STROLLER, AND MOTOCICLO
First a few words about yourself and a situation in which I found myself by fate. It all started with the fact that at the time of the motorcycle accident I received a severe spinal...
