
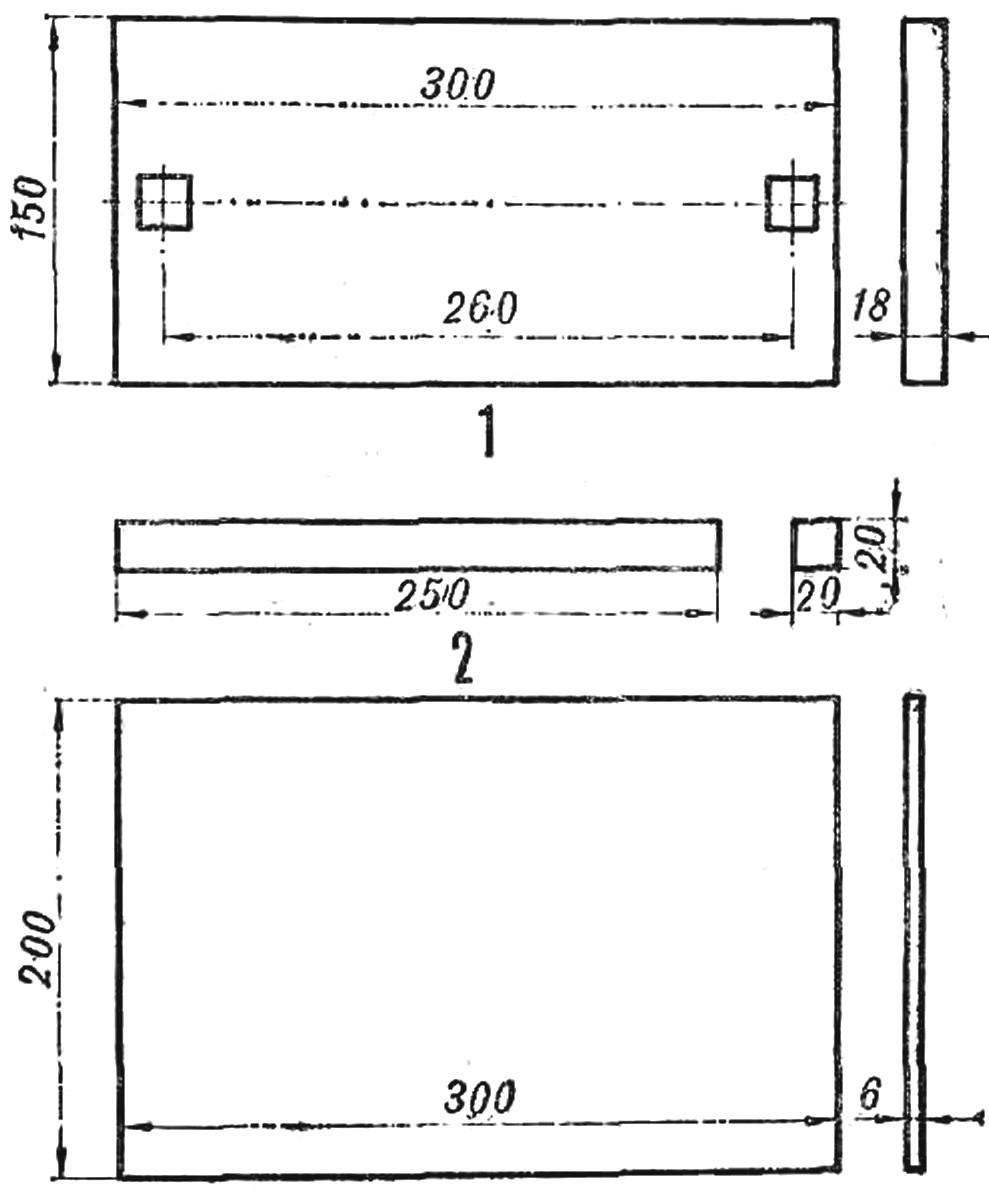
 A very simple device in order to train the hand for, say, playing table tennis, can be done in just one evening. Here are the materials you will need for this. Two boards: one size 200X300 mm (6 mm) and the other 300X150 mm thick (18 — 20 mm); Reiki 20X250 mm; the bar from which we will make the holders; a piece of wire for the installation of electrical circuits, copper wire thickness of 0.5 mm for the coil and the hook. Oh, and do not forget to prepare the light bulb from the flashlight with cartridge mounting and battery KBS-L.
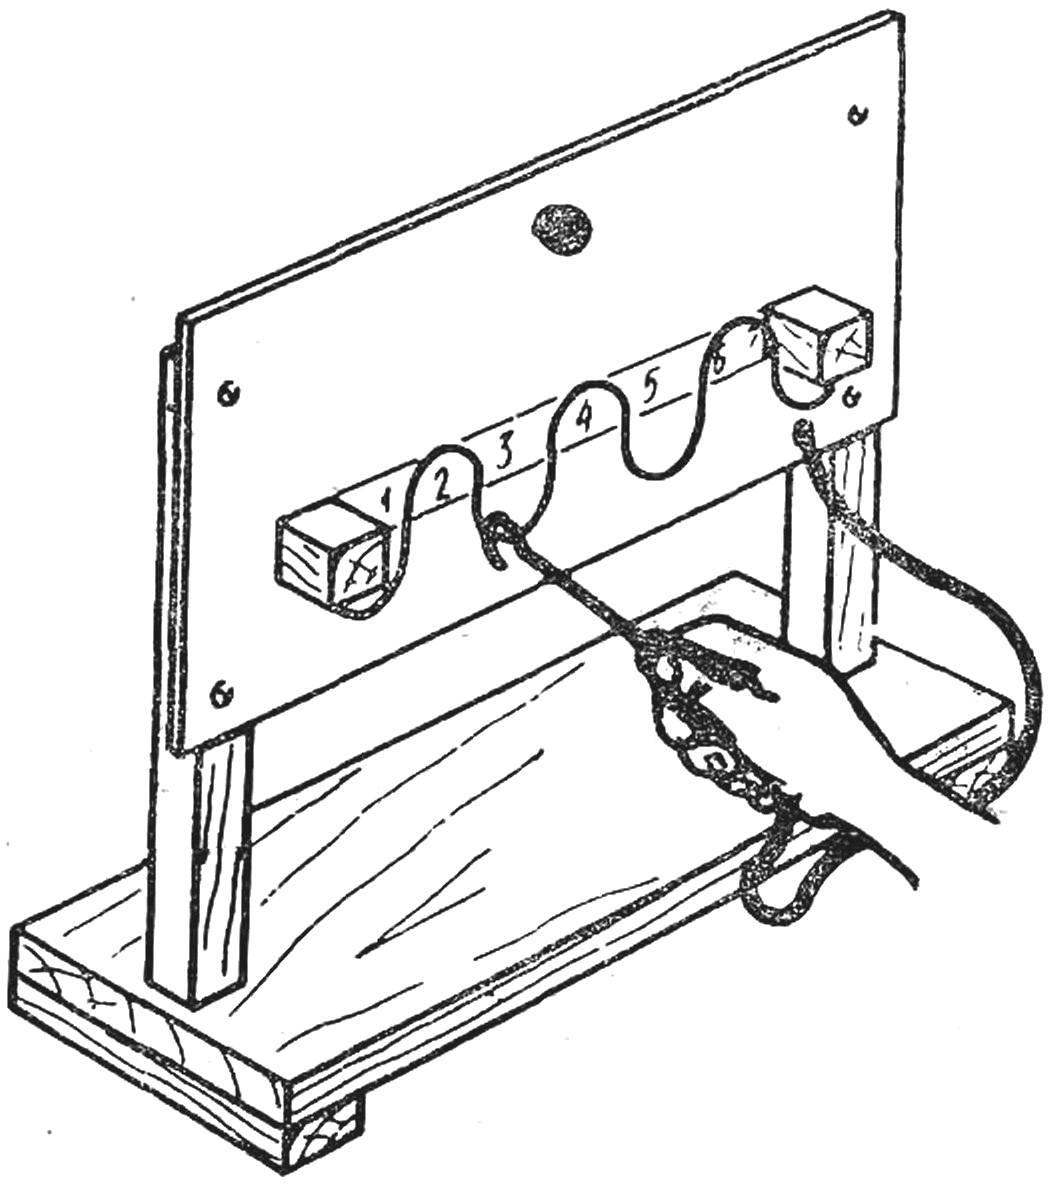
Tools: chisel, hammer, plane, saw, drill, pliers and a soldering iron. The sequence of manufacturing the device is as follows. First Board cut out stand as shown in the drawing (position 1), and a chisel punch out two holes. Wooden bars make risers 2 and secure them in the stand (best glue). The flap 3 can be done from a piece of plywood or plastic and attach it to the risers with screws. Two wooden cube 10 size 40X 40X40 mm screw to the panel from the back side, as shown on the Assembly drawing. The line between the cubes need to partition. It remains to solder the electrical circuit. To do this, first bend from a piece of copper wire hook it to prepay flexible insulated wire and strengthen any wooden handle 7. The other end of the wire 8 pass through the plate and prepay to the minus of the battery, strengthened on the back of the flap. From plus battery spend transactions to the bulb 6, passed through the flap, and another 5 transactions that stretch from the cartridge to the left of the cube. Prepay it here to the second end of the copper wire, bent as shown on drawing 4, and strengthen the wire to the cubes. Insert the light bulb. The device is ready.
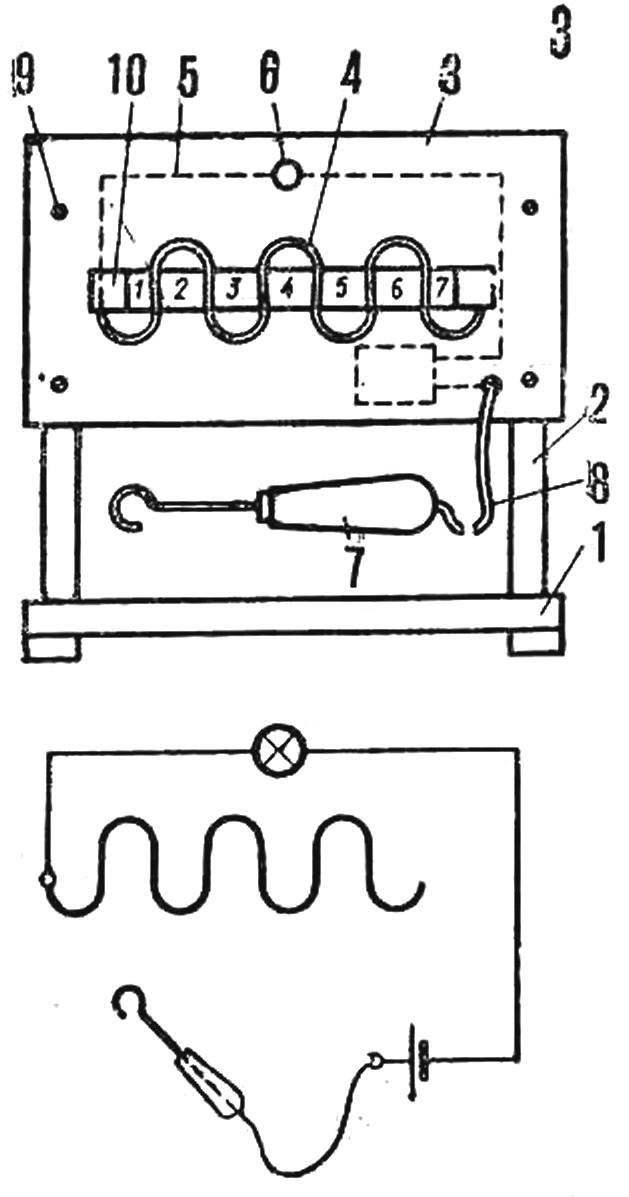
Now you can start the competition. The challenge was to hold the hook along the coil, not touching it, and to score the most points. If the lamp lights up before you’ve finished the course, count, how many did you have, and give place to the opponent.
Recommend to read
 WINTER SKAKUNOK
The elderly with a sense of humor remember the fun of skiing with the snow slopes on primitive boats — maskoobraznym the kruglyashi of frozen in the old city of wet hay. Or noisy slopes...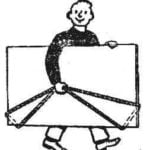 EASY, LIKE A SUITCASE
To carry or move the sheet of glass, slate, plywood is always a problem; not girth and take not for that. Take the rope, the length of which should be twice the length of the sheet, add...
