When you are finished drawing, you must draw Plaz — external contours of the frames in full size. For making the Plaza quite suitable any sheet of plywood or even drawing paper, cardboard of suitable size.
Plaz is fixed on a level floor or panels of chipboard; along the outer contour of one of the frames hammered the nails so that the outside was about 60 mm. is Then from 4 mm plywood cut into strips with a width of about 50 mm from these strips and press the frame, as shown in the figure. Strips promazyvaetsya with an epoxy adhesive and gently laid along the line labeled in the loft hammered nails. Each of the next bands first fixed temporarily hammered into the shield long nails, and then, after putting some of the frame of the desired thickness, package plywood strips cinch clamps.
If you do the cab like mine, you will need two of these bulkhead, as you can see from the pictures, they together with the base frame to constitute the power basis of the framework. By the way, the base frame of the cab wikiepedia the same way as the frames. The form needs to fit the contour of the docking area regular stroller bike, so plazovy drawing should be performed strictly in accordance with its size. As with the frames, the frame is laid out from strips of 4mm plywood with a width of 50 mm on the epoxy binder; the total thickness of a set of 20…25 mm.
Docking of the base frame and two key frames is done using plywood gussets and wood inserts, as shown on the drawings. Then installed the strut forming the frame of the windshield; on the racks, which consists of wooden slats with a thickness of about 25 mm and a width of 40 mm, then the so-called “quarter” — a groove for installation of the windshield. Similarly set and rear rack, form the frame of the tailgate, as well as longitudinal (left) stringer roof.
Now the frame should be placed on the base side of the trailer and temporarily mounting bolts, using standard mounting holes of the hinges front and rear hoods, and you can start making a lifting hatch. The frame is also assembled from plywood strips, put in place (in the frames of the door opening) and fixed with small nails. Strips pre-promazyvaetsya with epoxy glue. Bends are applied pre-cut letter G and bent billet, which they soaked in water, bent around a suitable – shaped block of wood, were fixed on him carnations, and in that position dried. When vitlake the joints between the strips must overlap adjacent plates. So the billet frame Luke turned solid, pull on her clamps, using wood blocks as spacers. Below the hatch is easily opened and closed, before laying the plywood blanks frame of the hatch lay in the doorway strip of cardboard and plastic film. The latter will not allow the blanks to be glued to the frame of the cab.
The frame of the passenger cabin:
1 — rear strut (right and left), 2 — longitudinal spar (left), 3 — front (left and right), 4, 5, 6, 11, 12, 13 — reinforcing gusset plate 9, the main rear bulkhead, 10 — main front frame.
Scheme vyklicky frames and the base of the cab:
1 — plazova Board, 2 — stops (nails), 3 — plywood strips, 4 — clips (nails). A — preparation of stocks, B — fixing plywood strips.
After curing of the resin frame is processed with a plane, rasps and sandpaper, and then the entire frame (including window openings) is sheathed with plywood or hardboard; pasted also the partition between the passenger and Luggage compartments.
To secure the hatch and the cockpit Glass (remember — all of them organic), first are cut in the openings of the holes of the appropriate form (you must leave a collar of a width not less than 20 mm), after which the window openings are processed with a file and sandpaper.
A regular windshield has a fairly complex form, so to make it under the frame, repeats its shape, is not easy. But here can help out a method of producing parts with complex shape Villenoy it from plywood strips, pre-cut and customized directly on the windshield.
Carefully processed and vishkarev cabin — both outside and inside, all the external surface pasted with a layer of fiberglass in epoxy resin, after which the cabin again vyshkurivaetsya outside, primed and painted in two-three transition.
To secure the glass, flanging window openings are marked a “Moment” rubber strip and each of the glass is fixed by screws and nuts with plastic washers from the side of the glass.
In conclusion, the cabin inside is pasted over with foam rubber or foam and upholstered with leatherette or artificial leather. Suggest also to take care of the ventilation of the cabin — it is possible, for example, to make the rejected cover in the upper part of the entrance hatch.
V. IVANTSOV, engineer, Voronezh
Recommend to read RENAULT MEGANE COUPE Specialists, no doubt, will note the advantages of a new car company Renault — RENAULT MEGANE COUPE. Memorable appearance, underlined "big-eyed" slanted headlights and back symmetrical... CHAIR BED Offer your variant of the design of the armchairs, on the basis of which you can make a new seat or redo is available. In my order was old, from a set of upholstered furniture "Narspi".... 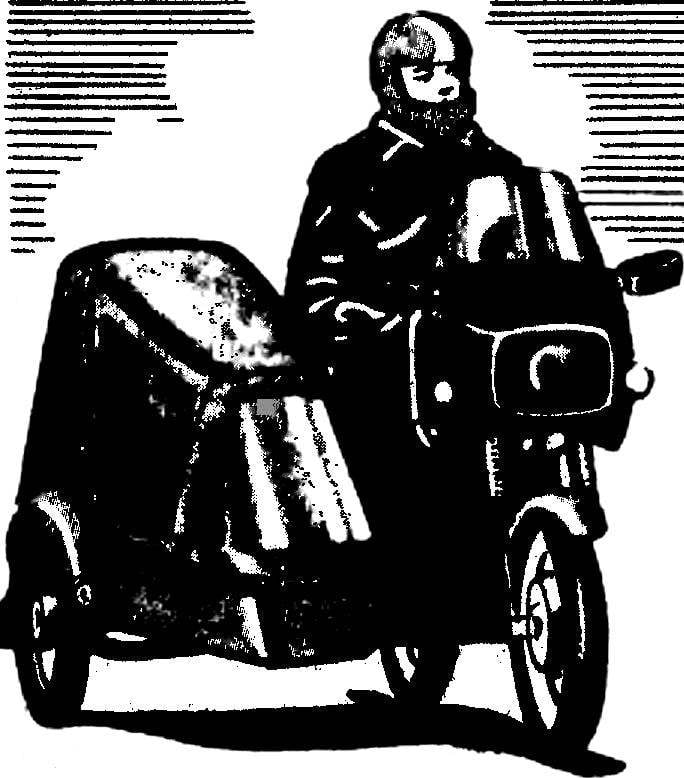
 Of most interest to the weather reports for tomorrow show… motorcyclists. Indeed, unexpected rain or, God forbid, snow transform trips on a two – or three-wheeled cars in torment. While it is not so much the driver (he knew what was going on, getting open to all the elements the car), how many passengers. Even in a side trailer can’t hide him from the weather troubles. That is why many motorcyclists are trying to solve this problem, creating on the basis of the serial side of the trailer closed cockpit with a particular level of comfort.