 Kitchen wall hangers allow you to place them in limbo the many auxiliary devices — from the ladle to tolkushkoy, which, of course, very convenient: all in the mind, everything is at hand. Except… knives. Most often they are forced to rest in the drawer. And it requires, perhaps, more frequently mentioned instruments: one or the other. Twitches here and a box here and there, and need to take the knife from the heap is not very handy.
 Meanwhile, it is quite easy to make for a special table knives sheath, which fit most of them running. Made of wood, these clips look very aesthetically pleasing.
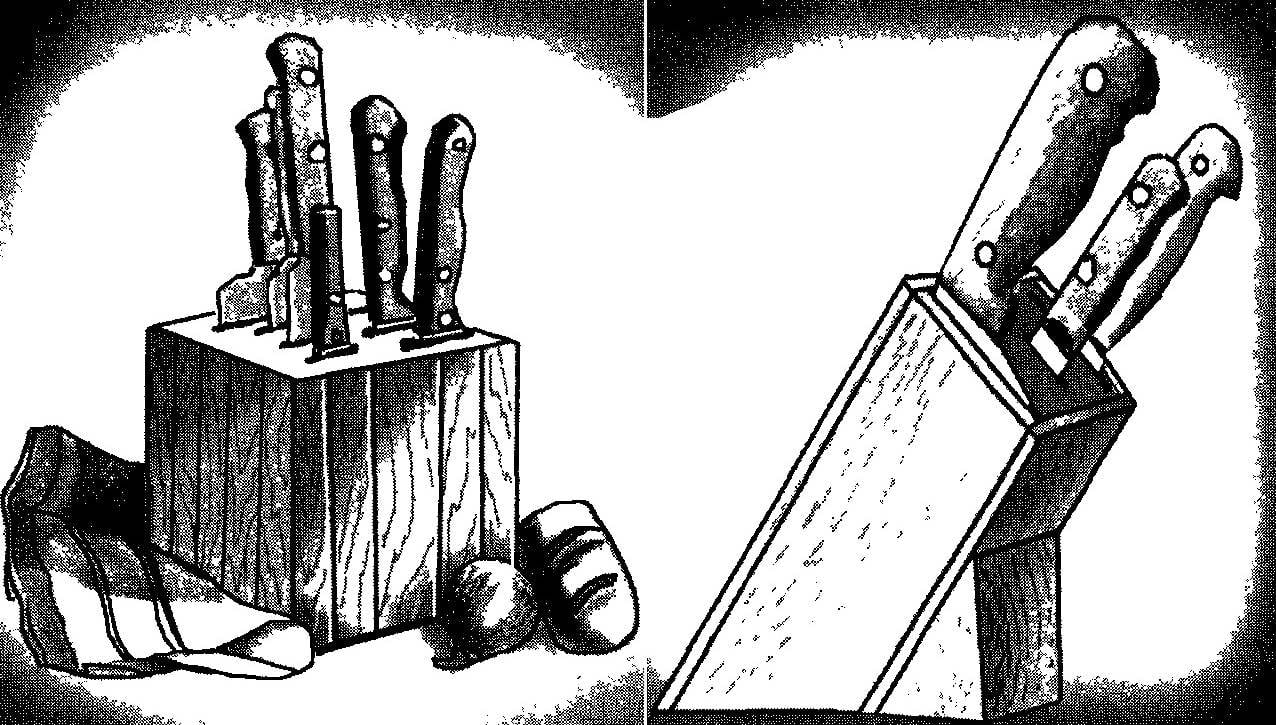
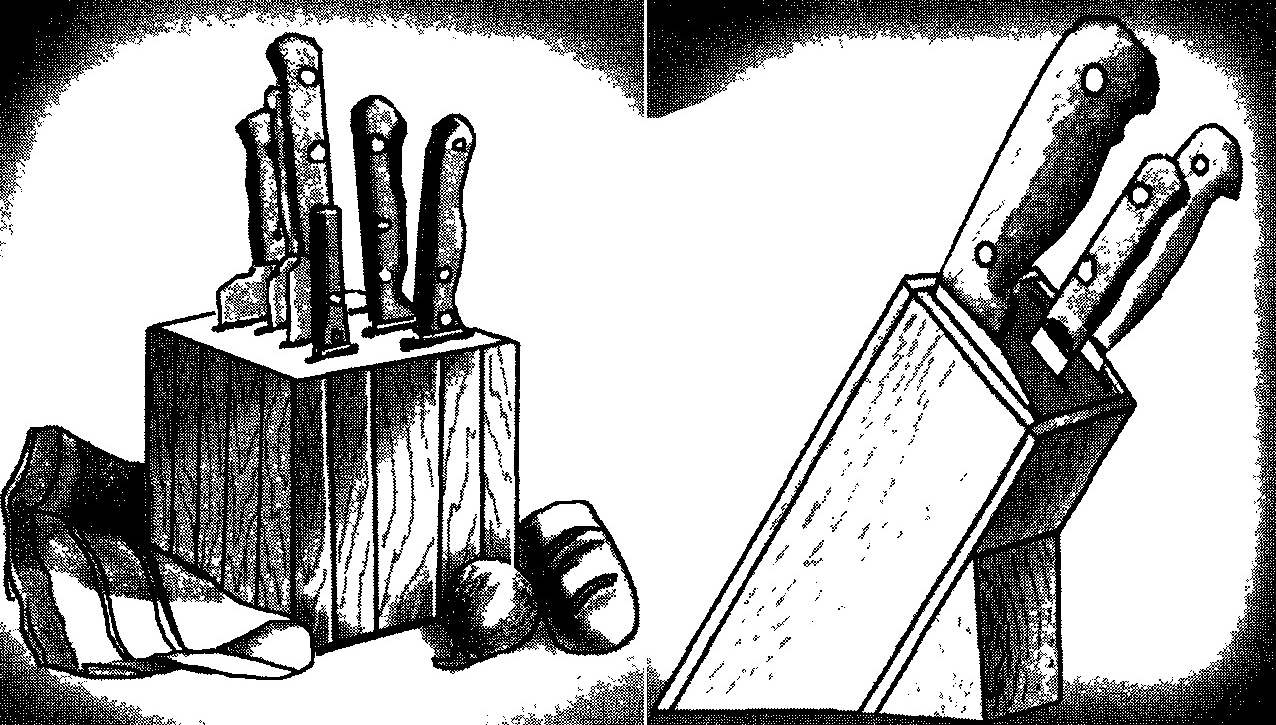
We offer two types of sheath: direct and oblique cube (corner) option.
Cube
Such sheath is designed for six conventional blades plus one wide knife. The manufacture of such a cage is not time consuming, as the cube just is made up of wooden bars almost the same size Only some of them are a little thinner — to form cracks under the blade To do this, simply use the plane of These bars-salubritate will need only nine of the total number (25 pieces) And three of them — thinner core 8 mm, and the other six — 4 mm.
The bulk of the wooden bars will have the dimensions of 30×30 mm and length 170 mm All the bars are going in the clip as shown in the figures, and stick together joiner’s glue or PVA.
Depending on the outer appearance of the planes of the bars is solved by the method of their finishing If you used a tree with beautiful texture — the surface of the resulting cube can be treated with stain, which will emphasize the winning pattern of the wood surface Then a few times cube light furniture varnish covered.
When a texture is missing — the product can cover dark furniture varnish or enamel paints, picking up their shade under the prevailing color of kitchen furniture, or, conversely, contrasting sharply to him.
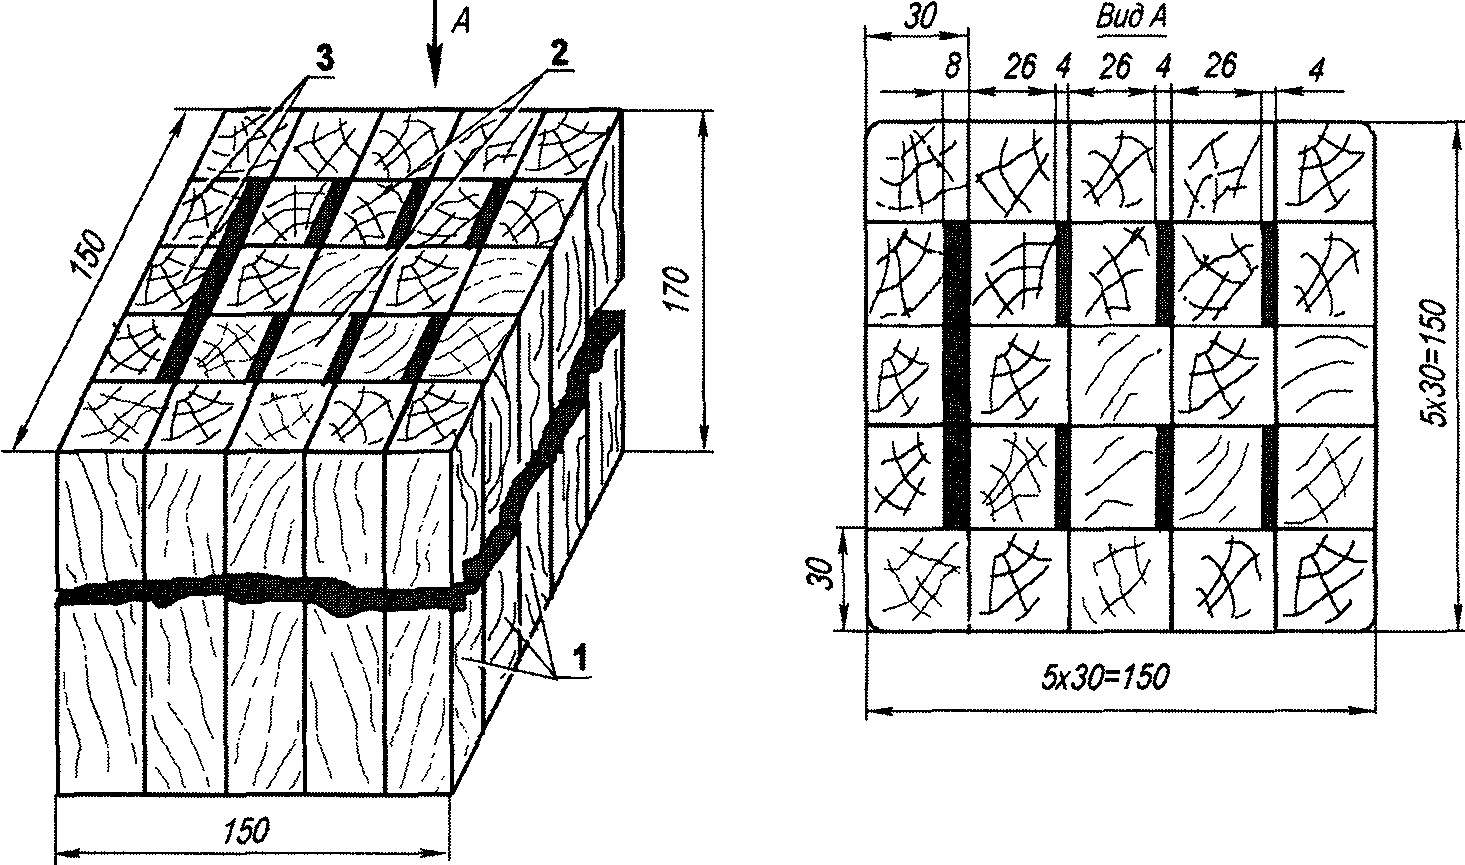
Sheath-cube:
1 — main bars (30x30x170, 16 PCs), 2 skinny sticks under ordinary knives (26x30x170, 6 PCs.), 3 — narrow bars under a wide knife, cleaver (22x30x170, 3 PCs.).
Before painting or varnishing the surface of the cube carefully polished with sandpaper, first with an average abrasive grain, then all the smaller fine-grained sandpaper Most enjoy when varnishing in several layers of gloss, then the surface will be more qualitative and deep.
The corner sheath
More comfortable and looks much more aesthetically — angular sheath Due to the inclined position of their body simplified insertion of knives in them, and subsequent their use.
The figure below shows the option designed for the three most used conventional knife and one wide (slasher) However, while retaining the principle of forming such a sheath, you can increase their capacity to make more cells available for the entire set of blades Going the same oblique sheath All items are easy made of boards with a thickness of 10 mm. optionally assembled unit can be installed on the same slate-base.
The case of the angular scabbard consists of two inclined panels, playing the role of the sidewalls, two of the same median dividers and brackets, spacers, together forming a cell for knives Covering their front and rear panels are made of rectangular plates of the same thickness Of the matching scraps and cut the remaining boards of the set of rectangular triangles to supports, or spacers are selected or cut three strips the width of 20 mm and a length of the place.

The corner sheath:
1 — the oblique sidewall (2) and separators (2 PCs) — (Board 80×225, 4 PCs) 2 — front panel (70×235), 3 — back panel (70×145), 4 backup (switching from 7 right triangles 50×50); 5 — spacer (strip width and length for the position, 3 PCs.), thickness of all parts is 10 mm.
The corner of the sheath Assembly begins with gluing the separation of the panels with the bars-spacers and right side panel wherein the upper ends of the slats and panels should be in one plane and Then on the adhesive joins the back panel is attached Last front (front) panel and at the same time between her and the rear panel — left side, flush with their edges, with a gap for a wide knife.
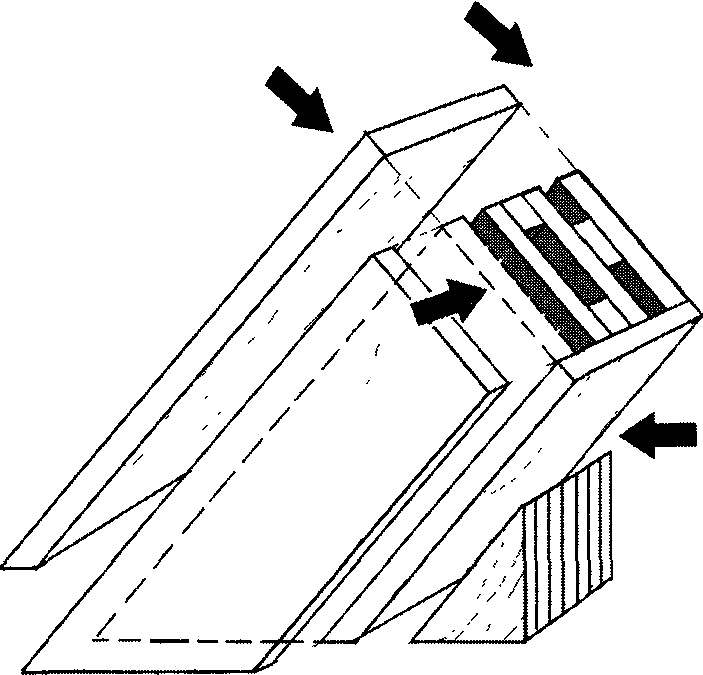
Assembly corner of the sheath.
Separately glued to a block of blanks backup, and so that the “hypotenuse” of their triangles are in one plane This will facilitate the attaching of the block to the back of the sheath.
If the connection details used PVA glue, the abutting places are first lubricated with a thin layer and exposed “to detachment” Then applied a second thin (wetting) layer of densely compressed and everything happens fast setting node gluing If you want some place you can heat up the dryer — it contributes to a more durable adhesive connection of the parts the same purpose will serve and strengthen the joints with small nails otkusannymi caps After Assembly the corner of the sheath surface is treated and polished, like the cube In accordance with the preceding recommendations and varnishing or staining of the body together with the backup However, there is a separate version for example, the sheath remain light, and backup — black (stain or other paint).
B. VLADIMIROV (on materials of foreign seal)
Recommend to read
 SUCCESSFUL COMPLETION
Usually all devices in the lab the photographer separately, so working with them in the printing of the images is not very convenient: need a separate or combined outlet for the... TOOTHED SHOVEL
She can endure tough ground, not falling in the ground the roots of weeds or shrubs — it is all easily overcomes the simple improvement consisting in that its working edge is jagged with...
