I’ve been familiar with the “Modelist-Konstruktor” magazine for more than a year now. Mainly as an avid reader and somewhat less as a DIY enthusiast, trying to implement in practice some of the promoted ideas and original technical solutions in the conditions of a simple home workshop. Now I’m offering one of my own developments. Its essence lies in equipping a standard electrical plug with an LED indicator.
The modernized plug makes it possible to visually monitor the presence of current in the load. With the ratings specified in the circuit, the total power of devices connected to the plug-indicator should not exceed 500 W. Well, if the load is more substantial, it will be necessary to replace the КД208А diodes placed in the plug with semiconductor analogs with higher energy parameters.
In any case, to embed a light indicator into a standard УХЛ4 plug, it’s impossible to avoid modifying the latter’s cover. No overly complex operations are required here. You just need to remove three (out of four existing) plastic fixing protrusions, and opposite the remaining one (where the recessed stop for the contact pin was located), drill a hole for the LED.
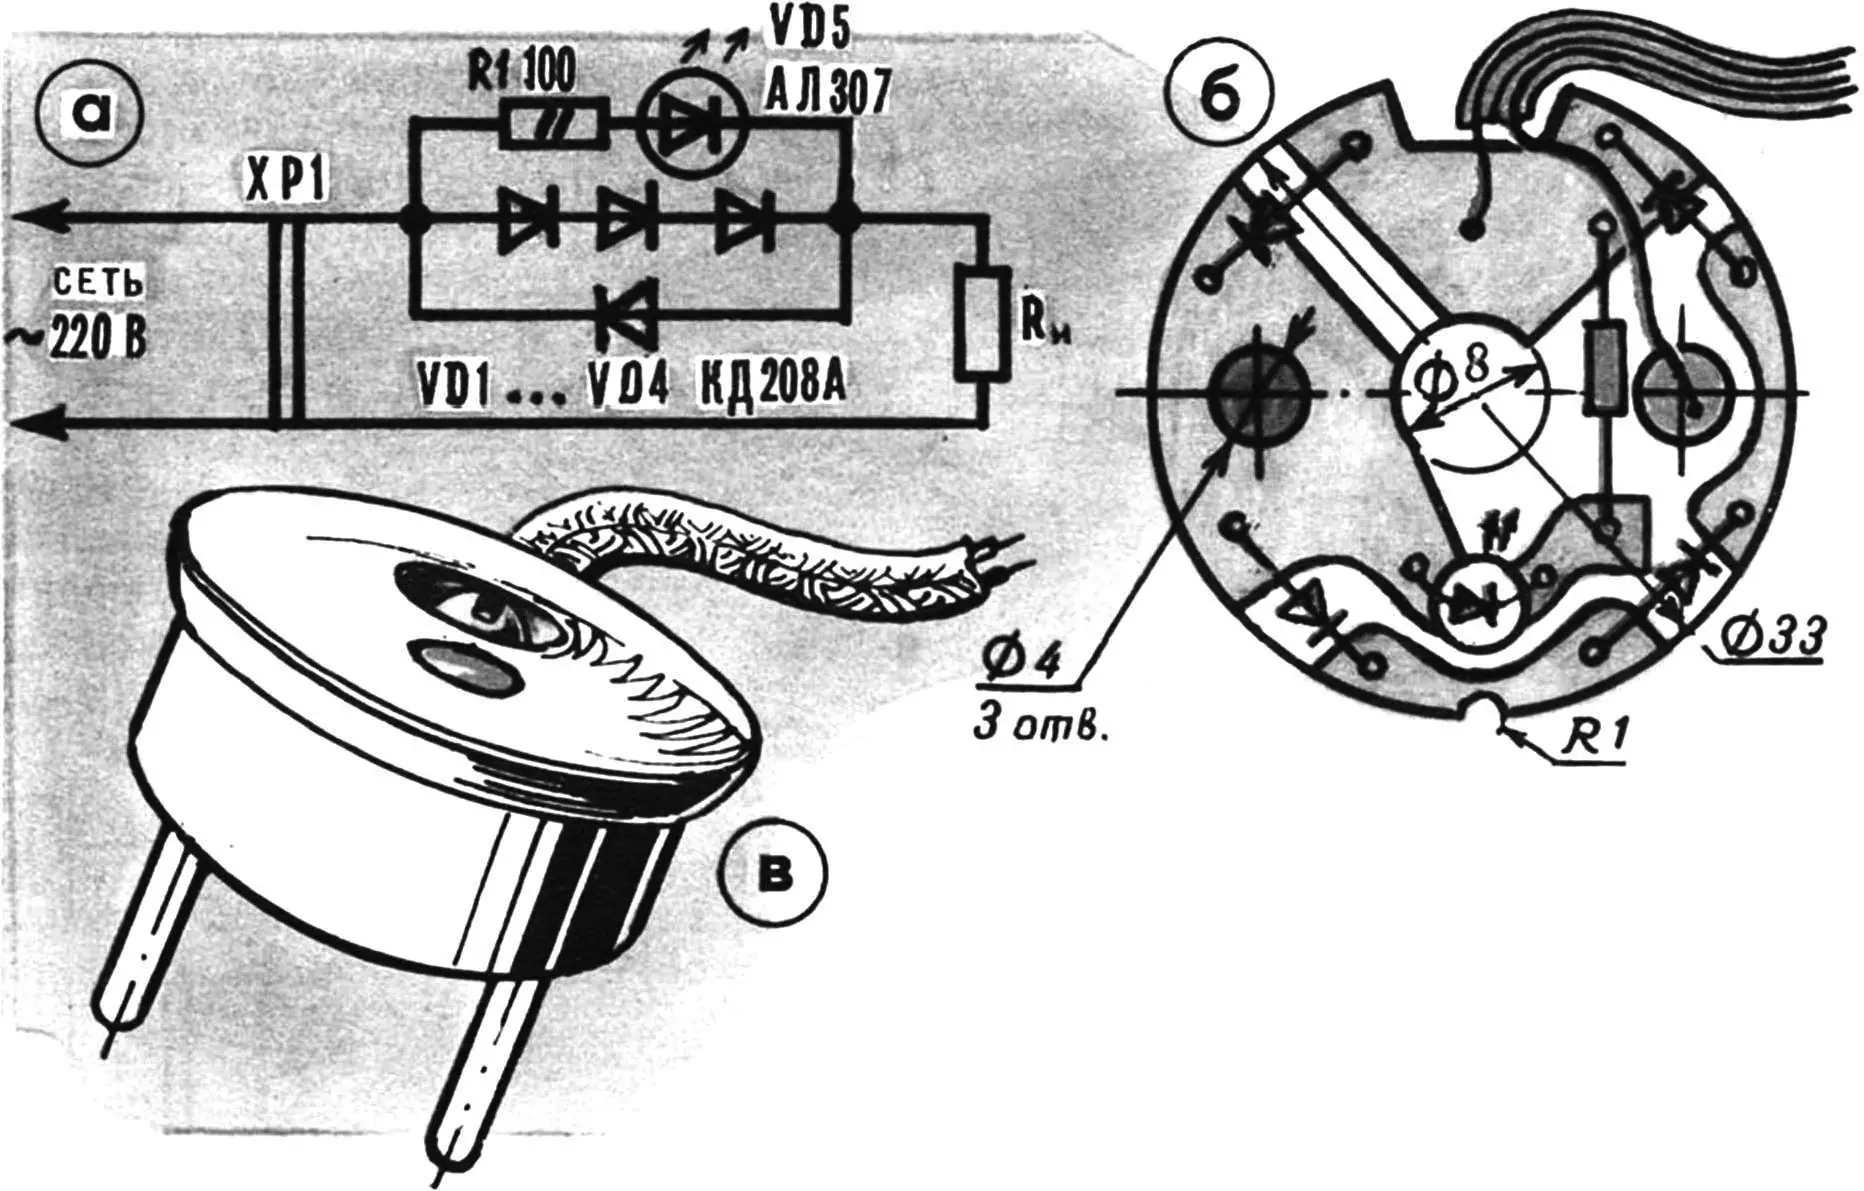
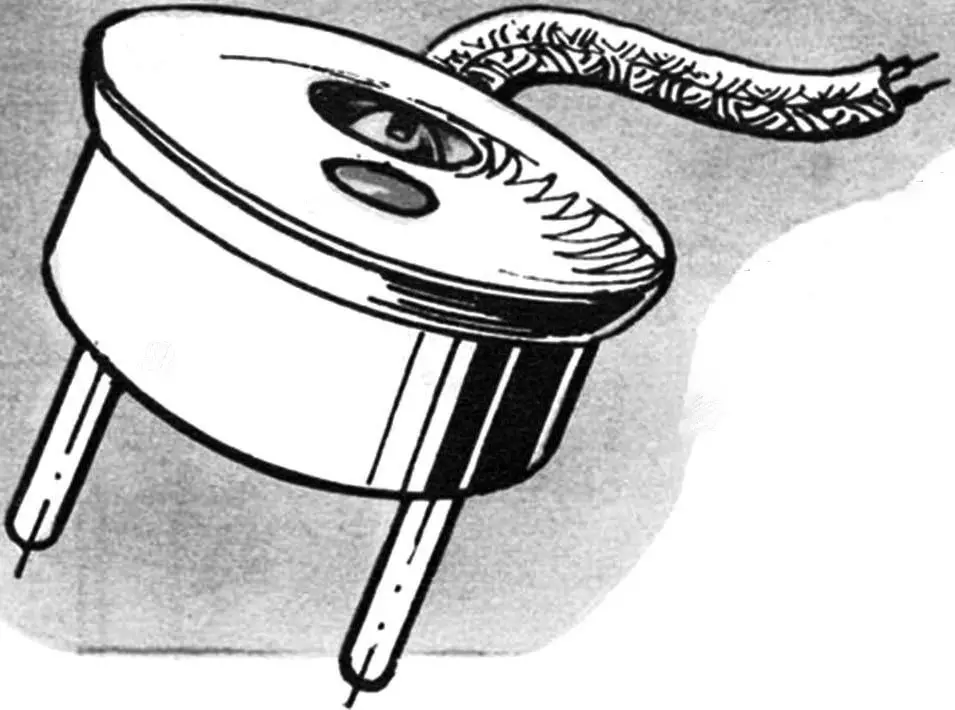
а — schematic electrical diagram of the device, б — printed circuit board with completed assembly, в — electrical plug after modernization.
Making a printed circuit board from 1.5-mm foil-clad fiberglass is also, as they say, simpler than simple. For final fitting, it is installed on the plug cover, contact pins are inserted into the corresponding sockets, and a trial assembly of the plug is performed with prompt elimination of detected inaccuracies in the parts. Then disassembly and final assembly follow.
Having properly positioned the printed circuit board on the cover, the first contact pin is soldered (into the foil-clad area with the socket hole). The remaining circuit components are placed. In doing so, the КД208А diodes are slightly filed (top and bottom) to reduce the mounting height. And a piece of polyvinyl chloride tubing is put on the body of the 100-ohm resistor for insulation from the second contact pin, which is inserted into the board last and connected to the wire going to the load using a standard M3 screw with a washer. As for the second load wire, it is simply soldered to the “common” conductor of the printed circuit board.
The plug-indicator is ready for operation. As practice shows, its operation causes no complaints. Reliability is one hundred percent.
V. KEDROV
Recommend to read
 WITH ALL THE COMFORTS
When it comes to building a country house, it almost always implies that all "amenities" will be equipped in the yard. These include a shower (bathroom), toilet, bathhouse, and... THE SPOON ON THE BUCKET
Well mixed mortar is quite a heavy mixture, which is difficult to work with. To give greater plasticity, the builders introduced it with various additives, such as clay. Work becomes...
