The importance of proper operation of a car’s electrical equipment is, of course, indisputable. This thematic selection prepared by our author tells how to increase its reliability.
HOW TO MEASURE THE DWELL ANGLE?
The dwell angle (contact closed angle) of a VAZ-2105 car can be determined by the amount of movement of the camshaft timing belt. To do this, remove the belt protective cover and, having connected a test lamp in parallel to the breaker contacts, turn the crankshaft with the ignition on to such an angle that the “test lamp” goes out. Then on the belt, opposite any moving point (for example, one of the marks on the gear cover), make a noticeable mark with a marker, after which turn the crankshaft until the lamp turns on.
Next, measure with a ruler how much the belt has moved relative to the same point. If the value falls within 62±3.4 mm, this corresponds to the required dwell angle, i.e., 55±3°. In case of excessive deviations, it is necessary to adjust the gap between the contacts and repeat the measurements.
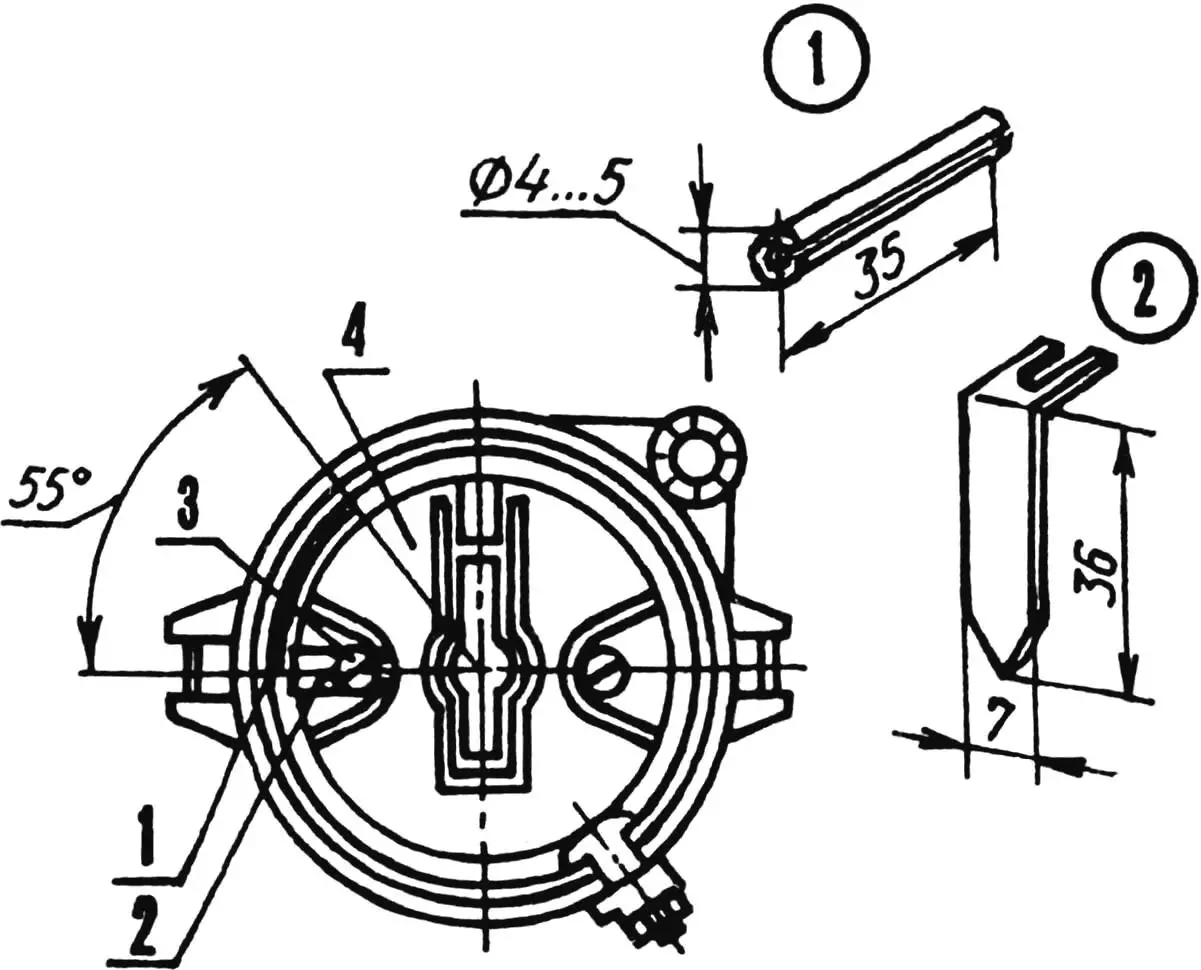
1 — hose; 2 — pointer; 3 — screw; 4 — ignition distributor
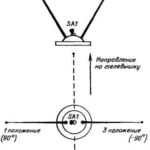
The dwell angle can also be determined using a pointer indicator. The pointer is cut from a tin can and installed under the breaker rotor (distributor cap) screw, or made from wire and attached to the rotor with plasticine. A lengthwise cut piece of rubber or plastic hose with an outer diameter of 4—5 mm will serve as the “scale”. For “Zhiguli” cars, its length is 35 mm, which corresponds to a dwell angle of 55°.
The “scale” is put on the distributor housing rim and moved under the pointer at the start of the count.
LONGEVITY FOR CONTACTS
To reduce the burning of the “50” ignition switch contacts in a “Zhiguli” car, it is necessary to reduce the current passing through them (and also prevent accidental starter engagement when the engine is running).
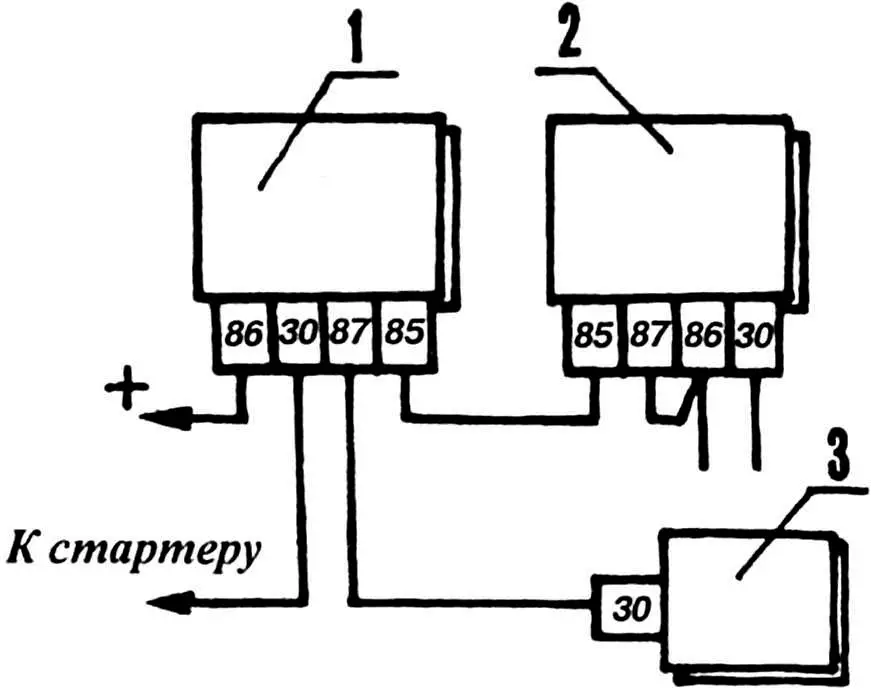
1 — additional relay RS702; 2 — standard RS702 battery discharge warning lamp relay; 3 — ignition switch
For this, you can use the battery discharge warning lamp relay (RS702), connecting it according to the provided electrical diagram.
ROTOR PLATE REPAIR
It happens that there is nothing to replace a worn distributor rotor with. Then you can solder a brass strip onto the current-carrying plate. However, it is difficult to maintain the base dimension “a”. If the strip turns out to be shorter, the entire effect of the restoration work will be “smeared”, and if longer — the plate will catch on the cap contacts.
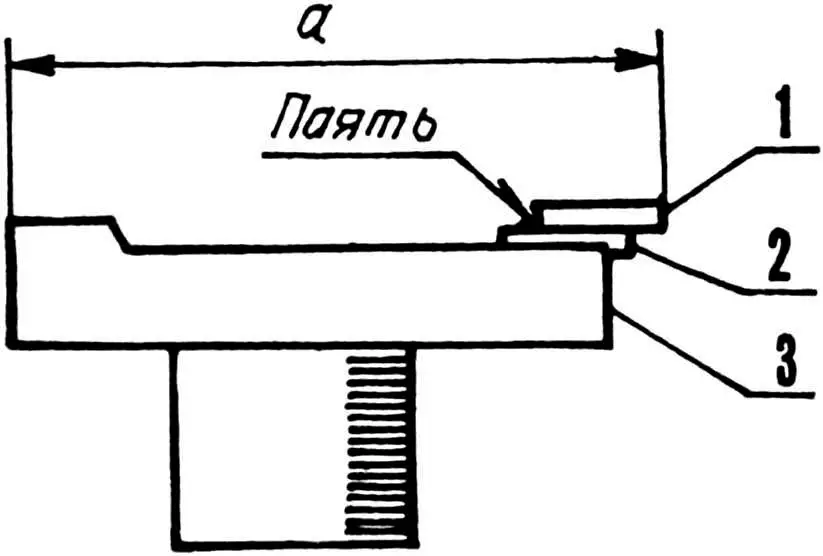
1 — additional plate; 2 — standard current-carrying plate; 3 — rotor housing
To determine this dimension, before repair, stick a piece of plasticine on the end of the standard current-carrying plate and, having installed the distributor cap in place, turn the crankshaft. The excess plasticine will be cut off by the contacts, which will allow you to accurately measure “a” later.
After soldering the brass strip, carefully file its protruding end, bringing the length to the required (a — 0.1 mm).
BULB INSTEAD OF VOLTAGE REGULATOR
If the voltage regulator fails on a “Zhiguli” or another car on the road, disconnect the wires from the “Ш”, “ВЗ” or “Я” terminals (“15” and “67” on “Zhiguli”) and connect a 21 W automotive bulb to them. As a temporary (partial) replacement for the voltage regulator, such an active load will protect the generator from damage.
BALLS DON’T FALL OUT
In ignition distributors type 30.3706 (-01 or -02) with a vacuum advance, used on passenger cars, the ball bearing fails over time. However, thrifty owners don’t throw it away, but skillfully repair it.
First of all, disconnect the movable plate and install it on a 30 mm diameter mandrel. Then bend back the crimp and remove the bearing. Remove the separator by shifting the balls to some sector, and… disassemble the bearing itself.
Using an emery stone 10—20 mm in diameter with an electric drill, make grooves on the inner and outer rings down to the raceway. Wash the rings and, having applied grease, align the grooves. Through the resulting window, push in 37—38 balls of suitable diameter from another distributor.
Having rotated one ring relative to the other by 180°, crimp the bearing into the plate. The balls won’t fall out, because the rotation angle of the rings during operation does not exceed 40°.
HEADLIGHT PROTECTION
A thrifty motorist will, of course, not give their car’s headlights “to be torn apart” by road stones. Most likely, they will use protective screens made of acrylic glass. But despite all their availability and cheapness, they usually lose transparency quite quickly.
More resistant to abrasive impact is a homemade screen made of ordinary window glass 3—4 mm thick, inserted into a frame that folds on two hinges with a spring latch.
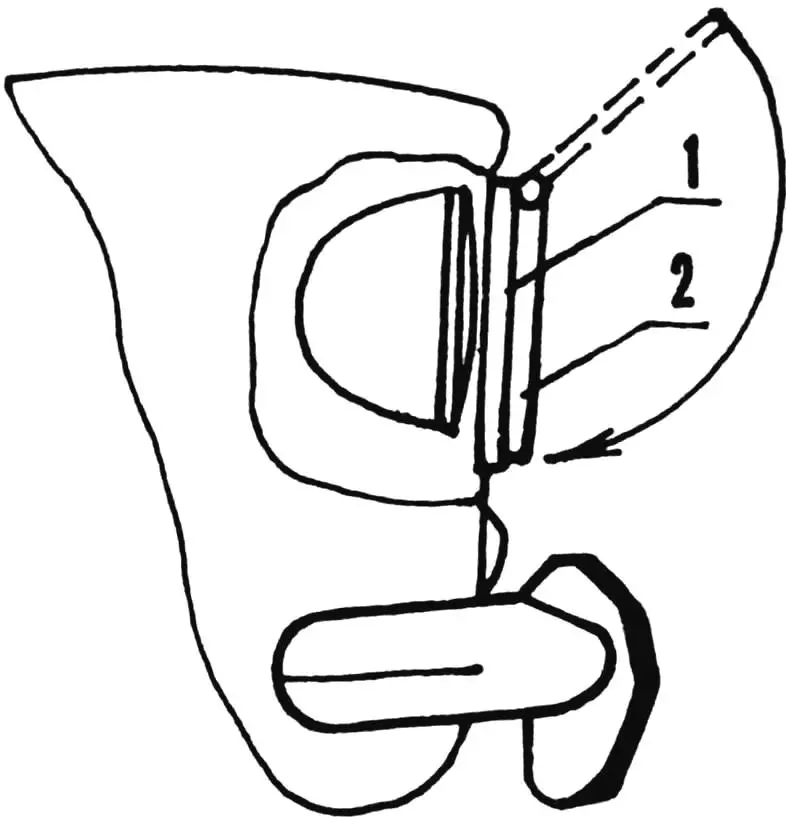
1 — opening in radiator grille for headlight; 2 — screen (frame with glass)
Remaining clean, the glass does not weaken the headlight’s light. True, when hit by a stone that flew out from under the wheels of a car ahead, it may crack or even break, but it will protect the headlight with the bulb.
A POLYETHYLENE BAG WILL HELP
It happens that high voltage breaks through the distributor rotor. After unscrewing two screws, remove the damaged part. Having placed a polyethylene bag folded in half between the rotor and the centrifugal advance mechanism, tighten everything with standard screws. Then trim the polyethylene excess protruding from under the rotor and put the distributor cap in place. That’s it, you can start the engine.
«Modelist-Konstruktor» No. 12’2001, V. ZHUK, Khmelnytskyi, Ukraine
Recommend to read
 ANTENNA GOOD RECEPTION
It often happens that the collective TV antenna is not working properly. In our high-rise building, for example, to take a high-quality image with such antenna only one TV channel. At... ATV “TRAMP-YUGRA”
The history of the vehicle is quite long. First began to be fit to travel on our road of "Niva-2121" - put her on the big wheel from the "Jeep". Traveled on it with a neighbor (also,...
