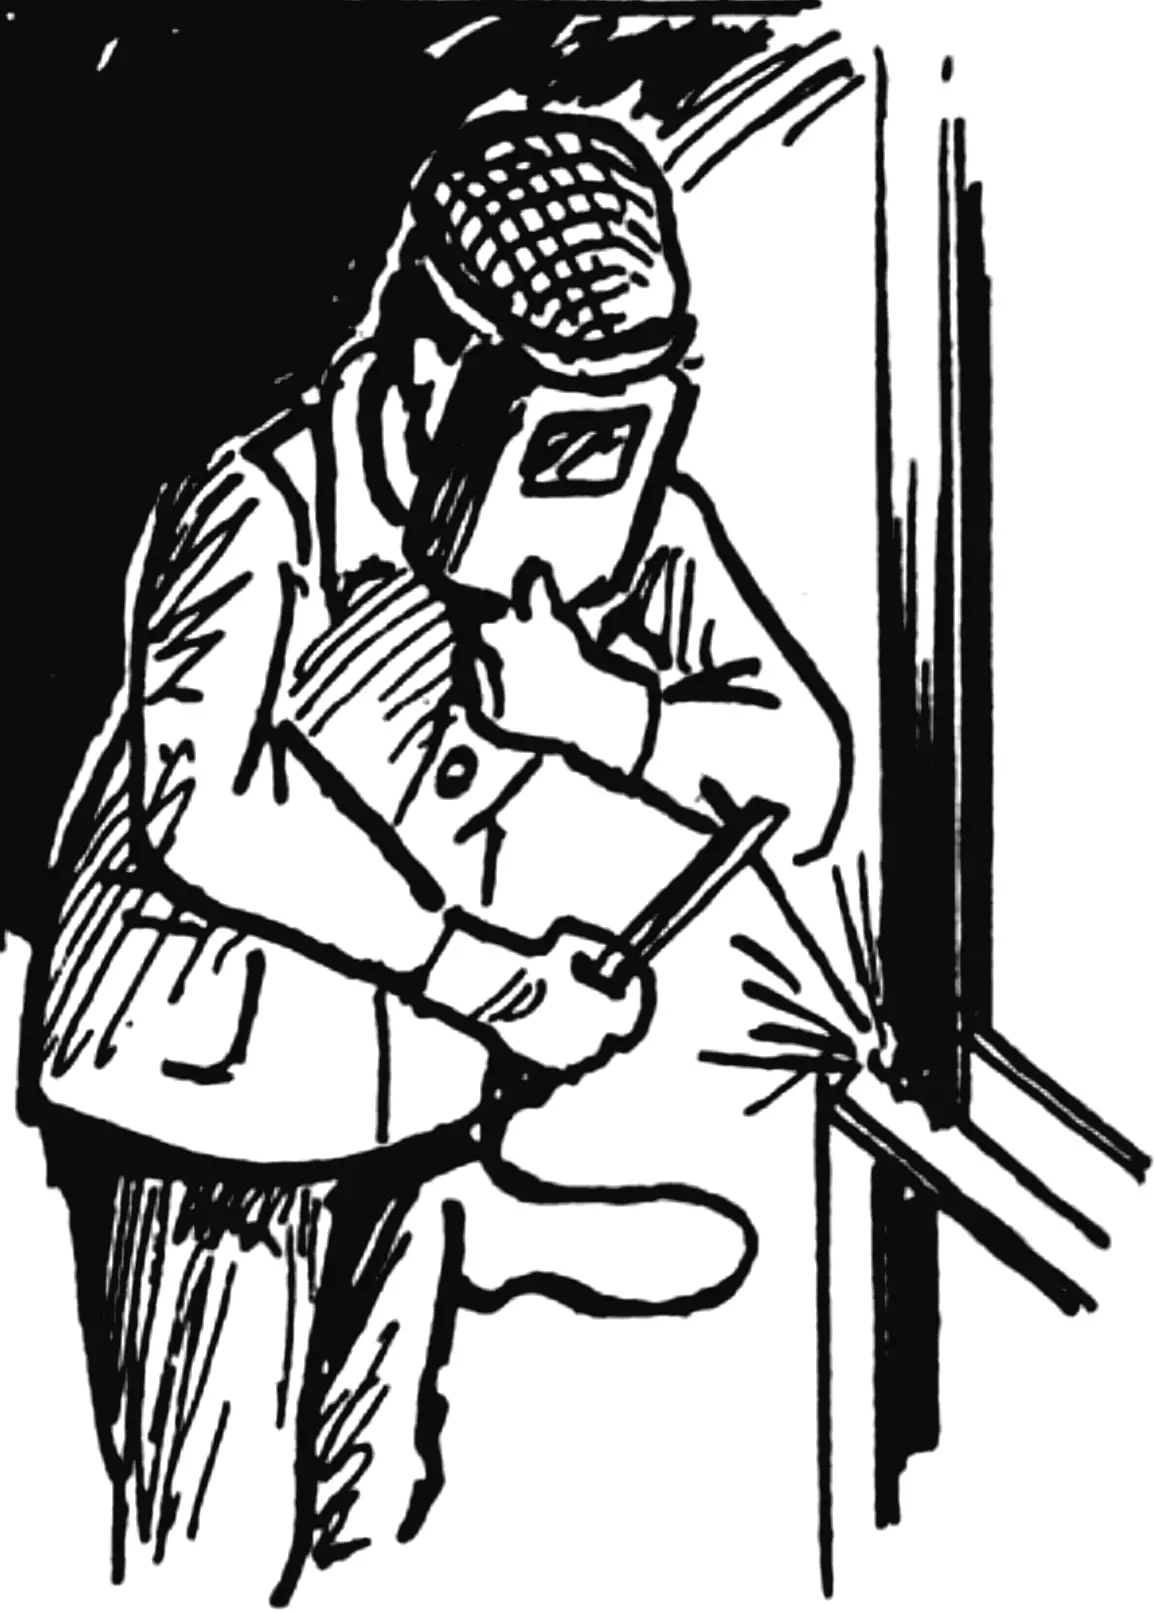
“Dear editorial office of Modelist-Konstruktor magazine! There is a rather difficult craft — the ability to use manual arc welding. It is needed not only by professionals in production, but also by those who like to make things with their own hands at home — both in the garage and at the dacha. However, few truly master it. As the author of the self-instruction book Arc Welding Through a Practitioner’s Eyes, I dare say that with a welding machine and conditions for direct practical work using the book, one can successfully acquire the first skills in this trade,” wrote Sergei Aleksandrovich Arkhipov from the town of Shlisselburg, Leningrad Region. A highly skilled welder, he worked for many years in such responsible industries as shipbuilding and ship repair. The rich experience of the practitioner formed the basis of his unusual self-instruction book, in which the author clearly reveals the secrets of welding work and gives specific recommendations that will help acquire the necessary arc welding skills not only for those wishing to master this trade, but also for the large army of enthusiasts of technical creativity, auto and motorcycle lovers, gardeners and farmers, amateur designers, and home craftsmen.
S. A. Arkhipov’s book was published in St. Petersburg in a small, unfortunately, print run. Therefore, we give interested readers of our magazine the opportunity to familiarize themselves with some of its practical sections.
An old joke says: to cook shashlik from a lamb, you need at least a rabbit. The same is true in electric arc metal joining: to take the first steps toward the secrets of this technology, you will need a transformer, electrodes, and what without which no welder can work even if these are available — a shield with a light filter and an electrode holder. Obtaining most of these necessary items now is not a problem: industry and trade offer a wide choice. But for improving them, as practice shows, there is also a broad field for creativity. It is even possible to make more convenient homemade ones. And not only after mastering the technique and knowledge in this field, but also on the way to it — for example, the design of an electrode holder (we will tell about it below).
But before acquiring equipment, it is necessary to absorb practical information about its features and connection with the work that lies ahead. And here it is not enough to have an idea that manual metal arc welding is joining metal parts by progressively heating the place of their joint to a liquid state due to the thermal energy of an electric arc discharge between opposite electric fields: the welded structure (workpiece) and the electrode. After all, the welding arc can have different power sources. For example, AC welding transformers or DC welding rectifiers and generators. What is the difference here? And it exists even within one of these varieties. For example, when using a DC arc power source, two types of connection are distinguished: straight polarity and reverse polarity. In the first case, the welding lead — “ground”, which is connected to the “workpiece” — the welded structure, is attached to the “plus” terminal of the welding rectifier, and the lead from the electrode holder — to the “minus” terminal. Such connection and straight-polarity current are advisable for metal cutting and welding thick-walled parts that require a large amount of heat for their preheating. By changing the lead connections on the rectifier, we obtain reverse-polarity current, used when welding thin-walled parts. The trick here is that the temperature at the negative pole (cathode) is lower than at the positive pole (anode), due to which the electrode melts faster, and heating of the part is relatively reduced — and the risk of burn-through is also reduced.
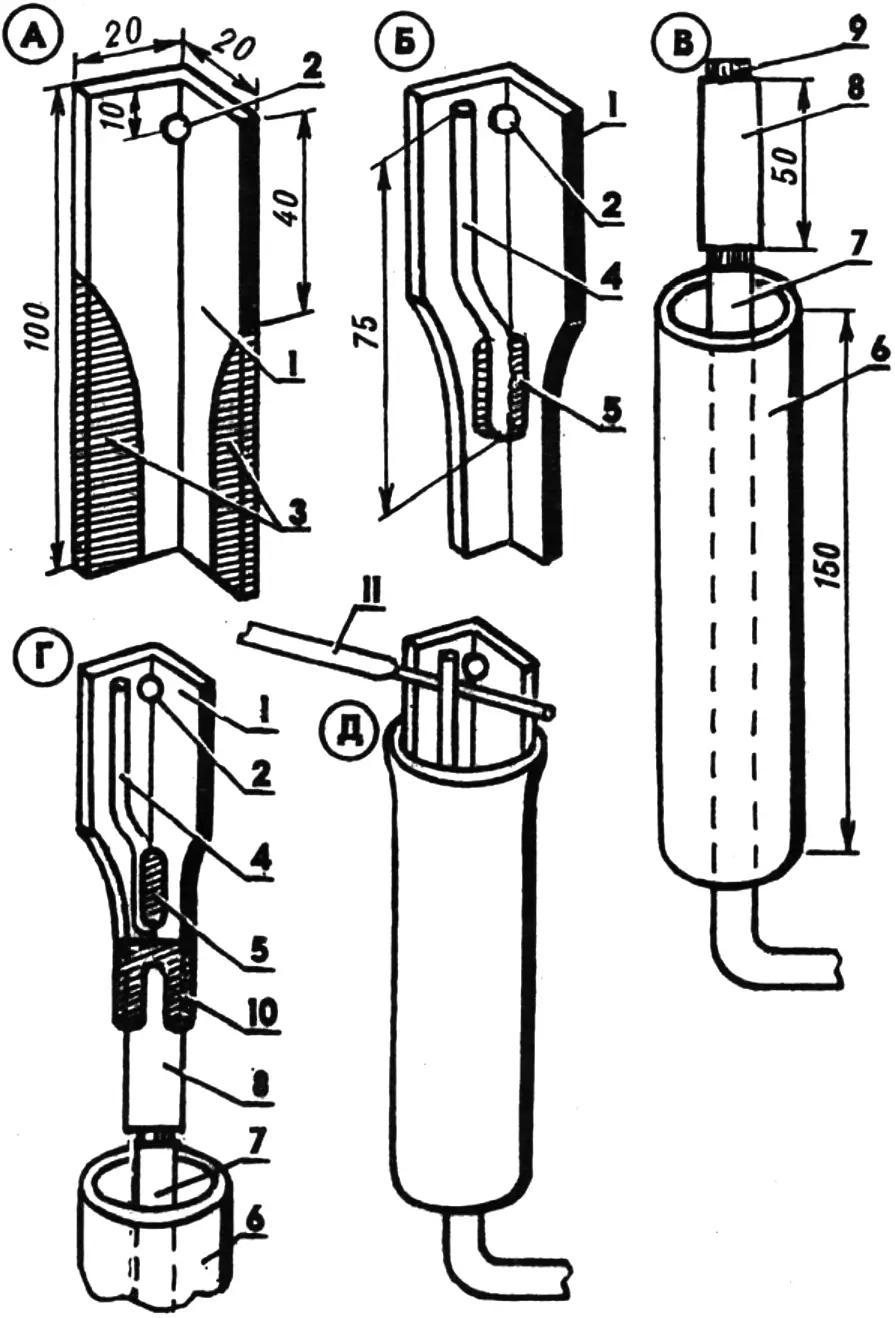
A, B, C, D, E — sequence of stages of its manufacture; 1 — angle iron; 2 — Ø4 hole for pushing out the stub; 3 — areas of angle iron narrowing; 4 — electrode clamp; 5 — clamp weld; 6 — handle-insulator; 7 — welding cable; 8 — cable crimping tube; 9 — place of welding the cable end to the tube; 10 — tube weld; 11 — electrode in working position.
And when working on AC welding transformers, there is neither straight nor reverse polarity of the welding current due to the periodic change of positive and negative poles in the welding circuit; here the working features are different.
Several practical recommendations so that the first steps in mastering arc welding go more successfully.
The most suitable electrodes for beginners are AC electrodes 3—4 mm in diameter. For the first trial welds, it is better to use metal plates 4—6 mm thick. And among welding shields, I recommend the head shield as the most convenient in work. Its advantage over the hand-held one is that the free hand can hold the part being welded. For cleaning weld seams of slag, it is also useful to have a heavy chisel with a lever handle. Finally, one of the most important details of successful work is the electrode holder. It deserves special attention.
The fact is that there are many varieties of electrode holder designs, both professional and homemade. And this is not accidental, because this simple tool must meet many requirements, from safety to convenience in work.
I would like to offer readers my version of a holder, extremely simple in design and reliable, tested in practice and well proven. It is distinguished by such work-tested qualities as compactness and lightness, convenience in hand manipulation during welding, strength of electrode fixation in the holder, and the possibility of simple and quick replacement of a spent stub with a new electrode.
To make such an electrode holder, it is enough to select suitable materials from those at hand and perform a number of simple operations (see fig.). You will need a metal angle iron 1 with flanges 20×20 mm in size and 100 mm long. Stepping back 10 mm from one end, drill hole 2 with a diameter of 4.1 mm. It is needed so that the electrode can be changed conveniently and quickly: by inserting the bare end of a new one into this hole, we will push the stub electrode out of the holder.
Stepping back 40 mm from the same end, arbitrarily narrow the remaining part of the angle iron 3, as shown in the figure. Next, from a piece of reinforcing bar 6 mm in diameter and 80 mm long (or spring wire of the same diameter), we will make clamp 4 of bent shape. Setting this spring at the level of the angle iron cut, we weld its shank in the center of the angle iron (weld 5 on both sides of the shank). A piece of durite or thick-walled rubber hose with a small internal diameter and 150 mm long will serve as the holder handle and at the same time its insulator 6. Passing welding cable 7 through it and stripping its end, we crimp it by flattening thin-walled steel tube 8 of suitable (small) diameter and 50 mm long. The protruding end of the cable 9 for better contact is welded to the tube, and the latter is placed on the narrowed part of the holder angle iron and also welded with a U-shaped seam 10. It remains to slide the insulator onto the angle iron — and the electrode holder is ready.
As practice has shown, such an electrode holder is convenient and even indispensable when welding in cramped conditions. Let us remind you that when working with it, as with all similar open-type devices, it is necessary to observe safety precautions and not allow short circuits, that is, prolonged contact with the “workpiece”.
«Modelist-Konstruktor» No. 4’2000
Recommend to read
 WILL PROTECT THE NAILS
Varnish or paint the chair — this seemingly simple task often ends stained priest, FDI it is necessary to proceed in stages. Four small cloves, hammered the bottom of the legs, eliminate... TRACKED WALK-BEHIND
Built by A. Lomakin and tillers, and not absolutely usual — it with a crawler gear: a variant of its execution is best suited for soil in the garden or in the garden. For this purpose,...
