For apple juice lovers I can suggest a homemade juicer that is simple to make and does not require large investments. It is built from an old washing machine.
Factory juicers have low output and poor reliability because they contain many plastic parts. My homemade unit processes a bucket of apples in 7–10 minutes.
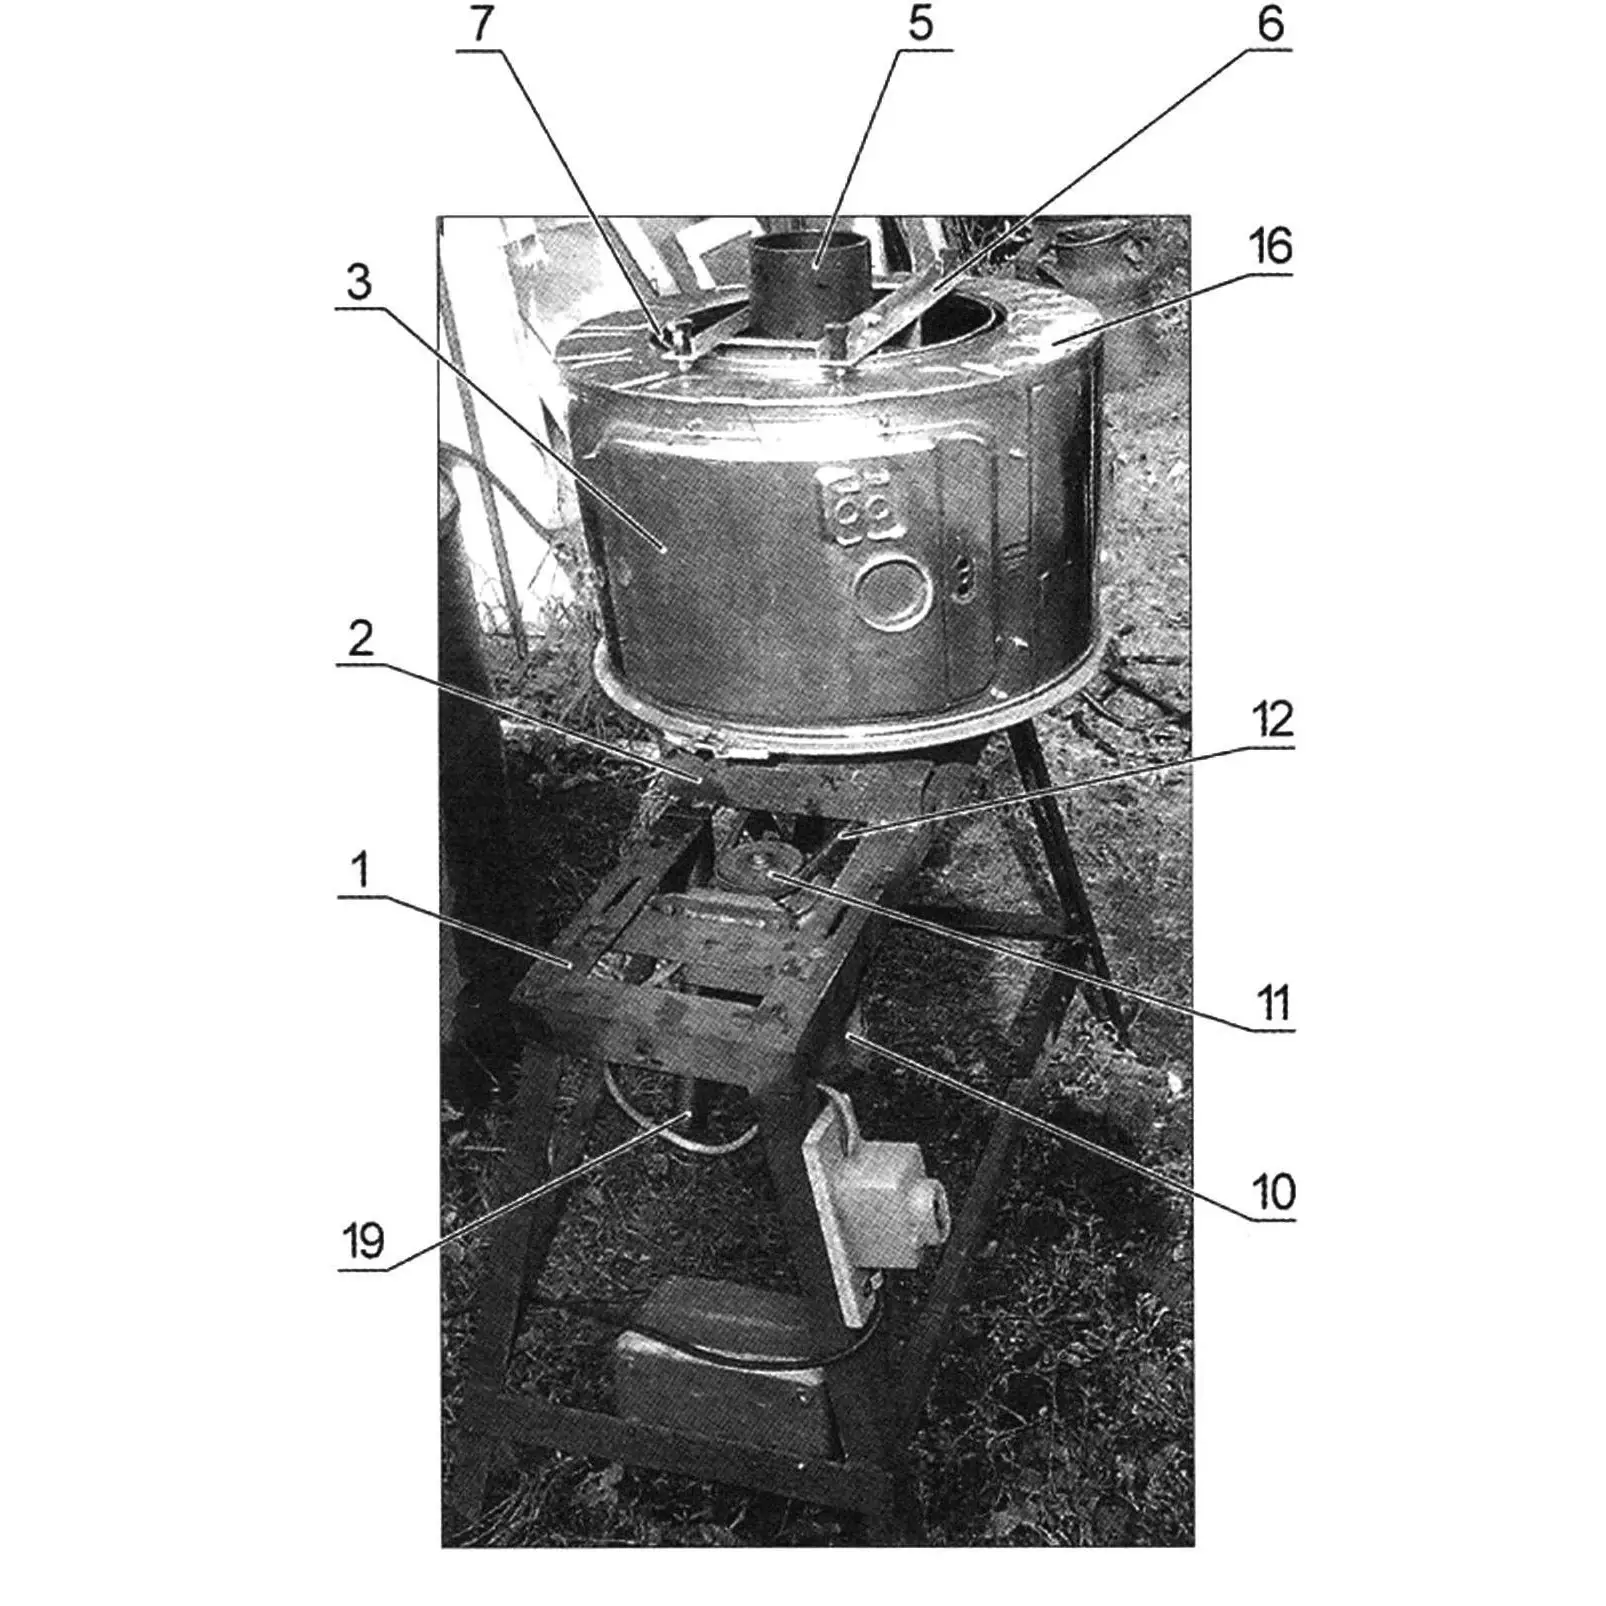
To build it we mainly need the drum and its housing from a washing machine. They can be taken from any worn-out front-loading washing machine. Finding such a machine nowadays is not a problem, since models are replaced every 2–3 years.
We fully disassemble the old machine. We keep the drum, drum housing, and drum mounting bracket with bearings. Balance weights, temperature sensors, heating element, and other unneeded parts we unscrew and remove from the housing.
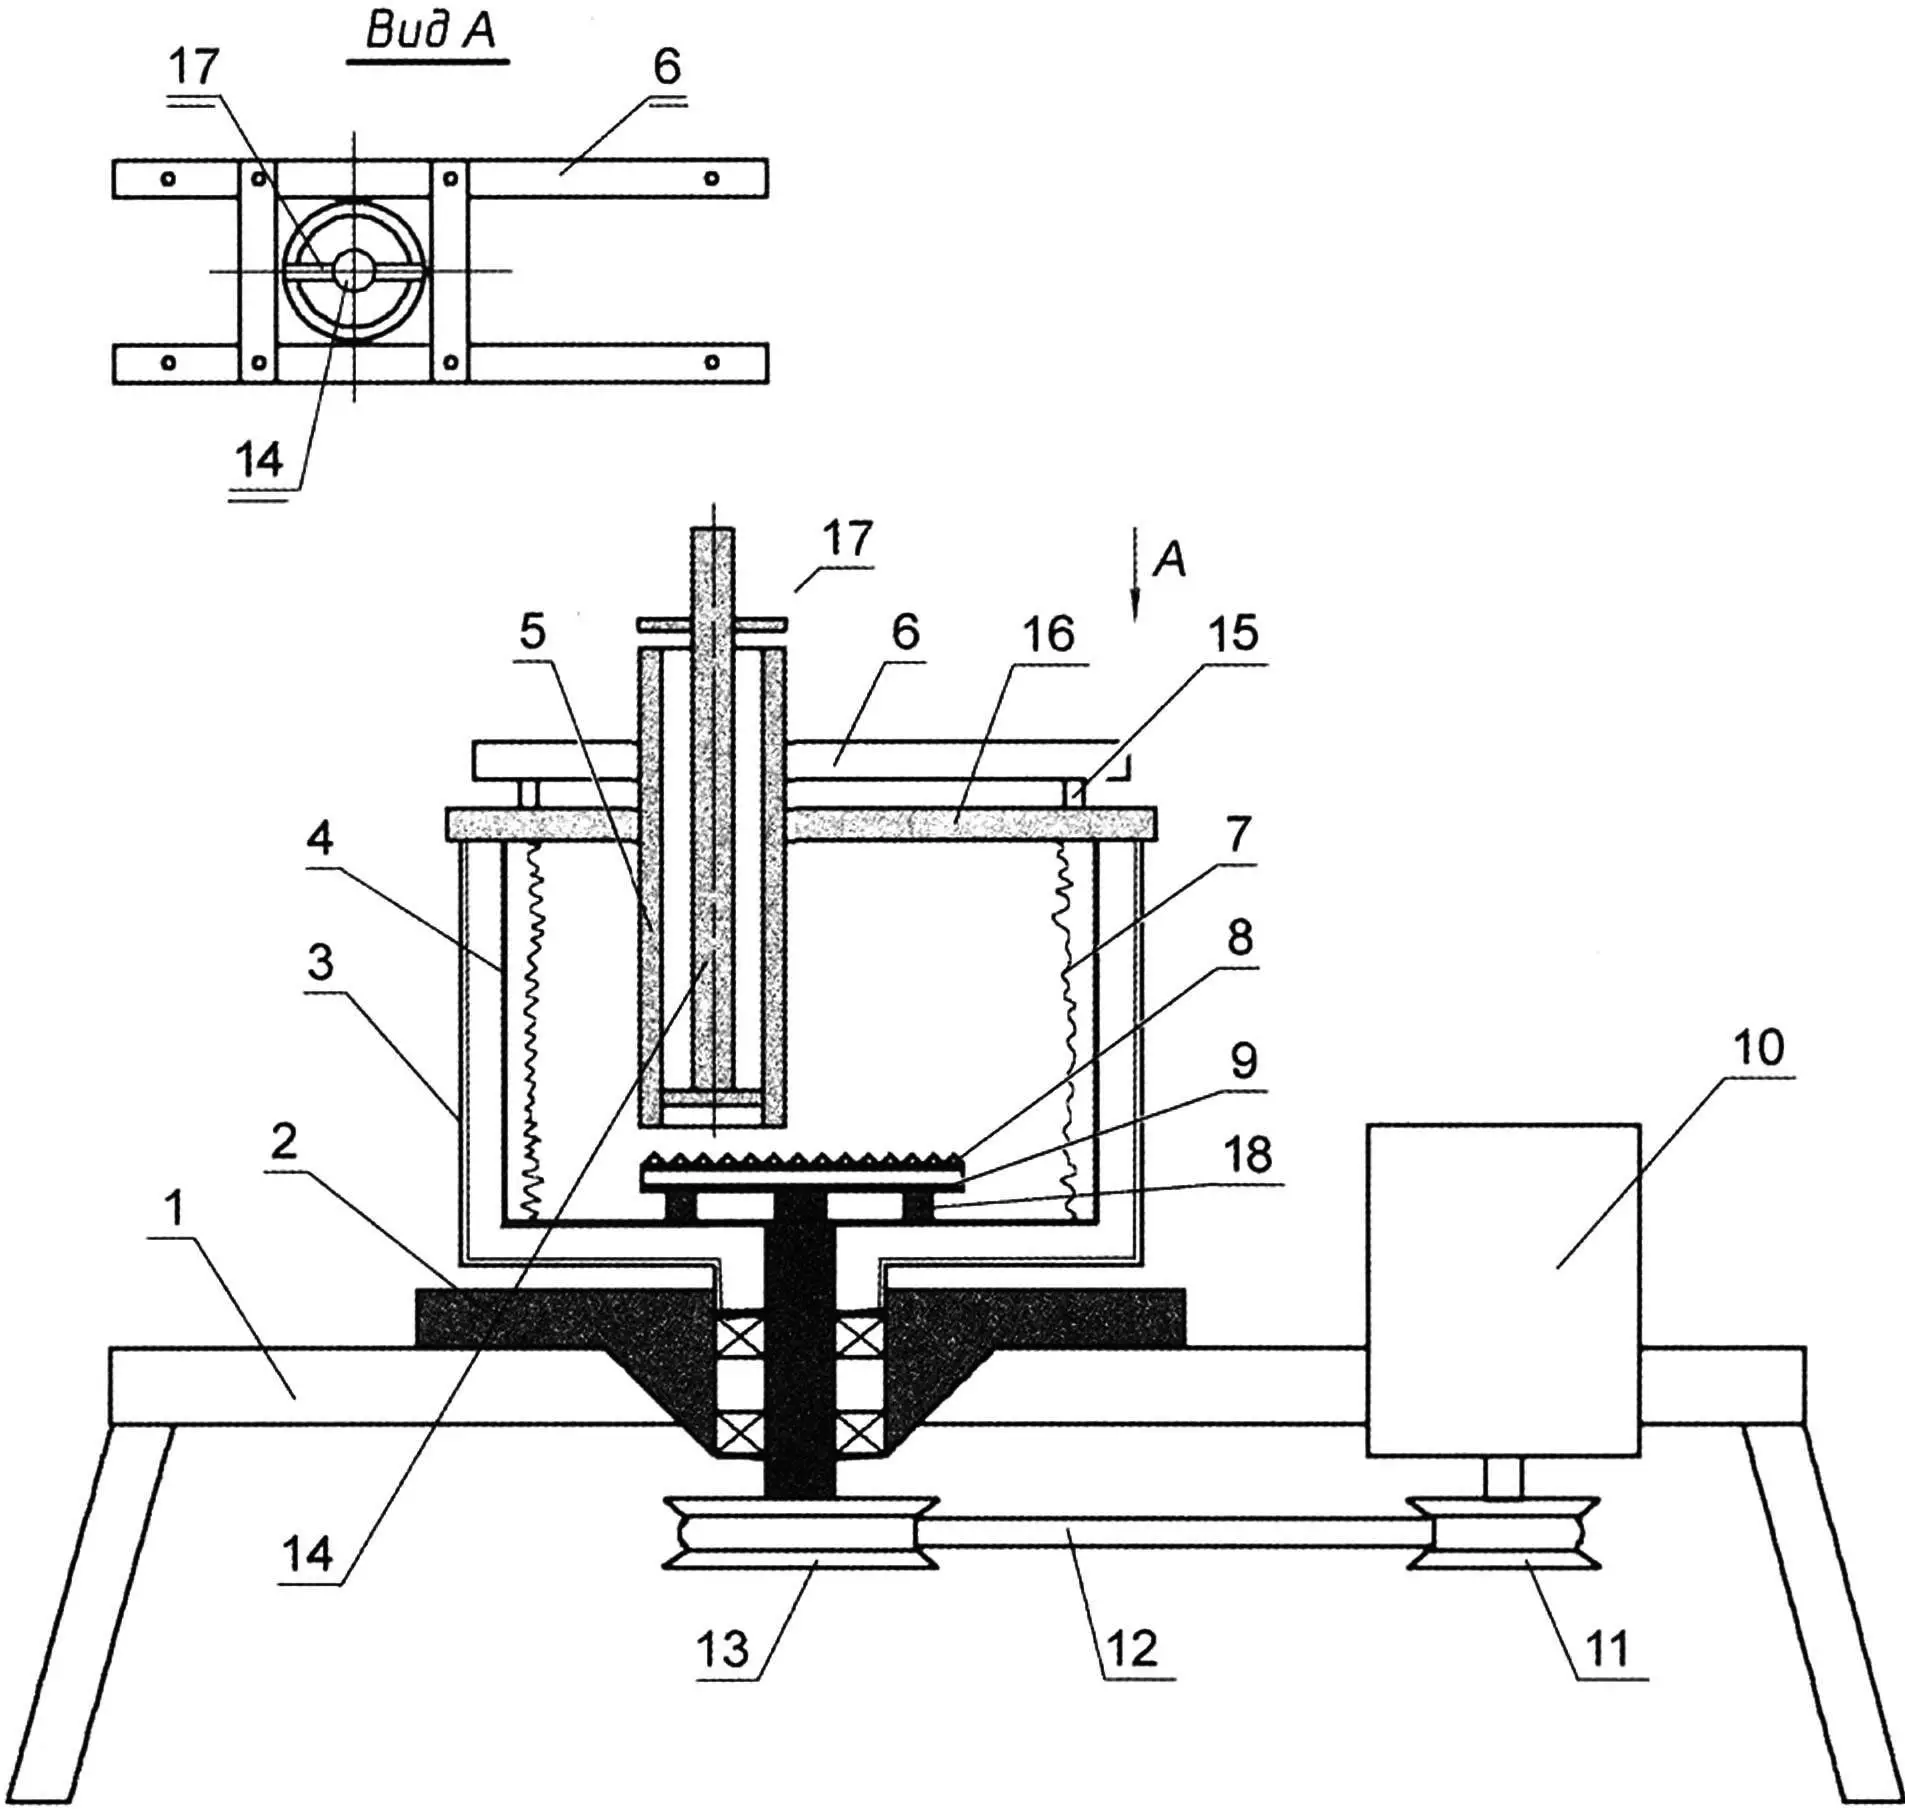
1 — base frame; 2 — drum mounting bracket (original from washing machine with bearing block and seals); 3 — drum housing; 4 — drum; 5 — fruit feed pipe/hopper; 6 — upper frame; 7 — screen; 8 — grater disc; 9 — grater spacer disc; 10 — electric motor; 11 — motor pulley; 12 — belt drive; 13 — pulley with drum shaft; 14 — pusher; 15 — upper frame to housing attachment; 16 — lid; 17 — pusher stop; 18 — grater attachment (3 pcs.); 19 — drain hose (not shown on diagram)
We thoroughly clean all parts of detergent and scale. We polish all surfaces to a shine with fine sandpaper. We inspect the existing holes. We need to leave only one hole in the drum housing, at the bottom—for juice to drain. All other holes we seal with a thin rubber gasket, clamping it with stainless steel plates on bolts. Where possible, bolts and nuts are best in brass or stainless steel. In my case a tube with a corrugated hose from a kitchen sink trap fit the large hole by diameter.
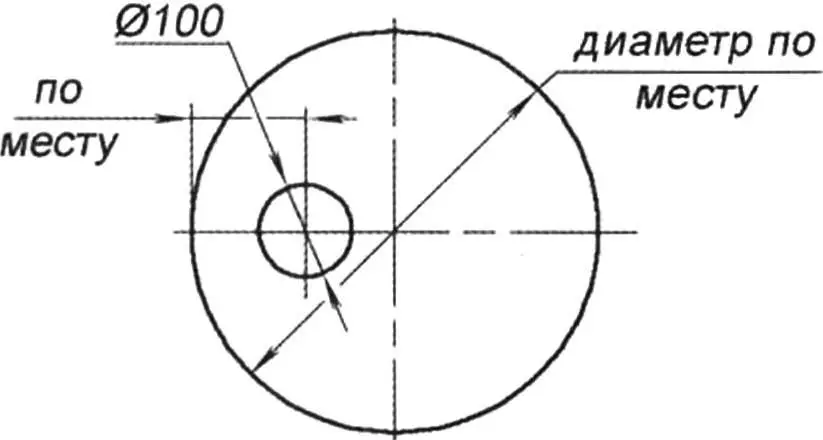
We make the grater and grater spacer. From 2 mm thick stainless steel we cut a 220 mm diameter disc with an angle grinder or on a lathe—for the grater. From the same 0.5 mm thick steel we cut a second 220 mm diameter disc with metal shears: this will be the spacer. It is needed for stiffness so the grater does not flex. The spacer is fastened with three brass standoffs to the drum bottom, and the grater to it with five M5 screws. We tap the threads directly in the spacer.
The grater is made as follows. After drilling 5 mm diameter holes, we mark at 10 mm pitch around the full diameter. We divide the disc into 14–20 sectors. We fix the blank with screws to 10–16 mm thick plywood in the 5 mm holes. Following the layout we punch the cutting teeth with a punch having a round or square working profile. The screws and spacer keep the grater from bending and shifting. Layout and drilling of all parts should be done as accurately as possible so the grater is centered on the drum.
The drum has 3–4 mm diameter holes, so we modify it. Usually the drum has three stiffening ribs inside. We take fine stainless steel mesh with 1×1 mm cells, make three blanks to match the drum sections (if there are no stiffening ribs, we make the screen in one piece). At the top of the screen we add 10 mm for a bend, done against a straightedge by tapping with a hammer—the edges end up smooth and safe. We fix the screen inside the drum with an awl and blind rivet gun. The number of rivets is arbitrary so the screen sits tightly against the drum and does not come off when rotating.
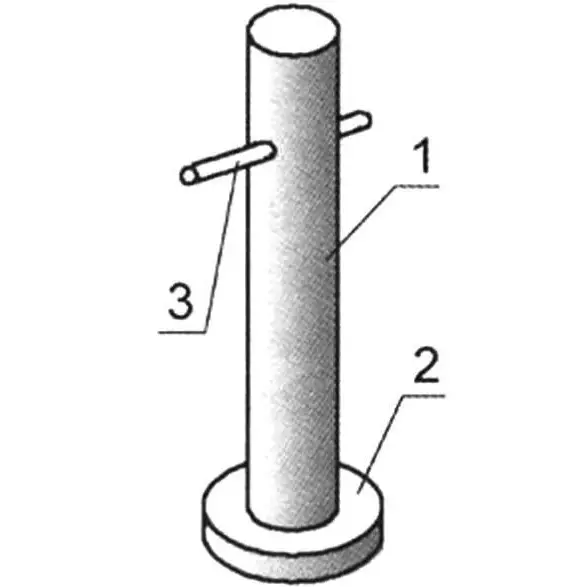
1 — rod (from shovel handle); 2 — pusher heel; 3 — stop
From a length of polyethylene pipe with 100 mm inner diameter and 5–6 mm wall thickness we make the apple feed hopper. To fix the pipe we need four aluminum alloy brackets. We fix the pipe offset from center so its edge is at the edge of the grater.
The pipe with brackets is attached to the drum housing with four M6 bolts, with the bolts inserted from inside the housing before assembly and tightened with nuts on the outside. We adjust the gap between pipe and grater with washers under the brackets: this sets how fine the apples are shredded. The brackets are secured at the top with wing nuts for quick disassembly and assembly.
From a birch shovel handle we make the apple pusher. We attach a 90 mm diameter plywood disc to its end, and put a stop at the top so the pusher cannot go down to the grater.
After we have all the parts ready, we assemble the drum with housing and bracket. We check the bearings and seal and replace if needed. The pulley will have to be adapted to your dimensions and V-belt.
I used a 1.1 kW motor at 3000 rpm. The drum is driven at 1500 rpm via the belt. More is risky due to vibration, and less—juice will not extract well.
We weld the base frame from angle iron or adapt a ready-made one. We mount the bracket with drum housing to it on rubber vibration-damping washers. We cut a lid from thick polyethylene or rubber—a disc the diameter of the drum housing with a hole for the apple feed pipe. The lid is needed not only to protect from juice splatter: it also protects from the rotating drum.
All fasteners must be securely tightened, and the electrical part assembled with proper insulation to avoid electric shock. Before assembly we wash the vessel parts thoroughly with dish soap and rinse. All components should be made of food-safe materials, resist corrosion, and not release harmful substances into the juice.
After assembly and adjustment we do a test run. The empty drum should run without knocking or unusual noise. We prepare the apples, wash them well, and discard rotten or wormy ones. Good apples can be left whole. Cores and seeds are no problem for our juicer. We place a bucket under the drain tube. We drop 1–2 apples at a time into the hopper and press them against the grater with the pusher. With steady feeding about a bucket of apples is shredded before vibration starts. Centrifugal force presses the pulp evenly around the screen. If light vibration begins—we stop feeding and let it run to finish extracting until juice stops flowing from the tube.
We switch off the motor and wait for it to stop completely. We scrape the pulp off the drum screen with a plastic scraper or a child’s sand shovel.
After use we rinse the screen and all parts thoroughly with a strong stream of water.
For long-term storage we separate the drum housing from the bracket and remove the screen for thorough cleaning and rinsing.
Dried pulp is a good vitamin supplement for chicken and goat feed in winter.
«Modelist-Konstruktor» No. 1’2012, E. YABLONSKY, Bobruisk, Belarus
Recommend to read
 ELLIPSE-PILOTAGE
We offer cordovano-pilotando design developed in the model aircraft kraine Industrial syut Perm city under the leadership of K. Minkova. It is designed for engine KMD-2,5 and has a... BIPLANE CHERNIKOV
Last summer, the head asiacruise Vnukovo house of culture (Moscow) Amateur pilot, Andrey Chernikov demonstrated are designed and built with his own hands a single biplane rather...
