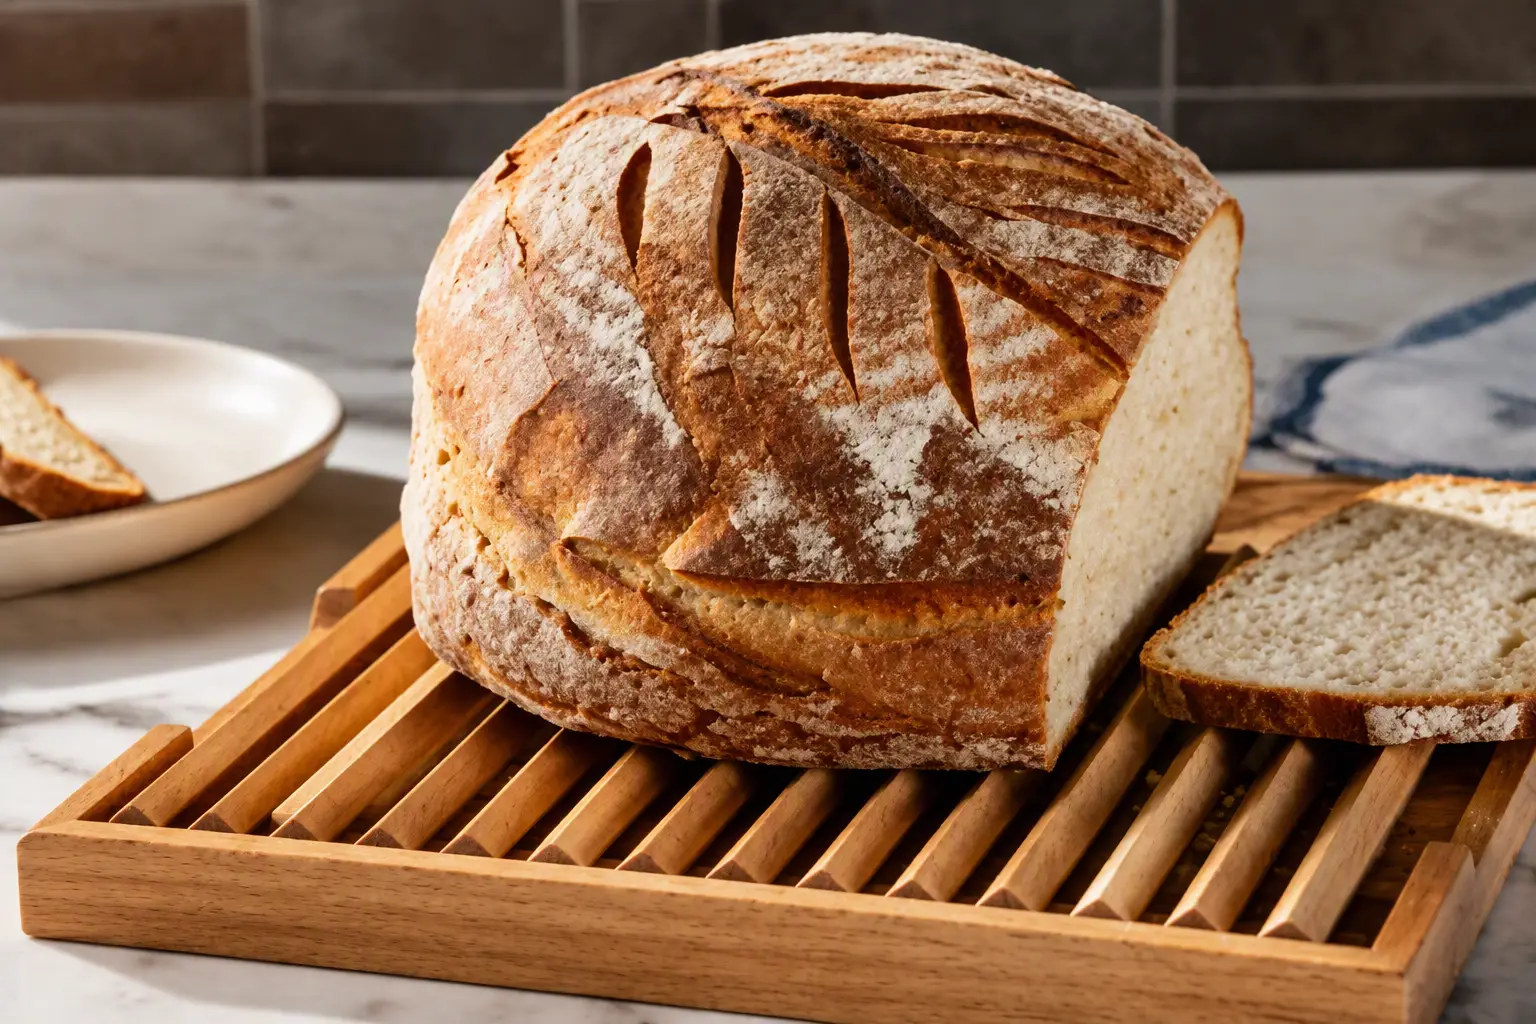
Today, stores offer a huge variety of kitchen cutting boards. There are boards made of wood, plastic, glass, ceramics, and even marble. But despite such an abundance of items with a similar purpose, there is one crucial rule that any experienced cook knows: different foods require different cutting boards. One for meat and poultry, another for seafood, a third for chopping vegetables and fruit. And, of course, a separate board is needed for bread and other baked goods. Following this simple principle ensures a high level of kitchen hygiene, improves the quality of dishes, and helps avoid unpleasant food-poisoning situations.
The cutting board proposed here is intended exclusively for slicing bread. Compared with traditional “little boards” from the store, it has several advantages at once. Have you ever sliced, for example, a French baguette with a hard crust? Crumbs everywhere! In this case, thanks to the grate, they collect in the tray — you have to admit, that’s convenient. Another plus of the grate: the knife blade does not contact a hard surface and does not get dull. And you can serve the sliced bread at the table in the wooden tray-platter — stylish and original.
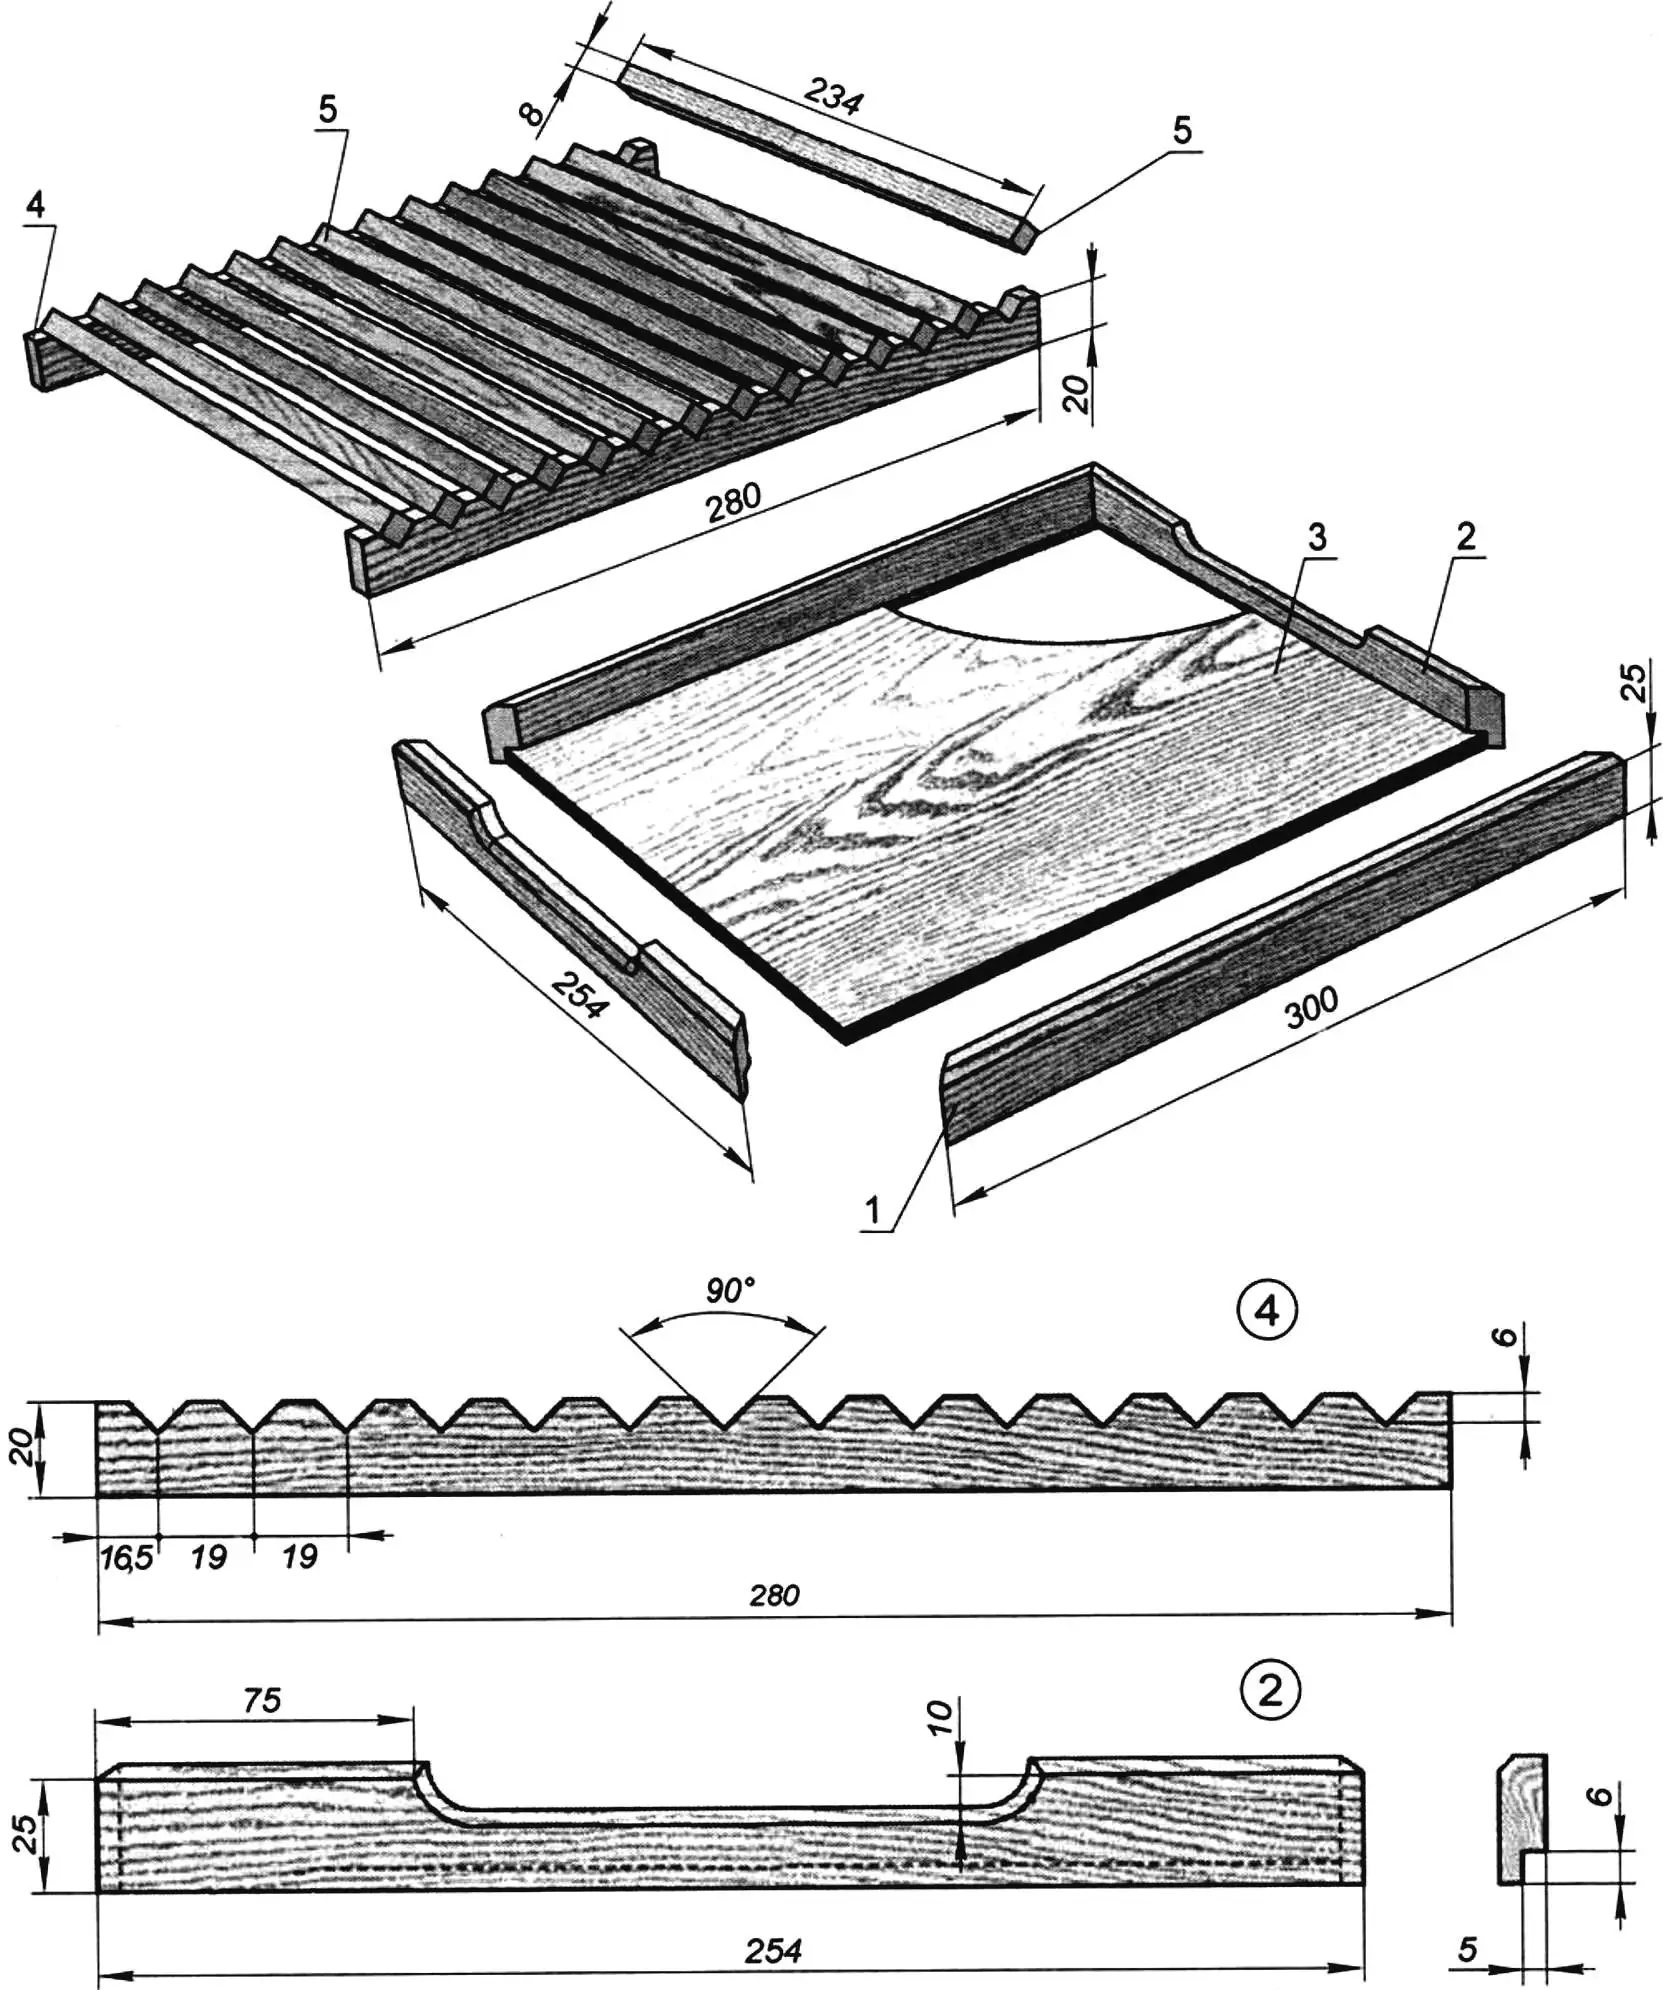
1 — longitudinal tray wall; 2 — transverse tray wall; 3 — tray bottom; 4 — grate side rail; 5 — grate crosspiece
The ideal material for the “bread slicer” is maple wood, valued by cabinetmakers and designers for its attractive color and texture. It has no persistent smell, unlike pine and spruce, and it is easy to work. Both solid maple stock and maple plywood are available for sale. In hardness, maple is somewhat inferior to cherry and oak, but that parameter is not decisive here.
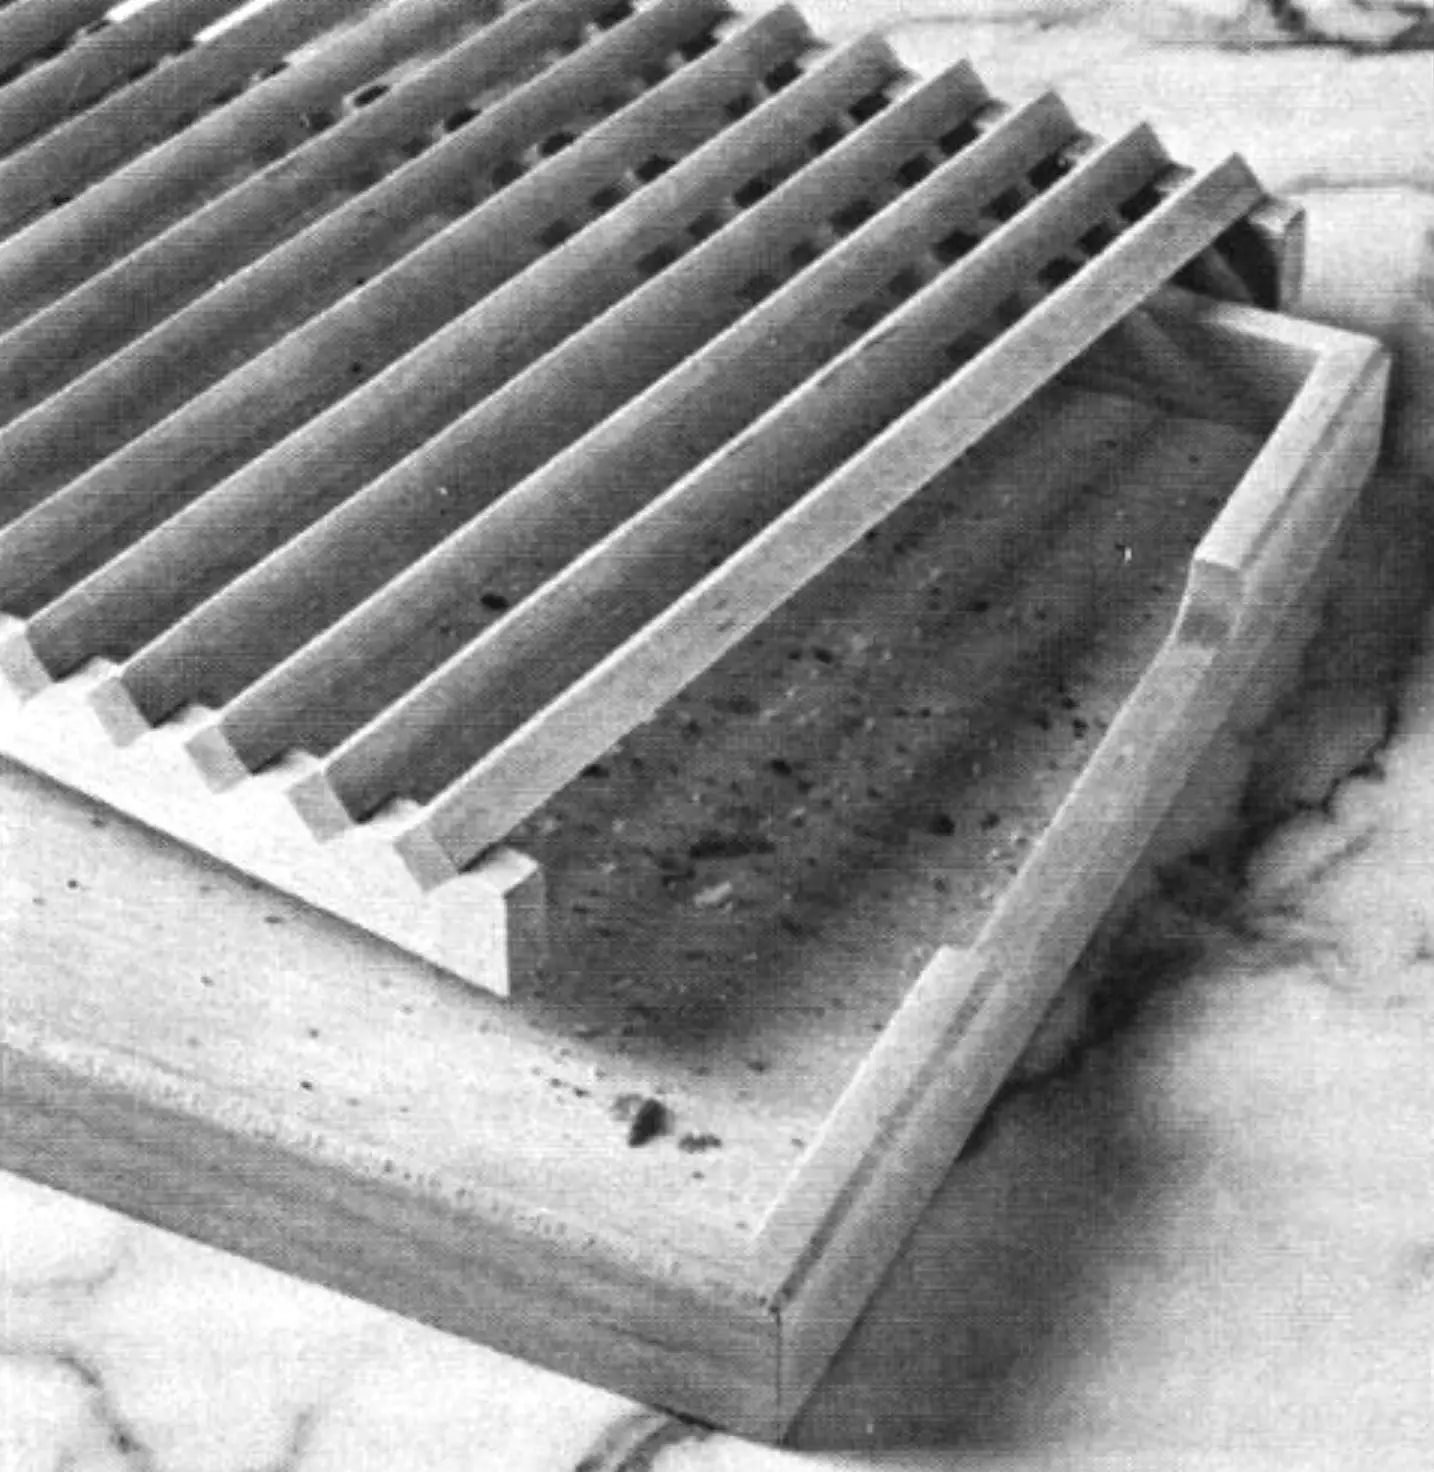
The design of the fixture is shown in the drawings, and repeating it is unlikely to cause any difficulties for a home craftsman who knows how to use basic woodworking tools. Naturally, cutting the tray walls at 45 degrees should be done with a miter box, and a hand router is best for cutting the groove for installing the tray bottom. However, you can do without it if you slightly change the bottom dimensions (increase them to 254×300 mm) and join it to the tray walls from below. Double clamps that lock the corners are used to assemble the tray walls. Since the structure experiences no load-bearing stresses, a glue joint of the parts is sufficient.
The grate parts are assembled in the same way. The crosspieces are carefully sanded and glued into the corresponding grooves of the side rails.
Parts list
| Drawing position | Blank dimensions, mm | Quantity |
|---|---|---|
| 1 | 10×25×300 | 2 |
| 2 | 10×25×254 | 2 |
| 3 | 2×244×290 | 1 |
| 4 | 10×20×280 | 2 |
| 5 | 8×8×234 | 14 |
An important point is the finish. Several coats of a food-safe oil- or wax-based finish should be applied to the sanded grate and tray. This will bring out the wood grain and make the piece durable.
“Modelist-Konstruktor” No. 9’2025, Yulia CHERNYSHEVA, designer
Recommend to read
 NOT THE RING FINGER
Sometimes it is difficult to remove on finger tight ring, but much harder — pressed on the shaft bushing or bearing, Not accidentally creating a variety of devices. One of such devices... CHESS TABLE MADE OF MIRRORS
Modern small apartment is not always possible to place it with all the furniture that you feel necessary. Here, say, chess table — the place is quite a lot, is used relatively rarely. If...
