“Not long ago, the chief engineer of one of the factories producing refrigerators, V. V. Ulyanovsky, called me. As it turned out, he was interested in the thermostat I built for storing potatoes on the balcony in winter.” This is how engineer-builder A. A. Rozhdestvensky somewhat unexpectedly began presenting his mini-vegetable storage. Then he showed a letter in which he was invited to the factory “to resolve the issue of cooperation on the introduction into production and release of the ‘cellar on the balcony’.”
You will agree that, unfortunately, industry does not often respond so favorably to homemade innovations. In turn, having become interested, we called V. V. Ulyanovsky. He willingly shared his opinion about the thermostat. He confirmed that the design is very successful, has a simple heating circuit, and almost does not need maintenance. Therefore, the factory is not against developing an industrial prototype based on A. A. Rozhdestvensky’s proposal. And having heard about our intention to publish an article about the cellar, he added that there will certainly be many who want to follow the author’s example.
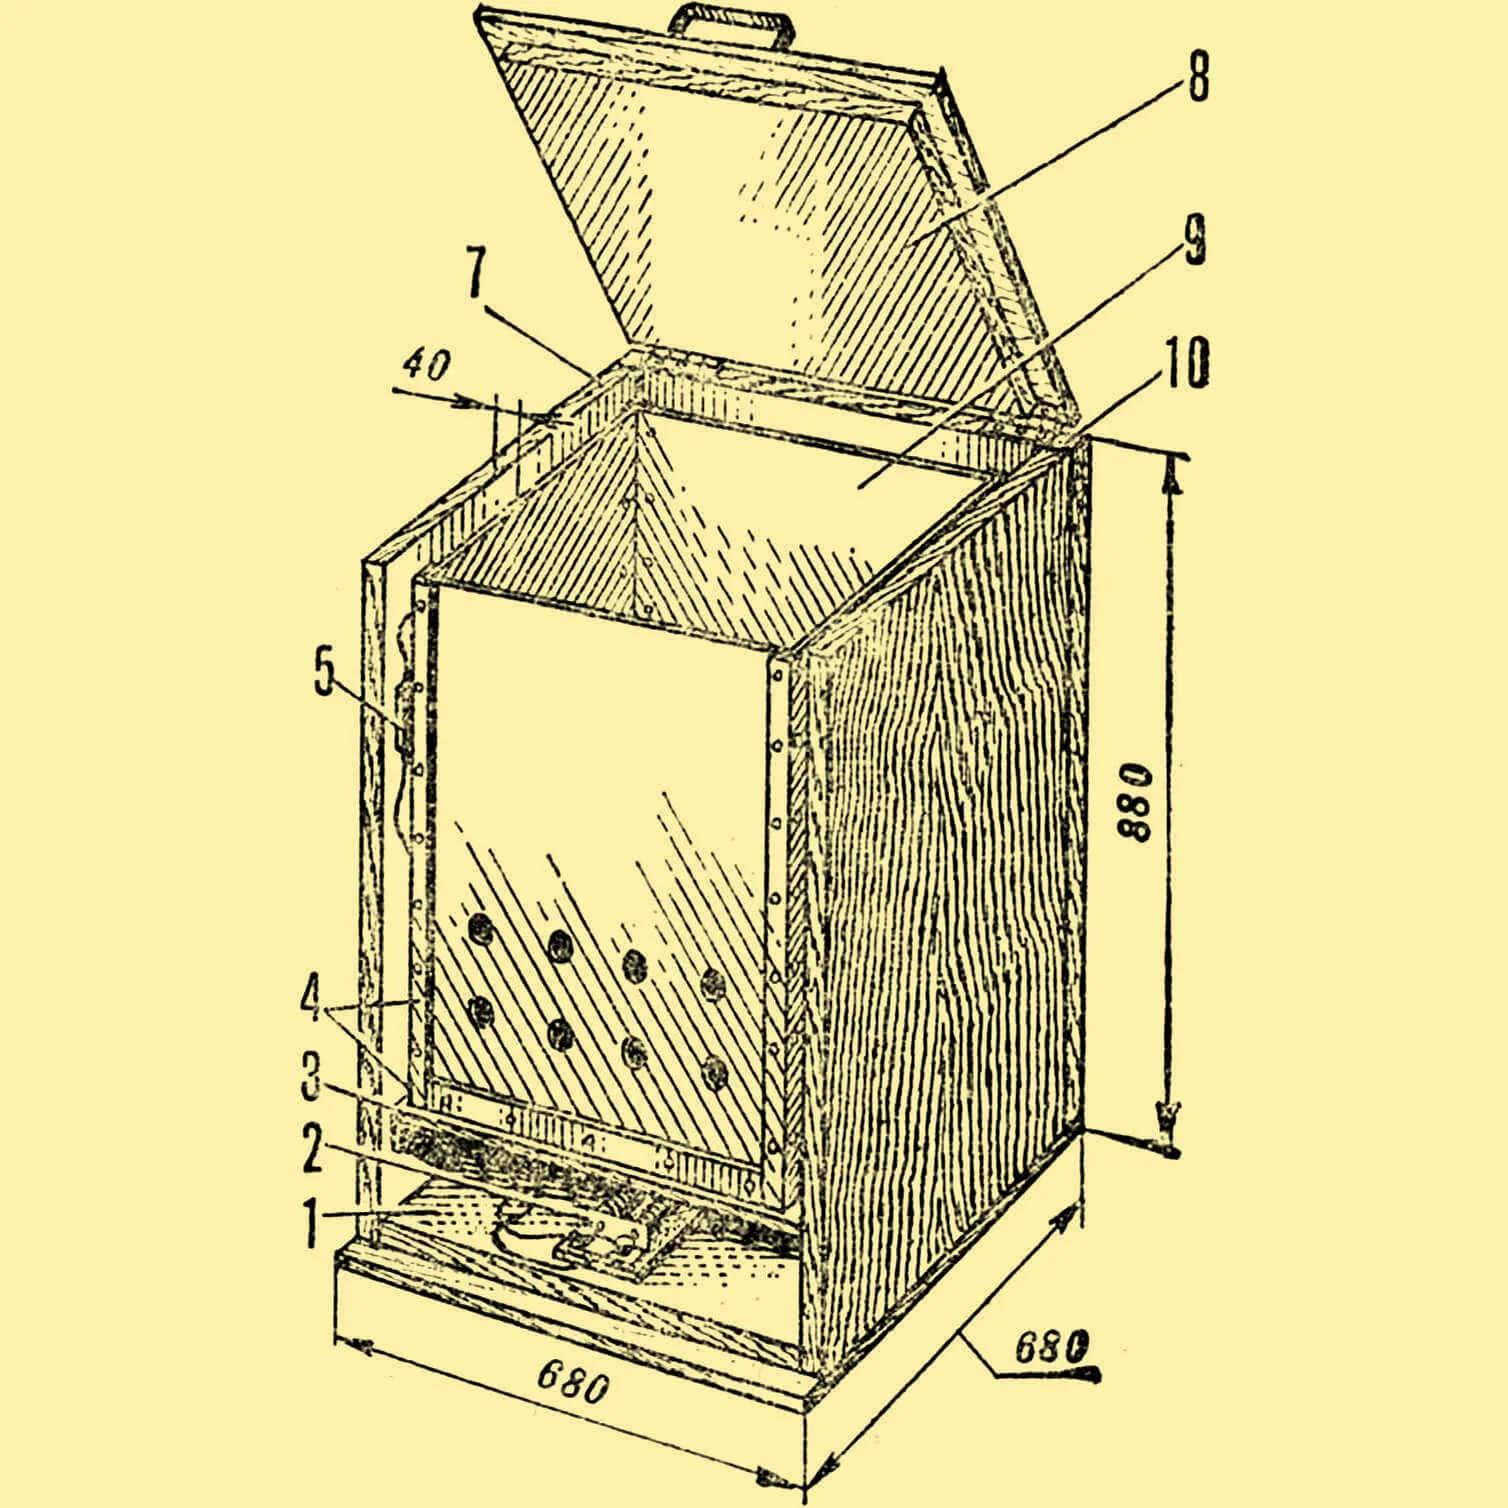
A solution sometimes comes to a person as if by accident: the motivating impulse can be a word dropped by someone, an object that caught the eye, which for some reason is associated with what you constantly think about. For me, the solution to the conceived scheme acquired real outlines when I read an article about a thermostat in a magazine. Let me remind you, this is a temperature regulator, a device that serves to maintain a certain constant temperature in a given volume — this is what the brief technical dictionary states. So, first of all, an internal container and a shell that closes the volume are necessary — and so we came to the topic of our conversation, to the mini-vegetable storage I built on the balcony for storing potatoes in it during the cold season, or, as I called it for a quite, I hope, understandable reason, to the thermostat. The shell here is a heat-insulating cabinet, inside it is a container for potatoes, heating is provided by an electric heating element (TEN), the necessary constant temperature is maintained using a sensor.
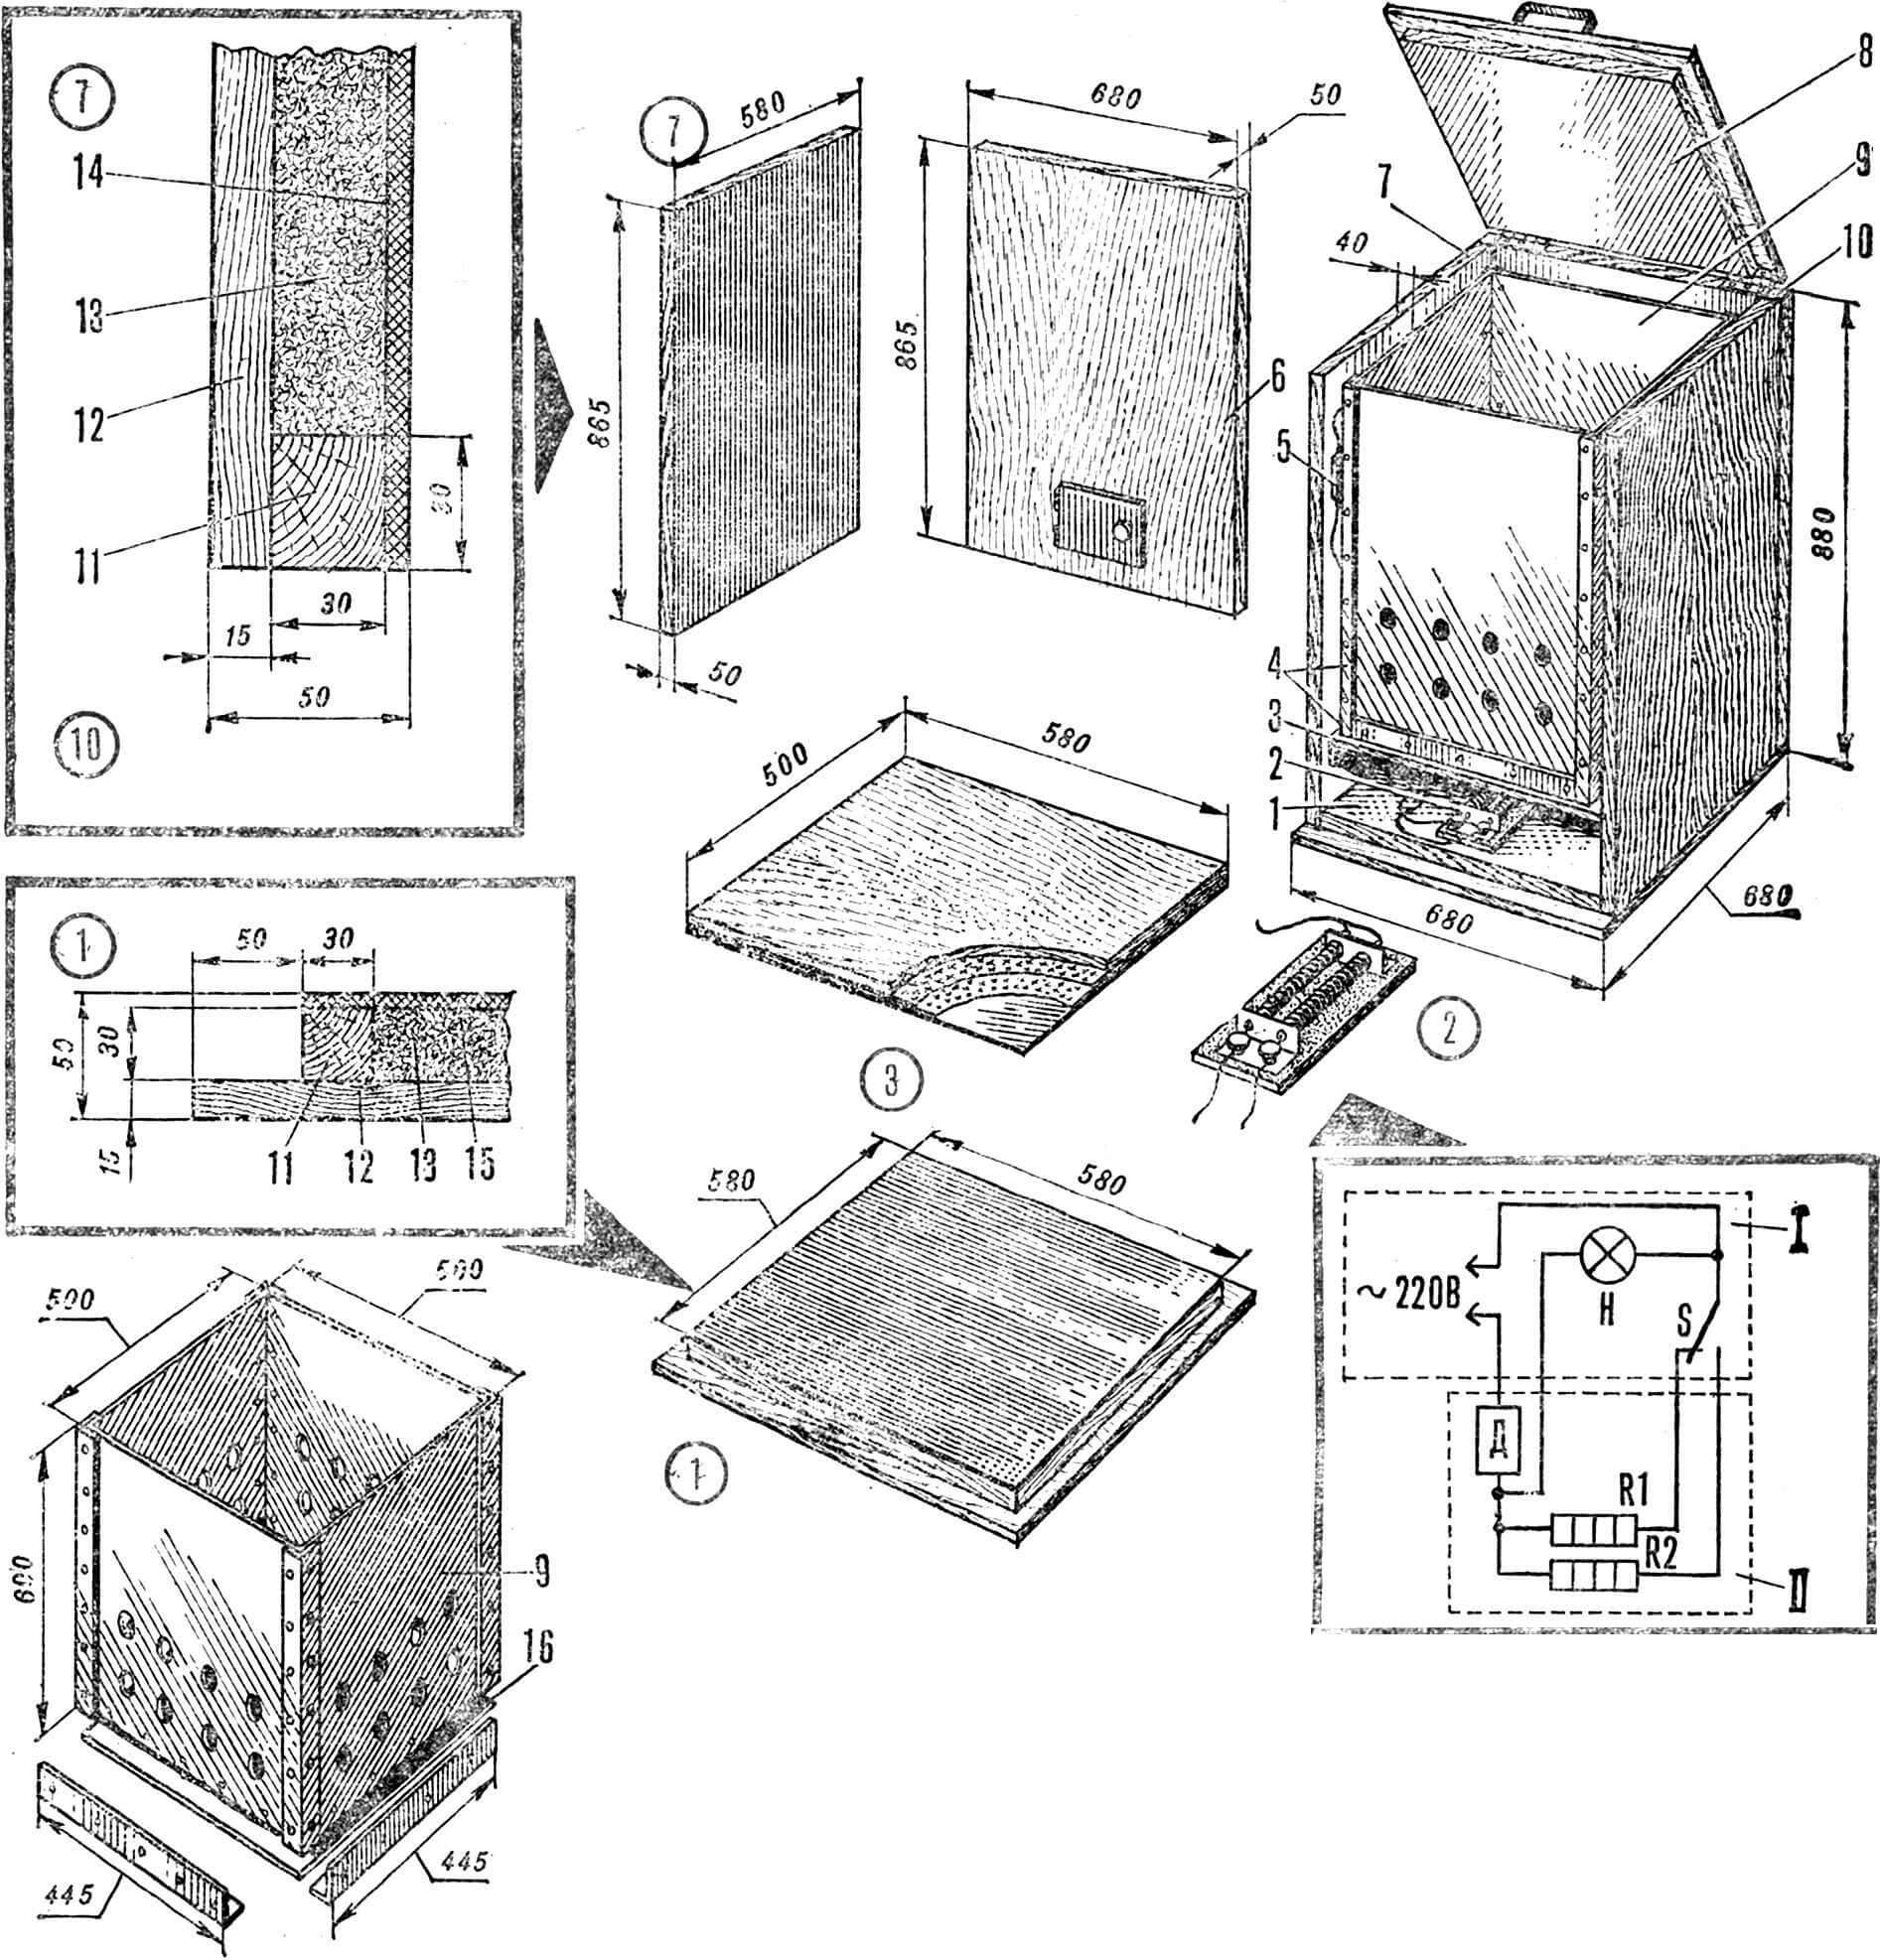
1 — thermostat bottom, 2 — electric heating element, 3 — “second bottom”, 4 — container connecting angles, 5 — temperature sensor, 6 — thermostat front panel, 7 — side panel, 8 — lid, 9 — container, 10 — rear panel, 11 — frame rail, 12 — chipboard, 13 — foam plastic, 14 — hardboard, 15 — asbestos, 16 — container bottom.
Fig. 2. Thermostat electrical circuit:
H — indicator lamp, D — temperature sensor, R1 — working TEN, R2 — backup TEN, S — switch; I — block located in the apartment, II — thermostat block.
The cabinet is assembled from separate panels, each of which is a “sandwich” of the following construction.
First, frames-bases are assembled from 30X30 mm slats according to the dimensions shown in the drawing. Corresponding chipboard panels 15 mm thick are nailed (or glued) to them on one side. The resulting boxes are lined with a 30-mm layer of foam plastic and covered on top with 5 mm thick hardboard sheets, trimmed flush along the perimeter of each frame. All cabinet elements are primed and painted with oil paint or heat-resistant enamels before assembly.
Additional work before the final installation of the cabinet on the balcony is as follows. Supporting metal angles 30X30 mm are screwed to the side panels at a distance of 100 mm from the bottom panel. The bottom is made somewhat differently: instead of hardboard, its inner surface is lined with sheet asbestos, and the dimensions are limited to 580X580 mm.
The container is made of 2 mm thick duralumin sheets. Its side walls have dimensions of 500X600 mm, the bottom — 500X500 mm. They are connected to each other with angles on rivets. In addition, there is a second bottom (500X580 mm). It is four-layer: chipboard, two layers of sheet asbestos and duralumin. It is connected to the supporting angles with M4 bolts with countersunk heads. This is like an insulating gasket. After all, the TEN is located on the floor of the cabinet, and hot air without such protection will excessively heat the lower tubers. For ventilation and heat exchange, 8—10 holes Ø 10 mm are drilled in the container walls.
A door opening access to the TEN is provided in the front panel of the thermostat. It is cut from chipboard (180X100 mm) and attached with two casement hinges.
To increase the reliability of the thermostat, I installed two electric heaters: working and backup. They are rod-shaped — from a fireplace, their total power is 0.5 kW. This is quite enough to maintain an optimal temperature of +2… +4° in the container in any frost. They are placed on an insulated stand made of chipboard, covered with asbestos, 10 mm thick, and fastened in metal angles 50X50 mm on getinax insulators.
As a temperature control sensor, it is best to purchase the very common TUDE-1 — it is widely used in water heating control systems. The device is equipped with a regulator, with which the required thermal regime is set. The sensor is fixed in the upper part of the thermostat between the wall and the container. The electrical wiring must be well insulated, for example, pulled in a rubber tube, a special electrical wire of the CRPS type (with four cores) is also suitable. It is brought out through a hole Ø 10—15 mm drilled in one of the panels — in the most convenient place for you.
A lamp (15—25 W) connected to the electrical circuit of the control unit located in the apartment serves for visual control of the TEN operation: when the heater is working, the lamp also lights up. At an outside air temperature, for example, —10…—15°, the TEN remains on for 5—10 min, then there is a break for 2—3 hours. Therefore, if the lamp burns for more than, say, 15— 20 min without turning off, there may be a malfunction in the circuit. The thermostat itself holds heat well: at the same sub-zero temperature, potatoes can be stored without heating for up to half a day.
A. ROZHDESTVENSKY, engineer-builder
Recommend to read
 IN THE STRUGGLE FOR THE HARVEST
A real scourge of the potato fields was the Colorado potato beetle. And in recent years because of the warm winter it is getting more and more. To deal with it in different ways. But the...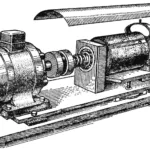 Bench grinder
In technical hobby clubs there is often a need for wooden workpieces with an even, smooth surface. Getting a well‑sanded board is not easy: hand processing is labor‑intensive and requires...
