CHAIR-RETRO

CHAIR-RETRO

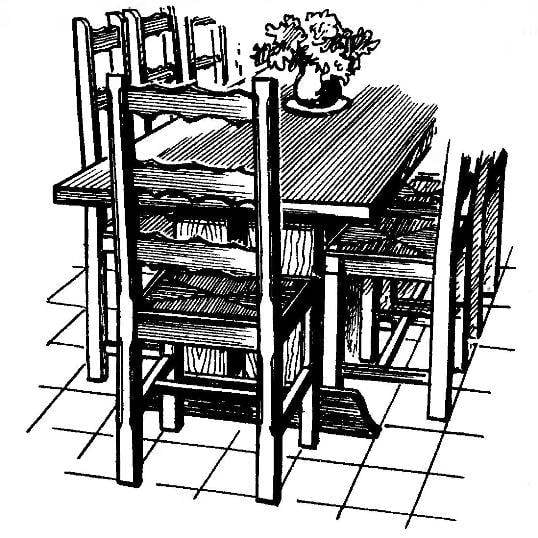
Along with the sleek and lightweight modern furniture no less interest are the objects solid, solid, often stylized antique, that is, manual work. It is to this category proposed by the Hungarian magazine “Earmaster” design of a retro chair that is equally organic in both city and country interior, especially complete with a massive Desk. All parts of this chair are quite simple, but require precise and meticulous workmanship, which determines how beautiful you will be as a result of this simplicity.

BASIC DETAILS
 
The impression of massiveness to the chair attached to the use of the wood of a large enough size. So, for the front legs and the back that go into the rack of the back, require the cross-bar 56×56 mm. Three rungs and back rails of the boards in thickness 25 mm.
 
All the details of the structure connected to the ship with the use of carpentry, casein or PVA glue. The chair also has at the corners of the reinforcement struts of bars section 40×20 mm, which are fastened by screws, also missed glue. So struts does not crack when tightening the screws, under the last pre-drilled holes slightly smaller diameter. The struts are mounted below the upper edge of the rings is about 20 mm and act as a support for the seat. In the manufacture of seat used bar cross-section 40×20 mm, to be glued together and to spike.
The seat can be, for example, from plywood, soft close-fitting foam and upholstery fabrics. However, looks spectacular, is shown in the figure seat woven from cord (e.g. clothesline) on the diagram above. The sequence and direction of movement of the ball or Shuttle with cord different possible, what determines the General pattern of the netting (“inverted triangle”, “trapezoid with triangles,” etc.). In the process of netting permitted capacity of the cord when it is insufficient, however, the nodes of the ligament should be placed under the seat, so as not to spoil the picture.
 
The finished seat is inserted firmly into the chair and does not require additional fastening.
 
Chair
Chair “antique”:
 
1 — front leg (470x56x56,2); 2 — PRONASCI (38×38,2); 3 — jumper (38×32); 4 — front drawer side (60×25); 5 — side rails (60×25); 6 — rear drawer side (60×25); 7 — rear leg stand (1200x56x56); 8 — cross (90×25, 3). 9 — brace (100x40x20,4 PCs.); 10 — rear cross seat (40×20); 11 — cross front seat (40×20); 12 — sidewall seats (40×20)

 
Because of cross backless curved contour of the workpiece it is better to lay out the pattern, made for example of cardboard or hardboard. The desired pattern to the workpiece it is easy to make with a small cross-handed plane or humpback, file or sandpaper on a curved clasp.
Partially chamfered sharp edges on the legs and the back of the chair are also important additional decorative elements.
 
SEQUENCE ASSEMBLY
 
Mnogokanalnosti construction and tongue and groove joints require a certain Assembly sequence prepared items. It is better to start with these knots, which would combine most of the logging and formed to the same rigid part of the structure. In this case they can be the sides of the chair formed by the connection of the side rings with front legs and rear legs of the uprights. The thus obtained sidewall is easier to stykovanii with the crossbars of the back and other parts.
 
The wicker seat And print
Woven seat:
 
A — pattern “inverted triangles”; — print “triangles and trapezoids”

 
After daily exposure (for the final setting of the adhesive) remains to decorate the stand assembled and insert the wicker seat.
 
DESIGN FINISH
 
Before the General Assembly prepared every detail of the chair should be carefully handled (along the layers) emery paper so that all its surfaces are perfectly smooth and show beautiful texture of wood. To preserve and further identify the pattern the most effective method of finishing is processing furniture Polish. If desirable darker shades, you should cover the sections with the stain or paint “Pinotex”, try them first on the remains of the workpieces to achieve the desired “density” of the color.
 
It is better to varnish after final Assembly with a cotton swab wrapped in a thick cloth or flat brush. The first layer, letting it to dry out well, need to Polish the fine sandpaper and re-varnish, if necessary repeating these operations, and achieving deep, rich gloss surfaces.

Recommend to read

  • ROTARY HOEROTARY HOE
    We return to a universal small-sized agricultural machine WSM-2 "Cinderella", designed and built by members of the primary organization of VOIR Seversk secondary school № 44, Krasnodar...
  • MAGNETIC LEVITATIONMAGNETIC LEVITATION
    The one who had the opportunity to disassemble a conventional magnetic latch for a door, must have noticed how strong the magnet used in it. This leads us to the idea to use magnets...