
 Contemporary polished surface of the dining table, coffee table or bedside tables podtsvetochniki a pity to hide under a tablecloth or other nakryvki. Good Housewives prefer to use a small beautiful napkin-holders, who are also themselves serve as an additional decoration, in addition to the protective functions.
Such wipes can be made easily and quickly on their own, having a simple circular fit-frame of cardboard, plastic or plywood. From them elegant Placentia stand will serve not only you, but also as Souvenirs for friends and family.
Framework—templates
They look like hoops. The number for “weaving” and the dimensions are determined by a variety of planned napkins-coasters.
As already mentioned, the frame can be made of thick cardboard or plywood—the latter better fits the purpose, so consider the options for this material. External frame size (its diameter) regardless of the material up to 300 mm Thickness— 3 mm for frame out of plywood and 4 mm if made of cardboard.
The workpiece can be of different types: gear, with holes, hammered in a circle with nails. If any of these options: between the saws teeth, nasverleny holes or fill them with nails—the distance must be 2 cm it is Important that they are located diametrically opposite each other, thus, the best crossing of the strands in the center of the frame.
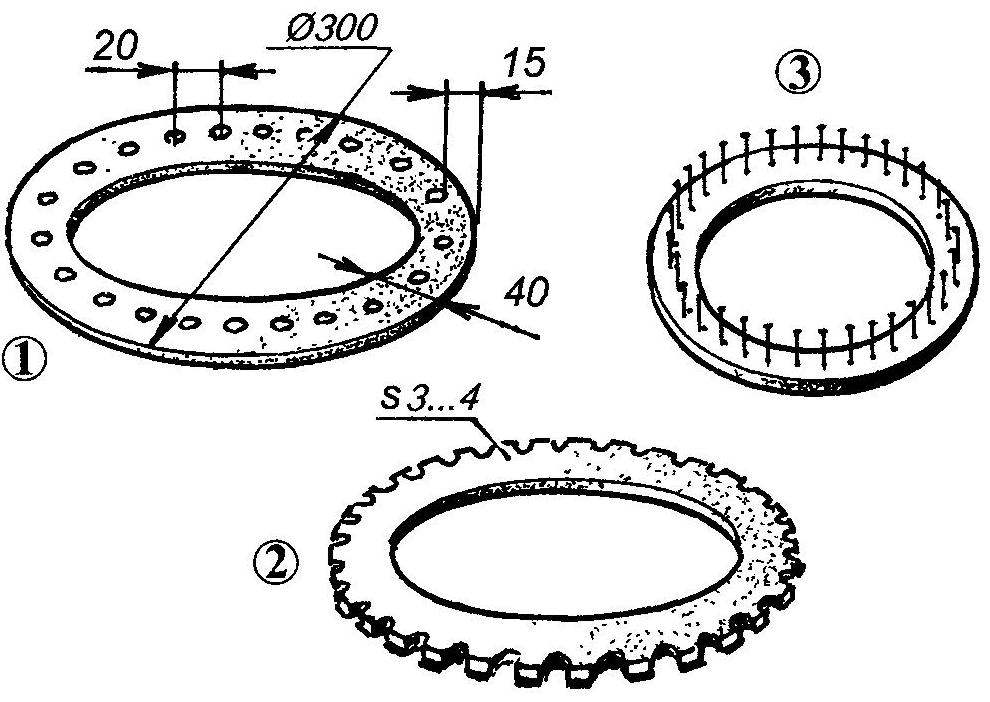
Fig. 1. Frame for weaving cloths:
1—large with holes; 2—large with teeth; 3—small with a comb of nails
For example, the choice fell on the variant of the gear frame. To get these same teeth, drill on the edge of the hole with a diameter of 4 mm, which then, using a hacksaw or jigsaw saw, forming the perimeter of a chain of depressions. Each of them (as well as in the other cases—the chain holes or combs of nails) should be at a distance of 1 cm from the edge in the case of the frame of medium size, and at a distance of 1.5 cm in the case of manufacturing the frame of large diameter.
In the version with holes for follow-up work will require a few large needles (like used for sewing bags), and for “weaving” in any of the options—and even two or three canoe, made of wood or plastic (such shuttles are used to repair fishing nets). The Shuttle can be made by according to the above scheme.
As a material for weaving purpose, any suitable thick, natural yarn (for cold stand suitable synthetic cord).
Preparing duck
In the case of the frame with holes will denem needle in a long thread that will extend through the first hole, and then secure the thread end node. Skip the thread through the hole on the opposite side, and then inject the needle into the adjacent hole. Similarly we repeat this operation as long as the filaments will not be stretched through all the holes (see schema). The long end of the thread can not be cut, since after all the holes it can immediately begin to weave.
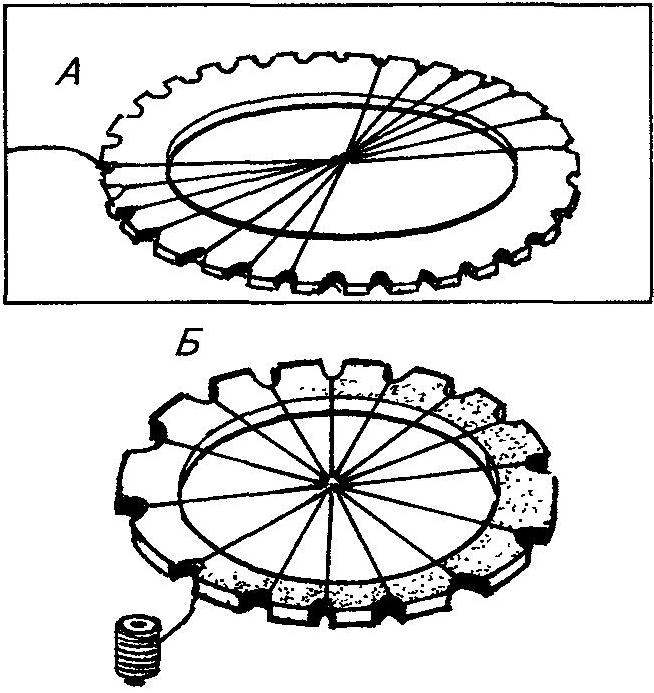
Fig. 2. Winding of weft on the frame with the teeth:
A—the beginning of the taping thread; B—complete duck
The same principle of operation observed in gear and hammer the frame: at the beginning of the fastened end of the thread on the first prong, or make a knot on one nail and make a sequential crossing of threads.
Netting
We begin to “weave” from the center weave. In the beginning, in the center of the crosshair, working with a needle, then proceed to use the Shuttle with the thread that is running through the crosshair alternately: the bottom, top.
A cord or thread wound on a Shuttle according to the scheme: at the beginning of winding the thread around the tongue, then skip the thread through the notch at the other end, then turn over the canoe to the other side and repeat the winding. Work following the same sequence: first, the thread goes around the tongue, then through the notch, again the rotation of the Shuttle and so on.
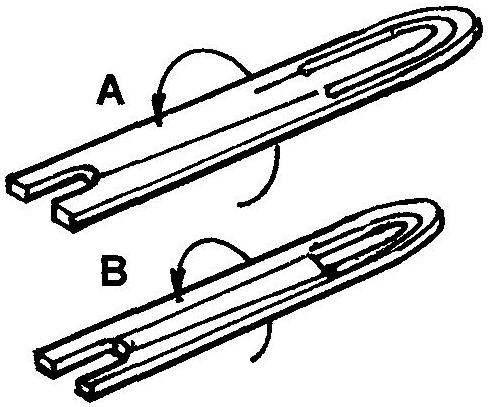
Fig. 3. The Shuttle and the sequence of winding of the thread:
And — start loop at the tongue of the Shuttle and pulling the thread to the end cut with the subsequent revolution of the Shuttle; — the transaction thread to the tongue and back to the neckline followed the coup dropship
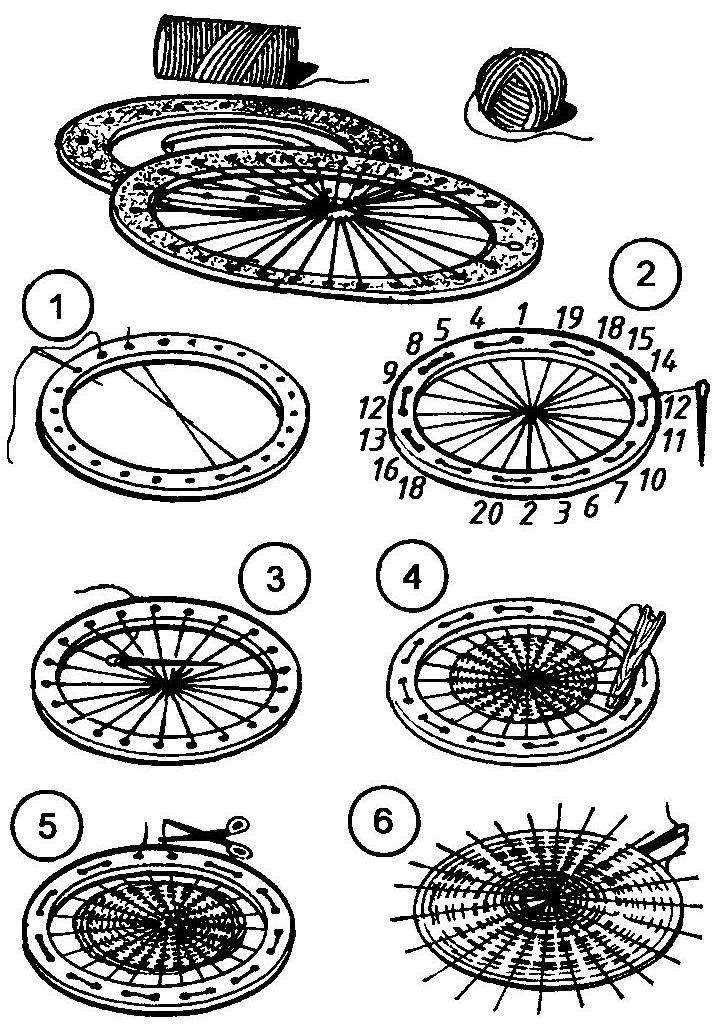
Fig. 4. Working with perforated frame:
1—beginning of formation of the weft needle; 2 — complete duck; 3 — the transition from the weft to the weave (frame inverted); 4—weaving Shuttle; 5—liberation of the workpiece swipe from the frame; 6—lacing – edge swipe
During weaving it is important that each new row of closely adjoined to the previous one: only in this case you will get a dense fabric. If the thread in the Shuttle ends, using a needle and inject it in the end of the last turns of the resulting fabric, and a new thread to continue fixed in the same way. Act as well to change the color of the thread (for that you have to have multiple shuttles).
As soon as weaving cloth has reached the desired size, cut to span the frame of the weft thread, and the ends of them with a needle hide in the finished fabric. To secure the edges can bind it to a loop seam (type “overlock”) or braid.
Varying colors of yarn, you can obtain a variety of patterned designs.
Recommend to read
 WILL NOT SLIP OFF
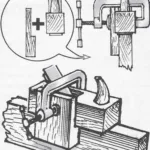
In the processing plane of the edges of the wooden parts is difficult to adjust so that the tool cannot slip sideways and did not spoil the work. However, the output is very simple:...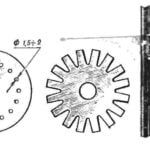 “ETERNAL” CUFF
The weak point of any piston pump — automobile, motorcycle or Bicycle, as is well known, piston, or rather, leather cuff, and the main fault is a loose fit it to the cylinder walls. The...
