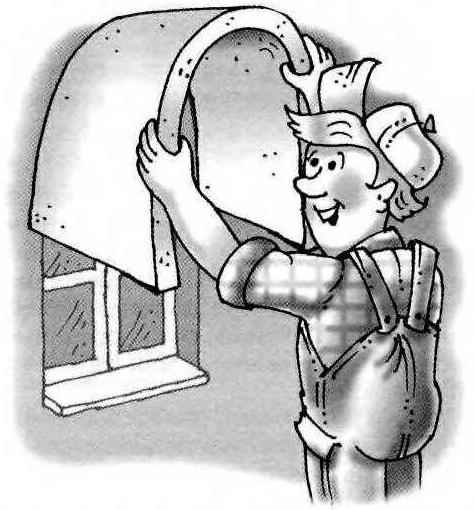
Normal newpenny the drywall is heavier and fragile. This material suffers during transportation. However, the choice in his favor do when looking for an economical solution.
Properties of gypsum
This material is distinguished by the absence of toxic substances and the ability to regulate the microclimate in the premises: if there is a surplus of moisture, the sheet will absorb it; if a shortage, on the contrary, to give. The acidity of the gypsum Board is identical to the acidity of human skin that, as electrical neutrality, confirms his innocence. In addition, the use of drywall makes it beneficial is its property as the heat supply. The drywall is not combustible, fire resistant (fire it could only be cardboard, but it does not burn, but only char), moisture-proof and has veterinaires property.
A huge advantage of this material is high speed of installation; however, he immediately gives a perfectly smooth surface. The disadvantages can be attributed only to the fragility and fear of water, and even then not all brands.
Types of gypsum Board
Cardboard-plaster “sandwich” used for cladding walls, creating partitions, installing suspended ceilings, install fire-retardant coatings, insulation, manufacture of decorative elements. Depending on the scope you can use the following types of drywall.
Table 1. Types of gypsum Board
Table 2. Minimum bending radii of gypsum Board (mm)
Normal — GCR. Suitable for internal furnish of premises with dry and normal humidity conditions. It is convenient for installation of partition walls, lining walls and ceilings with mounting on the supporting structure. It can be used in rooms with relative humidity up to 70 percent. This material is often used in the repair of apartments, furnish of premises of the country.
Fireproof, PLASTERBOARD. He has increased resistance to an open flame, as there is a reinforcing additive. The fire-resistant sheet suitable for use in premises with dry and normal humidity conditions. PLASTERBOARD relevant when fire protection comes to the fore, for example when finishing the duct and communications.
Moisture proof gypsum PLASTERBOARD. In contrast to other brands is a special water-resistant variety. Contains im pregnany (saturated) cardboard and special (e.g., anti-fungal) additives in gypsum based. Gypsum PLASTERBOARD is used in areas with high humidity: in bathrooms, toilets, houses, saunas and steam baths, as well as the base under covering the ceramic tiles.
Moisture-fire resistant GKLVO. The material synthesizes in itself all the qualities of the previous types, their main advantages.
To distinguish one type of drywall from another by the color and marking. New drywall, gray; water — resistant-green. Marking of fire-resistant material red. A generalized description of the types and properties of drywall. Some manufacturers of this material endow their products with additional properties. For example, offer a special plasterboard that is suitable for bending or for sex.
Examining the range of different companies, the consumer can find the most suitable product for each specific case. When you buy drywall, it is desirable to obtain expert advice. Usually professionals prefer well-known manufacturers that manufacture the core material for emerging technologies. This approach allows us to influence the formation of pores in gypsum filler, their size and distribution. The fact that many communicating fine pores reduces the strength of the structure, and the presence of large negatively affects the appearance of the material.
The cost of drywall depends on the manufacturer, size, sheet, material properties and ranges from 190 to 400 rubles apiece. As a rule, imported products are ten percent more expensive than the Russian stuff.
Architectural features drywall
Drywall is easy to use: first, the process of decorating the room, unlike, for example, from plaster, dispenses moisture and dirt; second, the material is very convenient for installation, which is made using gypsum adhesive or screws when using special frame. Thanks to the drywall can be translated any interior design: fanciful arches arches, smooth curves of the walls, dome, columns, tracery ceilings.
To achieve this, it is sufficient to wet the sheet: in this state it is ductile and capable of taking any given shape. And after drying the material again solidifies.
Slabs of drywall are easily cut and sawn. Using conventional tools, can cut the panel the desired shape, length and width, to make it any, including the notched holes. The use of plasterboard allows to prepare the Assembly design outside of the construction site and reduce turnaround time.
Veneer wall gypsum Board is made two times faster than its plastering and sealing, and installation of gypsum partition work requires 2.8 times less with much better quality. The smooth surface of the sheet may be varnished, painted, roll-ProcName and other coatings.
Practice shows that the drywall has incredible technological skills. Design of plasterboard in three-four times lighter than made of other materials, simply and quickly assembled. One a qualified technician within one working day collects up to 60 m2 of plasterboard structures.
The secret of flexibility
Along with these characteristics, the drywall has one remarkable ability to acquire greater flexibility in the wet state and to restore the original hardness after drying. While it retains the new form given to it in plastic state. This property allows you to greatly expand the architectural possibilities of drywall by forming curved surfaces as ceilings and walls.
For the manufacture of curved shapes are mainly used plasterboard with a width of not more than 600 mm Minimum radius (R) flexible sheet with a thickness of 12.5 mm is about 1000 mm. While reducing the thickness of the drywall its flexibility is also reduced. So, for sheets with a thickness of 9 mm minimum bending radius is 500 mm.
The curved sheet is mounted on a wooden or metal frame. The main elements of the latter, especially in a ceiling system, metal profiles of PP 60/27, which are also pre-curved to the required radius of the formed sheet surface. Such propipe can have a bending radius not less than 500 mm by cutting their shelves.
The birth of the arch
Preparation to receive the curved shapes of the sheet is mainly in the manufacture of the template, which is flexible gypsum Board (Fig.1).
Fig. 1. Template for a flexible drywall:
1—sheets of gypsum Board; 2 – wood: 3 profiles; 4—screws; 5— flexible cardboard sheet
The sequence of works the following. Using the same sheets of drywall, mark them and cut Poporului sidewalls of the template, which will provide the necessary bending radius. It is important that the radius of the sidewalls of the template was made slightly smaller than the radius of the generated surface. Next is to mark and cut, also from drywall sheets, inserted between the sidewall spacers, the size of which depends on the width of bent sheet, but a few less.
Now you can, using auxiliary wood, with screws to assemble the template.
Flexible sheets
The sequence of operations. For a start it is necessary to roll a spiked roller (Fig.2) compressible side of the sheet. In convex form, this will be the back side, the concave — face. The thus treated sheet to put the pinned side up on the bars strip in order to avoid getting water on the reverse side of the sheet during subsequent wetting. Otherwise, when bending may result in broken cardboard. Next to water harvesting water with a sponge or brush. Processing to produce complete saturation of the plaster component of the sheet (until the water will no longer soak). We should now set the prepared sheet to the template so that its center coincides with the axis of the pattern, and carefully bend it. Secure the ends of the sheet with clips, and then fix the workpiece in a bent position, such as adhesive tape. Then remove the panel from the template and install in the same position for drying. And released a template to start making the next element of the arch.
Fig. 2. Needle roller for perforating one of the surfaces of the drywall before bending
Installation arched ceiling
The sequence of operations follows (Fig.Z). First, you need to install curved profiles by using direct suspensions. If the mounting structure to the overlap length of the suspension is insufficient, it is possible to apply the pin lengthening or extending elements, special Vernier suspension. Next, using duplex connectors, install weight-bearing ceiling profiles at a distance of 300 — 400 mm from each other.
Fig. 3. Arched ceiling of plasterboard:
1—sheet of gypsum Board; 2 — bracket; 3—lengthening stiletto heel suspension; 4 — curved ceiling profile; 5 — suspensions
Positioning a curved plasterboard element on the frame, secure it with a wooden T-shaped stand, which is set in the spacers between the drywall sheet and the floor. Fix the sheet on the frame with Samon-rezayi screws. Screwing up they need to lead from the middle of the plasterboard sheet to its edges. It remains to produce the joints according to the conventional technology, and if necessary, then putty the entire surface.
Figure 4 shows the convergence of the curvilinear potoka to the frame. In the manufacture of curved elements is necessary to ensure that the front side of a sheet of gypsum Board was the visible surface of the ceiling.
Fig. 4. The mounting elements curved ceiling:
1 —sheet of drywall; 2 — bracket; 3—suspension; 4 — curved ceiling profile; 5 — screw; 6 — wall longitudinal profile; 7 – stack vertical profile
Making a curved ceiling elements with a very small radius (R-100 — 400 mm)
This method of forming curvilinear and polygonal shapes based on the use of krivokolennyy frame (wooden timber or metal profiles) and special processing of the sheet of drywall with a thickness of 12.5 mm on its rear side parallel grooves are milled, U-shaped (curved surfaces) forms, but without disturbing the front of the cardboard. The distance between the grooves depends on the requirements to the form of the bend and the thickness of the cutter. A reduction in the distance between the grooves and the increase in the thickness of the cutter lead to the formation of smoother lines of bending (Fig.5).
Fig. 5. Sloping ceiling with a small radius:
1—sheet of gypsum Board; 2 — lateral profile of the frame; 3 — piece suspension: 4—retaining stud to adjust the length of the suspension; 5 — longitudinal profiles of the frame; 6 — template
Sequence of activities: 1 — milled sheet of gypsum Board laid on a previously prepared pattern grooves out and thoroughly cleaned from dust; 2 — seal the grooves with putty and allow it to dry; 3 — fasten the finished piece in the frame; 4 — joints of adjacent elements from the back side to install (pattern) steel strips (Fig. 6) thickness 0.5 — 0.6 mm, width 100 mm, securing them with screws; 5 — to putty the seams, and then the entire surface.
Fig. 6. Strengthening the joints of sheets of drywall:
1—sheets of gypsum Board; 2 — steel strip; 3 — screws: 4—junction
Installation of partitions, curved (R>500 mm)
The sequence of operations (Fig.7):
Fig. 7. Septum curved:
1—the sheets of drywall; 2— floor mullion profile; 3 — screws; 4 — curved profile with slits in flexible shelves; 5—wall, 6 — floor
1 — make a layout of the partitions on the ass and plumb to carry her to the ceiling; 2 — metal shears to make the cuts parallel to the outer shelf and backrest PN profile to the inner shelf, bend the profile in accordance with the required radius; 3 — set the PN profile by marking, securing dowels in increments of not more than 300 mm; 4 — set rack profiles with a step not exceeding 300 mm, fixing them in the guide; 5 — set curved plasterboard, placing them across the rack profiles; 6 — putty the seams.
Recommend to read THE GARDENER’S STOVE In rural estate-type houses, and even in simple country cottages, of which there are countless numbers today, it's unlikely to get by without some kind of stove — Russian, Dutch, or a... “OVERTAKE, NOT CATCHING” Composed at the end of the Second world war on Stalin's personal order long-term plan of development of the Navy (see "modelist-Konstruktor" No. 6 in 2002) were struck by its size. It is...
 Union gypsum and cardboard. In modern homes and in the individual construction of partition, suspended ceilings often are made of drywall – this versatile material. The popularity contributes to the fact that it is cheap, non-toxic, flame retardant, suitable for different humidity conditions. In addition, be aware that this sheet of finishing material is made from eco-friendly materials. In essence, it’s a thin panel, which is a kind of sandwich, the outer layers which leaves special lining cardboard and an inner layer or a filler composed of plaster and some extra special components.