 In the old days, a good boss before you buy a horse, build a stable. And in the recent past, when, in the words of the poet S. Esenin, “live horses were replaced with steel cavalry”, the car under the open sky few people kept it though, because it was worth many times the price of the garage. In our time even a simple garage-type “shell” often exceeds the price of some cars.
When I bought a used, but still quite “fresh” “Moskvich-412”, then it turned out that for the purchase of garage tools was required in several times more than for a car that I no longer afford. But the prospect of storage of cars under the open sky am not very happy about it. First, it was a pity the car from rain and snow, his body quickly deteriorated rust — in fact the anticorrosion protection of domestic cars, to put it mildly, leaves much to be desired. Secondly, in such circumstances, storage is not easy to protect a car from theft. But because I began to think, how to make a garage was estimated to build even a wooden.
The decision came quite suddenly in my apartment began to leak from two panel radiator heating system. These heating devices for a long time its bad reputation as unreliable, but because the owners tried (and try) at the first opportunity to replace them with more experienced, but the panel was just thrown away.
Radiators made from two 2-mm steel sheets with relevant vystupovanie channels. The sheets are superposed on each other and connected to each other (apparently, in the hot state under pressure).

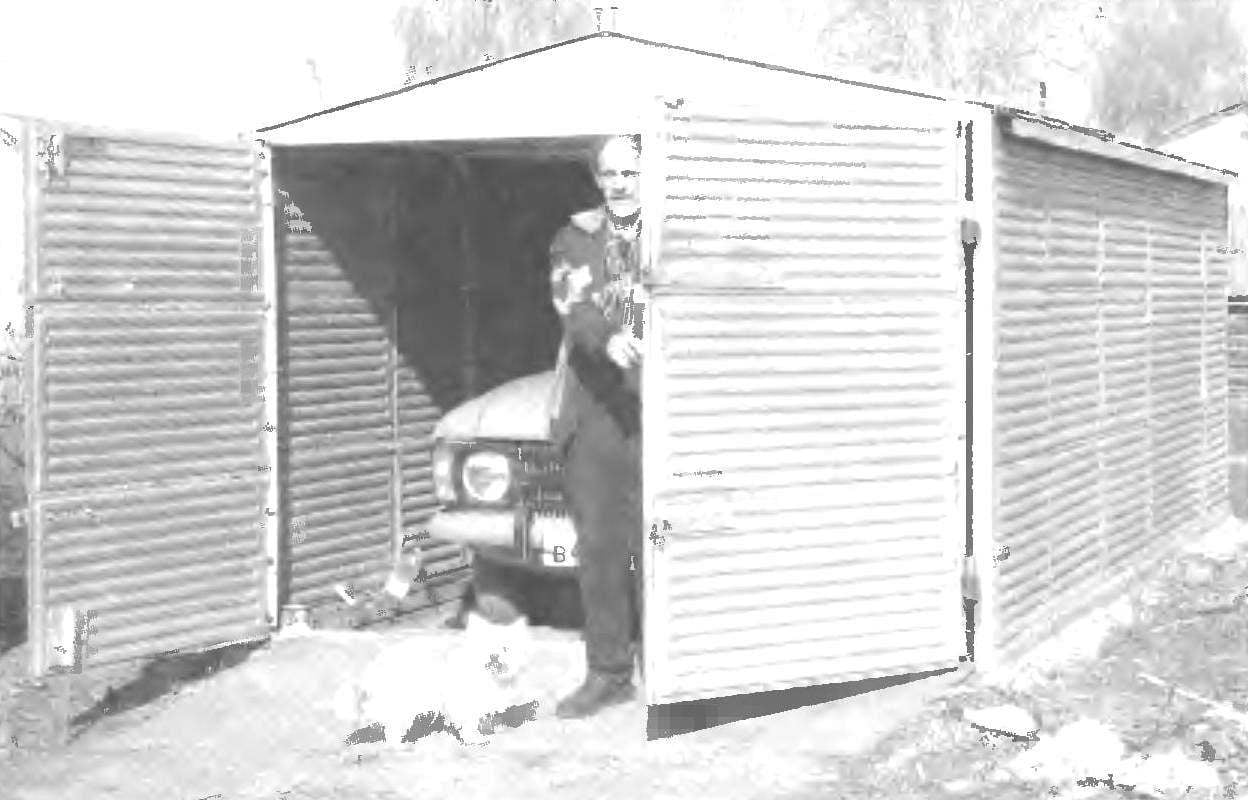
A garage with panel radiators

Garage interior
So, replacing your radiators, I began to collect discarded and the other owners of apartments, to make them a garage. To be honest, this idea came first not me — are the garages I’ve seen, spending time in neighboring regions, there are in our area.
However, the collection panels threatens to escalate into quite a long process. But here is dedicated to my caring friends suggested that we offer for sale a garage of the same heating panels — and I bought.
The garage was portable, although it consisted of major elements: a fully pitched roof.separately, each wall, two doors and corner posts. Obvjaza neither upper nor lower from the previous design was not. There was only the threshold and the lintel on the gate made from angle corner No. 5. I left them as is, and also like elements welded to the rear wall.
Earlier in the garage kept the motorcycle “Ural” with the lateral trailer, what width and height it was a good fit for my “Moskvich”. And the length had to increase those panel radiators, I managed to procure.
Panel radiators in the elements were joined by welding. Therefore, in order to avoid inconsistencies, agreed to new additional structures to perform connection “in the image and likeness” are available.


Garage panels for heating radiators:
1 — ramp (corrugated steel sheet s4); 2 — corner stand (area 65×65, 4 pieces); 3 — purchased (main) part of the side wall (2); 4 — made (optional) the slope of the roof; 5 — horse (steel sheet s2); 6 — acquired (primary) roof (2 PCs); 7 — manufactured (additional) part of the side wall (2 PCs) 8 – lateral obvjaza (channel №12, 2); 9 — the Foundation (brick wall cellar); 10 — front part obvjaza and lintel (area 50×50,4 items); 11 — lock plate (steel, sheet s4, x4); 12 — front doors (area 35×35, 2); 13 — door hinge (steel, circle Ø20, 4 pieces); 14 — left wing of the gate; 15 — the pediment (steel, sheet s3, 2), 16 — pad right gate leaf (area 20×20); 17 — right wing of the gate; 18 — roof (galvanized steel sheet 52, 2 items); 19 — drain (galvanized steel sheet s1 , 2); 20 — purchased rear wall; 21 — anchor plate (steel sheet, s4, 18 items); 22 — beam-banner (steel pipe Ø32, 6 PCs); 23 — bracket (12 PCs)
Welding craft myself I speak not well, and the phone I do not have and therefore asked to carry out the relevant work of a good friend — his unit had, and skills he was not to occupy. And I was his worker and designer. The design was to ensure that, extending the garage, efficient use of the available not in excess of the radiators (and besides, they were different lengths) and it does not spoil the appearance of the purchased garage.
So, as they say, having measured seven times, decided to extend the wall towards the rear wall and the roof, on the contrary, go ahead to the gate, then slide in the Assembly before part of the roof back on again made additional wall.
The mix of old and new parts of the walls and roof decided to make the split, bolt-on. Additional holes in the walls drilled (as conductor) in the holes of the previous designs.
As a result, the garage extended nearly half a meter, docked the former and the additional side walls overlap. Here is to the joints from the floor to the roof put the inside pieces of channel No. 5. Parts of the walls with plates connected with bolts M8.
The new design of the roof as well as walls, made the type the same: two Stingray, welded along the ridge at an angle of about 150°, bottom sealed with stretch marks-beams of steel pipe with a diameter of 32 mm. Pipe at the ends flattened and fastened to the edges of the roof bolts M10. To prevent penetration through the gaps in the holes of rainwater and meltwater under the bolt heads placed rubber washers, and the gaps sealed with sealant. The bolts are selected of such length that their threaded ends protrude from the tubular beams and they can be put on and tighten the nuts more and plate brackets. Through the holes in the bracket and wall panels with special grab-hook, the roof is attracted to the wall (see photo).

With the help of simple devices, each of which consists of a bracket and hook, the roof is securely attracted to the walls
Between the main (old) and additional (new) parts of the roof remained small (less than 200mm) aperture, but the radiator panels more was not available — and the gap had to close steel 2 mm galvanized sheets. Through jointly drilled in the details of the hole pulled the sheets to the roof panels with M8 bolts.
On the stretch along the garage put long boards — they formed a ceiling with a hatch where the store is not heavy, but large parts of the winter (or summer) tires, etc. in addition, the ceiling prevents condensation on the roof in case of large temperature differences. Although it should be noted that the walls due to the presence of air in the battery is also practically no condensation.
Under the garage, for all its length and width, arranged in a cellar with brick walls. The perimeter walls on the top of the stowed package: on the sides of the steel channel No. 12, and at the ends, as already mentioned, from corner No. 5. Package connected with the walls by means embeds steel plates. Garage wall shelves privernuty to the outer channel bolts M10 with slant washers, and the gaps outside of the sealed with a sealant (filled with bitumen). The overlap of the cellar reliable and insulated. The hatch to the cellar is designed in such a way that the narrow entrance, removing covering his wooden shield, can be used as a viewing hole.
Front of the garage door made a ramp, covering it in steel corrugated 4 mm sheet, and cellar on the perimeter of alfalaval soil. After Assembly all designs are painted from inside and outside with silver paint.
In the end — it has a large garage with cellar.
V. DRYGIN, Saransk


