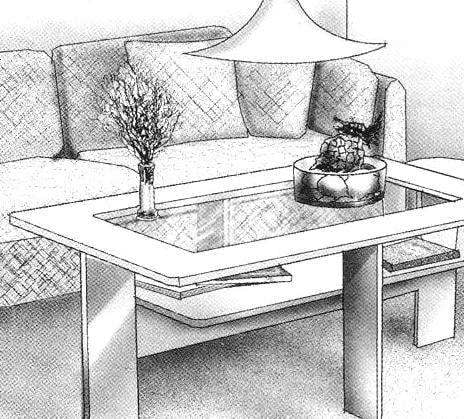
N-shaped legs
The wooden parts of the table is made of particle Board (chipboard) with a thickness of 19 mm. For table top cut glass, thickness 4 mm.
The table has the following dimensions: 700x1100x470 mm dimensions of glass: 460х 860 mm table Manufacturing does not require large expenditures of material. For the top fit a sheet of chipboard size 700×1100 mm, sawn from the middle panel sizes 460×860 mm is used as a shelf. For the manufacture of table legs will need chipboard 1100×450 size mm 700×450 mm. Of them are cut, H-shaped legs according to figure 2.
It is necessary to mark the middle of the horizontal part of each blank legs. In these areas the grooves are cut to a depth of 60 mm, which is half the width of the jumper. In a long jumper the groove is on, and in short from the bottom. Sawed place then get out with a chisel. After that, both elements are connected with their grooves toward each other, forming a cross-shaped base of the table. If all operations were performed accurately, then the legs fit together tightly and do not require additional fastening to each other. Moreover, they will unite the frame of the tabletop, which both workpiece base are assembled with round plug-in thorns.
Fig. 2. The main parts of the table:
1 —frame table top; 2 shelf; 3 — long section crosses legs; 4—short part of the cross-piece; 5—bracket for shelves (2 PCs); 6 — anchor lugs for glass; 7—glass; 8 — spikes (A — principle of the Assembly base)
After all parts are cut, it is necessary to round the corners of the frame of the tabletop with a radius of 20 mm.
Assembly
Before assembling the legs, they must be secured with screws two l-shaped metal bracket size 15x15x2 mm Staples should be removed from the crossing of the legs 100 — 150 mm. thereto with screws size 3×15 countersunk head mounted regiment. The screws are threaded into pre-drilled holes. To compound has turned solid before screwing the screws should be dipped in epoxy glue (or PVA).
At the top of each pair of legs to drill one hole with a diameter of 8 mm and a depth of 20 mm. they are glued wooden spikes with a diameter of 8 mm and a length of 30 — 35 mm. then drilled the return holes in the frame of a wall mount for it on the legs.
Before final Assembly, the ends of all the details carefully zashpaklevyvajutsja and after drying, rubbing with emery paper, and then pasted with veneer or strips of wood (white glue, “Time”), All of the main plane of the parts are painted. Initially, they are primed — coated with a layer of paint containing a large amount of solvent. After that, apply thicker paint. Thus it is necessary to make brush strokes in two mutually perpendicular directions.
Fig. 3. Propilivanie groove
Fig. 4. Sample groove with a chisel
Fig. 5. Installation mounting brackets for shelves
The latter are screwed plastic lugs or brackets for installing the glass cover of the table. On the longer side of the frame are attached two brackets, and the shorter one is enough. It is important to install the brackets so that the glass took a position flush with the frame of the tabletop and evenly supported on the support lugs, otherwise the glass may crack under a heavy load such as a heavy object.
Recommend to read QUIET EAST ON THE SLY… When February 10, 1904 Japan officially declared war on Russia, first shots have already sounded: the Russian ships were suddenly attacked at Port Arthur and Chemulpo neutral. Initial... TRICYCLE TX-200 On the roads of Kharkiv, there was one car with the familiar letters of the COI — "Club eternal". The automotive laboratory of the centre of scientific and technical work is headed by...  A small table, color coordinated with the seats, carpet and the lamp, will transform one of the corners of your apartment, will add to her comfort. The top — worktop — made of glass inserted in a wooden frame. Below there is a shelf for Newspapers and magazines, the dimensions of which correspond to the sizes of glass. The shape of the table is simple, corners are rounded.
