
 Solid protective helmets, which became several years ago an obligatory accessory for riding a motorcycle, in recent years has undergone significant structural changes and improvements. The analysis of road accidents and during sports competitions revealed the shortcomings of the serial production and gave rich material for further development.
Unfortunately, these data are either not considered enterprises producing motorcycle helmets, or are noted very late. Anyway, today on the shelves of sports shops, good motorcycle helmets are few and many have to do their own hands.
What are the basic requirements for a good helmet? Put them in order. First: the helmet should fit your head shape as corresponds, for example, a good Shoe the shape of your foot. Second, the helmet must be very light. Third: the helmet should sit on the head without causing condensation or. If it has vents or ducts, the air flow should not cause hypothermia of the head. The best option — adjustable ventilation. Fourth: the helmet must be equipped with a dust – and light-proof visor or glasses that are easy to put on and take off. This problem is successfully solved in the design of face masks for pilots, where a large SiteFinity flap with a single hand movement to translate into the working position. Like a helmet for motorcyclists with a shield of white Plexiglas produces Baltic sports complex in the city of Tallinn. Fifth: in recent years, in connection with the increase in the number of vehicles on streets and roads, increased airborne levels of dust and exhaust fumes (and in the rainy season — suspended particles of liquid mud). This fact makes coming up with a variety of filters, respirators, protective bandage that needs conveniently and quickly be mounted on the helmet. Such respirators are widely used by motorcyclists, racing on racetracks and gurevych tracks. And finally, sixth: the design of the helmet should protect your head and neck from impacts from any angle and from any direction, including strokes from the bottom up. How to satisfy these requirements are shown in the figures.
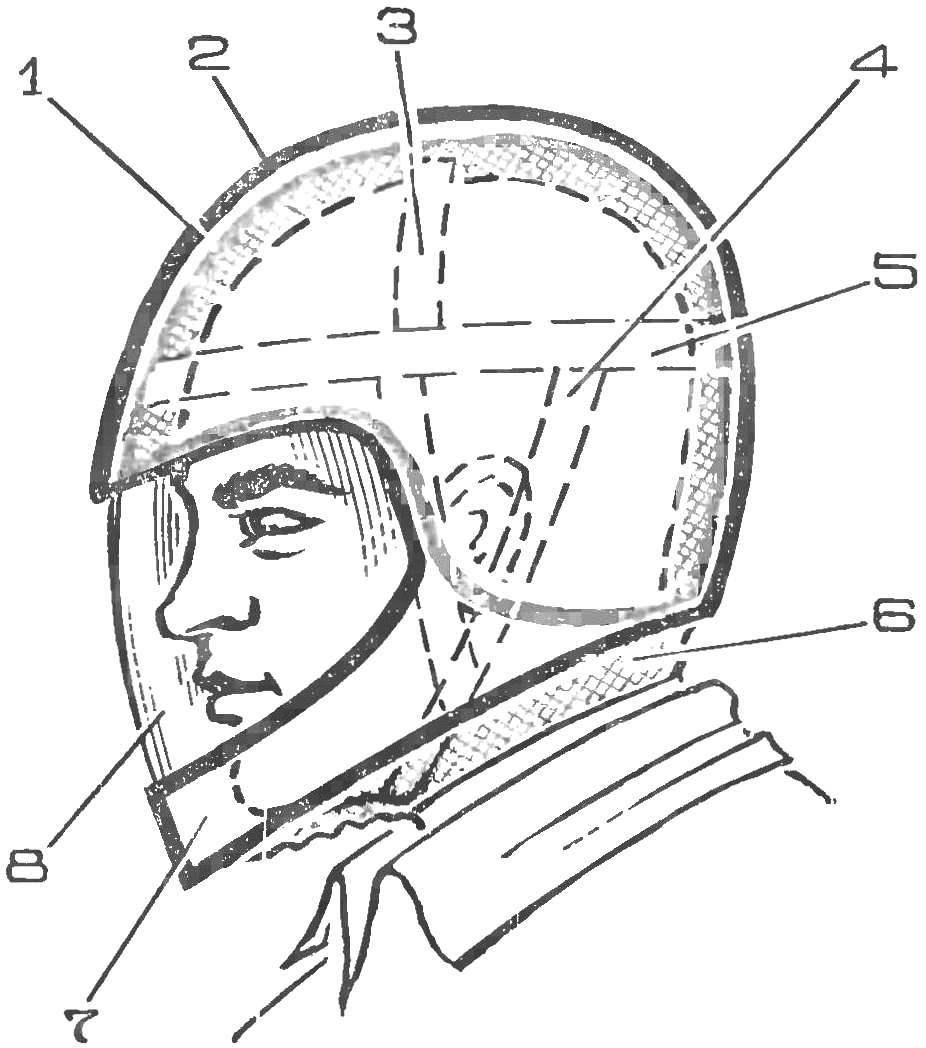
Fig. 1. The helmet of the “bell” compared to the usual helmet type:
1 — protective shell (fiberglass reinforced plastic cold forming), 2 — soft filler (foam or sponge rubber), 3 d— pad liner, 4 — strap, 5 — ring, 6 — skirt, 7 — lower rim “bells” to protect the jaw, 8 — windshield.
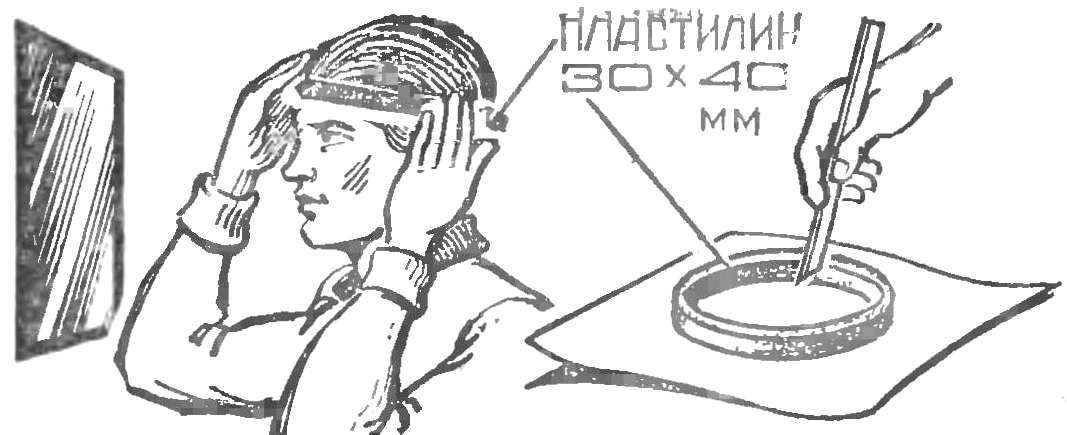
Fig. 2. The production of molds of the head using a clay roller section 30X40 mm.
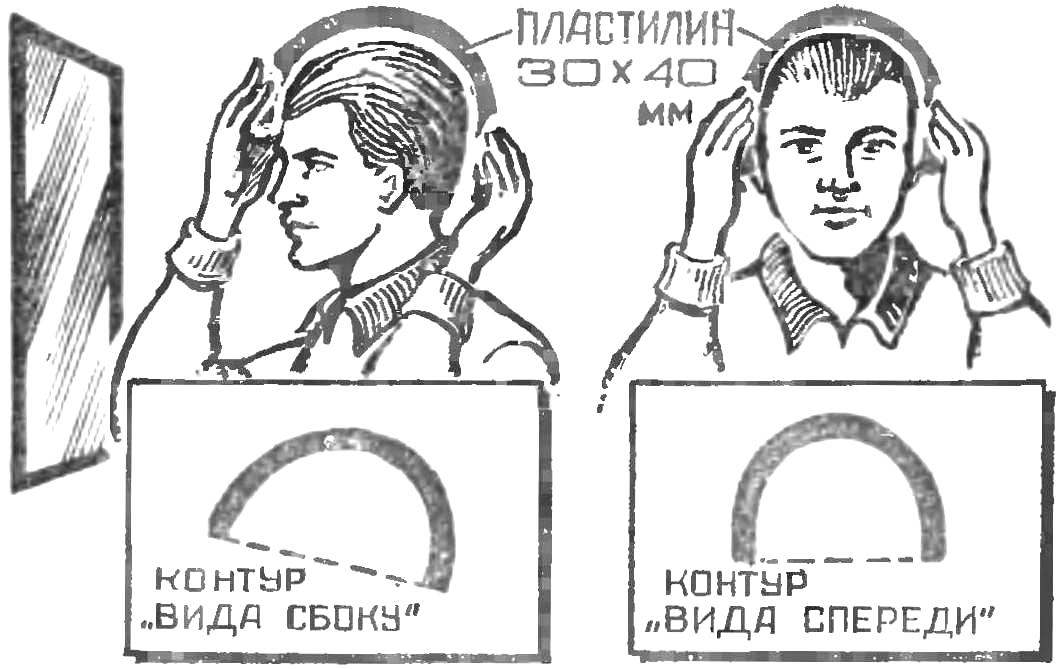
Fig. 3. The production of molds of the side view and front view.
Now about making a good helmet with his hands. We offer our readers one of the latest models of helmet is fully closed type, the so-called “bell” (Fig. 1). It largely satisfies the above requirements.
Required for the manufacture of the following materials: 2 kg of epoxy (or polyester) resin, a 5 m fiberglass brand ASTT-b (thick fabric), 0.5 m good imitation leather any color. The procedure works as follows. First, you need to take measurements to determine the size and shape of the head. This is done by using calipers, made of plywood thickness of 5 mm or 1 mm aluminum edges (see Fig. 4) and a plasticine cushion. From last is a ring that is worn on the head directly on the brow arcs as shown in figure 2, then the ring is tightly crimped, on the shape of the skull and gently removed. Then put it on graph paper and draw out a pencil in the internal contour (see Fig. 2). Clarify the data obtained by measurements made using calipers, and parallel to the existing contour drawing the second, with an allowance of 20 mm on each side. Get the base of the boob, which is Vileika shell of the helmet.
To obtain the final form of the dummy it is necessary to make the molds for the front view and the side view (Fig. 3), which are the same as the first mold is transferred to the paper with an allowance of 20 mm On them without much difficulty, to make a fool out of clay, plasticine, soft wood or dense foam. People with extra long nose is required in front of the boob to make an additional allowance.
As helmet http://simplyroad.ua/shlemy/ type “bell” its lower edge should completely cover the neck and chin, this part of the boob is made from the same material as the top, along the contour, the above-mentioned base.
Glue or sculpting a blockhead, it is necessary to carefully handle rasps and sandpaper the surface. If it was made of wood or foam, it is useful to paste over the surface of the pieces of newsprint on starch paste 2-3 layers (papier-mache). After drying of the crust fool is covered with wax mastic, paraffin or polyvinyl alcohol, that is, the separation layer, so that the finished product can be removed with blockhead.
Before Villenoy helmet should carefully prepare the workplace and materials needed. Cutting of fabric is performed Crescent-shaped pieces that best be on the boob (Fig. 5). Glue is made in a low dish (a skillet or wide Bank out of canned herring). Tools — scissors and a small hard bristle brush, which the adhesive is applied to the fabric, and then she privorovyvat to fool. Overlay pieces of fabric should overlap 1-2 cm, smoothing with a brush or fingers (in rubber gloves!), to avoid bubbles and creases. Best results are obtained if the molding news from small hand-picked by place pieces of fiberglass with all of them overlap. Vileika conducted without breaks (in the “crust” should be laid 6 layers of fiberglass, ASTT-b and two layers of fiberglass, which gives a smooth surface). Last layers of fiberglass should privorovyvat particularly carefully, as they determine the marketability of the product.
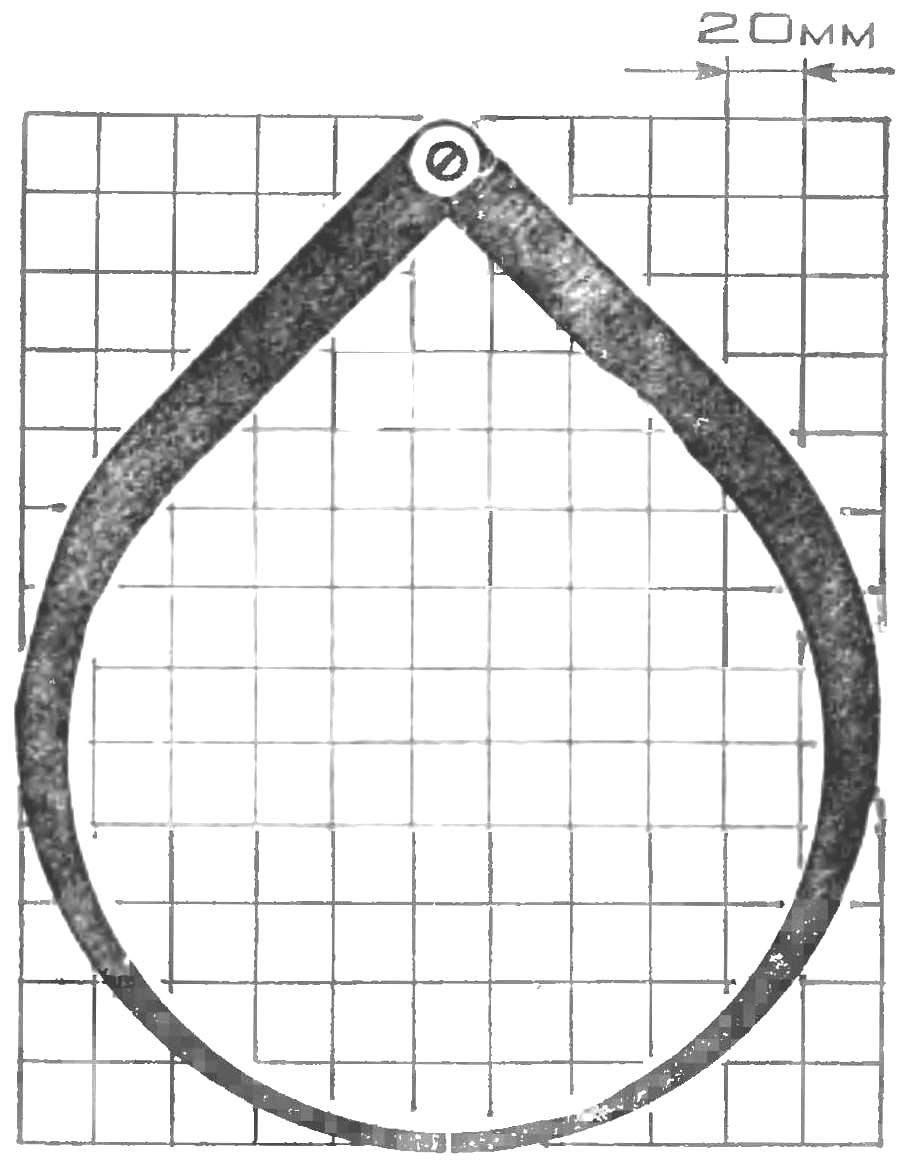
Fig. 4. Calipers for measuring head.
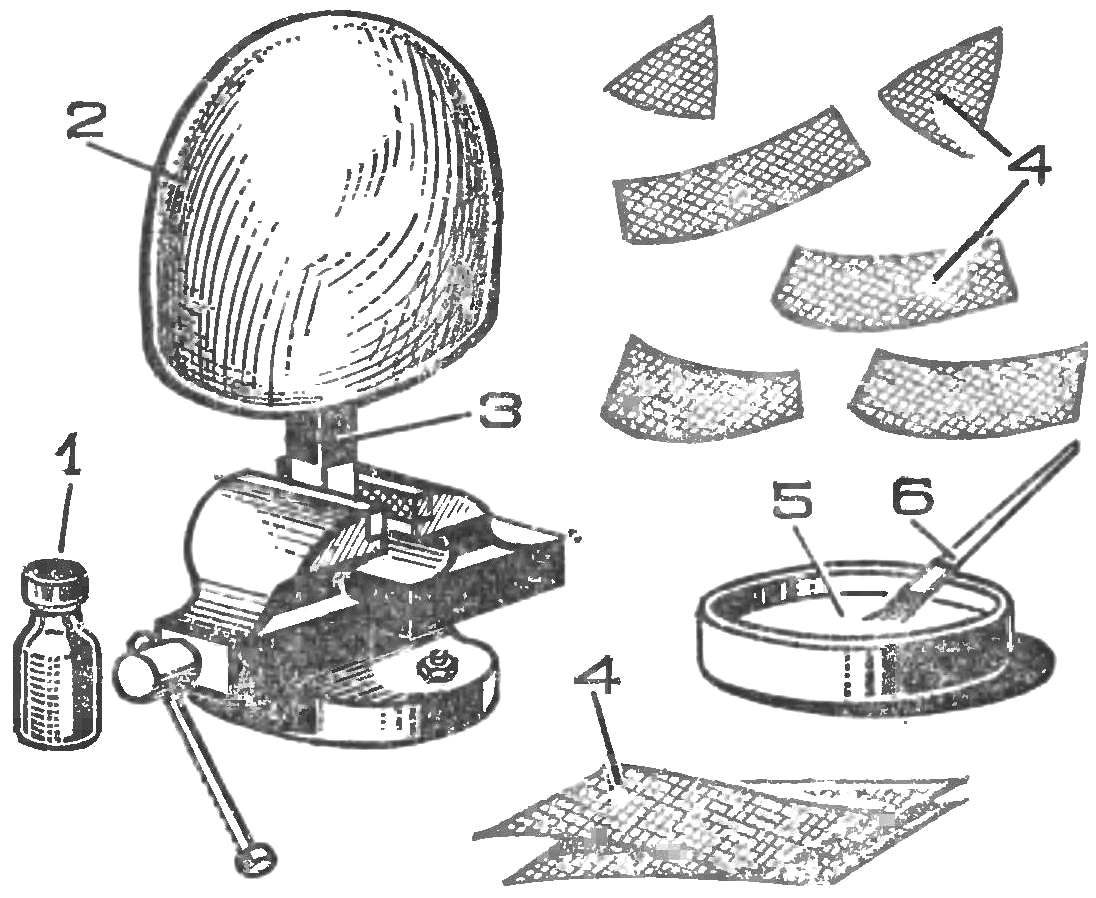
Fig. 5. Vileika of the helmet on the dummy:
1 — release emulsion, 2 — jerk, 3 — leg, boob, 4 — blanks of fiberglass, 5 — epoxy adhesive, 6 forming the brush.
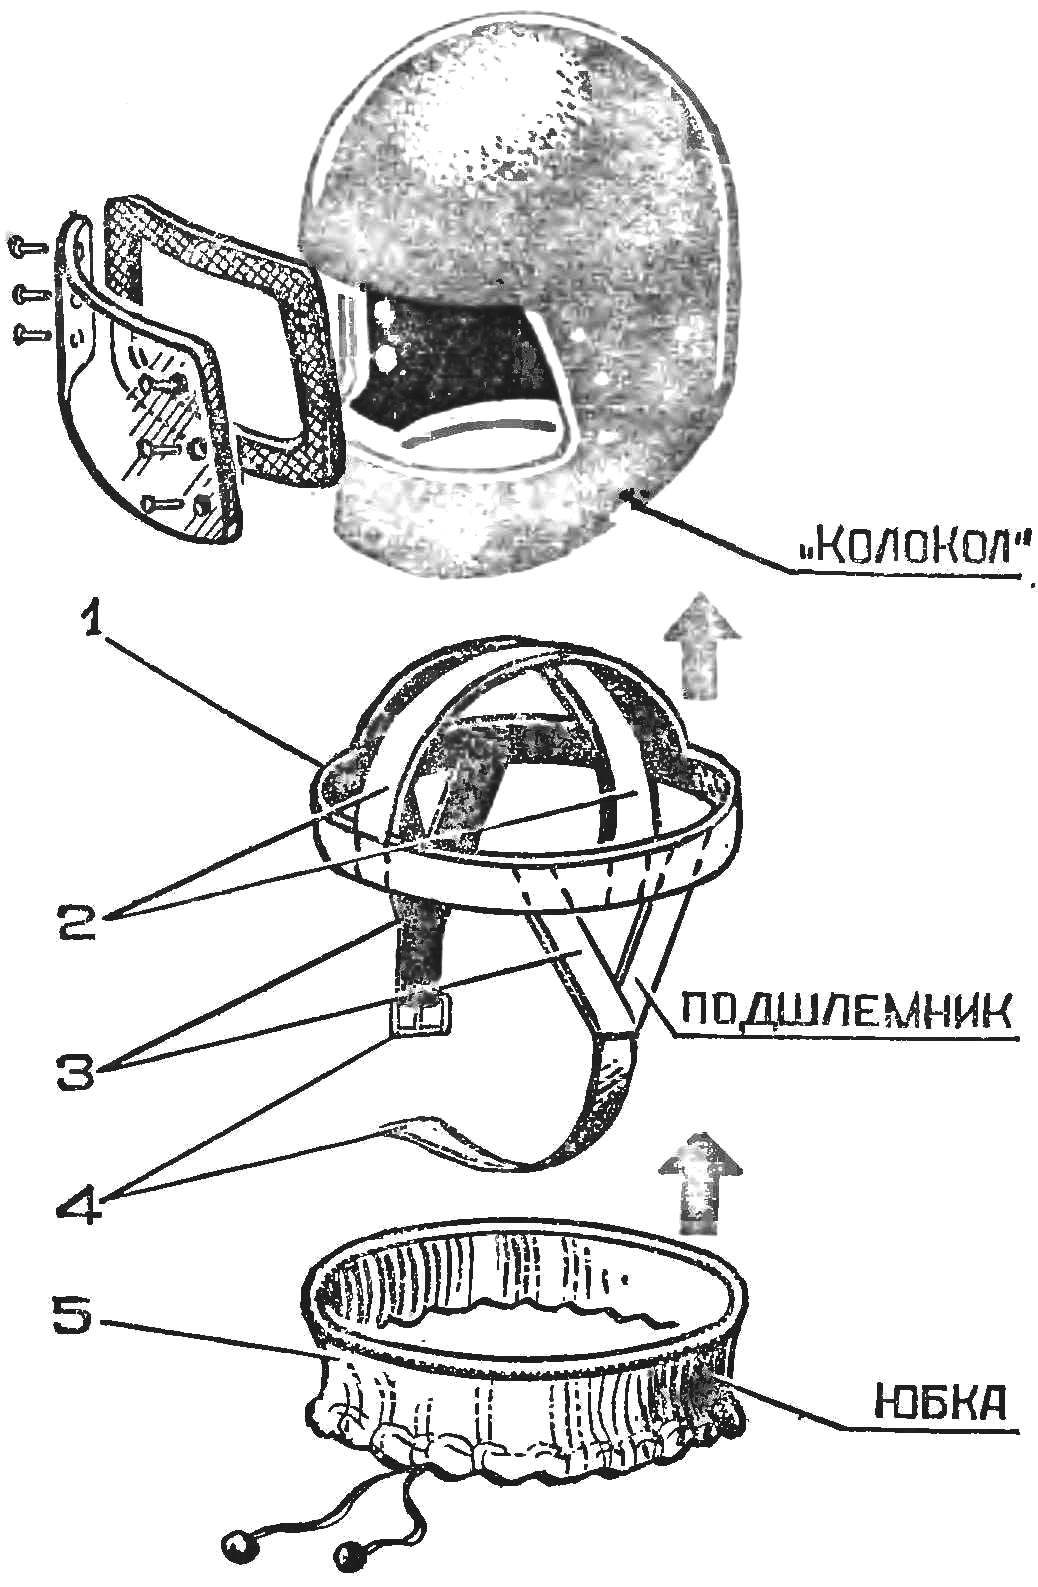
Fig. 6. Design podshlemnik and skirts:
1 — Hoop, 2 — cross, 3 — straps, 4 — zipper, 5 — skirt.
After complete polymerization of the glue, which takes about two days, ready to “peel” treated on the surface with rasps and sandpaper. Without removing from the boob, she squeezed a few windshields made of Plexiglas of different thickness and colors in order to have a reserve in case of damage, etc. To extrude a piece of plexiglass the right size heated over the flame of the gas stove and quickly superimposed on a surface “crust”, previously covered with a piece of clean flannel. Top — through flannel — plexiglass is tightly pressed against the disc from thin plywood or metal and in a position held by two hands until fully cured. If it fails this process can be repeated without harm to the quality of the product. Squeeze the required number of glasses, “peel” can be removed from the boob. If the eye moves bad, you should use small wedges, and in extreme cases to fill in the gap between the crust and jerk warm water. Then in front of the “peel” milling a window in accordance with the drawing.
Manufactured in the described way the “bell” represents the outer protective part of the helmet.
It needs to be sealed inner part, the so-called liner, which will keep the “bell” on the head. The design and dimensions of the liner shown in figure 6. The main component is the Hoop 1, which is sewn and glued around the perimeter of the “bell” and carries the spider and the zipper. The design of these details (especially when installed in the helmet phones) may differ from the intended us, but the principle of their interaction in all cases is maintained.
The windshield is attached to the helmet with six screws M3 on the strip of thick rubber, which provides ventilation channels. Because people have different flagoobraznye on the face (and thus the possibility of fogging of the windshield), these ventilation channels may be insufficient; then you have to make extra holes in the front and rear walls of the “bell.”
For insulation from dust and harmful suction air from under the “bell” to the bottom of the skirt is sewn of thick fabric (see Fig. 6), tighten the lower edge with a thin lace or elastic band around the collar of the driver. This skirt can be also used thin wool or synthetic yarn in the form of a sleeve, which, after donning the helmet seals the gap between its inner walls and head.
Final finishing and painting of “the bells” to a large extent depend on the taste of the manufacturer. However, remember that to improve security paint the helmet should be bright, contrasting between colors — for example yellow and black, red and white etc.
Storage of helmet protection from scratches windshield recommend to sew a bag for him (case) of thick flannel, a raincoat-tent of cloth or leatherette: it will allow you to carry a helmet on the trunk or in a sidecar.
G. MALINOWSKI, master of sports of the USSR
Recommend to read
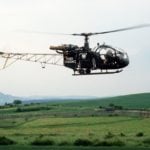 SUD-AVIATION SE.313B ALOUETTE II
Aerospatiale SNI, a leading aerospace firm in France, with four offices, including a helicopter. Company Aerospatiale SNI takes a leading place in Western Europe for the production of... WITH THE EFFECT OF “DISTORTION”
Amplifiers loved by many musical instrument — the electric guitar created a lot. Including the so-called effect of "distortion", the essence of which is to limit the primary sine wave...
