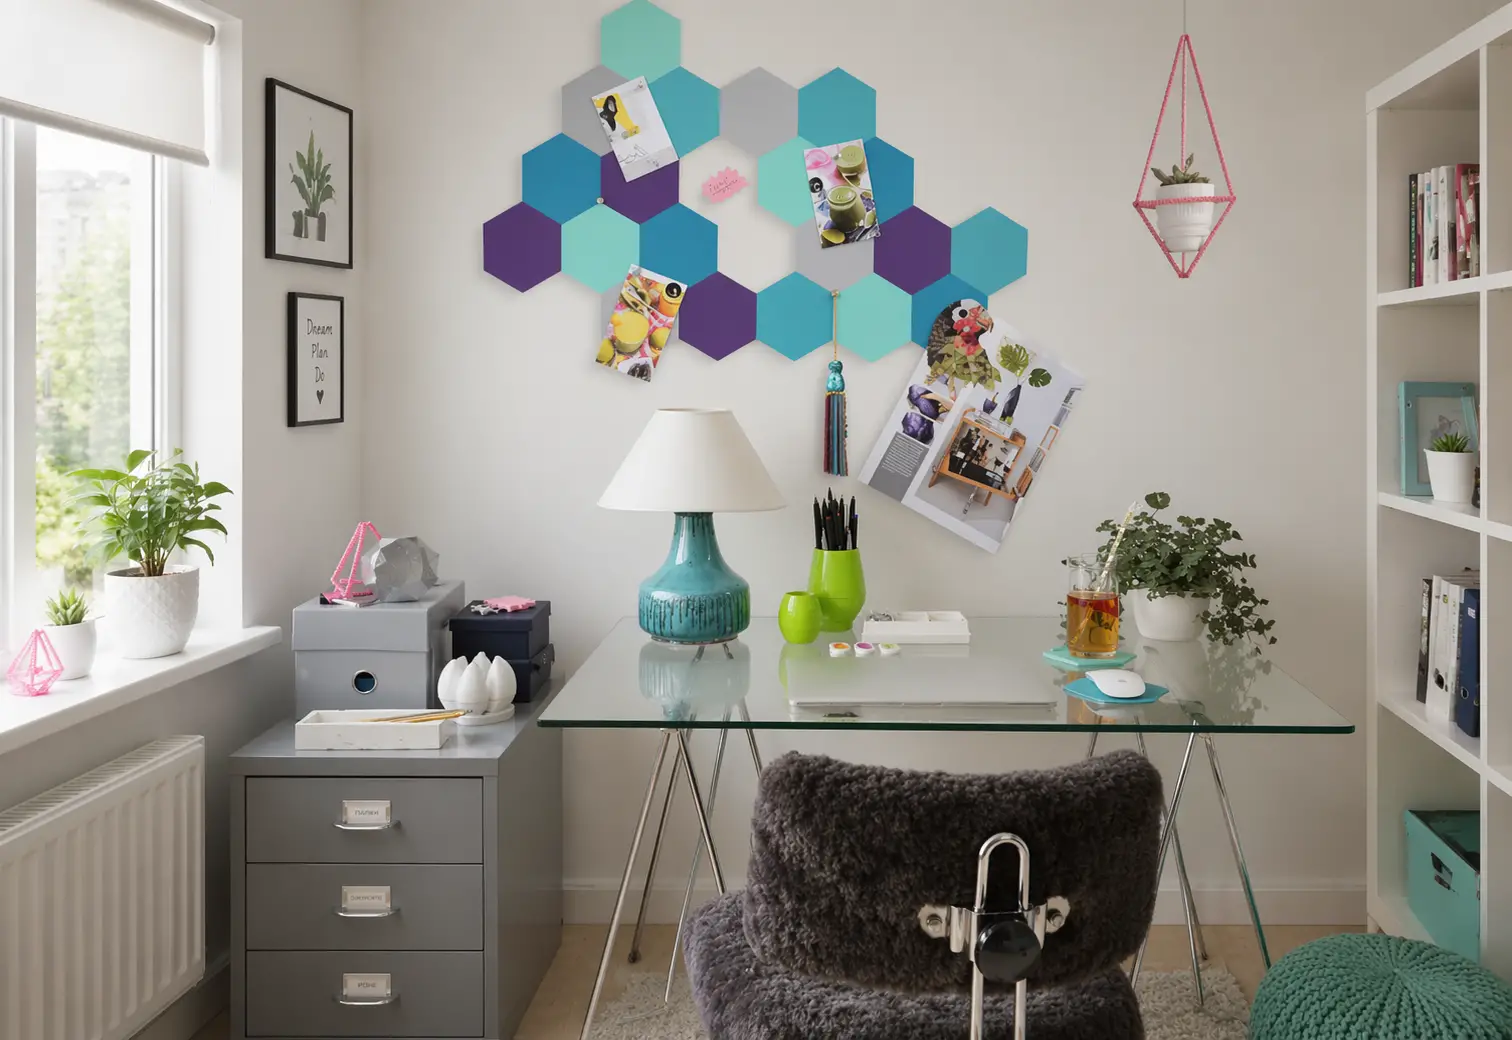
When notes, photos, and ticket stubs pile up on the desk again and the fridge magnet can no longer cope, it is time to make something beautiful and useful. A honeycomb-shaped wall board is exactly the kind of craft that genuinely improves everyday life rather than simply filling a weekend. You get an organizer, décor, and a little pride in something made with your own hands — all in one package.
In this guide, I will explain how to assemble a bright pinboard composition from foam board in about three hours and for around $20. No dust, no workbench, no “I can’t do this.” Just scissors, a compass, a ruler — and a bit of patience that pays off every time you hang a new idea on the wall.
Why honeycombs instead of a regular board?
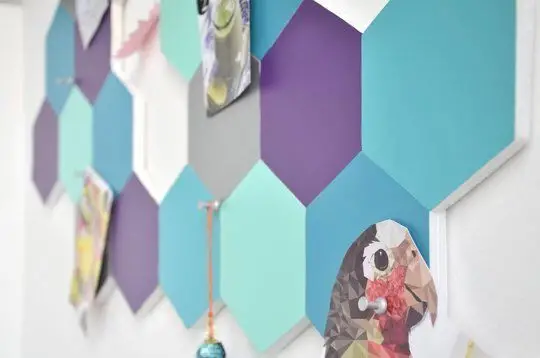
Imagine a wall as an empty album. A flat rectangle is one page. Honeycombs are already a whole chapter with rhythm, color, and geometry that draws the eye on its own. Hexagons repeat like notes in a melody: each one is simple alone, together they form a complete composition.
This format is convenient not only aesthetically. You can:
- pin notes, photos, business cards, and small souvenirs;
- play with colors — from pastels to bold contrasts;
- leave a “window” in the center of the composition or build a solid panel;
- use individual hexagons as coasters or mouse pads — a bonus nobody expects.
The main advantage over store-bought boards? You decide the size, palette, and mood yourself. It is like sewing a T-shirt instead of picking one off the shelf — the same function, but with your character.
What you will need
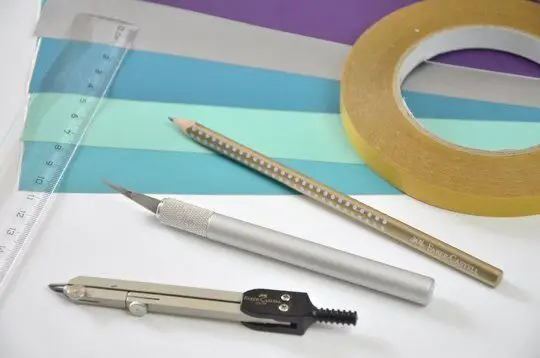
Before you start, gather everything on one table — that way you will not lose momentum midway through. Here is the full list of materials:
- White foam board — one sheet 3 mm thick and one 5 mm thick;
- Compass — for an accurate hexagon template;
- Double-sided tape — to bond the parts securely;
- Ruler, pencil, utility knife or scalpel — for marking and cutting;
- Colored self-adhesive film or contact paper — as many shades as you want on the wall.
Optionally add painter’s tape to hold the template in place, as well as sandpaper — if the edges are slightly uneven after cutting. But even without that, this project is well within a beginner’s reach.
How much it costs and how long it takes
The approximate budget is around $20. Most of the cost is foam board and decorative film; tools you already have at home barely increase the total.
Allow 3 hours: the first for cutting and covering, the second for assembling the composition, the third for finishing and preparing it for hanging. Want to do it all in one evening with a series playing in the background? Entirely doable.
Step-by-step instructions: from template to finished board
Step 1. Draw and cut the first hexagon
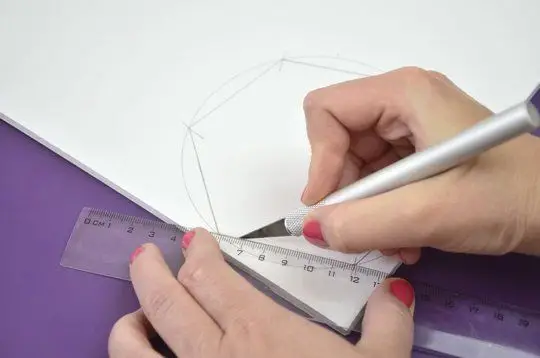
Take a 3 mm foam board sheet. Use a compass to draw an even hexagon — it will become your standard. Mark all the vertices with a pencil, check that the sides look equal, and carefully cut out the piece with a utility knife.
Tip: cut in several passes instead of pressing too hard the first time. Foam board cuts easily, but rushing leaves jagged edges — and we need clean geometry.
Step 2. Cut 24 more hexagons using the template
Place the finished piece on the foam board and trace it 24 times. That gives you 25 hexagons — enough for an expressive wall composition. You can change the quantity: fewer for a compact board, more for a larger décor piece.
This is the most “mechanical” part of the work. Turn on your favorite playlist, stack the pieces in piles — and the process becomes a meditative routine rather than a boring chore.
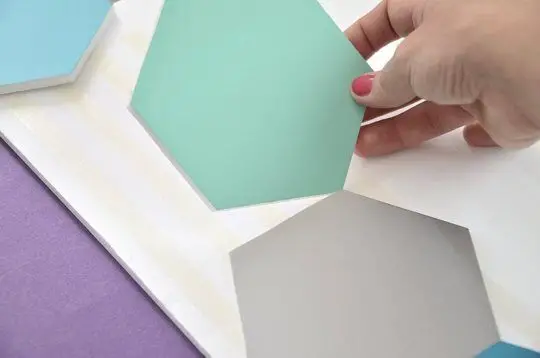
Step 3. Cover each hexagon with colored film
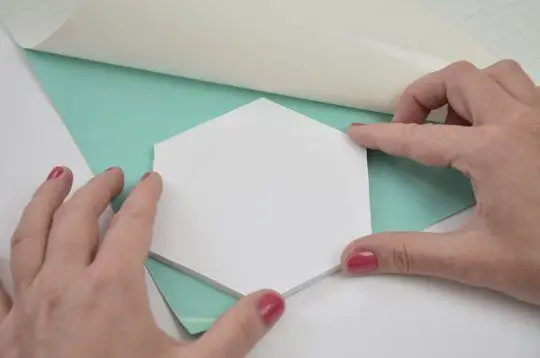
Now comes the most enjoyable part — color. Cover the hexagons one by one with self-adhesive film. Smooth the surface from the center toward the edges so no air bubbles remain.
Do not be afraid to experiment: alternate shades, make a gradient, or highlight one bright “accent” element. Honeycombs are like an artist’s palette: few rules, mood comes first.
Step 4. Prepare the base from thicker foam board
Apply double-sided tape to the 5 mm foam board sheet. It holds the whole structure together and turns the board into a single module — much easier to hang than 25 separate pieces.
Arrange the hexagons on the base however you like. Want a symmetrical pattern? Go for it. Want an intentional “gap” in the center, like an open hive? That works beautifully too. There is no single right answer here.
Step 5. Trim the base to the outline of the composition
When all the elements are in place, trim the excess 5 mm foam board along the outer edge of the honeycombs. The result is a single figure — not a set of scattered parts, but a finished art object you can hang with one nail or a Command hook.
Check that no edges stick out and that the layers lie flat. If tape is visible anywhere, trim it with a knife. Details matter, especially when the board ends up in a prominent spot.
Step 6. How to attach notes without damaging the board
Here is a small secret that preserves the look: do not push pins into the center of every cell. Better to fix them in the corners or between hexagon joints — the foam board is less “injured” that way, and the composition stays neat longer.
And those hexagons left over or deliberately left out of the main board? Use them as coasters or mouse pads — functional décor in the best sense of the phrase.
Tips that will save your nerves
- Dry-fit first. Before gluing, place all hexagons on the base without tape — you will see the final picture and avoid redoing what is already stuck down.
- Choose textured film. A matte surface reflects less light on a sunny wall; glossy is brighter but shows fingerprints.
- Think about weight. Do not overload the board with heavy items — foam board is light and suited to paper, photos, and small things.
- Protect the corners. If the board will be in a child’s room or near a walkway, round sharp edges with sandpaper.
Variation ideas: make the project your own
The basic recipe is only a starting point. Here are a few directions to explore:
- Monochrome. Shades of one color — from light to saturated — look very stylish in a minimalist interior.
- Contrasting frame. An outer row of cells in another color — like a border for the inner pattern.
- Functional zones. One section for work reminders, another for inspiration: postcards, quotes, sketches.
- A gift. Assemble a compact version from 7–9 cells — a perfect handmade present for a friend who loves an organized space.

Can I use cardboard instead of foam board?
You can, but cardboard bends faster and holds pushpins less well. Foam board is the optimal balance between lightness and rigidity. That is why this material is so popular in scrapbooking and model making.
How many hexagons do I need for a small board?
For a compact version, 7–13 elements are enough. In our project, 25 pieces already make a noticeable wall accent. Base your choice on the free space and how many notes you plan to pin.
How do I hang the board without damaging wallpaper?
The easiest way is adhesive wall hooks (for example, 3M Command) rated for the weight of your composition. One or two hooks at the top are usually enough because foam board is very light.
Will the board withstand repeated use of pushpins?
Yes, if you attach them in corners and at joints rather than in the same center points each time. Foam board “heals” better than thin cardboard, but it still needs a sensible approach.
Bottom line: a small project with a big effect
A honeycomb wall board is not just “another DIY idea from Pinterest.” It is a way to bring order to thoughts and space without spending a fortune or a whole weekend. You take simple materials, repeat a familiar shape, add your favorite colors — and get something that works for you every day.
If you have been putting off organizing your desk or wanted to liven up an empty wall — here is your sign. Pick up a compass, turn on some music, and start with one hexagon. Geometry will do the rest: cell by cell, a board will appear where you will want to leave not only tasks, but a little joy too.
M. KOVALENKO, Poltava
Recommend to read
 Micromotorcycle “Gnome”
Maximum simplicity of design and minimal complexity of manufacturing - these are the principles that were used as the basis for the creation of the Gnome micromotorcycle (see...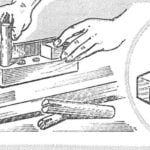 WHEN THE BAR IS ROUND
To cut a pipe or wood block round section diameter accurately is difficult. In this case, will help the jig from a wooden block having a groove, the width and height of the corresponding...
