 Many are familiar with the ancient art of Inlaid wood. Magnificent paintings drawn from tens and hundreds of pieces of wood, and now decorate the interior of apartments. But we are not going to describe the technology of this complex case, and we will tell about a simplified method of inlay (call it “pseudoinsulata”) using a self-adhesive polymer films, imitating precious wood. We offer several ways to create a “wooden” pictures.
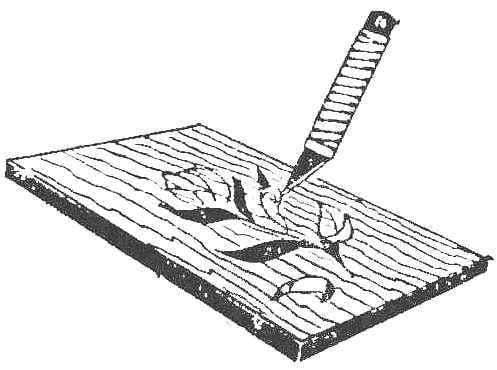
The first is the easiest. You take a piece of self-adhesive film and glued it to the plastic sheet. For film substrate a dark color should choose light and, conversely, for the light film dark. Next, using carbon paper the chosen picture is transferred to film. It remains to take a sharpened knife and to remove excess parts of the material. With proper selection of flowers and the substrate film can obtain interesting combinations.
The second method is more difficult, but obtained with the help of pictures is much closer to a true inlay. But it is necessary to have tapes of several shades.
You must first choose a base plate for it as in the previous case, may be a sheet of plastic, but the fit plywood or hardboard sheet. At the base (again with the help of carbon paper) is transferred to the figure; just be sure to clearly define its contour relative to the edges of the substrate. The participation of the image, which are scheduled to provide, are Packed with pieces of tape, and it is not necessary to contour the patch conformed to the shape of the section of the pattern.
Then, on the thus prepared substrate is glued to a sheet of film corresponding to the background of the painting. Is applied on top of the blueprint and the original picture again translated.

Fig. 1. The first way to get the “wood” paintings:
1 — adhesion of the film to the substrate, 2 — translation of figure 3 — cutting pattern elements.

Fig. 2. The second method:
1 — original picture 2 — transfer pattern on a substrate, the 3 — gluing pieces of film elements that should be highlighted, 4 — gluing the background of the film, 5 — a re-translation of pattern on the background film and the clipping elements.
Now you are probably clear, which required the precise fixing of the contour image relative to the substrate — otherwise, the discrepancy between the two translations of the image.
Well, now the same as in the first case, with a sharp knife cut through the covering sheet of film (try not to cut through both layers), the cut portions are removed, and you receive practically indistinguishable from true inlays product.
And finally, the third way: it resembles the second, but is somewhat simpler in execution. Glued on a substrate film, corresponding to the background of the painting, and it translates the contour of the figure. You can also painting by numbers on canvas you can buy. For the details you need to select the color or appropriate pattern, selected relevant pieces of self-adhesive film, they transferred the outlines of these parts, and the last cut with a knife or scissors. It remains only to stick them on the background and the picture is ready.


