 I think many know the situation: you come home from work – totally exhausted and again, eyes clinging to the instrument on the shelf and the “sticks” hanging on the wall since last year. Automatically then I remember that the season has long been opened and begin a frenzy to finish the plane… eyes, lying on the couch. However, this does not last too long. Comes a real enthusiasm and somewhere there is immeasurable energy. But… for some reason it always occurs exactly at the end of the season. And when more than half of the super-model is ready, a bad weather, the rains, snow and other delights associated with autumn. The plane is just so desirable again “hangs” on the wall. He rarely survives until the next season (or tide mood!), often “killed” by a caring hand of his wife, wipe the dust off it.
The author proposed to your attention the material, analyzing the situation, came to the conclusion (or, if you prefer it, found an excuse for myself) that the last few years with enviable persistence built planes are not for intense flights, and “for the soul.” The model had to meet the highest aesthetic demands, but at the same time wanted to test new technological and design ideas. As a result, the aircraft evolved slowly and in agony. Indeed, their performance was highly appreciated by experienced fellow modelers. But a century of flight models was not long. Because time was spent on practicing the design, construction, technology, licking the smallest nodes in the model, and to the training… this time almost does not remain. But more self-esteem and not always (?) was realistic, saying that if the Desk you are able to do miracles, then certainly in the field, holding onto the handles of the transmitter…
The conclusion was clear – sadly, you first have to learn to steer at all bearable (and, in particular, and in all weather conditions). Then the time will come lovely complex machines that “live” active flight life for a few years and justify the moral and material costs of their production.
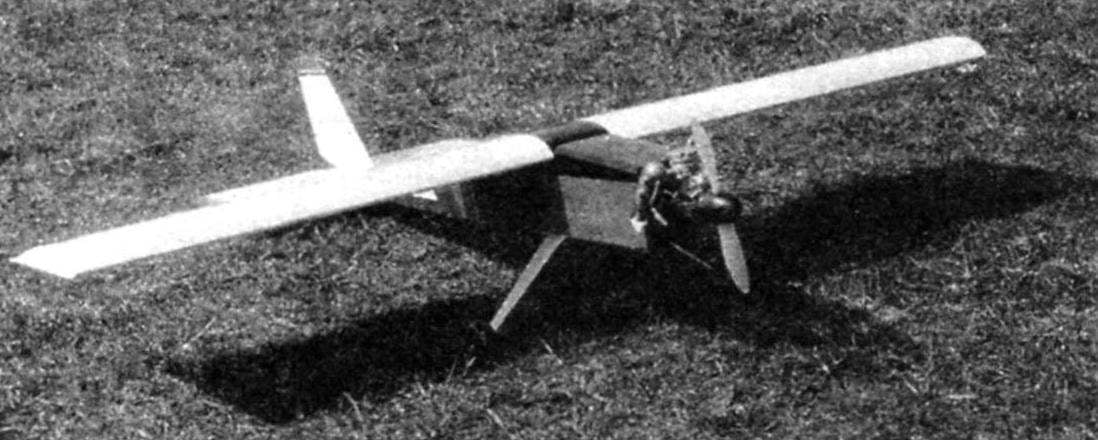
Was a good training “party”. But so what-what, and design experience gained considerable. In the result only on paper appears the most simple and technologically advanced aircraft, which on top of everything else doesn’t look “crocodile”. The only tribute of adaptability was the rudder – it is not there. But those who believe that without him even training aircraft will be flawed (?), will be able to receive a place in the fuselage under the additional machine and to hang the wheel.


Just a couple of weeks not hard work the new model can be tested in the air. This machine in the manufacture has a number of advantages. Virtually all parts of the wing and fuselage are manufactured with a sharpened knife with a thin blade, and just a few hours. Work with a jigsaw and machining of parts with skin is minimized, which not only saves time but also reduces the amount of dust and debris – a very important factor when building a model at home. A vacuum cleaner will have to work only after profiling the front edge of the wing and the final finish of the fuselage.
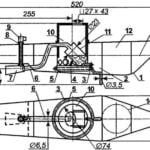
So (if you come back from work, but not quite go over with your legs), let’s start with the wing. The result of the pursuit of ease of manufacture it is designed all-in-one not having a cross angle of the “V” and without narrowing. Wing design, in principle, no different from the traditional, except not quite normal the front edge and the lack of a built-in center the steering servos drive ailerons – it is located in the fuselage. The latter can be eliminated from almost a dozen extra parts and not have to break your head how to place the machine in a confined space. Now the ailerons are actuated rods, wire, allied with a diameter of 2 mm, which are displayed on the sides of the fuselage and attached to the control horns after the installation of the wing. Here would be the best tips that can disconnect in extreme situations without damaging the steering machine, and Aileron, for example, ball.
A bit about the technology fast wing Assembly. Set aside the finished panel cladding of the wing walls between the spars and beech pin. All the ribs, edges and shelves of the spar assemble the pins and spill the seams with epoxy resin or a fix. After the adhesive has cured completely profilerate the rear edge and make it deeper under the panel sewing the center section. In the second stage, glue all the remaining parts. Finally, we use the plane and sandpaper profiled the forehead (or rather, the front edge). Cording film MonoCote. Other types of films, although in any case they should be tough enough – if the design of the wing that is covering prevents deformation of the twist.
Fabrication of the fuselage also will not make special work. Panel boards are made of balsa wood with a thickness of 6 mm. the Upper lining of the fuselage – balsa 3 mm, bottom (as the most susceptible to damage) – plywood with a thickness of 1 mm with a transverse layer. The front sub frame peraclean of two layers of 3-mm plywood and lined on both sides millimeter plywood. The following two frames and the fee servos are made of plywood 3 mm. the Rest of the frames are not load-bearing and can be cut from balsa: underwing -6 mm, others – 3 mm.
Getting started – preparation of the sides of the fuselage and power frames. On the balsa side panels are glued reinforcements: sewing the forward fuselage, strengthening of under frame located near the rear edge of the wing, strengthening the under boss of the rack mount chassis. At the same time plywood with a thickness of 1 mm is enhanced by the upper part of the second frame at the location of the hole for the pin installation of the wing and plywood workpieces perceived frontal frame.
Then the entire fuselage except for the top and bottom zalivok, going to the pins. Compression panels in the area of the narrowing of the fuselage used pine slats with a cross-section 10×10 mm, subtended rubber top and bottom. Seams at front and two following frames is spilled epoxy, and the rest – also a resin or a fix. After posting the control rods (the two brand “Bowden”) the fuselage is sutured completely, except for hatch access to fuel tank. The finishes are made of the same material as the wing-film type MonoCote.
Horizontal and vertical tail can be carved from balsa plates 6 mm thick that needs to be done. However, memories of the days of balsa shortage was not allowed to take the easy way out (Oh, the psychology…). Not in favor of the basic concept of the model was the re-feathering of the plates, as shown in the drawings. Later, the model itself, in a very accessible way, “explained” to its constructor, which is noble, but unnecessary gusts offense-balancing had to hang on the tail landing gear special heavy wheel. And even with such a “weighted” alignment happened, at least not the rear.
A little bit about the propeller group. The engine is mounted on standard plastic Motorama for the screws where the front bulkhead are glued four M4 fungus with broad heads. The proposed model was equipped with the engine “rainbow-7” (forgive us aces radiopilot for such an indecent choice). However, the “rainbow” before using passed cycle modification. The main work was carried out on the subject of the struggle with a terrible vibration motor, and fine-tuned controlled carb. It should be noted that we managed to win!
And besides the satisfaction from victory over a bad engine design, but this work has brought one more advantage. Because it’s nice to question colleagues, flying with motor OS or ST, to answer that you have on the model so good “saws” not some the latest Western engine, and “dense “rainbow”!
Of course, the motor “rainbow-7” – still not the best choice. However, after you have invested several man-hours suitable for a training flight. Besides, he is almost 100 g lighter than current counterparts. Add to this that “Rainbow” is not a pity a “smear” on the asphalt runway, and you may, in the end, you will agree with our choices (especially if you are given to see and hear this modified motor in action).
When retrofitting the completed model, all servos are in the fuselage. For mounting use a standard Hitec trehgroshovaya fee. But cars can easily accommodate and traditional way, grooves in a homemade plywood Board. The only condition is to servo control the ailerons should be moved as far forward as possible and situated exactly in the middle of the fuselage. This will ensure minimal divergence angle of the rods and the symmetry of the move Aileron up and down. By the way – it is for this reason Hitec standard fee was offset to the starboard side of the fuselage, and servo actuator rudder was located at the typewriter ailerons.
ADDITIONAL INFORMATION
– The access hatch to the tank is made of plywood thickness of 3 mm and located at the bottom, between the first formers. The hatch is fixed with four self-tapping screws.
– The fuel tank is mounted on the auxiliary polosamote (are made depending on the type and size of fuel tank), and is attracted to him rubber rings. The supply and drainage of the silicone tube is removed through the frontal frame. The diameter of the through holes is 0.3 – 0.5 mm less than the diameter of the tubing. The inner surface of these holes, tarred or covered with parquet lacquer. Silicone “end sleeves” must pass through the bulkhead with a force – this will confirm contact of the fuel compartment of the tank.
– The front chassis is done D16T sheet thickness: 3 mm Width of the strut from the fuselage is 40 mm and the ends it narrows to 15 mm.
– In the initial planning of the installation of the heavier engine recommended accordingly to reduce the length of the forward fuselage.
– Corners of installation of all the main elements of the model (wing, stabilizer and the axis of the engine) is equal to zero (wing setting angle is measured from the bottom forming his profile). The initial alignment is equal to 20% of the total chord of the wing. With minimal tolerances all control surfaces (the ailerons to 15 degrees in both directions, the Elevator 20 degrees) and you have an excellent training aircraft. Flies surprisingly – very reliable and stable. Initially some concerns rise from the ground in the absence of the rudder and controlled landing gear. But the first start showed that the model is out of the air with strips of any width without any problems. The main thing (unless, of course, complied with all installation angles and wing initially quite smooth) – “not to disturb” the plane. He takes off himself, at full throttle, running at the bandwidth of the order of one meter. Flies perfectly and even piloted on 50% gas. Different minimum landing speed and a very good planning with a stopped engine. The ability to easily create aerobatic aircraft is to replace the original wing others with similar design, but purely symmetric profile with a thickness of about 16-18% of SAH.
The basic data model
Wing area………………………….44,2 DM2
The surface of the stabilizer………………7,1 DM2
Total area…………………………51,3 DM2
Takeoff weight…………………………….1900 g
Specific load on the wing………43, g/DM2
A. SOKOLOV
Recommend to read
 REPAIR “EUROCHICAGO” AXE
I don't know what the standard of "rivet" in China, like axes with tapered eye and epoxy fill as a retainer of the ax. The first such axe weight 0.6 kg with wooden handle I bought after... PROTECTIVLY ON THE SHIP
Everyone who did the ship models with the electric drive, are familiar issues associated with power supplies. Often have to upgrade the batteries, but they are not cheap. Hence the...
 I think many know the situation: you come home from work – totally exhausted and again, eyes clinging to the instrument on the shelf and the “sticks” hanging on the wall since last year. Automatically then I remember that the season has long been opened and begin a frenzy to finish the plane… eyes, lying on the couch. However, this does not last too long. Comes a real enthusiasm and somewhere there is immeasurable energy. But… for some reason it always occurs exactly at the end of the season. And when more than half of the super-model is ready, a bad weather, the rains, snow and other delights associated with autumn. The plane is just so desirable again “hangs” on the wall. He rarely survives until the next season (or tide mood!), often “killed” by a caring hand of his wife, wipe the dust off it.


