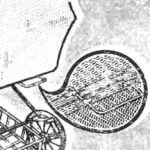
Now it is the turn to use fishing line. Tie at the end of the knot and secure it to the extreme of the slot of one of the triangles. Fishing line is stretched as shown in the figure. After completion of this operation the free end of the fishing line associated with the “tail” left on the opposite end of the nylon thread, and zaparivat the flame of a match.
Install the lamp cartridge with a wire, turn the lamp and put the lampshade in its intended place. Just remember that the lamp power should be no more than 60 watts, or the plexiglass can warp.
TABLE LAMP
Depending on the power of bulbs and colors of plexiglass this lamp with equal success can be used as night lamp and as table lamp. In the latter case, it. of course, the best thing to do from a glass of milky color.
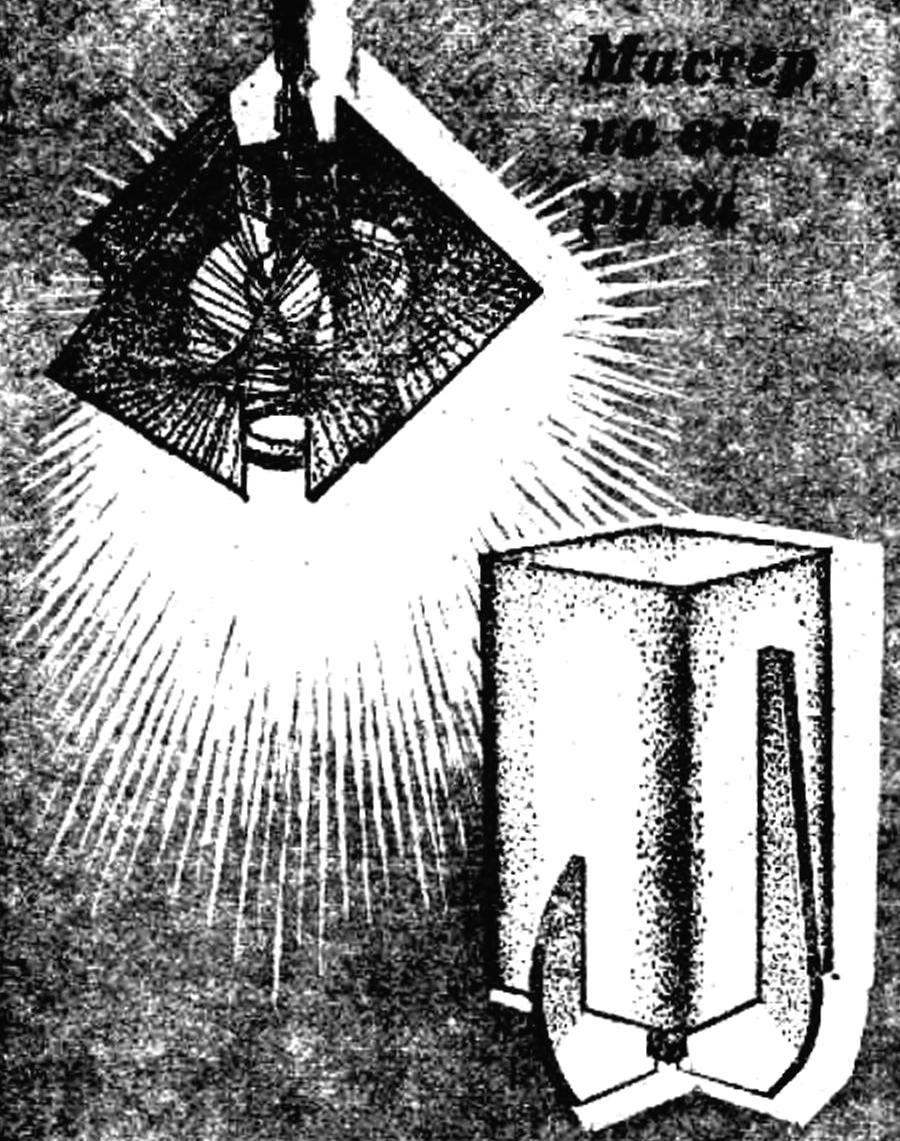
Manufacturer of lamp starts with the layout of the rectangular sides of the canopy. After cutting the ends of the long sides of the plates abrade at an angle of 45°. all the plates stacked PA Desk external surface and outward for ease of Assembly glued with adhesive tape. Then they turned, bevels promazyvaetsya solvent, and the plates formed a kind of box. Without waiting for drying of the solvent, pull her rubber band, ensuring the mutual perpendicularity of the faces of the workpiece. After a few hours, remove the rubber band, grind the sharp edges with fine sandpaper and Zapolarye them.
Fig. 4. Table lamp and its basic details. Right — the options supports.
Fig. 5. The sequence of Assembly of a table lamp:
And gluing of the sidewalls of the ceiling with adhesive tape, B — coating the beveled edges of the side walls glue or races” of solvent In the bonding of the light, Mr. the contraction of the sidewalls with a rubber band, D. installation of the stand.
The Central node of the lamp is cut out of wood — preferably oak or beech. Don’t forget that the width of the grooves should correspond to the thickness of the plexiglass.
Stand light can be any. In our drawings depicts three supports, it is possible that you will come up with more suited to your taste.
Cartridge with a threaded sleeve installed in the hole of the Central node. When you glue the parts of the stand to the Central site, don’t forget to shift it relative to the plane of the table 6 to 8 mm for the passage of the cord. For this lamp it is best to use a pass switch. After final Assembly of a table lamp attach with a few drops of glue every detail of the stand.
Recommend to read
 AND SIMPLY AND CONVENIENTLY
Lee leaves baby stroller out of the house (where now find entrance without stairs?), overcome whether the underpass is on the platform of the station or stations everywhere have to... BRAKES? ON THE CHECK!
Many accidents occur due to technical reasons, including due to faults of the brake system of the vehicle. One of the indicators of the effectiveness of this system is the braking...

 Many household items is easy to do with their hands. This furniture, and fixtures for kitchen and bathroom, and original details of the interior hallways and lobbies. No exception and lighting. Actuated even at home, they will look no worse than the serial favorably differing from the last by its originality. In this collection we offer you two easy to manufacture of the lamp, which can be made from readily available materials.