NEW OUTFIT OF THE APARTMENT

A NEW OUTFIT OF THE APARTMENTEach apartment will eventually need an upgrade. And in most cases to carry out this work do not necessarily cause masters of plant personal services: much quite on forces to execute and SMCM using the following recommendations.

PAINTING WALLS

 
Freshen up the walls help not only Wallpaper, but also adhesive, oil or emulsion paint. The first is easy to make yourself, oil and emulsion are in the sale.
 
Work with the glue paints. Prepare them as follows: in an aqueous solution of chalk add joiner’s glue or flour, the starch — coated surface after drying does not stain.
 
White paint composition or scheme can be prepared in a bowl, diluting the chalk with water to form a thick cream. Mel can be grayish or yellowish. Therefore, we take a turquoise or blue dye, diluted in a little water and, stirring constantly, gradually pour in the chalk, until the solution acquires a bluish tint. To check the solution on the color it put on a piece of tin (from tin cans) or glass about the size of a hand and dried on the fire. If the shade you like, add ultramarine or, on the contrary, Mel.
Then the composition “stick”: the injected adhesive additives. Most often it is joiner’s glue of an animal origin — bone or hide. 10% solution (10 g glue — 90 g of water) is boiled in a water bath until dissolved. Pour in color of the adhesive can be hot and cold, Yao small portions. Properly sealed, the color should slightly otmelivaetsja — dirty. Check it out on glass or metal is described. From the excessive amount of glue on the painted surface appears marbled stains, whitewash flakes.
 
In Kohler added construction paint of the desired color, pre-diluted with water to a creamy state. The powder is completely mixed and leaves on the surface color bands, so at least for a day, dilute the pigment with water: the grains will soften with stirring and dissolved. Get a check hue in the same way — on glass or the gesture of Picking up the right color, the solution “stick”. And after this color it is necessary to strain through cheesecloth or a tight grid: this is important when working with a brush, or spray.
 
Fig. 1. Staining wall paint brush (the lines show the sequence of operation).
 
Fig. 1. Staining wall paint brush (the lines show the sequence of operation).

 
R and p. 2. Paint application handbrake And longitudinal strokes, B — feather.
 
R and S. 2. Paint application handbrake:
 
A — longitudinal strokes, B — feather.

 
Fig. 3. Work roller on a long handle.
 
Fig. 3. Work roller on a long handle.
 
To Kohler gave a smooth coating, the wall must be thoroughly primed and apply it on already wet ground.
 
Preparation of primer. Often use copper sulphate primer. On 10 l of structure — copper sulfate 100-150 g, soap — 250 g of dry animal glue — 200 g, 24-30 g of linseed oil and sifted meta — 2000-3000 g. the Composition is prepared with continuous stirring in the following sequence. In 3 l of boiling water dissolve the sulphate of fashion. Separately in 2-3 liters of boiled glue. Soap also dissolve in 2 l of water. The solutions of soap and glue is poured; while stirring, add the varnish. In received emulsiju pour in a squirt a solution of vitriol. Before the introduction of the chalk emulsion is cooled, otherwise the solution will foam and “go” from the dish. The resulting light green liquid to drain through cheesecloth.
 
Vitriol better soil to mix in aluminum, enamel or glass container; store only in glass, metal-ware quickly collapses.
 
Vitriol primer forms a strong glassy-like film (which is well applied and the adhesive coders).
 
However, before priming the surface is cleaned from the old anew abundantly moistened with a brush or scraped off with a steel spatula and then wash away. Crack grease on izvestkovoglinistym plasters — gypsum, negoiu and cement plasters — the cement, mixing them with sand: 1 :2 or 1:3.
 
Priming is carried out after complete drying of the surface, and after a day or two, you can paint — brush, roller or spray. First, it is better to brush and then to align the first layer of paint, to “powder” it from the dispenser.
 
The prepared solutions were stored for not more than three days, especially in the warm season: the color with the glue begins to decompose, emit odor and lose adhesive properties.
 
The painting with oil paints. They are applied only on well-prepared — dried and prooliflennye surface.
 
If walls are rough, their smooth putty (putty) that is applied in a thin layer with a steel or wooden spatulas or exactly cut a piece of semi-hard rubber. Putty use store-bought, ready made, or make themselves. 100 g of a 10% adhesive solution is mixed with 50-100 g of linseed oil and add chalk to the desired thickness.
 
Depending on the condition of the wall sealing is performed in one or two layers. After drying each layer (and the latter especially) the surface is sanded sanding sandpaper wrapped on a wooden block. The medium-grained sandpaper is used, and for the last layer — fine-grained.
 
Fig. 4. Alignment of walls and sealing of cracks with putty.
 
Fig. 4. Alignment of walls and sealing of cracks with putty.
 
Fig. 5. Wooden template to sort the tiles
 
Fig. 5. Wooden template to sort the tiles:
 
1 – base plate, 2 – dimensional line.
 
Fig. 6. Preparation of tiles
 
Fig. 6. Preparation of tiles:
 
1 — cutting, 2 — splitting, pritochka edges.

 
paint definitely need to be ready to go. To achieve homogeneity of colour, we recommend you to make a small wooden Veselka for mixing paint. The fact that the pigments (dry paint) just sit on the bottom and the top layer becomes more liquid (one drying oil) and maloukryvistye.
 
Wall beforehand wipe with a damp cloth to remove contamination. Oil paint should be applied as a thinner layer, double-shading: first the paint is applied movements from left to right, and then immediately leveled up from the bottom — the coating is much smoother.
 
REPAIR OF TILE COVERINGS
 
For fixing the tiles apply cement, mastic, and heavy-bodied oil paint. Cement mortar consists of 1 part (by volume) of cement to 3-4 parts carefully sifted sand. Mastic, for example, casein-cement —
 
1 part of casein glue, 3 parts of cement grade from the “400” and above, 1 part fine river sand and 2.5 parts of water. First dissolve in water casein glue, stirring for about 30 minutes, then make up the cement-sand mixture, pour in the glue solution and again mixed well. The prepared composition is filtered through a sieve with openings of not more than 1X1 mm. is Then applied either PA the back of the tile, or on a revetted surface layer up to 5 mm.
Mastic can be prepared without sand — only from casein and cement: 1 part of dry glue dissolved in water and add 3-4 pieces of cement. It can be used only within two hours after cooking.
 
At painted with oil paint or prooliflennye surfaces: plaster, concrete, brick, wood — tile can be put and using gustotertuyu oil paint. The back of the tile clean from whining, applied a layer of paint thickness 1— 2 mm and pressed against the wall. Speaking of seams, the paint should Shine with a cloth soaked in kerosene, turpentine or any liquid oil. Note that through the marshy white tile paint can Shine through. Pre-coat the tile with the back side with white Paint and let dry. Or place it only on the white, light gray or ivory color heavy-bodied paints.
 
To replace individual tiles or put on the former place of the dropped can, thoroughly cleaning its back side, removing the 1-2 mm layer of old dried in the nest, and then — stick.
 
For tiling you can also use commercially available adhesives “Bustilat”, “PVA” and other similar: “the Stilit”, “Glue-71”, resin “PS-V”, “Adhesive sealant” and “Gumilaks”. Their use is usually indicated on the package.
 
Fig. 7. Wall cladding tiles
 
Fig. 7. Wall cladding tiles:
 
1, 2 — “beacons,” 3 — skins 4 — tile solution.

 
Fig. 8. Options tiling
 
Fig. 8. Options for tiling:
 
1 — a seam in a seam, 2 — breakdown, 3 – diagonally.

 
Fig. 9. Flooring PVC tiles on floor
 
Fig. 9. Flooring PVC tiles on floors:
 
1 — laying on the paste, 2 — lamination mallet.
 
When the veneer brick surfaces first, they better be plastered and allowed to dry, and then stick the tiles in the specified ways.
 
The quality of the veneer depends on the preliminary preparation of the tiles. Outwardly, it would seem that the same white squares are different from each other. First tile pick up on the hints, laying out by the Stoics. Then by size, using the simple template with divisions, which will immediately show you how much you need to whittle down a particular edge tiles in order to level it with the rest. Suitable for leveling any flat abrasive whetstone, sandpaper glued to a Board rubber Kleen.
 
Tiles can not fit one size and the use of groups: the large or different-sized bottom walls, above — average, then the standard size is 150X150 mm.
 
Often the tile should be cut — it is also available to everyone. Mark with a pencil line (at risk), attach a ruler and a glass cutter or cutter with carbide tip, pressing firmly, cut through the glaze of the tile to the crock. Incised tiles take over the edge, hit the bottom plane on the edge of the Board so that the blow fell on the cut tiles will break exactly on the lines. Edges not always turn out smooth — they align on the abrasive.
 
Roofing tile on the mortar or casein-cement paste, always rinse it, or even better drop at some time in the water: this will clean it from the dust and prepare the surface for adhesion to the mortar.
 
To the ranks of the pasted tiles is smooth, on the wall first glued one tile top row of veneer, and one to the bottom. On them pull a cord-prichalki, both vertically and horizontally.
 
Veneer carry out so. First, put one or two of the bottom row, using for check of horizontal lower beacons, and to control the vertical and the top and bottom.
 
Then lower Malki removed, using instead the already stacked veneer. On the tiles is applied a smooth layer of mortar, of such thickness that after pressing to the wall, he spoke a little at the edges. Spout then have to remove with a rag. You can put the solution on the whole plane, but only on her the most, but a thicker layer: it is dangerous when okazyvanii tile that is achieved by light prostukivaniem the handle of a shovel.
 
Veneer on cement-casein. mastic is no sand or oil paint much easier. But tile need be laid only on a flat wall by a thin layer of mastic, pressing her tighter to the wall.
 
WORKING WITH LINOLEUM
 
Lola, covered with linoleum, with proper care is very practical. However, the mechanical strength of the coating, of course below, to repair it more often than others. However, how to replace a damaged or fray area of the linoleum? You can put a patch identical or, conversely, contrasting color. Her cut of this size, so she was a little bigger Model of the site. Patch applied to the damaged area, encircle finely sharpened hard pencil and drawn lines cut iesny linoleum. The more precisely made to fit, the less noticeable the patch will be. Opened the basis clear of a dust, dirt and the old mastic. The patch is covered with putty, stack on a place, a good smooth top and press down load.
 
If the repair uses a thin linoleum is placed under a patch of dense paper or cardboard.
 
For linoleum, plastikatnyh tiles industry, has released a special postmark: “Bustilat”, “Shiptrax”, “Gumilaks”.
 
When you need to replace all the linoleum, remove old, clean and slowlt surface. New linoleum can be laid n dry, if the width of the canvas from wall to wall – for example, in the corridors. Cut the strip so that the region was under the baseboards. If when laying Polota joints can not be avoided, attach the edges small nails or put between hair putty and press load.
Pre-harvesting should be spread on the hearth at the place of installation or in another room back side up. It can pass: linoleum is equalized, stabiliziruemost in size. Only after that he laid in place.
 
Often in bathrooms and toilet floors are made of small ceramic tiles — as a rule, sloppy, ugly. For these areas it is better to use the so-called relin, rubber or linoleum. You don’t have to stick: elastic and heavy, it flies tight to the floor.
 
To preform exactly “fit” in the size and shape of the old cover, make a pre-copy-template of paper and then transfer the extracted contours to the relin.
 
When laying conventional linoleum mastic it also pre-incubated for about a week in the unfolded state and fold prior to coating the substrate outside roll diameter not less than 40 see End gently pressed against the floor covered with mastic and gradually turning the entire sheet, paste, carefully smoothing and leveling that under it does not remain air bags and bubbles.
 
Many correct “chess” decks from raznotsvetnyh polyacrylic tiles. They can be laid on old, but even coating. First lay out the tile without label, so that it exactly covered the floor, then gently lifting each tile is applied with a spatula a layer of mastic 1.5—2 mm, and immediately placed the tile back, carefully smoothing or, even better, “pripressovyvaja” wooden hammer mallet. To move laid on the mastic square is impossible. For several days until the mastic dries, the floor is better not to go, at least put on top of a few boards.
 
“RESTORING” PARQUET
 
Let’s start with the clarification that the parquet flooring alike. Although on the surface these floors are similar, but used wood, technologies of their manufacture, they are very different.
 
Block parquet consists of separate laths of studs of different length and width. Floors of this type are of two types: “solid rail” — when at bars with one longitudinal and one lateral side is formed spines-combs, and the other two grooves, and “soft rail” grooves on all four sides. When laying the latter in the grooves insert the spikes-Reiki of soft breeds of wood, often pine. Their thickness should be such that the slats are firmly held in the grooves. It is important that the wood planks and studs were well dried, otherwise, over time, connections and joints will disperse, parquet “sing” and gets cranky. Repair of such floor is that to remove klenki of parquet can only cut tires, damaged and adjacent strips.
 
Parquet floor is the shields or seals square shape with a size of 400X400 or 600X600 mm, recruited from rectangular strips of length from 100 to 200 mm, a width of 20 to 45 mm and a thickness of 8 mm. Such blanks get, pasting riveting face on heavy paper. Glue is used such that after stacking sheets on the subfloor paper can easily be starred tsiklej.
 
Parquet Board consists of two layers: a base rack and attached with water resistant adhesive coating of the blind.
 
These types of flooring in different plank and repaired. A small piece is attached with nails if the subfloor is wooden, and concrete is to be bonded to the mastic. Parquet floor fits well on the paste, and the parquet Board is nailed studs to the bars or planks-joists.
 
Fig. 10. The designs cycle.
 
Fig. 10. The designs cycle.
 
Fig. 11. Tsiklevanie of a parquet: cleaning of joints riveting.
 
Fig. 11. Tsiklevanie of a parquet: cleaning of the joints of the staves.
 
Parquet floors are the most durable. But they will eventually require updates. If the slats start to crack, fall out or warp — the old flooring or new inserts have to shave and scrape and cracked — replace.
 
When replacing the cells of the parquet on nail fastening them taken out of the socket, and inserts a new beat from the front side nails with the flattened hats guiding along the fibers and utaplivaja in the thickness of the strips of 2-3 mm.
 
At a panel Board parquet recruited using wood glue, rivets removed, and clearing the base, put new. After two or three days the egg party level.
 
On the concrete base of the strap have to stick to the mastic or in a well-heated bitumen, first carefully clearing old nests.
 
If one had riveting on the side of the plane of the riveting and the adjacent planks, apply waterproof glue or epoxy, if an adjacent hold on the other, nail it thin nails with otkusannymi hats. Nails hammer at an angle and utaplivajut in thickness drevesiny.
 
Mastic, especially hot, is applied to the base layer is not more than 1-1,5 mm, so that it is not squeezed out of seams: removing it is very time consuming. If this happens, it is best to remove mastic tsiklej or chisel, but not with gasoline or other solvents: paste will soak into the wood and leave black spots neudalimye.
 
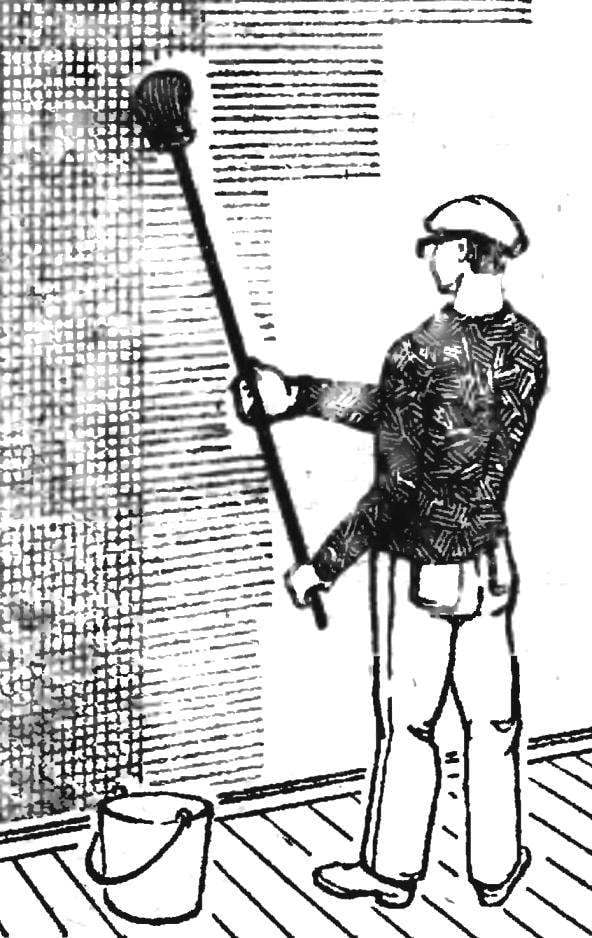
Renovated parquet floors, especially contaminated go rough, better re ottsiklevat. For this purpose it sweep, quickly washed and immediately start to scrape. Clean flooring, you can not myth, but be sure to wipe with a wet cloth.
 
The technique of scraping is. Tool take two hands, put to the floor at a 30-45° angle and push lead for themselves. But only along the stave, not across, otherwise the wood starts to ride up. Shavings to not interfere with work you should immediately rush.
 
Remaining on the studs to “fluff” is removed dry the floor well sharpened. and directed tsiklej.
 
Too big gaps between the wood slats sealed with a thin slats on glue or a specially prepared putty. For example, take by weight 20 parts of liquid were erased, 20 — fine dry sawdust and 20 dry sieved honey. For toning add dry building paints — no more than 5% by weight of chalk and sawdust. First mix the sawdust with chalk and paint. And “shut” them with liquid glass.
 
The same putty can be prepared in the epoxy resin.
 
A. SHEPELEV, civil engineer

Recommend to read

  • HOZBLOK-CLAMSHELLHOZBLOK-CLAMSHELL
    What outbuildings do not see in the garden or suburban areas! Most often it is a tiny shed, located at the far end of the site, or a large economic unit, combined with a summer kitchen....
  • THE DUCKBOARDS ON THE BALCONYTHE DUCKBOARDS ON THE BALCONY
    To get rid of moisture and dirt on the balcony, having made a wooden lattice and covered their floor surface of the balcony or loggia.   E. GRISHCHENKO, Moscow