The design was adapted from the industrial design, but it is simple and available for self-production. Moreover, a large part of the necessary for the manufacture of Cabinet materials and components available in the market. This is normal and laminated chipboard, slats of solid wood, universal furniture corners (dural or steel connecting elements) and a large number of screws.
About materials
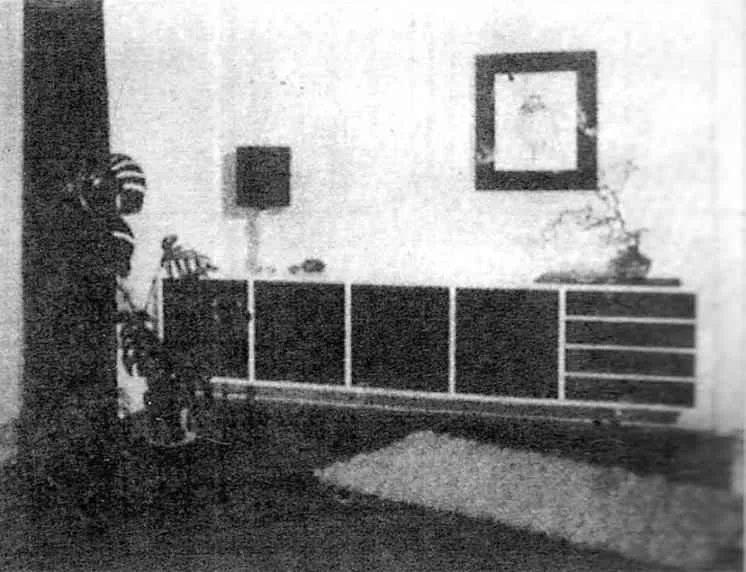
The outer surface and internal partitions are made of laminated chipboard. Immediately it should be noted that given the drawings and dimensions are only a guide. They should adjust depending on the room size and material is available (especially in cases when there is a possibility to acquire discounted items or use an old dismantled furniture).
Fittings can be specially manufactured from steel or dural corners, or used regular furniture corners. Piano hinges you can use any; they are attached by means of screws, the number of which depends on the number of holes necessary for mounting hinges.
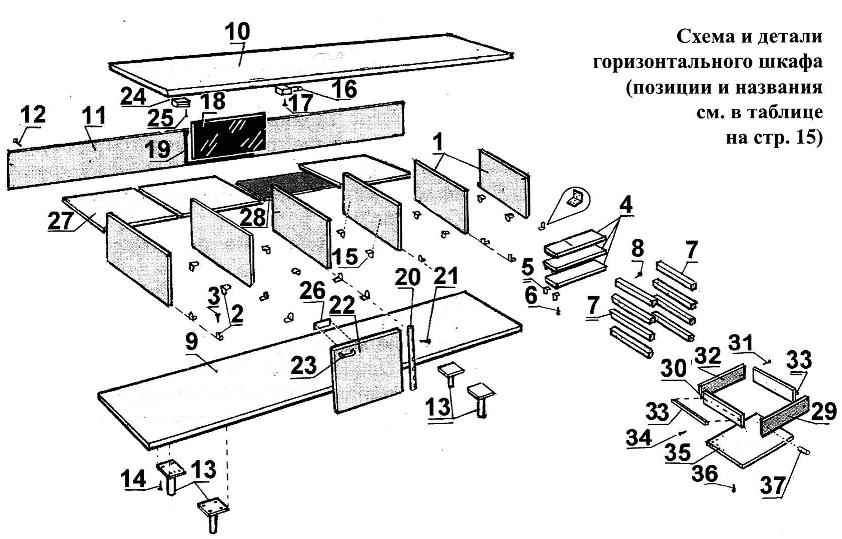
Slats of hardwood are used for the manufacture of supports for shelves and guides for drawers ( with longitudinal grooves ). Steel legs can be manufactured, but it is better to use ready-from old furniture. In addition, you will need about 25 meters decorative strip (film) for the finishing of the end edges of the parts.
Assembly, installation
Cut to size, uskorenie and prepared to assemble the parts together with the necessary tools for comfortable work. With the PVA glue and iron decorative film is welded on the end edges of the panels. Then you need to install their seats the doors and legs pull-out cabinets. Then it is necessary to partition the legs of the Cabinet For this purpose, the bottom panel is placed on the floor, and the lower (outer) surface should be facing up. In designated areas pre-drilled holes, and with screws fasten the legs to the bottom. Then the Assembly is placed on the legs and is done once-the label for the mounting of the sidewalls.
After you have installed the locking parts, they are attached to the sides of the wardrobe, then follows the installation of separation walls Installation on them of the supports of the shelves is preceded by marking and drilling holes for screws. Shelves can be installed in its place. Then mounted the first two left doors and the fourth. The third door (bar office) is set after take their place, mirror, glass shelf (and possibly lighting).
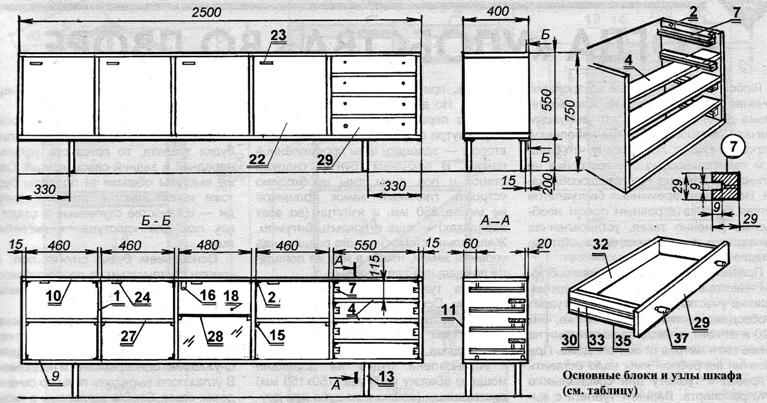

Panel shelves (one or two) are attached to the dividing partitions in the selected height. The use of colored light bulbs for illumination of the bar gives it a special mood. The wires from the bulbs are brought to a switch on the top of the bar and through the hole in the rear wall are brought out for connection to the nearest plug socket.
Now follows the installation box of the Cabinet. First set the direction and angle brackets for attaching the legs drawers. If necessary, instead of drawers can be mounted shelves. This is a more simple solution, and the installation will take significantly less time, but need to install another door, also with the help rojalnoj loops.
In the manufacture of boxes, special attention should be paid to their support rails are easily moved in the grooves of the guides. To do this before final Assembly of box inspect the smoothness of motions of a box inside the guides; then conducted the final Assembly of its elements.
We can finally install the top cover of the Cabinet with universal aluminum or steel furniture parts, mount the magnetic latch, put the light switch on. Remains to nail the back wall and eliminate caused during Assembly scratches, remnants of pencil markings. If necessary, Polish or varnish the outer surface.
Recommend to read
 COAXIAL ROTOR CHAMPION
General interest participants and experts of the past championship of Russia for sport flying showed to the model of the winner in the class of rotochutes (S9A) Mr. Voronenko. I must... AUDIO CONTROLLER
From Nickel-cadmium batteries with a life expectancy of 100-200 cycles of charge-discharge. Discharge below 1V per cell leads to a sharp reduction in the duration of battery life. How to...
 Large sibelectroterm plants from time to time organize specialized exhibitions, where to study avenues its primary products are making their drawings. Among other things come across the description and drawings of a variety of original furniture. This is done in order to interest the buyers in the acquisition of various tools and machines on the one hand and on the other to promote their products. These materials — is a convenient data sources for Amateur designers.