As living conditions improve, there arises a desire to decorate the interior aesthetically. And for this it is not necessary to buy expensive Western furniture sets — the problem can be solved with more modest decorative techniques that are no less effective even with ordinary furniture.
For example, with the help of… a screen. It is usually used simply as a light folding partition, which is why its panels, as a rule, are made in the form of opaque panels using fabric or other suitable materials.
However, a screen is very convenient in its design for decorating an interior as well. Such a decorative version was proposed by the Hungarian magazine “Ezermester”.
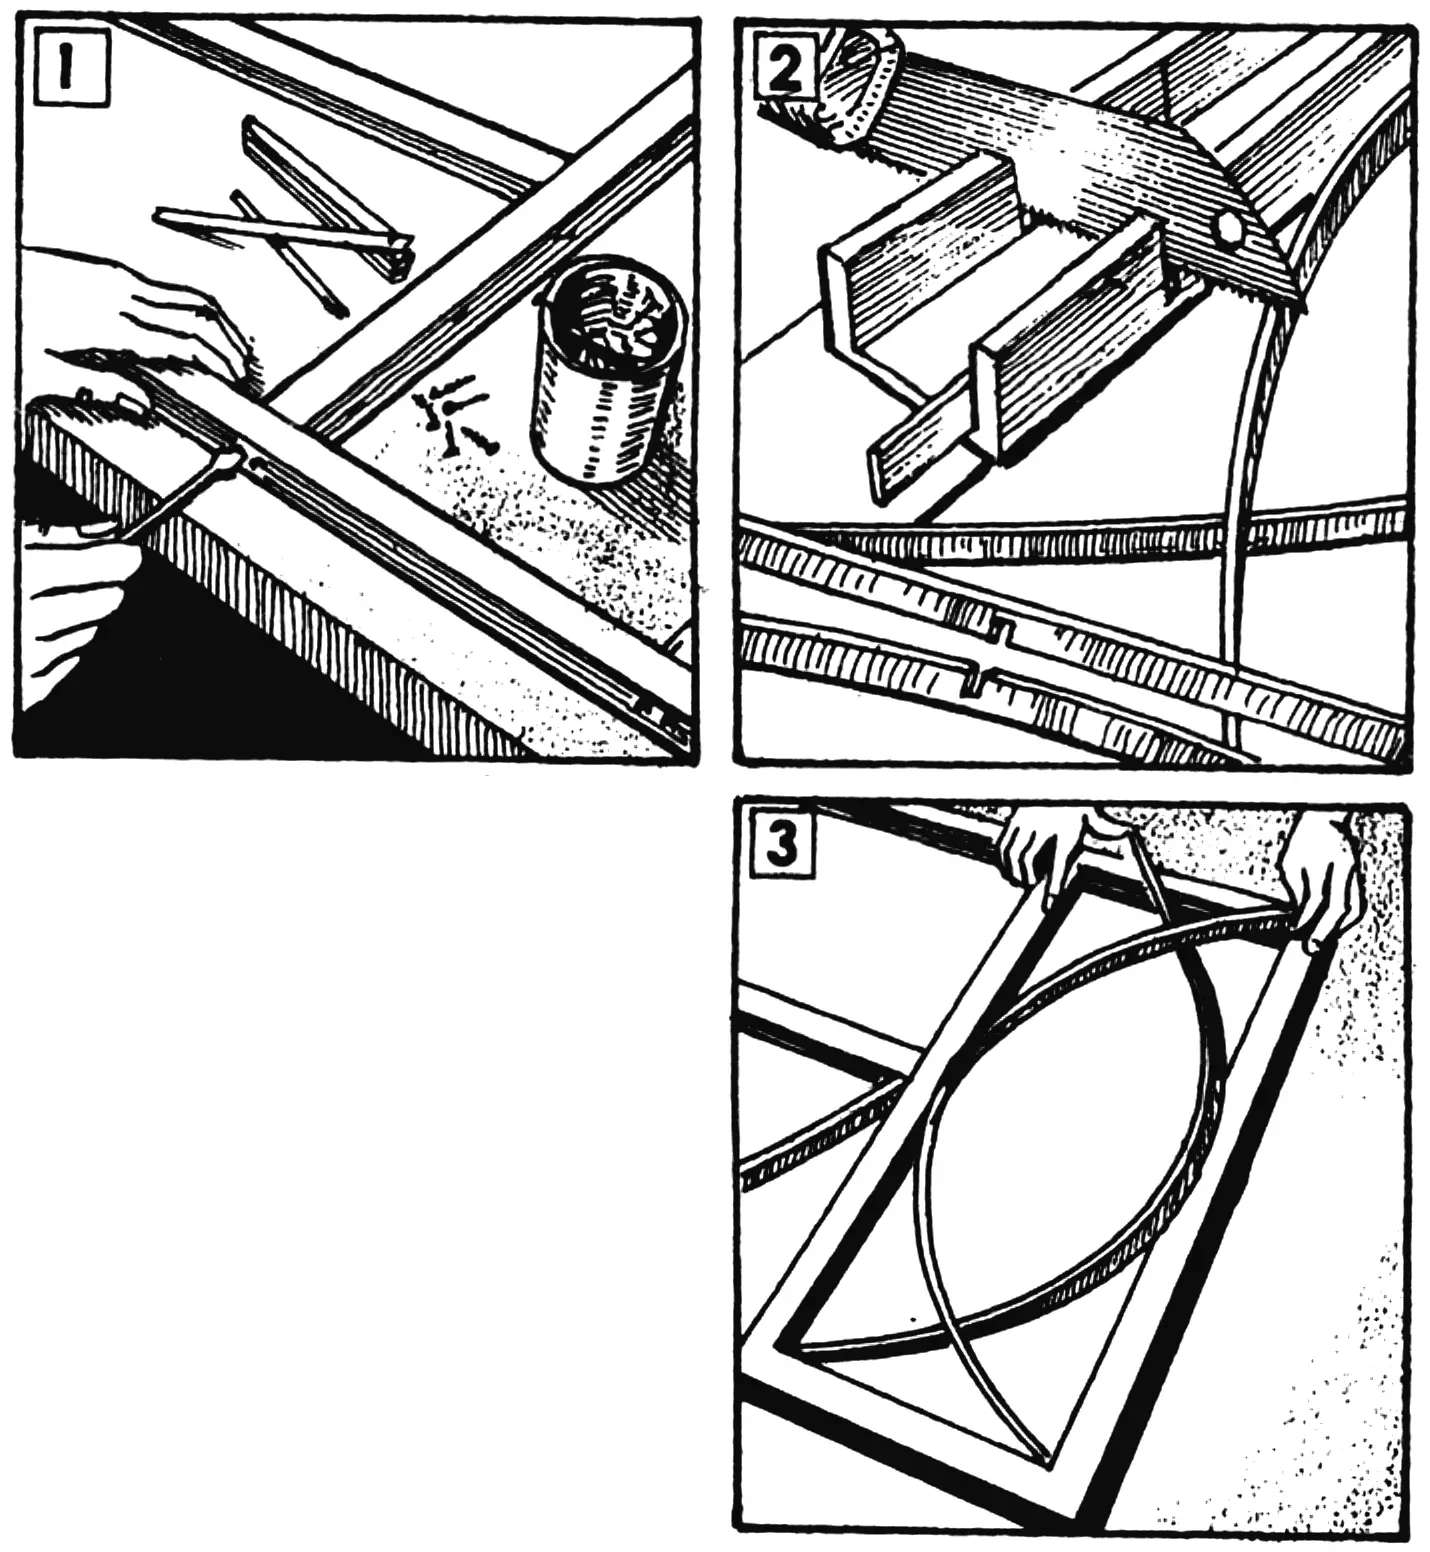
1 — assembling the panel frame; 2 — cutting arcs in a miter box; 3 — installing arcs in the panels
Unlike the traditional solution, the panels have no opaque filling, so the screen is perceived as a lacy beautiful wall that can be installed almost anywhere — not in order to hide what is behind it, but to distinctively highlight one or another part of the room. In its new role, it rather plays a functional and aesthetic part, similar to patterned garden trellises.
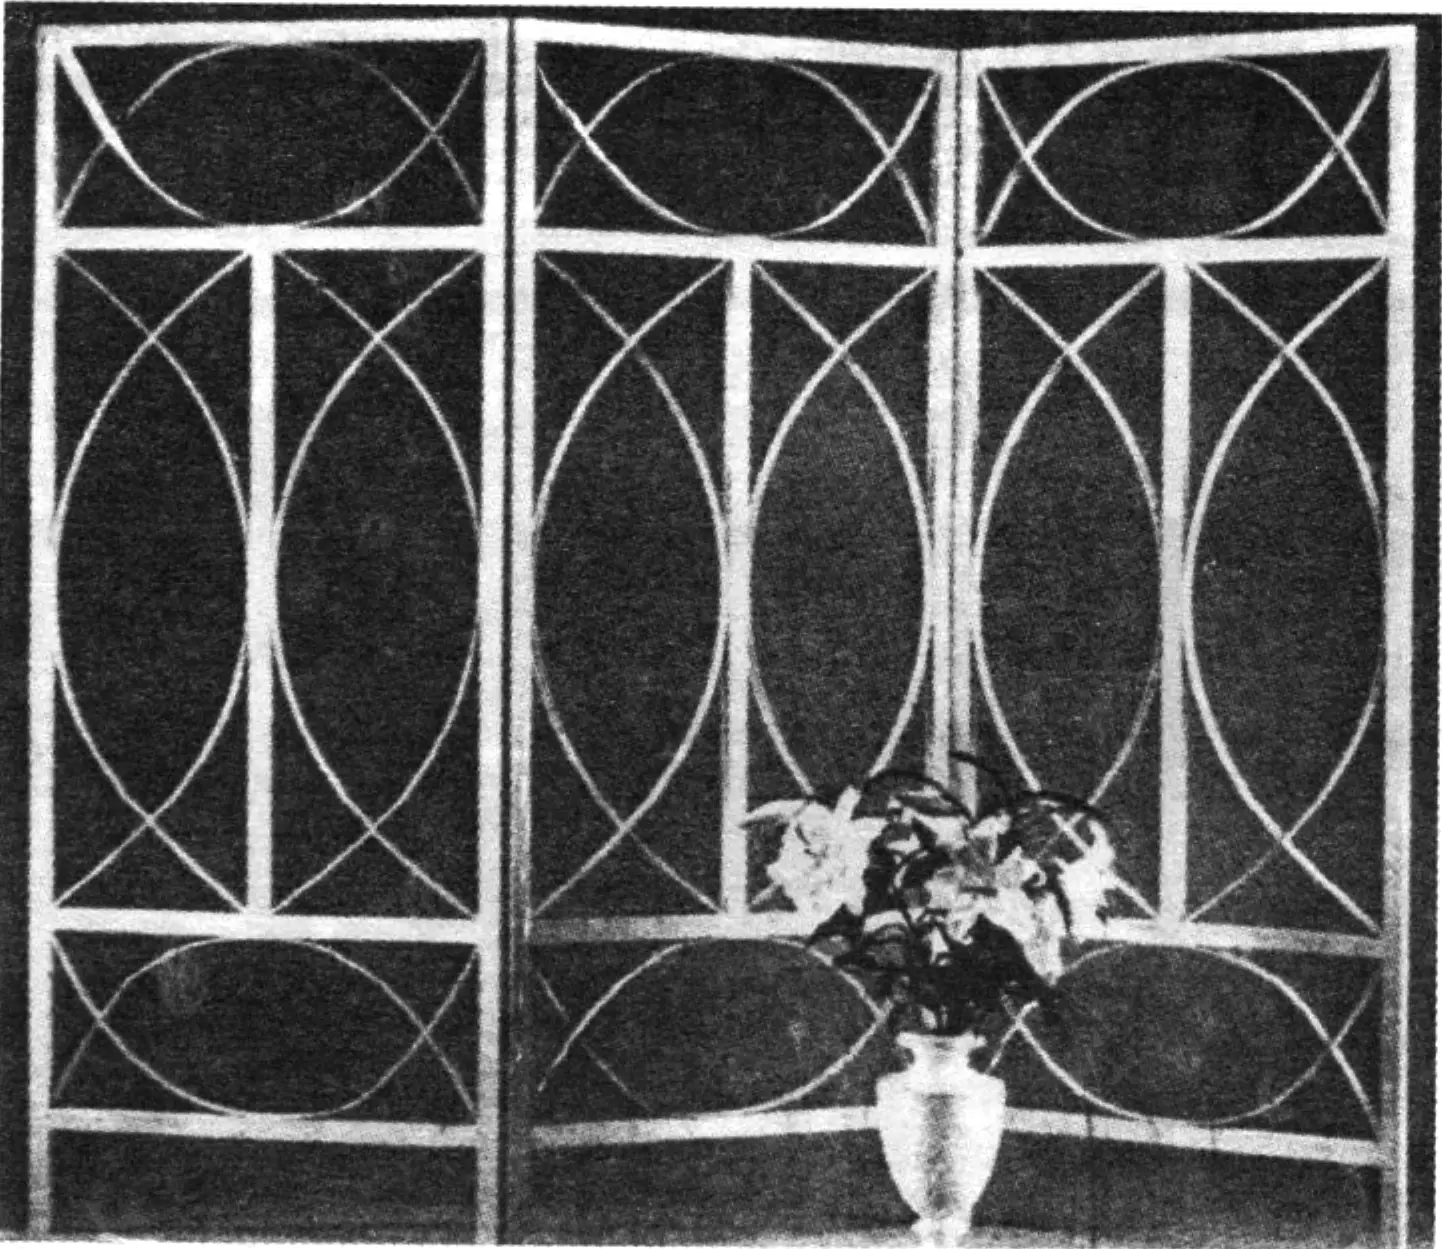
And indeed, it is enough to place such a decorative screen by a large bare wall and put a vase of flowers nearby — and you get the illusion of a pseudo-balcony or a summer mini-garden (Fig. 3).
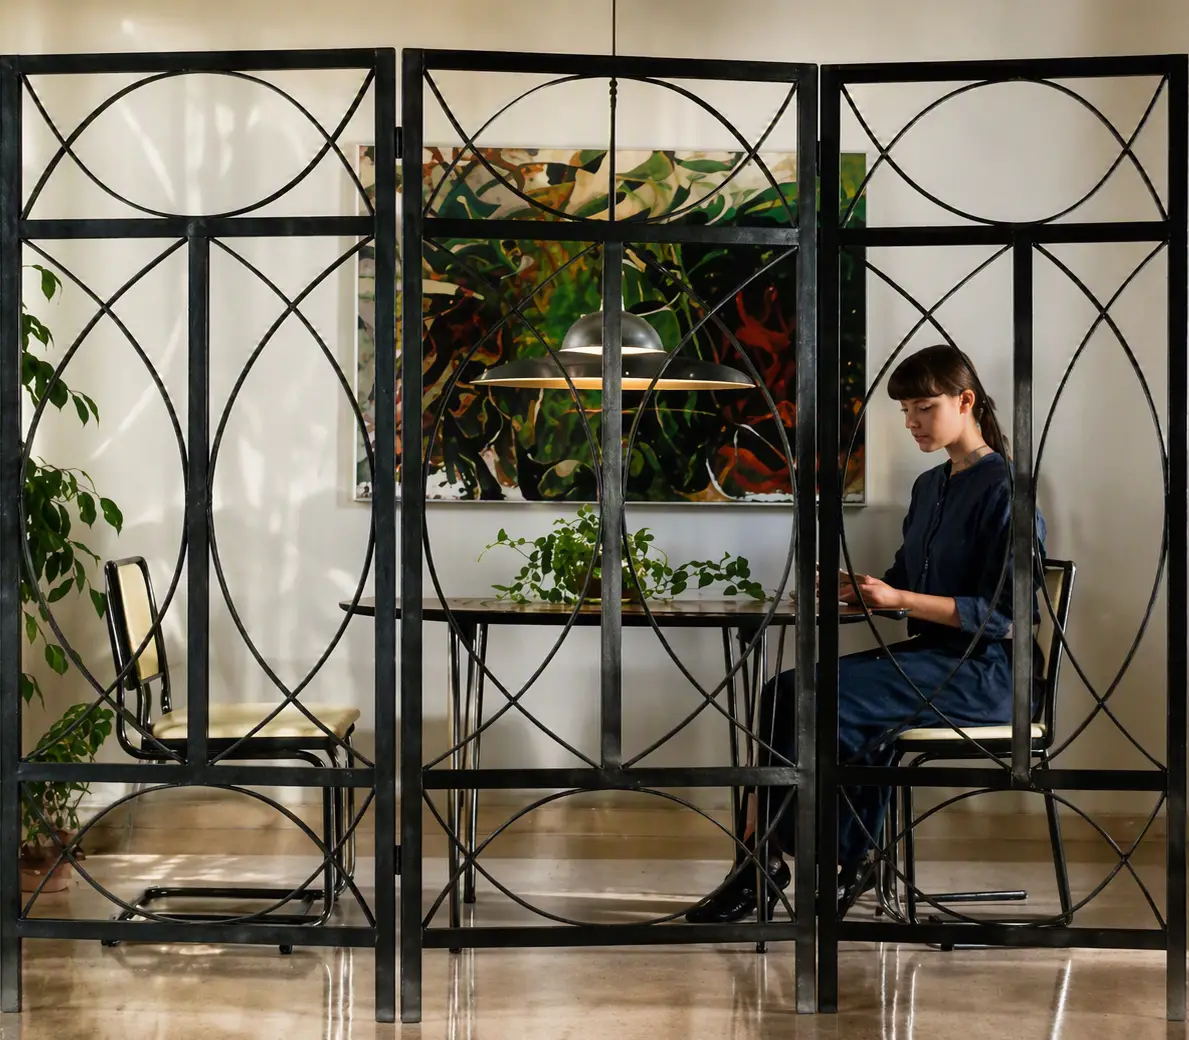
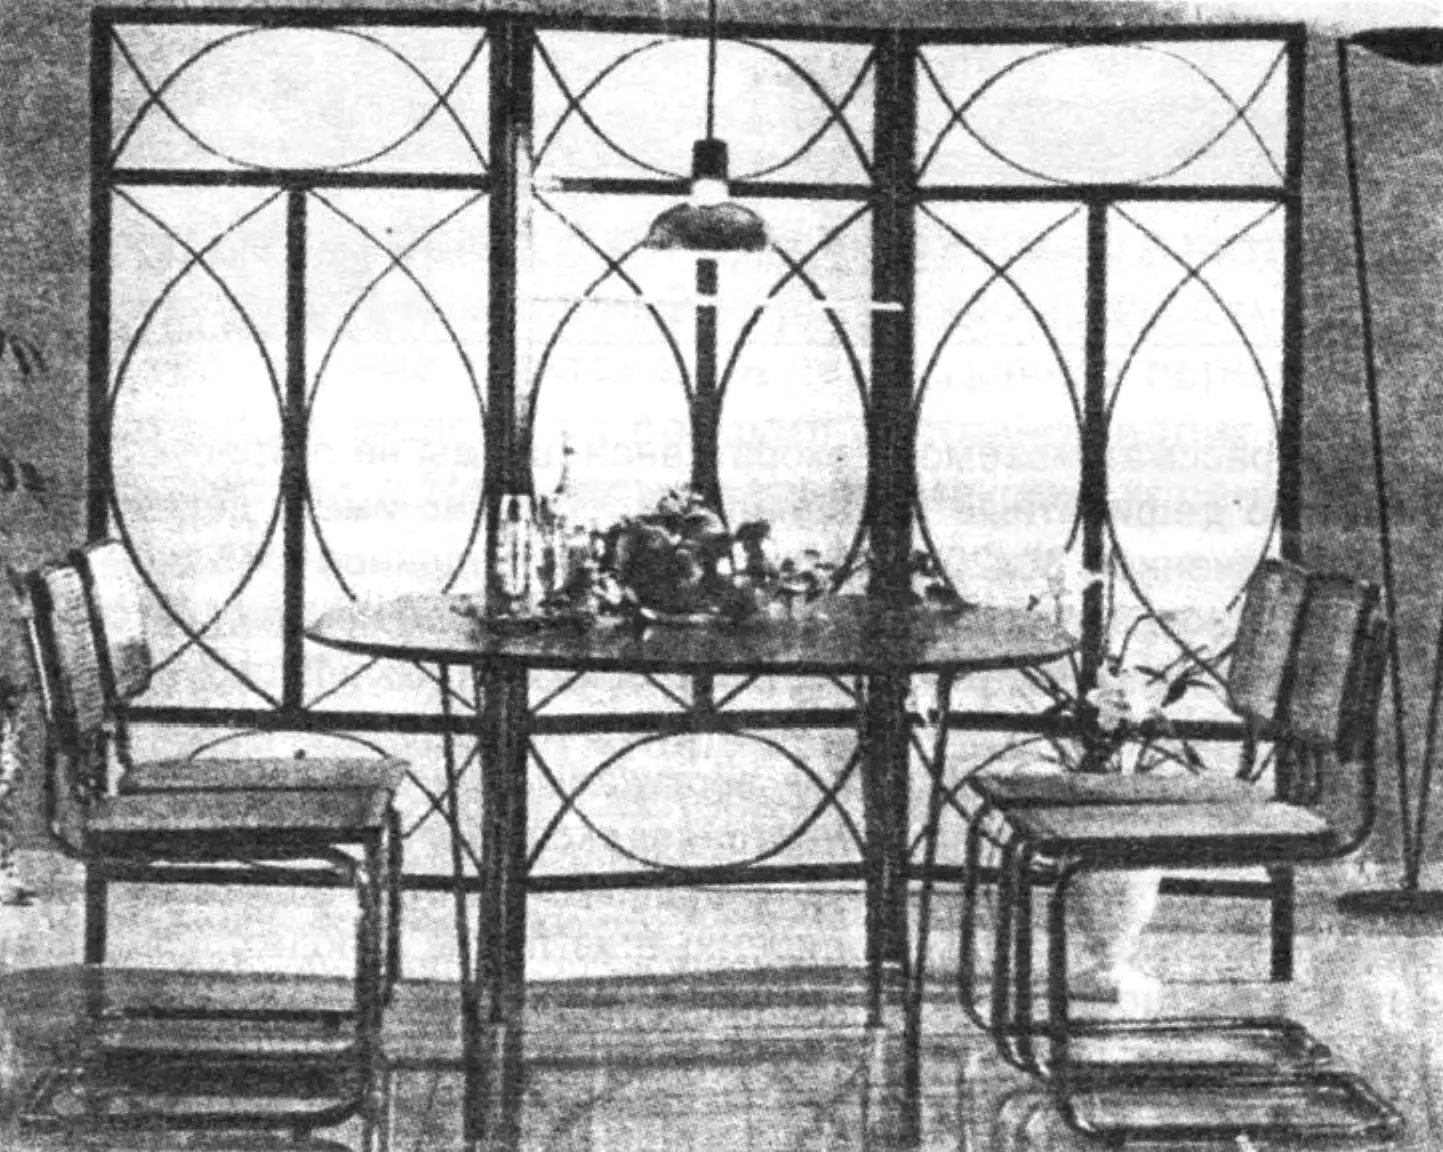
The use of a decorative screen is especially effective for spatially dividing a room into functional zones, for example, highlighting a rest corner or a cozy dining section with its help (Fig. 4).

1 — panel posts; 2 — panel crossbars; 3 — vertical brace; 4 — hinges; A — small pattern arcs; B — large arcs
It is also important that the beautiful patterned look of the panel is achieved in an extremely simple way, yet looks very attractive.
For the decorative screen under consideration, no scarce materials are required — it is enough to have wooden strips measuring 30×20 mm and a sheet of plywood 3—5 mm thick.
From the strips, the panel posts and crossbars are prepared: connected to each other with round dowels or simply screws, they form a rigid frame additionally reinforced with vertical braces made of the same strips installed in the middle. As a result, the panel looks like a window into which pattern-forming elements are inserted instead of glass. They are plywood strips sawn from the sheet, with slots prepared for joint assembly to half the width of the strip.
The arrangement of such saw cuts in the strips is calculated so that each individual pattern assembled from two strips turns out sufficiently springy and could, thanks to this, simply be inserted into the corresponding window of the panel even without additional fastening (Fig. 1). However, it is still worth coating the contact points of the patterned element with the panel parts with glue for a stronger connection — PVA or carpenter’s glue.
Before final assembly, all screen parts undergo traditional furniture finishing: thorough sanding with sandpaper, optionally — staining and coating with furniture varnish in several layers with mandatory intermediate drying. Enamel paints may also be used; for example, the strip part is painted one color and the patterned part another.
The screen panels do not necessarily have to be connected to each other with piano hinges: strangely enough, small ordinary card hinges (so-called casement hinges) will look even better here.
Traditionally, screens consist of three panels. However, depending on the place of use and purpose, a decorative screen can be assembled from four or five panels, and if necessary — even more, and not necessarily as one continuous “zigzag.” For example, a rest corner can be separated by two adjacent screens, with one of the panels serving as a kind of “entrance door.”
“Modelist-Constructor” No. 9’2002
Recommend to read
 Underground water tower
Having a year-round water supply system — and especially an automatic one — in a rural-type home is the dream of any homeowner who does not yet have one. Of course, few of them are willing... DIESEL BUS ELECTRIC
The development of industry in our country in the mid 30-ies of the last century entailed the growth of cities, and in these conditions all the more urgent became the problem of their...
