You know that feeling when you open your apartment door and immediately run into a mess of sneakers, slippers, and a pair of boots that simply have nowhere to go? That was exactly our situation. The hallway is small, there’s no shelf, and long boots were lying around wherever they happened to land, as if they lived their own separate life. At some point we realized: enough is enough. It was time to build our own shoe rack — and a bench to sit on while putting shoes on.
This isn’t store-bought furniture with perfect angles and glossy packaging. It’s our solution for our real needs: compact, sturdy, and with two zones — for everyday shoes and for tall boots. If you’re also looking for a DIY shoe rack for the hallway, I’ll tell you honestly and step by step how we put it together.
Why we needed this kind of rack in the first place
We had two simple but very annoying reasons to take on the project:
- There was nowhere to put long boots. Regular shelves don’t work for them — the boots either fall over or stick out so much they block the walkway.
- Almost no space was left in the hallway. We needed to store shoes and have a convenient spot where you can sit down and put shoes on calmly, without dancing on one leg by the door.
Think of a hallway as a small airport: everything should move quickly, without collisions or extra maneuvers. We didn’t need just a cabinet, but a multifunctional station — storage plus seating. That’s why we built a rack-bench for ourselves, not for some abstract “average apartment size.”
What we needed for assembly: materials and tools
Good news: for this kind of shoe rack with a seat, you don’t need a full woodworking shop. We used what we had on hand, plus a bit of lumber. Here’s the full list:
- Top panel (countertop): a wooden board 30×120×2 cm — it will serve as both a shelf and a seat.
- Legs: square timber 3×3×100 cm.
- Reinforcement: triangular wooden profiles 3×3 cm of different lengths — they hold the structure together like the frame of a good chair.
- Joinery: wooden dowels for attaching the legs to the top panel.
- Shelves and extra supports: leftover laminate flooring — a great way to avoid throwing away offcuts and get sturdy shelves.
If you have laminate scraps at home after a renovation — that’s your gold reserve. They’re strong, flat, and work perfectly for shelves in compact hallway furniture.
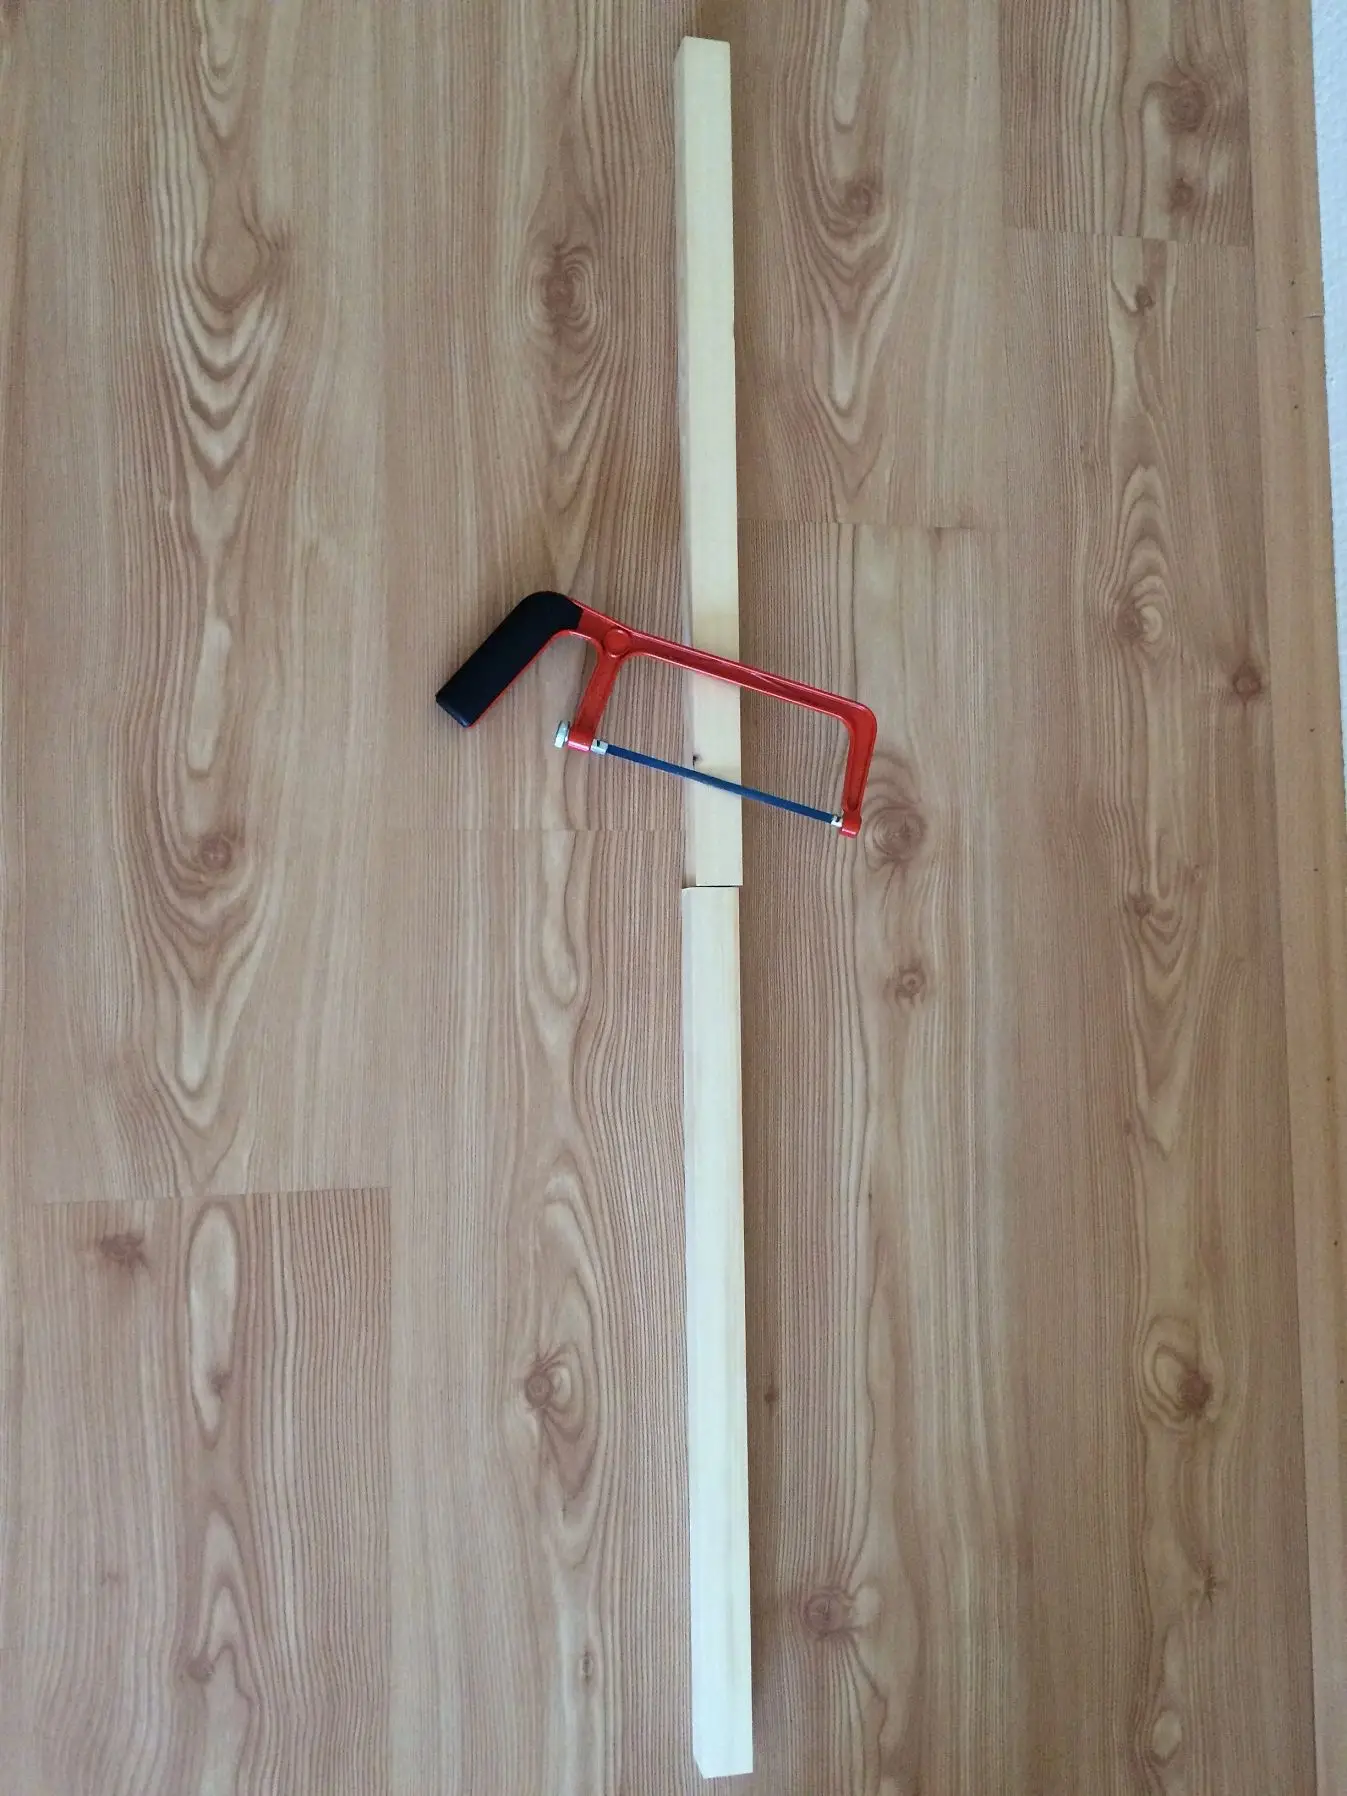
Step 1. Preparing the legs and choosing the height

First we cut the square timbers in two — that gave us the number of supports we needed. We chose a height of 50 cm. Why exactly that? It’s comfortable both for boots and for sitting: not too low, not too high. You can adjust the height to suit yourself — measure your boots and try sitting at a test height before making the final cut.
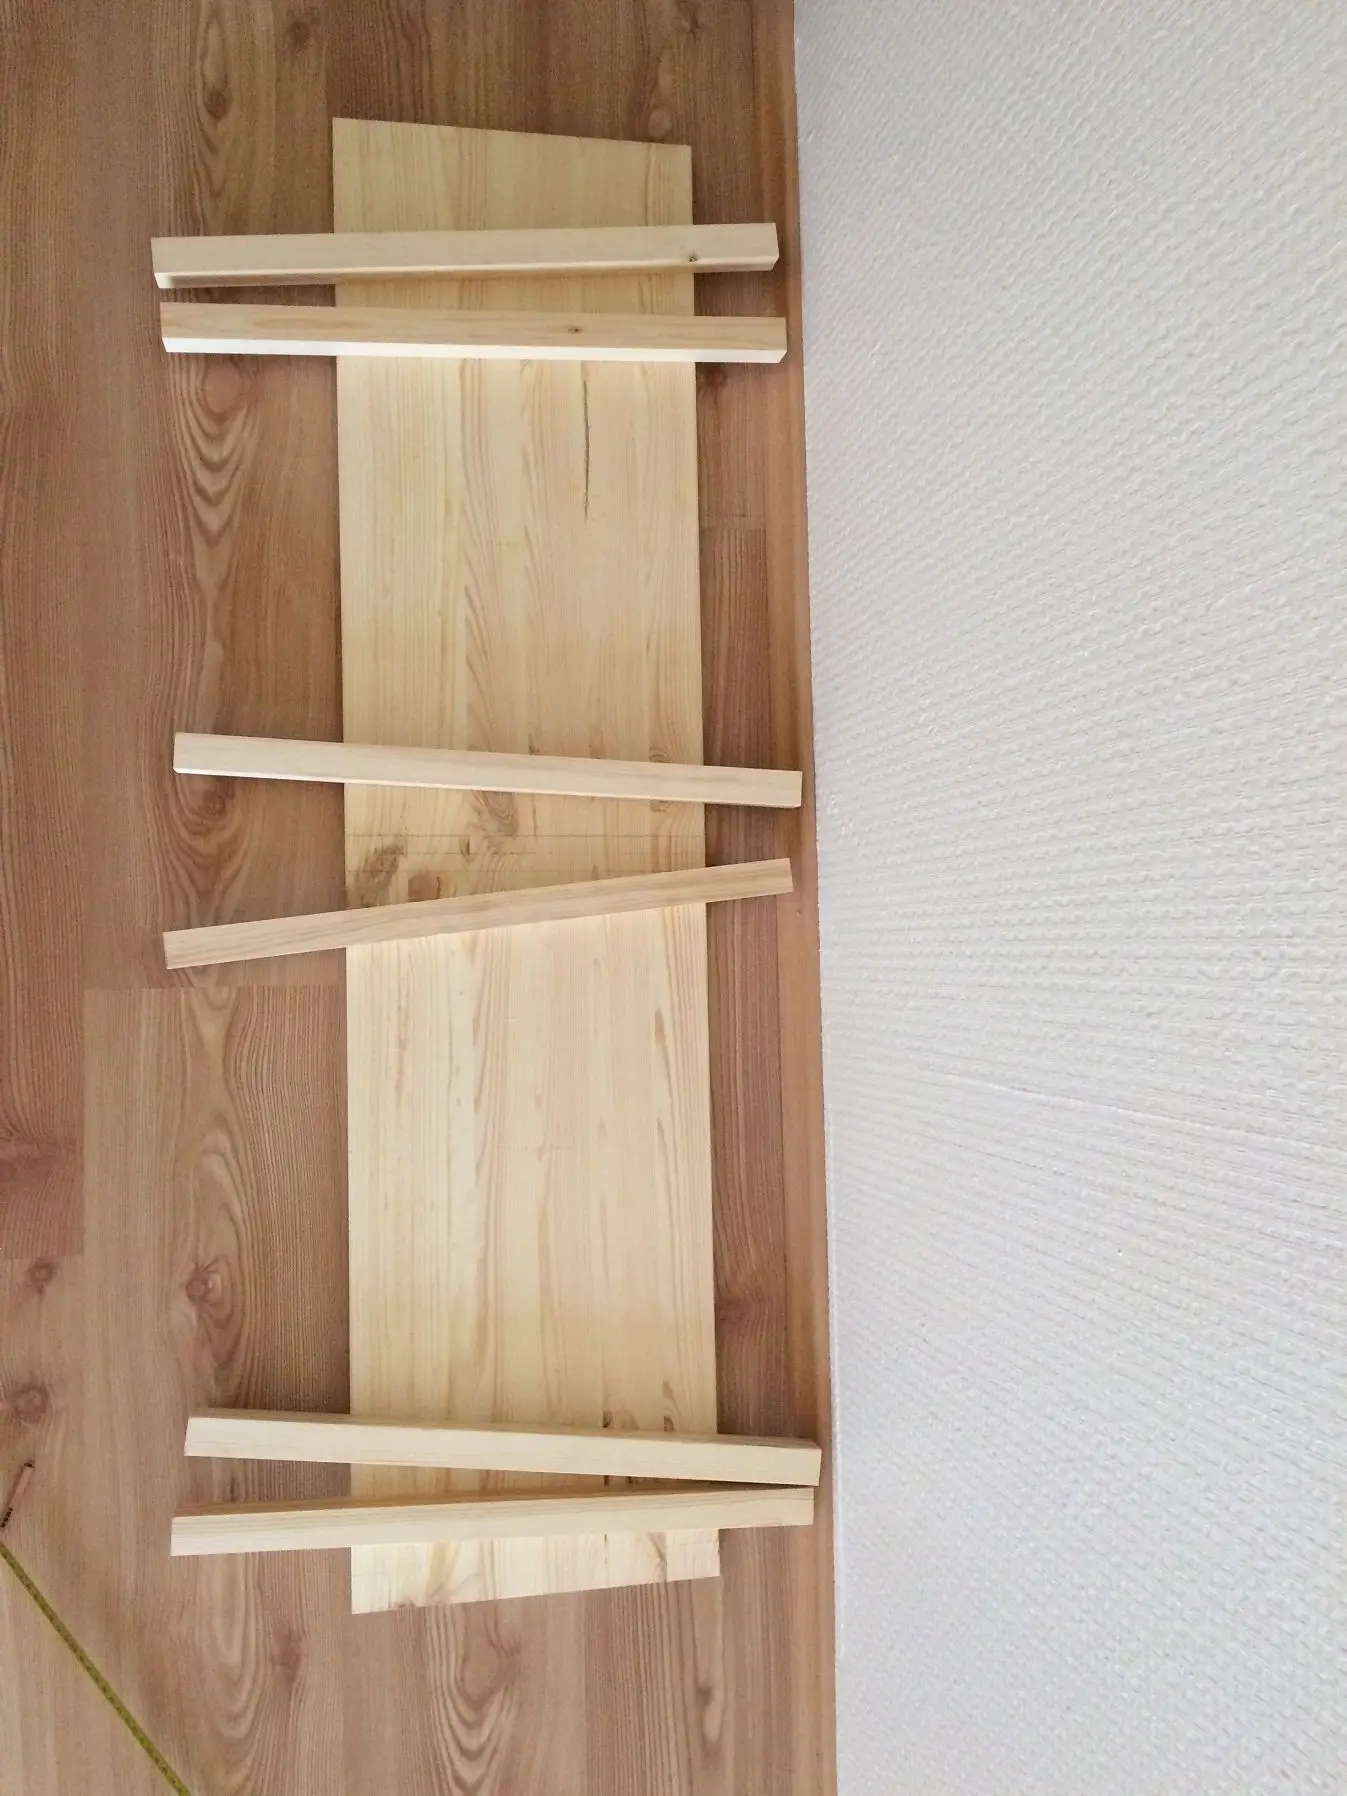
We placed the legs on the sides and in the middle of the top panel — that way the structure doesn’t wobble and comfortably supports the weight of a person sitting on top. The legs are joined to the panel with wooden dowels: drill holes about 1 cm deep in the legs and the countertop, insert the pins, and the frame already feels solid.
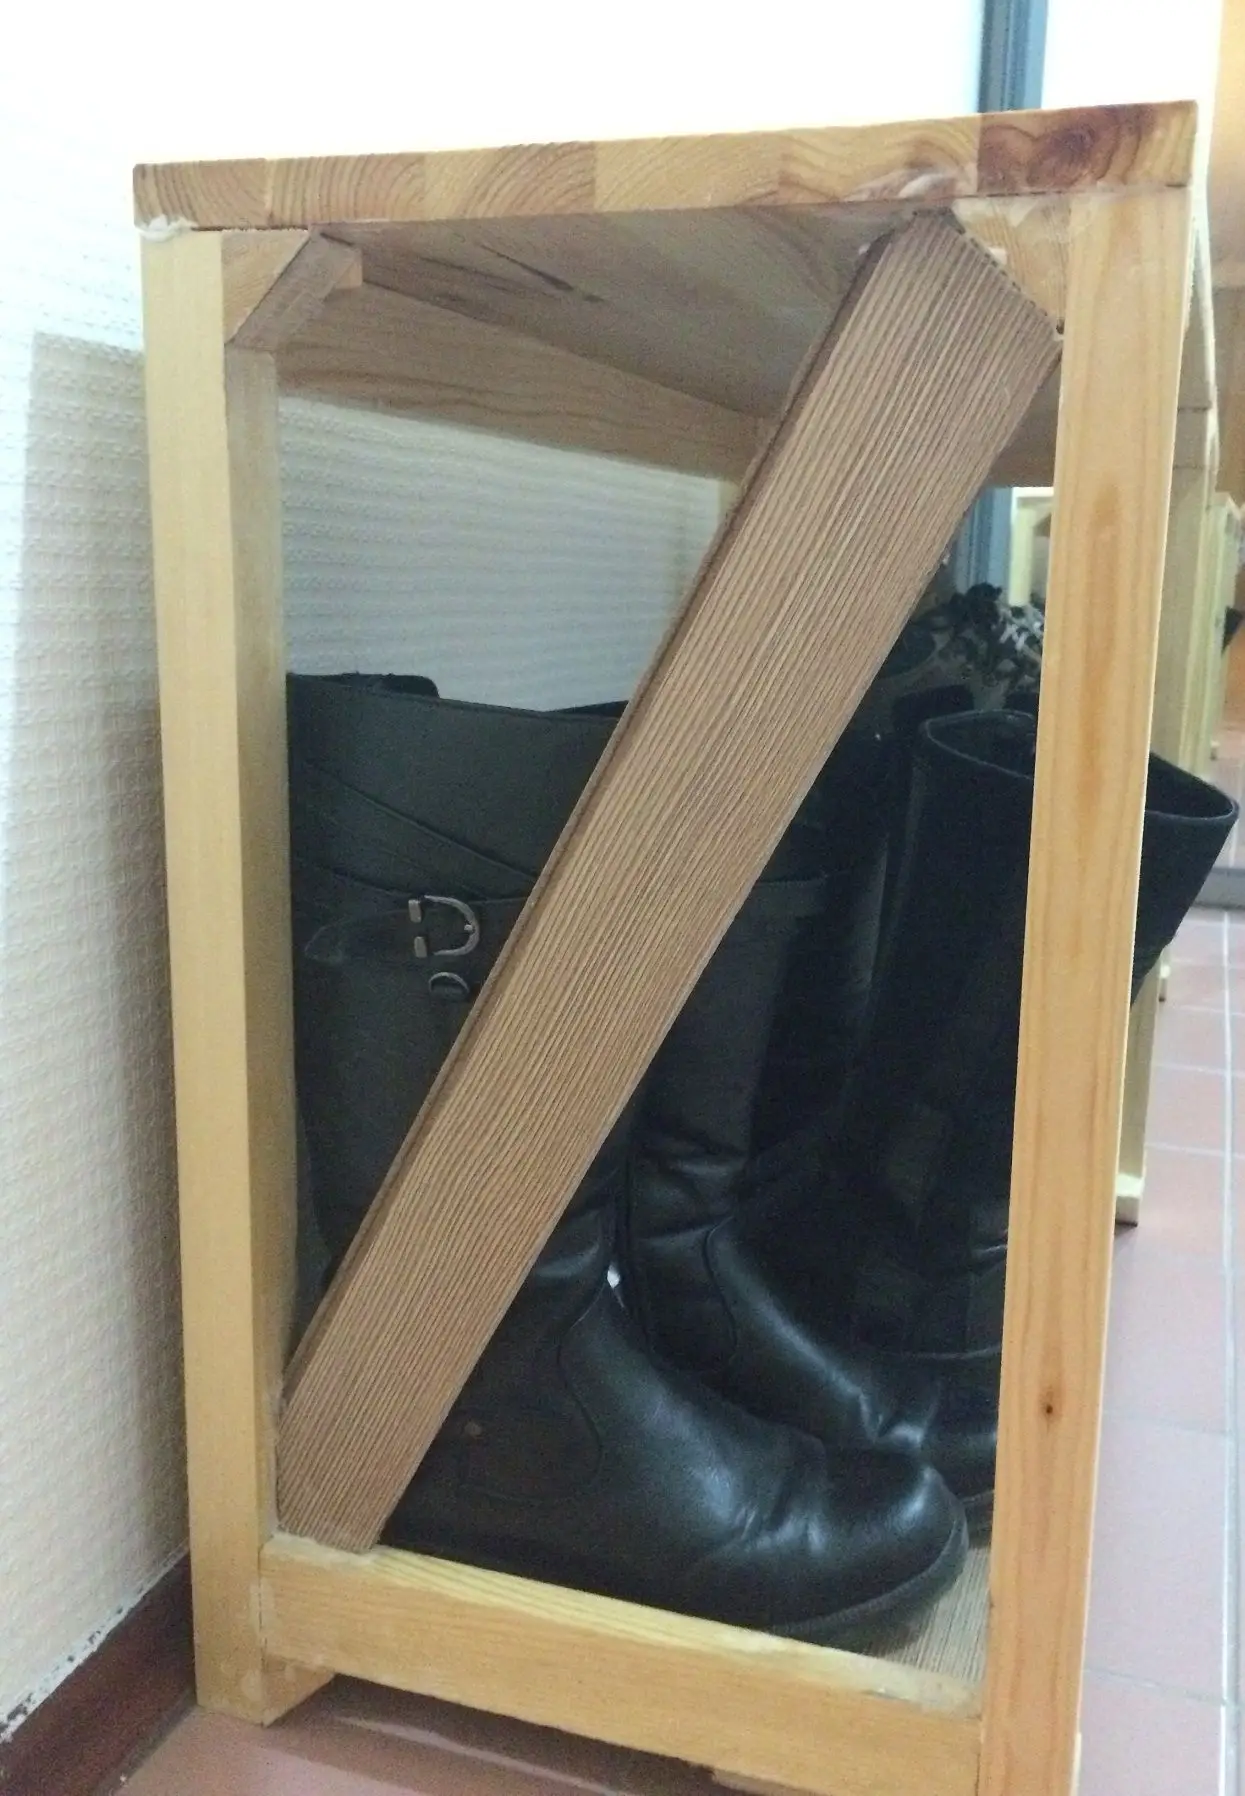
We glued triangular profiles to the ends of the legs. Sounds like a small detail, but those “little triangles” later become supports for the shelves and add rigidity to the whole structure. Without them the rack would be like a table on wobbly legs — it stands, but you don’t trust it much.
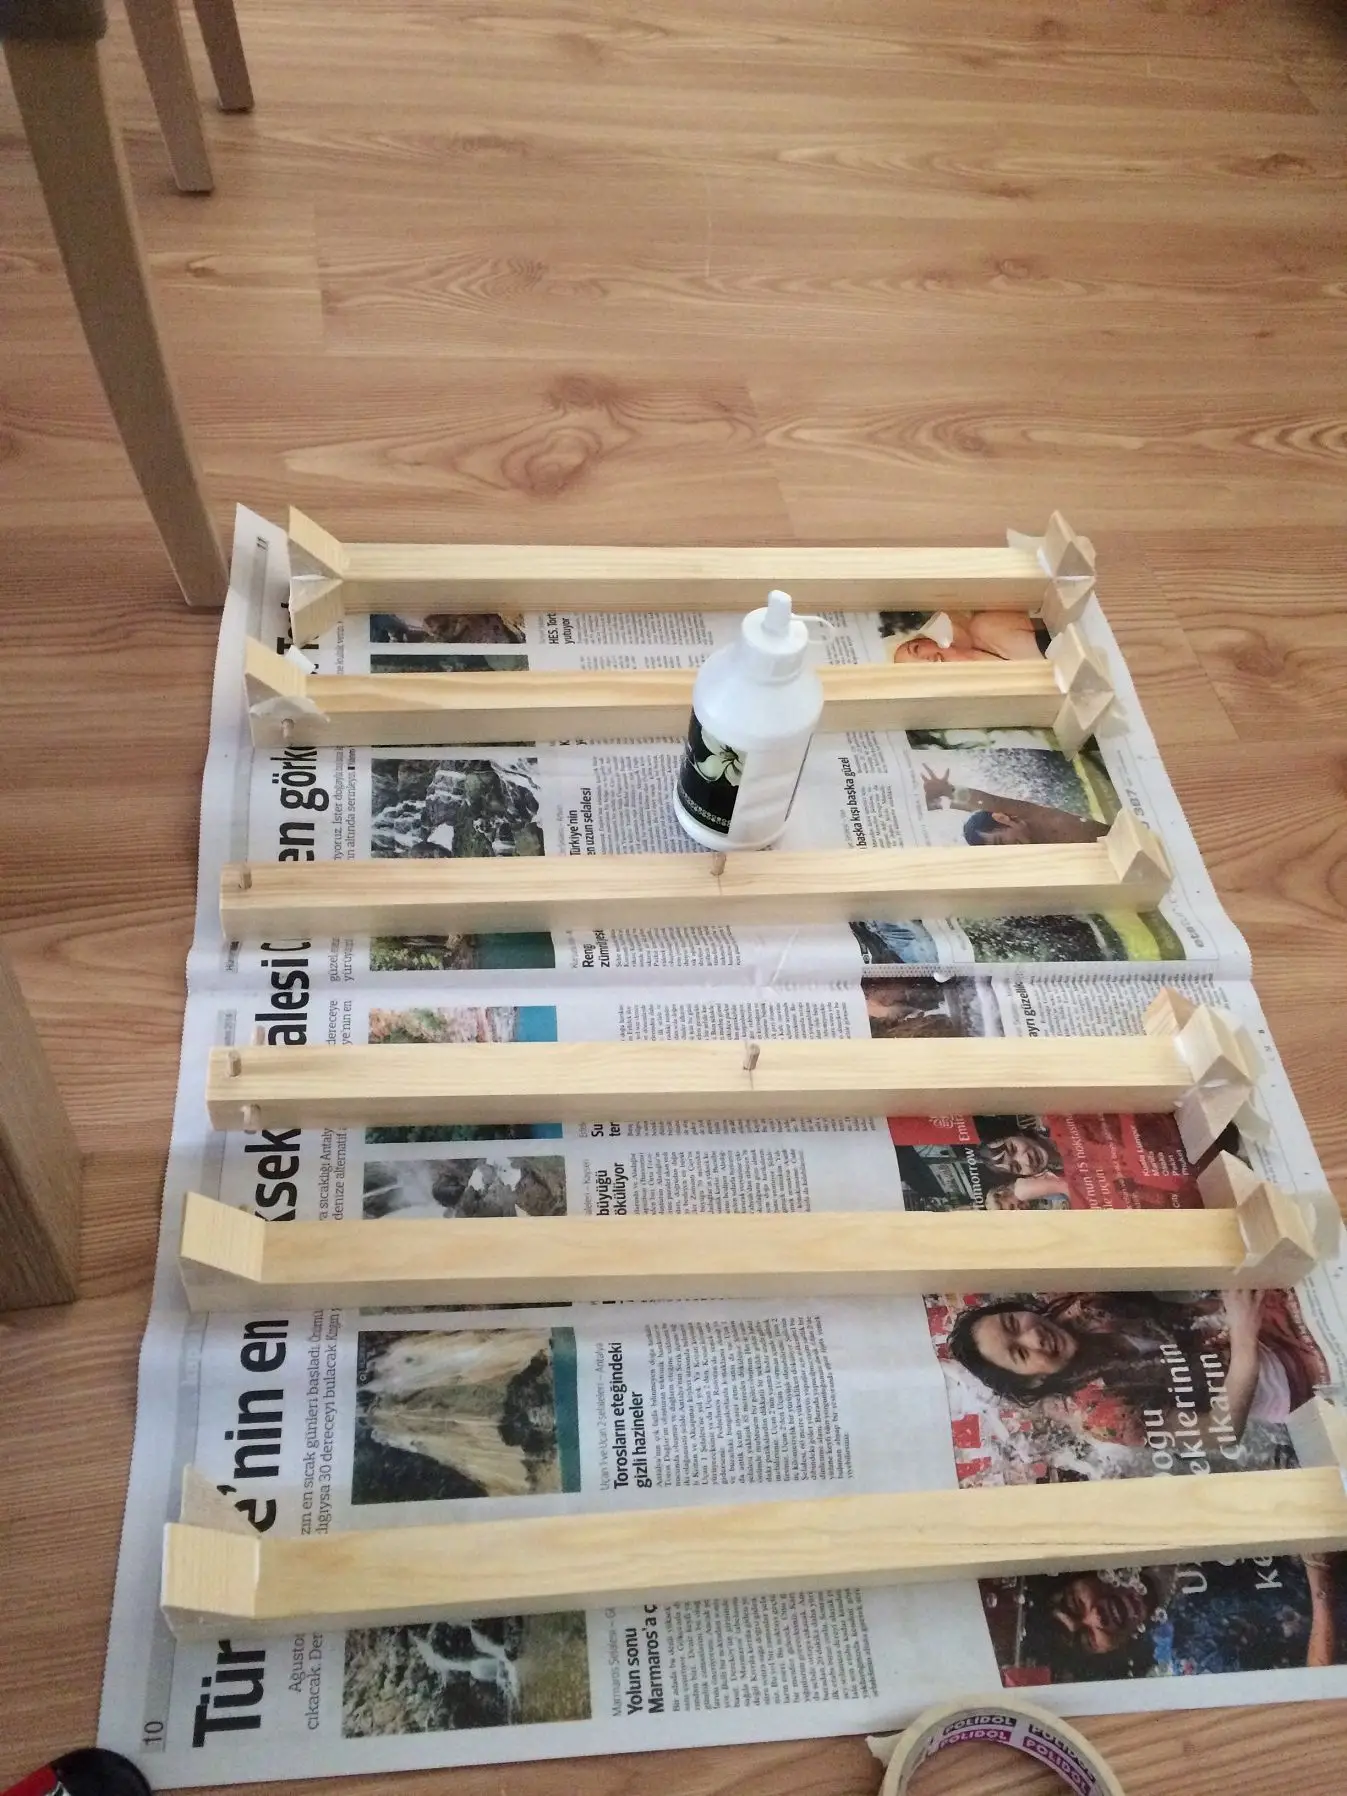
Step 2. Reinforcing the frame: where there’s strength, there’s peace of mind
Once the frame is assembled, it’s time to think not about looks but about shoe rack strength. Here’s what we did:
- Glued triangular profiles into every corner — they stop the structure from “spreading apart.”
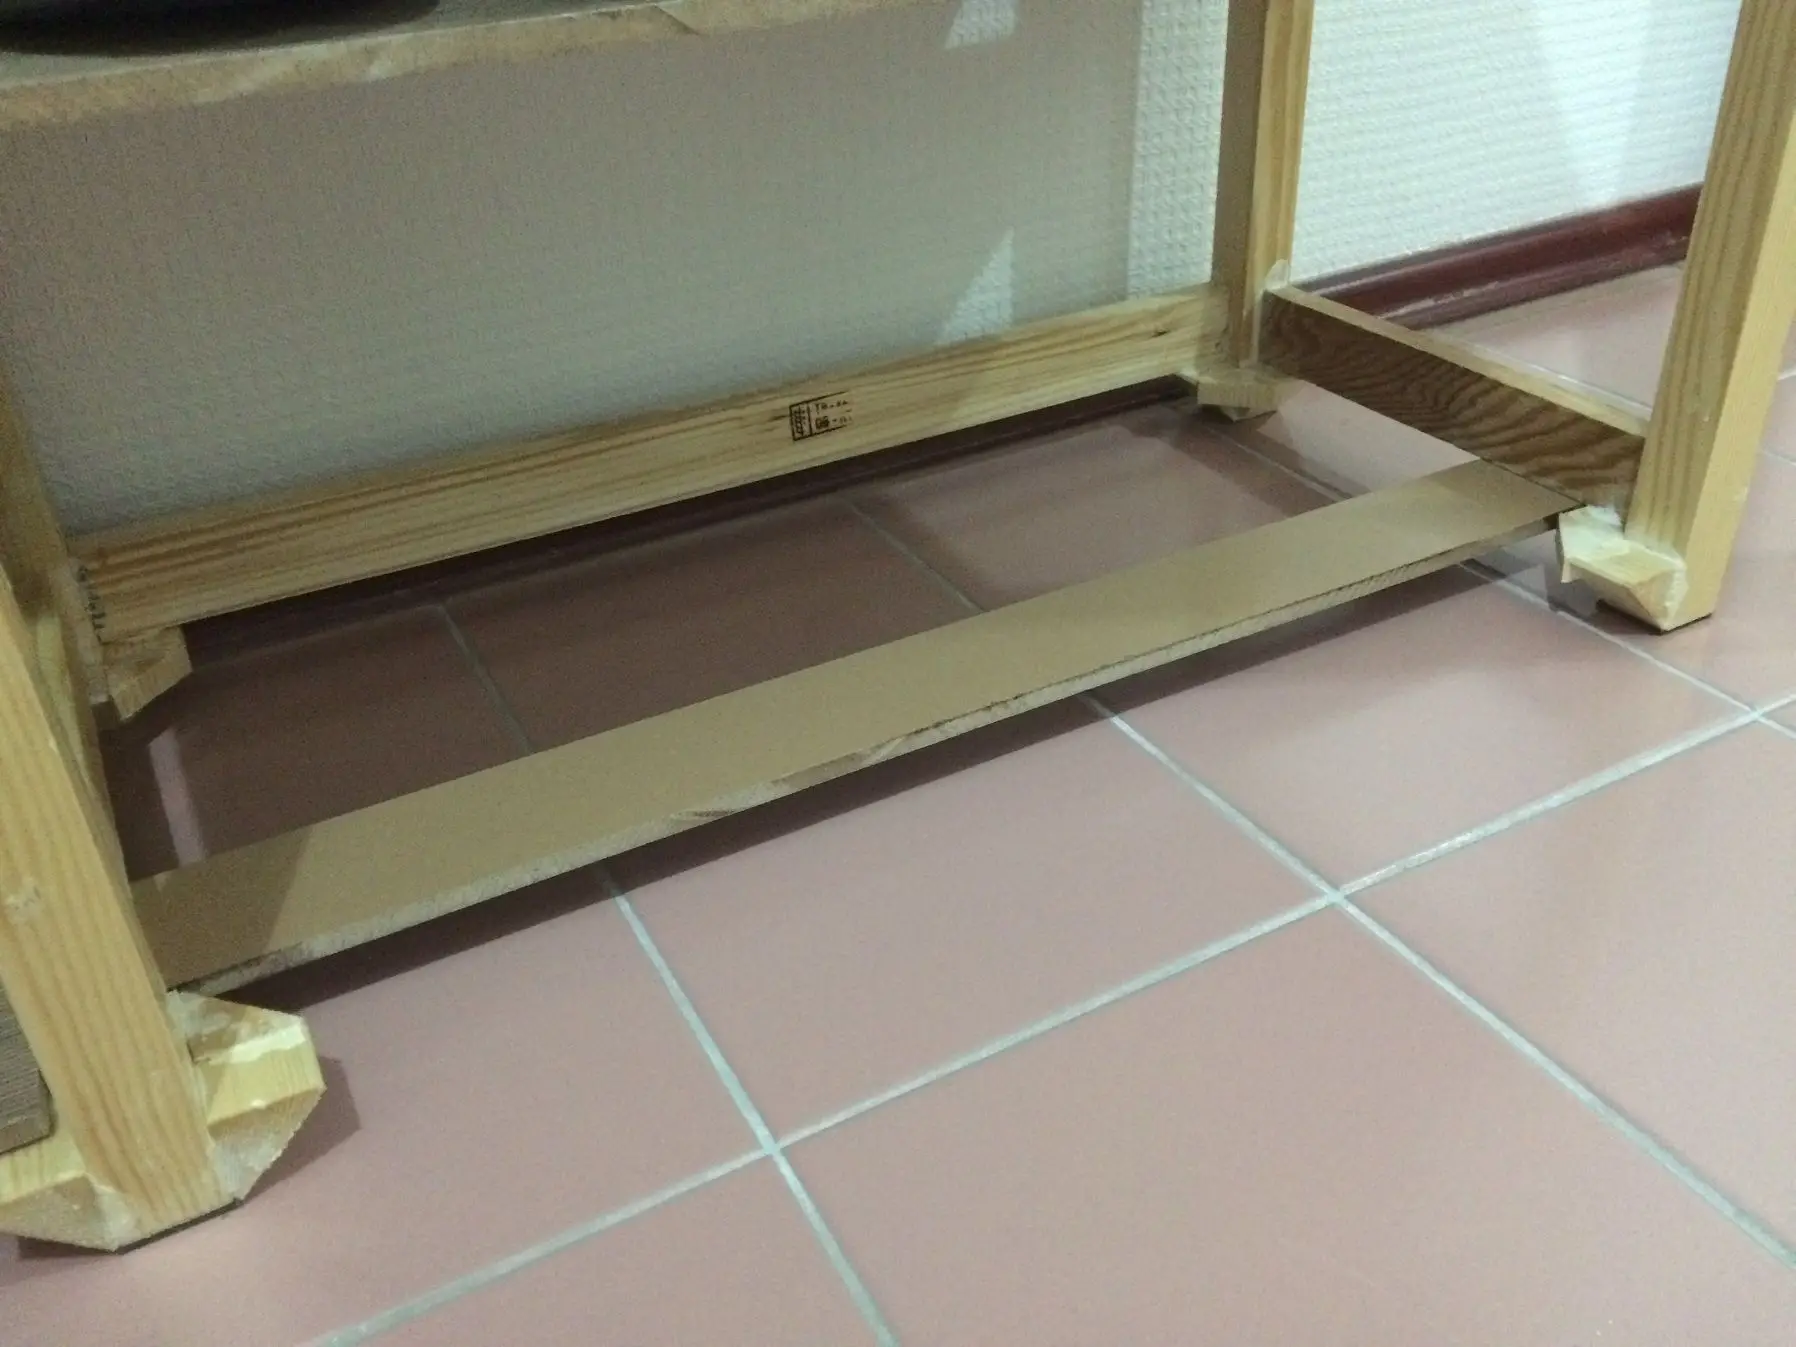
- Added stiffening ribs at the back — like a spine in furniture: invisible, but it holds everything together.
- Nailed a long strip of laminate flooring underneath — another layer of stability.
- Glued a cross rib on the left side — extra protection against sagging.
Our principle is simple: want it stronger — add support. Don’t skimp on extra triangles and ribs, especially if you plan not only to store shoes but also to sit on top. Better to over-engineer at the assembly stage than wonder later why the rack creaks and wobbles.
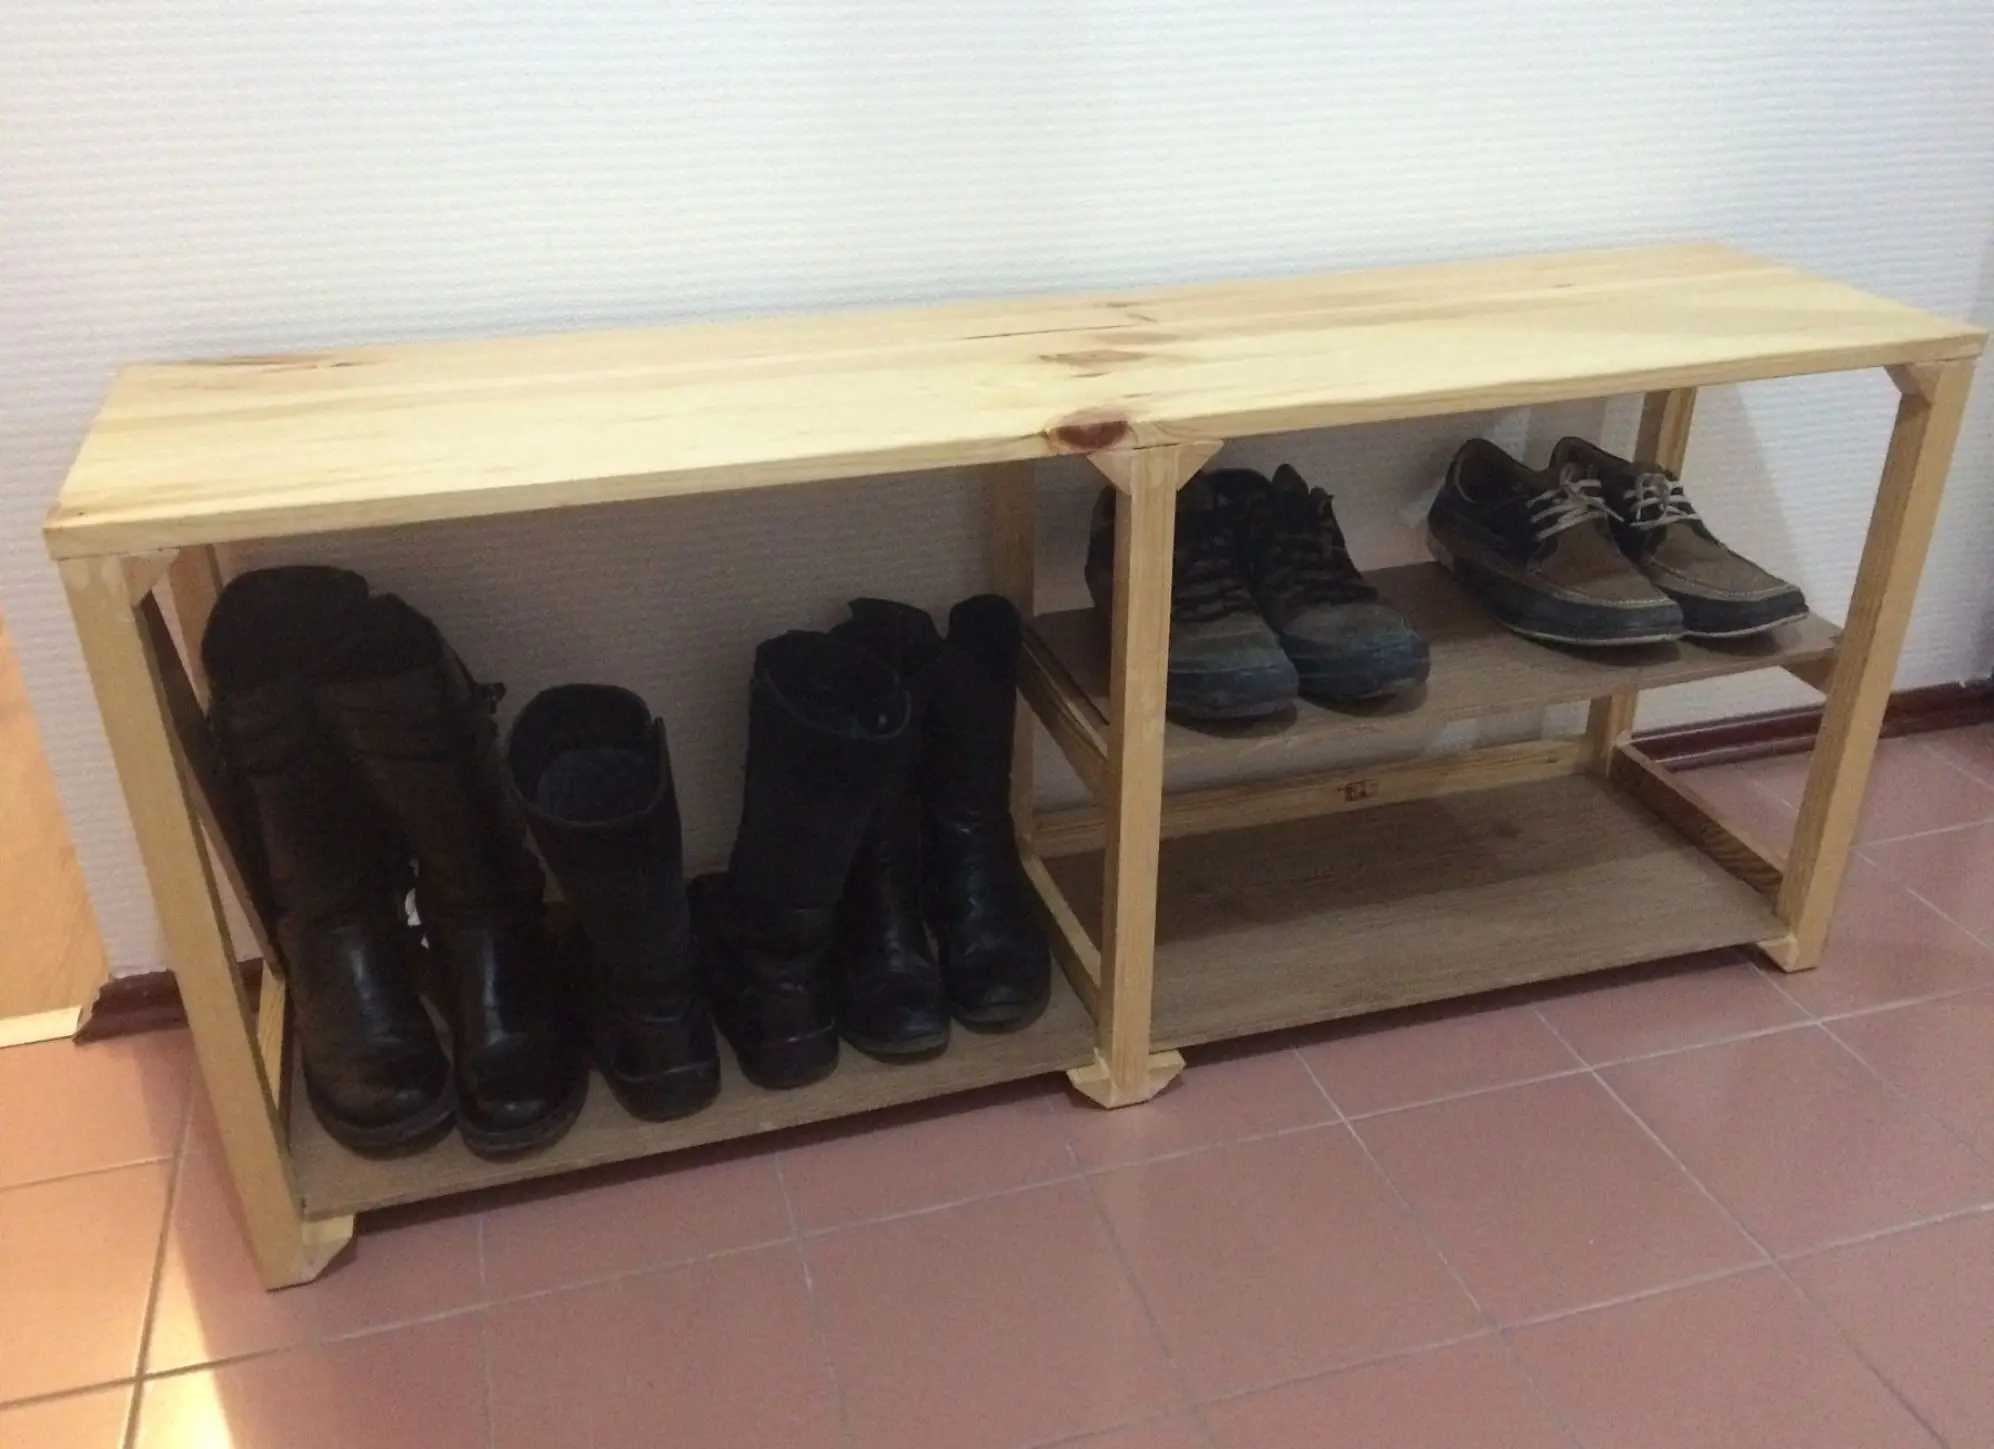
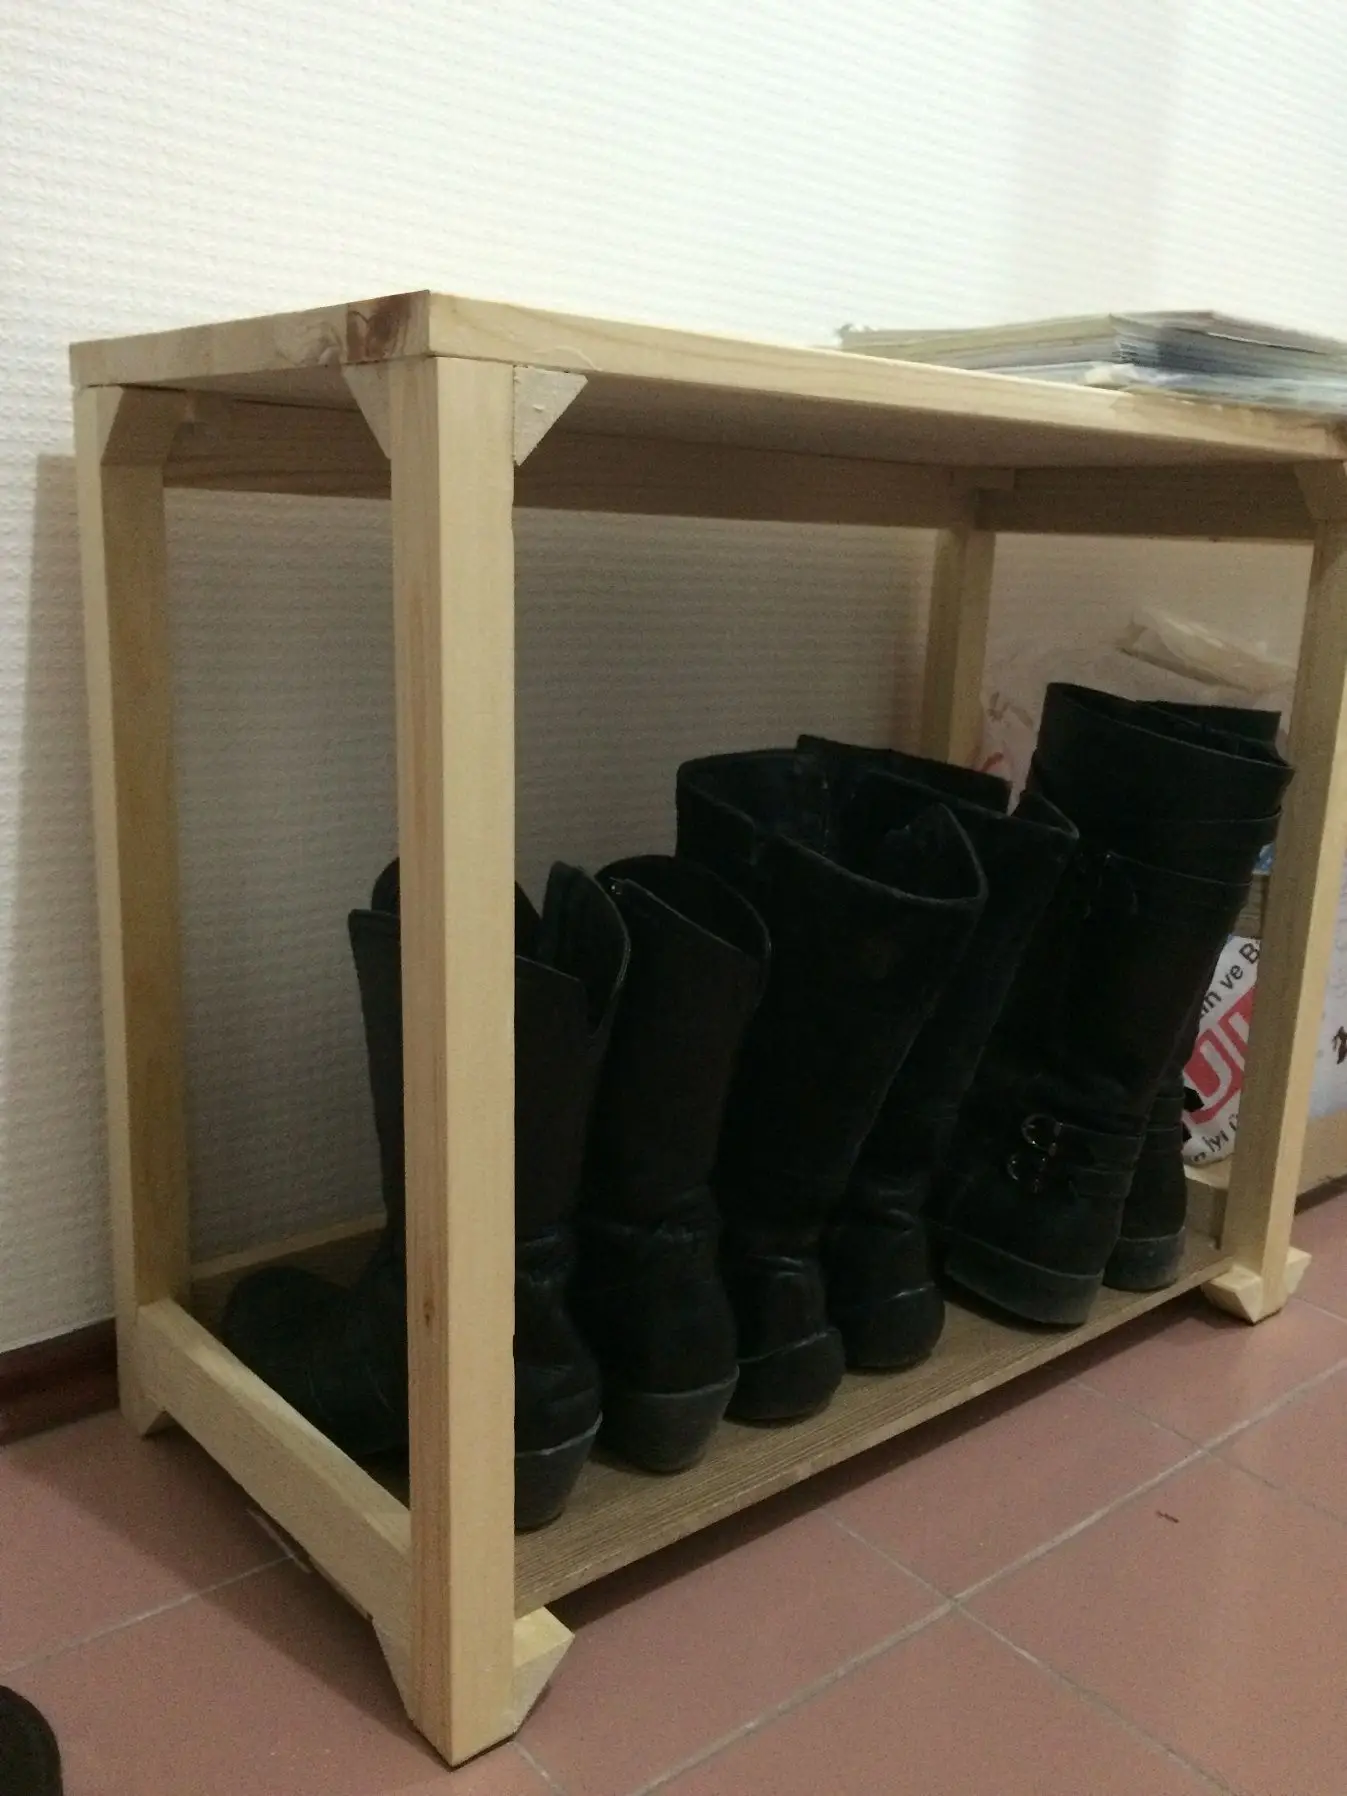
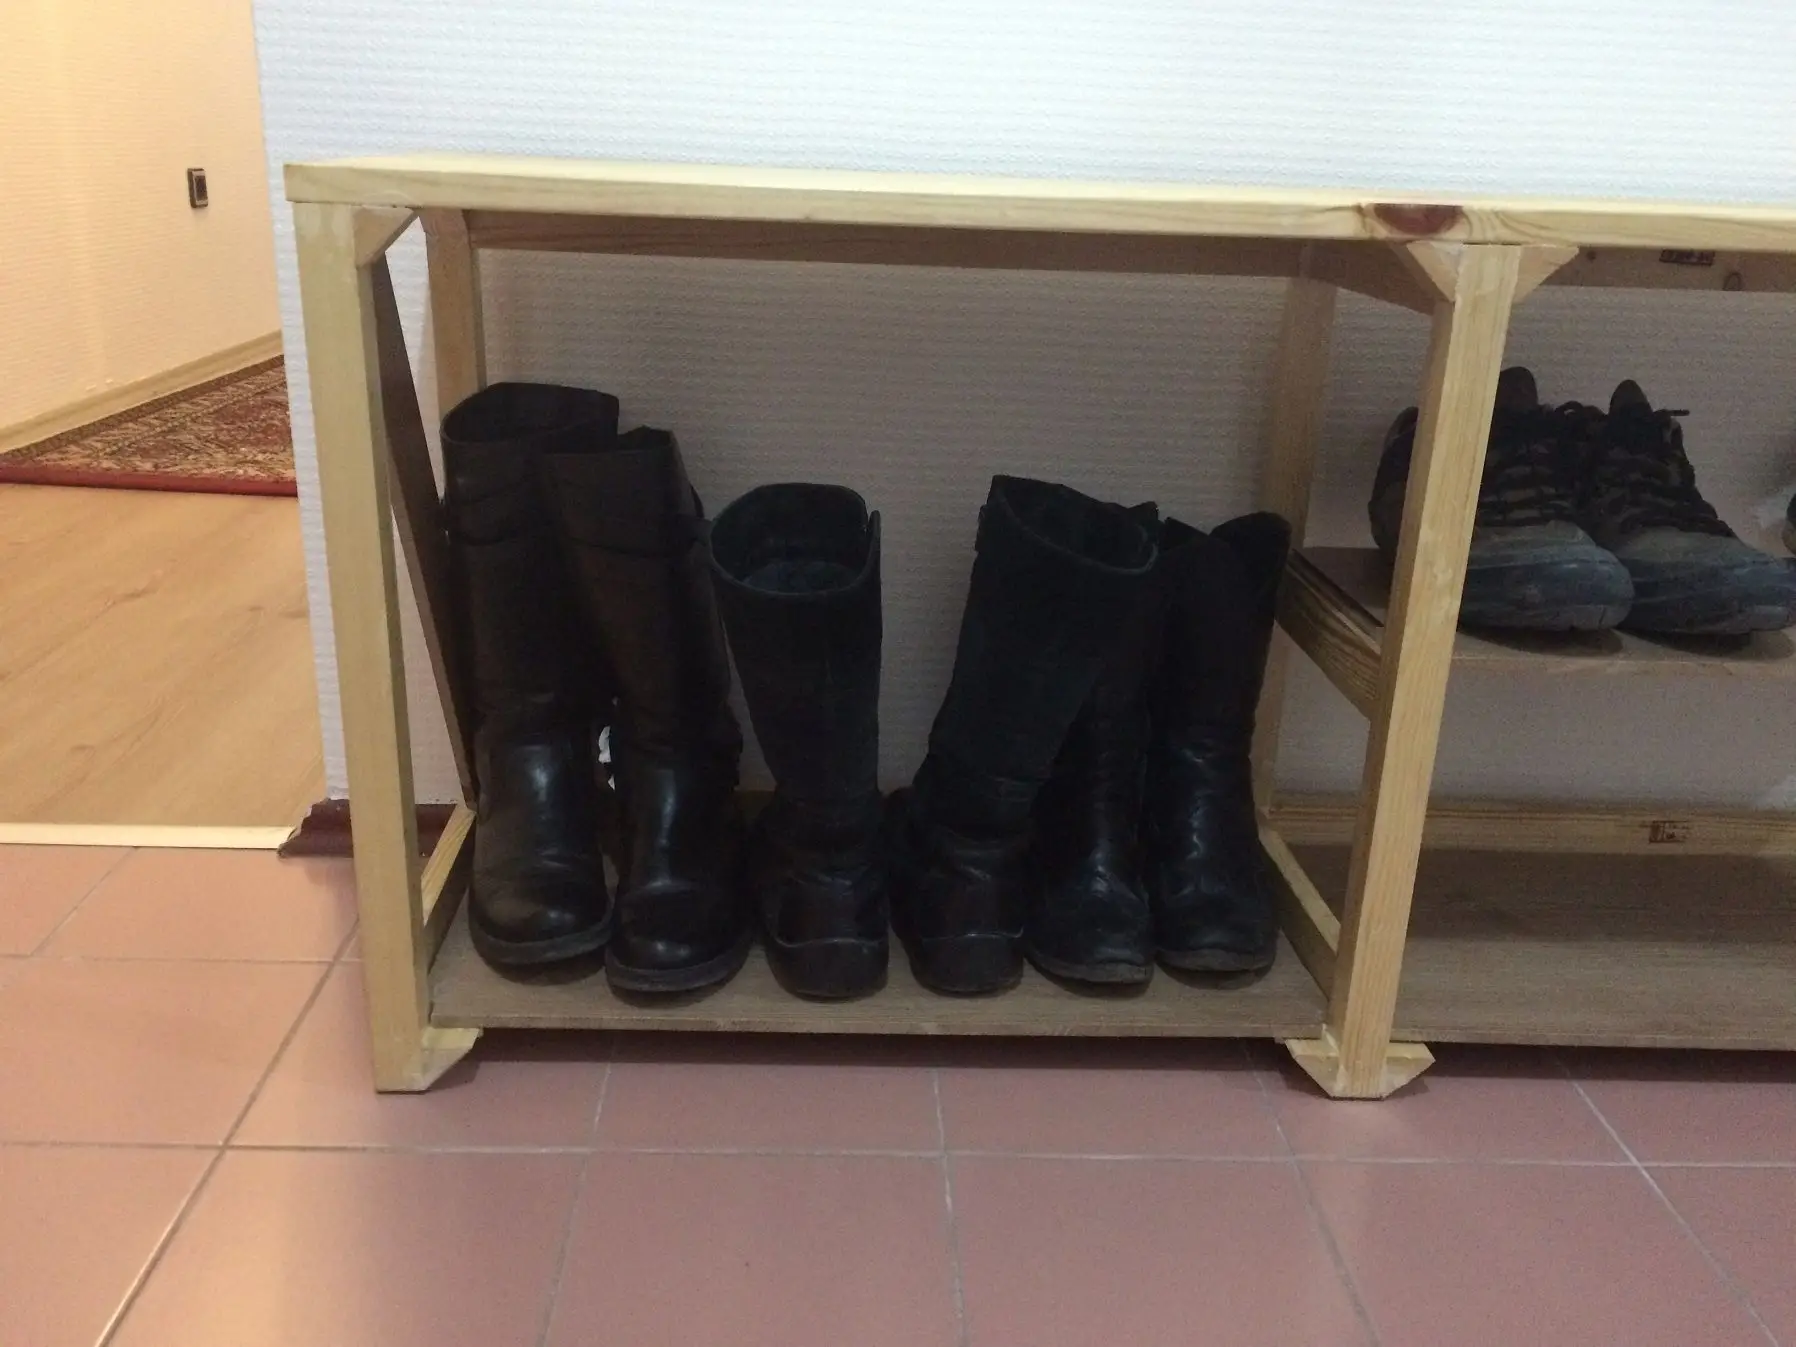
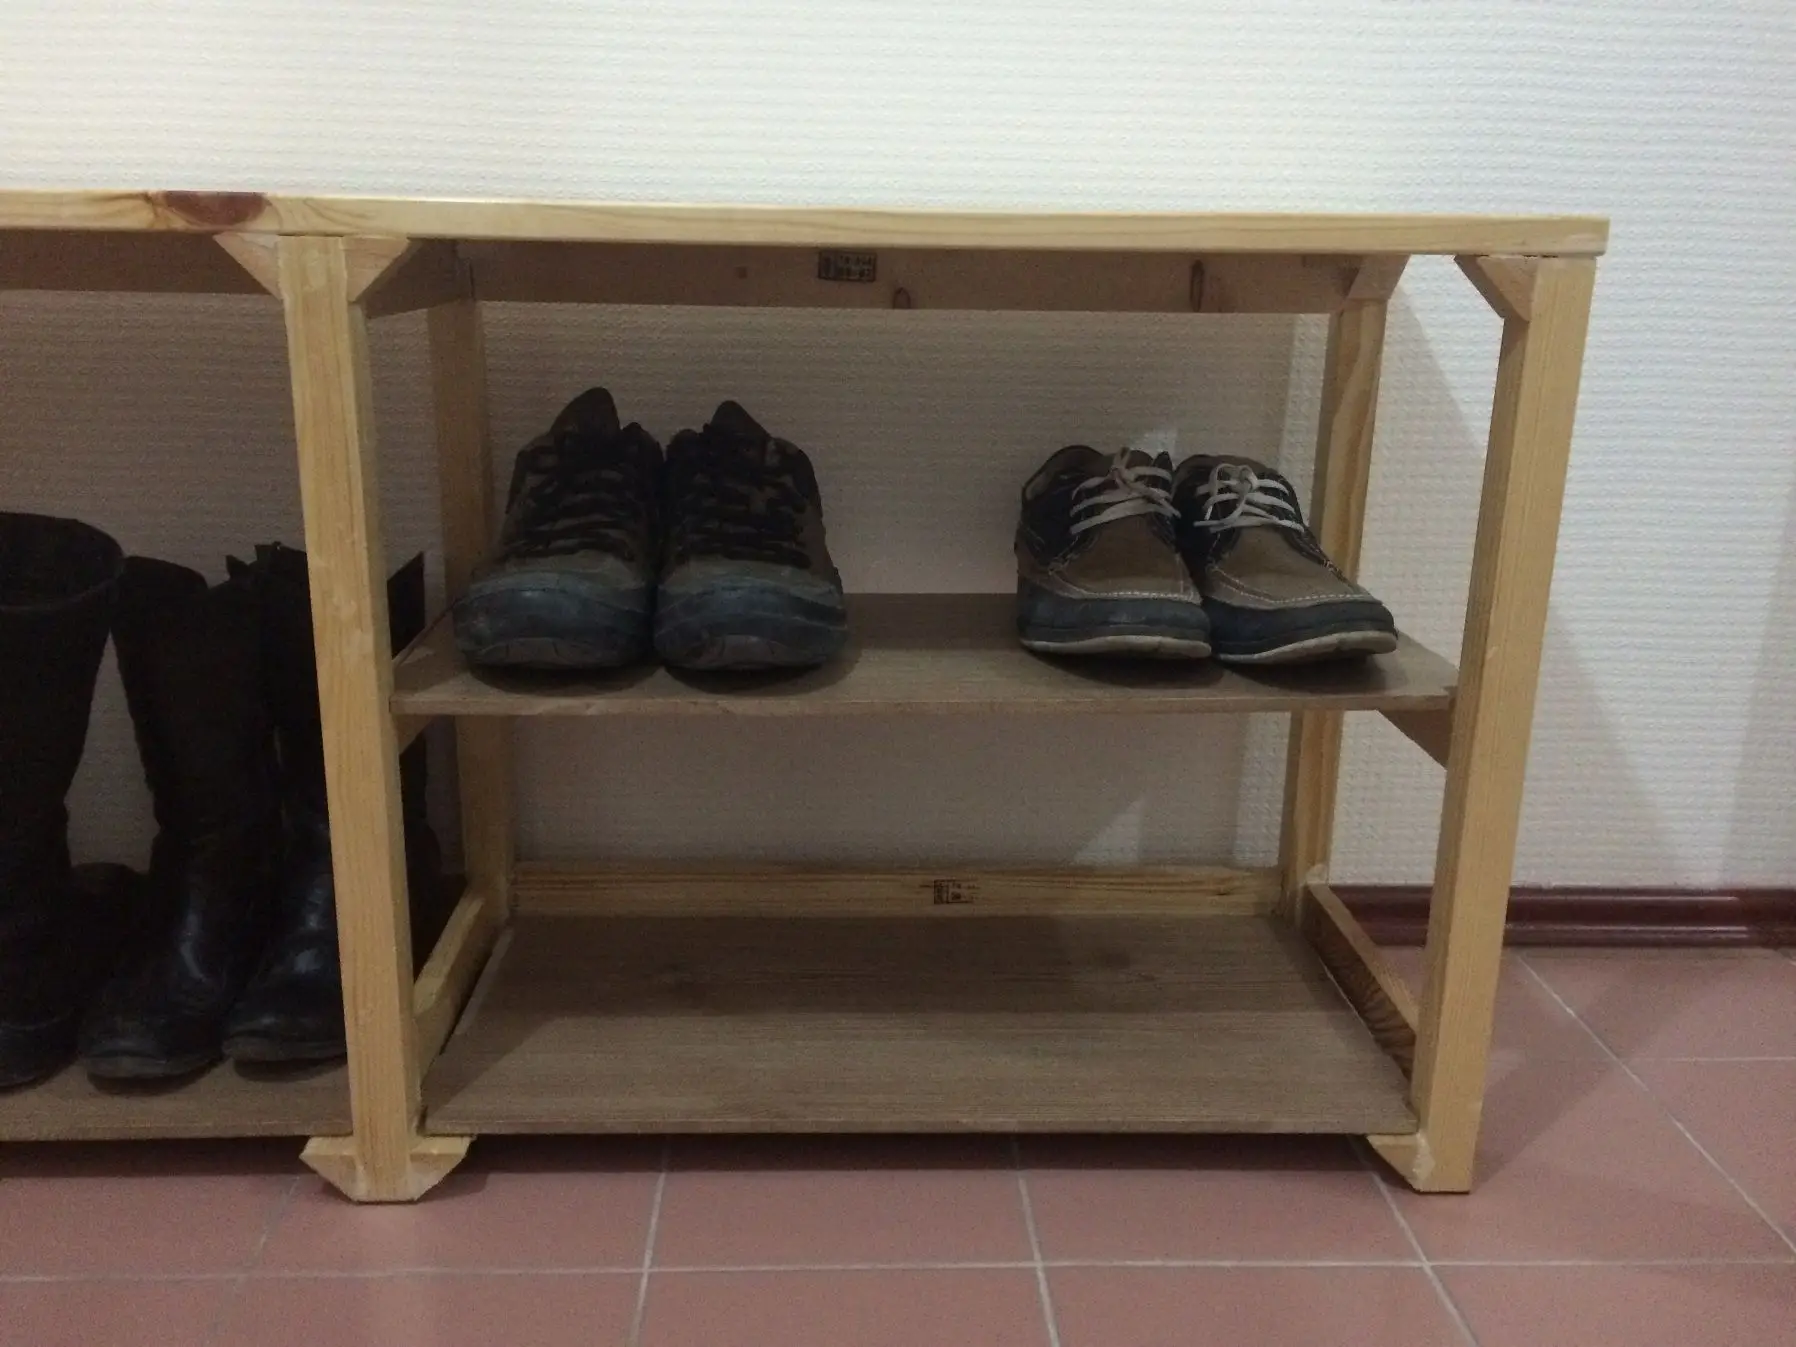
Step 3. Two storage zones: boots separately, shoes separately
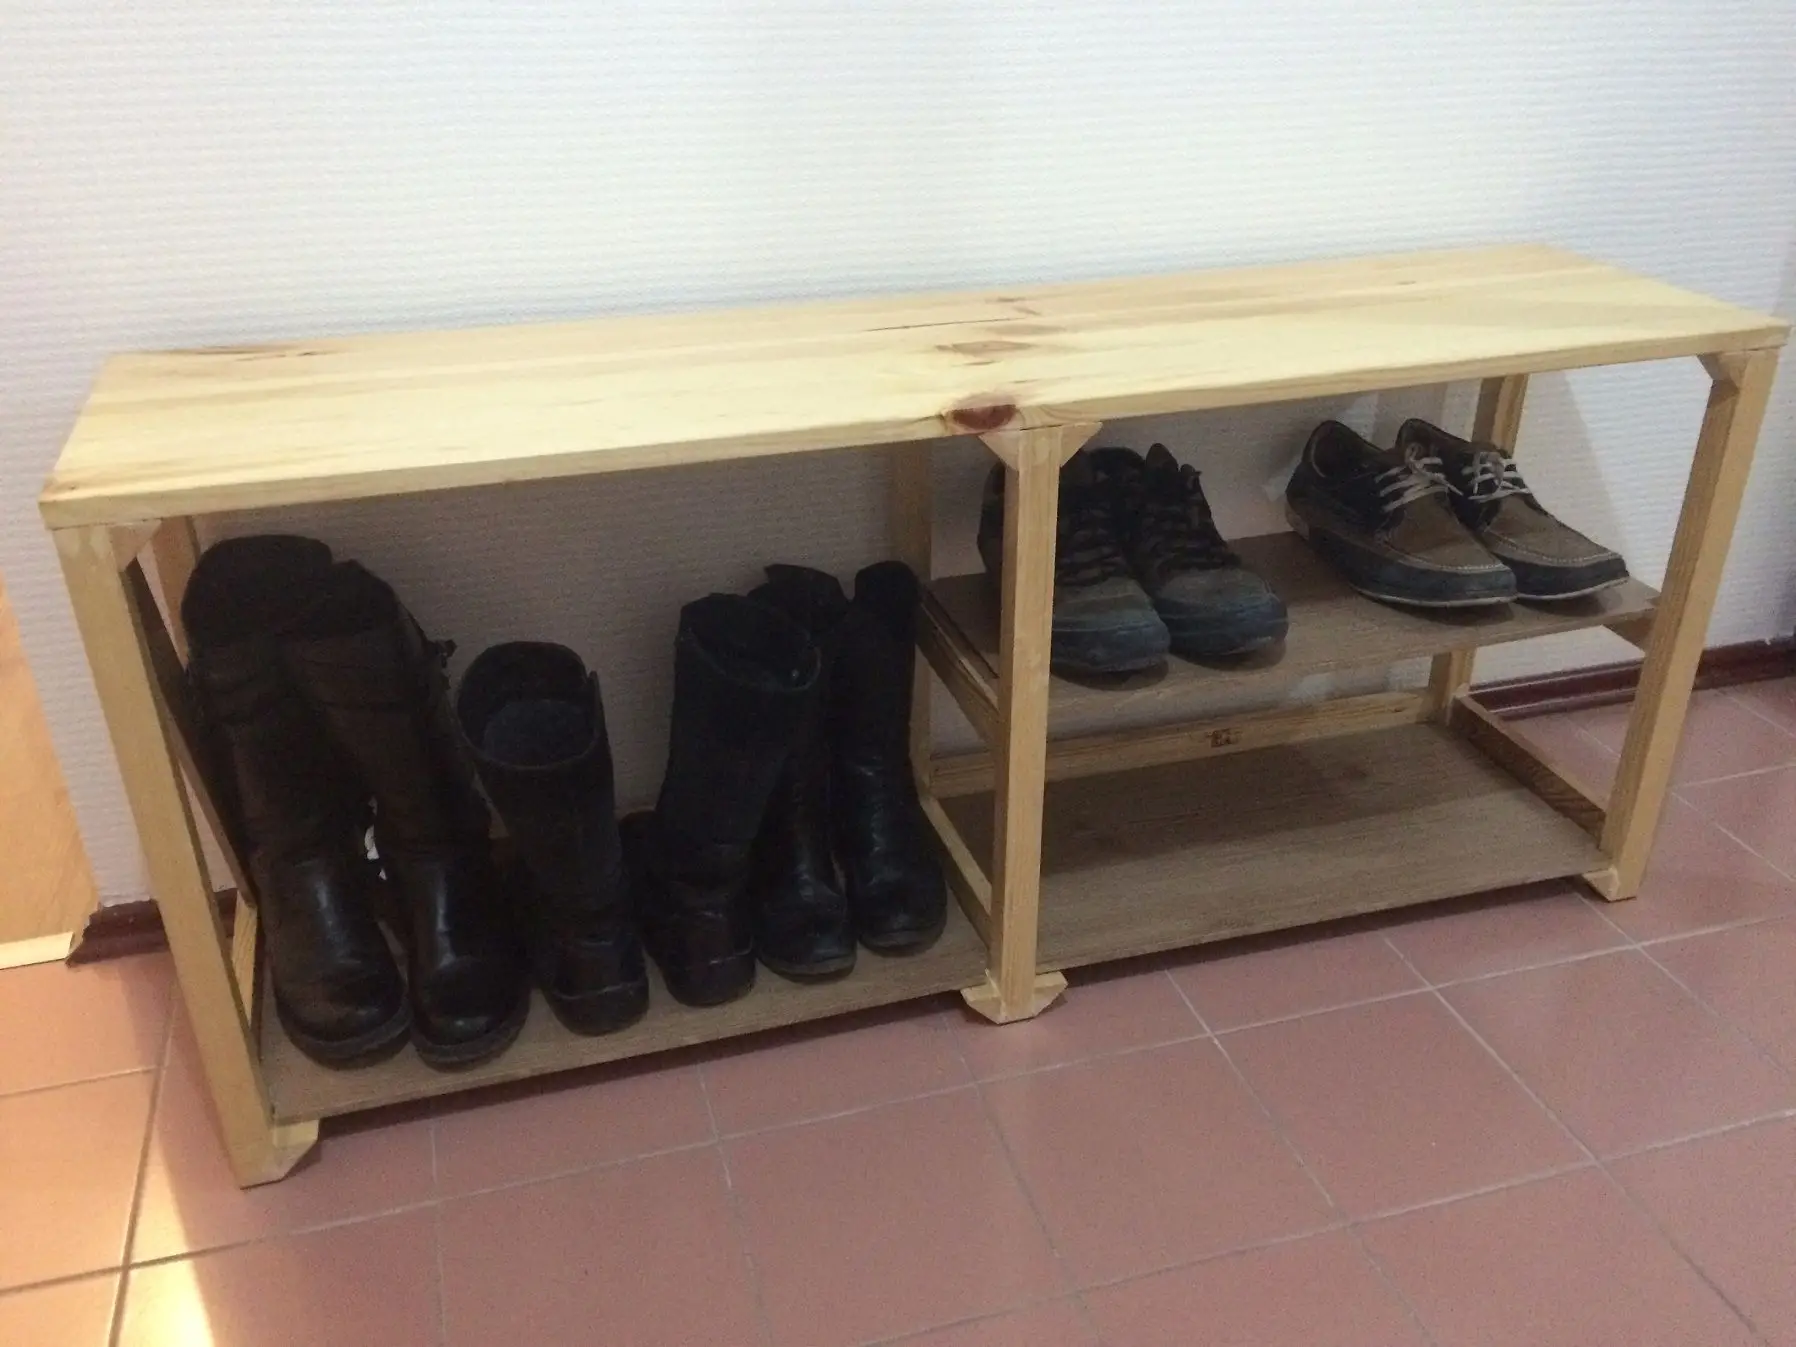
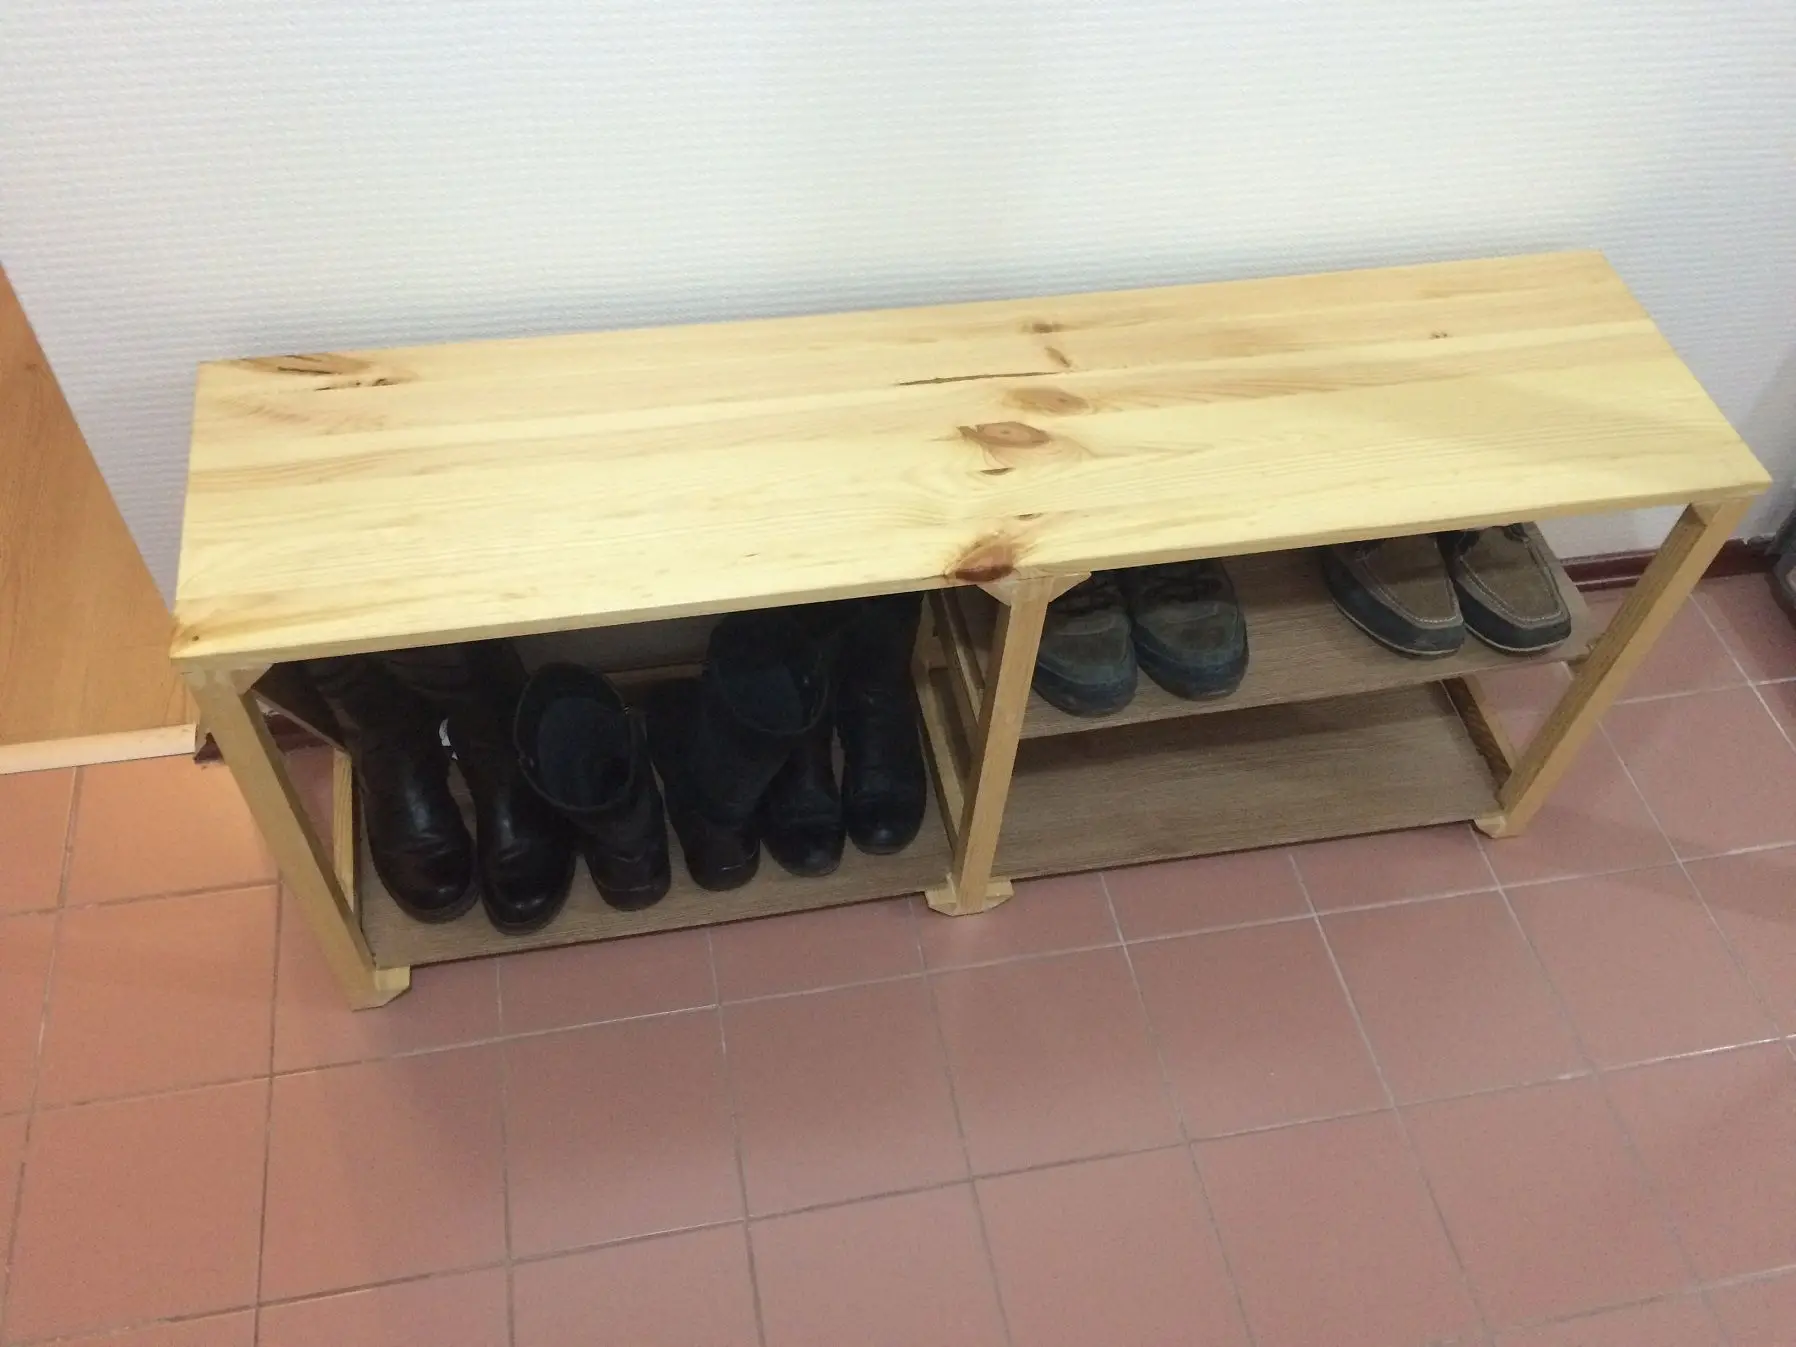
We divided the finished result into two logical zones:
- One side — for long boots. Finally they stand upright and don’t block the walkway.
- The other side — for everyday shoes. Sneakers, dress shoes, slippers — everything in its place.
On top — a full hallway seat. You can sit down calmly, put your shoes on, tie your laces, and only then leave the house. For a small hallway this is real comfort: instead of two items (rack + pouf) you get one smart piece.
What we learned along the way: useful tips
If you repeat our project, here are a few things that will save time and nerves:
- Height is personal. 50 cm worked for us, but measure your shoes and height — comfort matters more than a “pretty number.”
- Don’t cut corners on reinforcement. Triangles and ribs aren’t decoration — they’re insurance. Especially if kids will use the bench as a trampoline.
- Laminate is a great shelf material. Strong, affordable, and often already at home after a renovation.
- Dowels + glue. Wooden pins give a precise joint, and glue on triangles and ribs removes play.
One more thing: don’t chase a perfect look at the first stage. Make it reliable first; you can paint, varnish, or add decorative covers later. Function in the hallway always beats showroom gloss.
Result: a small rack, a big difference in daily life
We started with two simple problems — nowhere to put boots and no room by the entrance. We ended up with a full shoe rack with a seat that saves us time and nerves every day. It’s not a revolution in interior design, but a very down-to-earth, understandable improvement: shoes in place, a place to sit, a clear path through.
If your hallway looks like our “before” — cramped, no system, an endless fight for space by the door — try building this structure yourself. Wood, a little patience, a couple of evenings in the garage or on the balcony — and you’ll have furniture made for your life, not for an average catalog.
Have you already built hallway furniture yourself? Or are you still browsing ideas? Either way — start with measurements and a materials list. The rest will follow, step by step, just like it did for us.
Modelist-Konstruktor No. 6’2026, O. TKACHENKO, Kharkiv
Recommend to read
 RINGED HANDLE
Simple device — the plastic handle in the form of a groove — protects hands like reducing the weight of his burden. However, the trouble is, it has one unpleasant disadvantage — is often...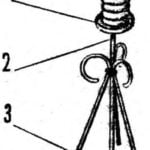 CANDLE holder
MATERIAL: heavy-gauge wire or metal rod with a diameter of 6 mm, copper thin wire, copper or brass sheet thickness of 3 mm. TOOLS: tin snips, hacksaw, file, drill and a drill bit Ø...
