
 to Sit and work for long periods of time for regular writing or computer Desk for taller people, bent double, is not very convenient. Even more difficult for the child accelerates. The skeletal system in such “Gulliver” is not yet Mature, and do they account for no less than adults, and lessons should be prepared, and computer “chat” want. Therefore, they have very often — a violation of posture, and even worse — scoliosis.
This inconvenience could be compensated by reducing the height of the chair, but uncomfortable to sit again.
Now, if it was possible to “raise” the table — then another matter. But this is not such a big problem — her decision was prompted by the modern fashion: we need the table “Shoe in shoes on the platform.” They are flat box-shaped coasters under the legs of the table, increase its height. They would be nice made from the same material as the support panel. But if such material is not available — use that is: particleboard, laminated plywood with a minimum thickness of 10 mm, Board thickness 15 — 20 mm of appropriate length and width.
The required dimensions indicated on the drawing by the letters, it is necessary to define the place. Of course, the main size — the height of internal spacers. It is necessary to adjust the growth of “Gulliver”. From practice it turns out that with the growth of 190 cm, this size will be about 15 cm
If the table “potamiaena” finally (i.e., the first and last time), then the height of the side and end plates, it is sufficient to take h equal to 1.5. If in the future you may need to increase their height should be taken as equal to 2h. Subsequent “raising” will not require any alterations — just have to remove “boots”, insert into the spacer of the desired height and put them on racks.
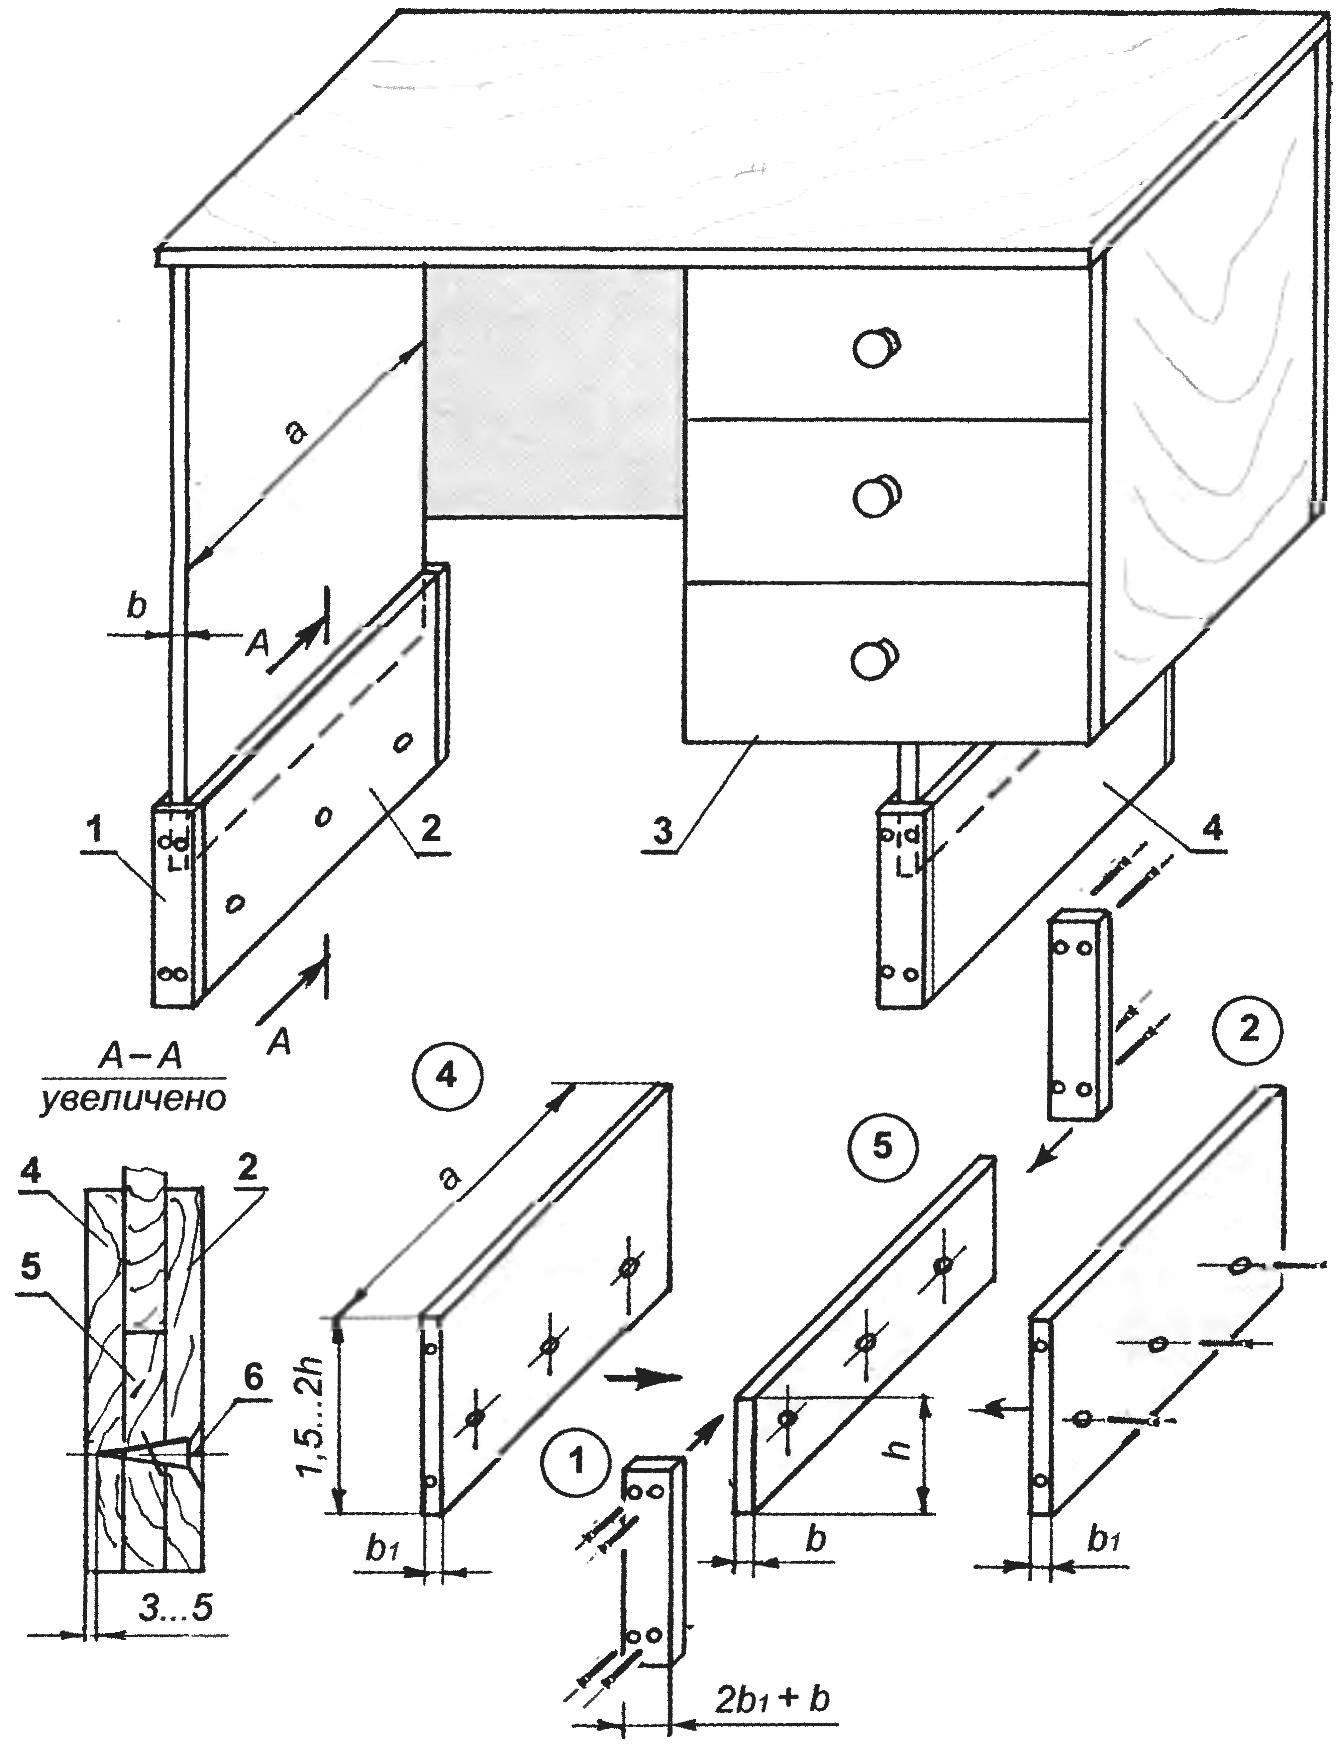
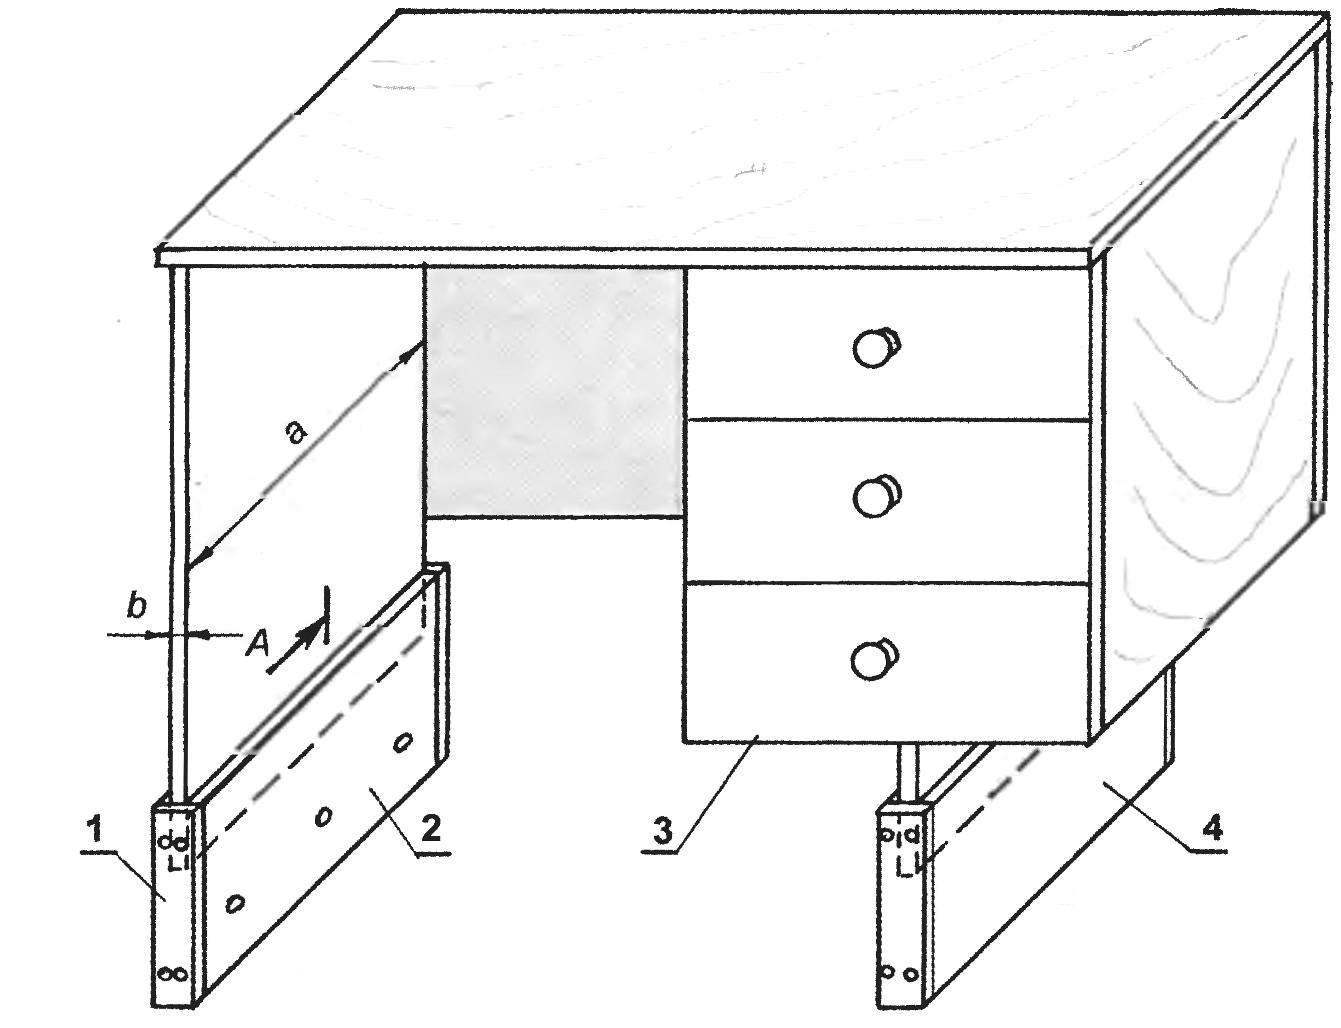
Table shoes:
1 — end strap Shoe (4 PCs); 2 — inner side panel (2 PCs); 3 — table; 4 — the outer sidewall (2); 5 — spacer (2 PCs); 6 — screw-tapping screw (22 pieces)
Going to “boots” by means of screws or screw ties the Number of fasteners and their location can be taken the same as in the picture. It is only necessary that their length was less than 3 — 5 mm total thickness of the base. Then one of the sides will be “clean” and can be put on the outside (facade) of the table.
Before connecting parts of a Shoe put in “design position”, fasten and drill holes in them for 1.5 — 2 mm less than the diameter and depth of 1 — 2 mm greater than the length of the screws (ties). Then in the inner sidewall of the hole rassverlivajut to the diameter of the screw and razzenkovyvajut under the countersunk head. Bond details make clamps or in a vise (protecting from surface damage stand).
The stand can be assembled and on the small screws (M3 — M6) with washers. But then the holes are of appropriate diameter, it is necessary to drill through and advanced to drill out the recesses for the bolt heads and nuts with washers and fit the bolt length under the thick boots.
Finish and color “boots” — depending on the material from which they are made – under the invoice table, or contrast for him. And it is better to paint in black enamel. This color will suitable to any other color, and practical, like these shoes.
A. RODIN
Recommend to read
 FROG IN THE KITCHEN SINK
Like it or protect the drain hole of the kitchen sink all sorts of motorolafree — it's a no-no and clogged. "Punch" garbage Prabhu can help magni pump“frog”, how pumped up air... SAILBOAT… ON THE TRUNK OF A CAR
Still quite recently it seemed that forever passed away, imbued with romanticism, but proved impractical in our rationalistic age, the legendary tall ships of the past centuries — a...
