Many photography enthusiasts today use old lenses on modern cameras. Especially those who are into leisurely creative or experimental photography. For this purpose, an adapter ring is purchased with a bayonet mount matching the camera being used and a thread (or also a bayonet) matching the lens. Such accessories are produced by many companies and are inexpensive. The lens itself can be taken from a camera that has been gathering dust since film days in the attic, or purchased on the secondary market – there are plenty of budget options. That’s exactly what I did, “crossing” a digital mirrorless Sony camera with a Soviet “Jupiter-11” (1:4/135mm). The results of the first experiments were pleasing, and it was decided to continue experiments with photographing distant objects (in particular, celestial bodies). The full moon was approaching, so an urgent need arose for a lens with an even longer focal length. And here a problem arose: even old specialized equipment continues to be expensive, and buying it without understanding in advance whether it will be needed in the future is completely illogical. This is an experiment – why spend money.
I delved into studying Soviet technical publications and realized that a telephoto lens can be made independently. To implement the idea, it is necessary to make an attachment that is installed between the camera and the existing lens. It turns optics with normal focal length into “portrait” optics, and long-focus optics into even more long-focus optics. The degree of magnification depends on the lens installed in the device.
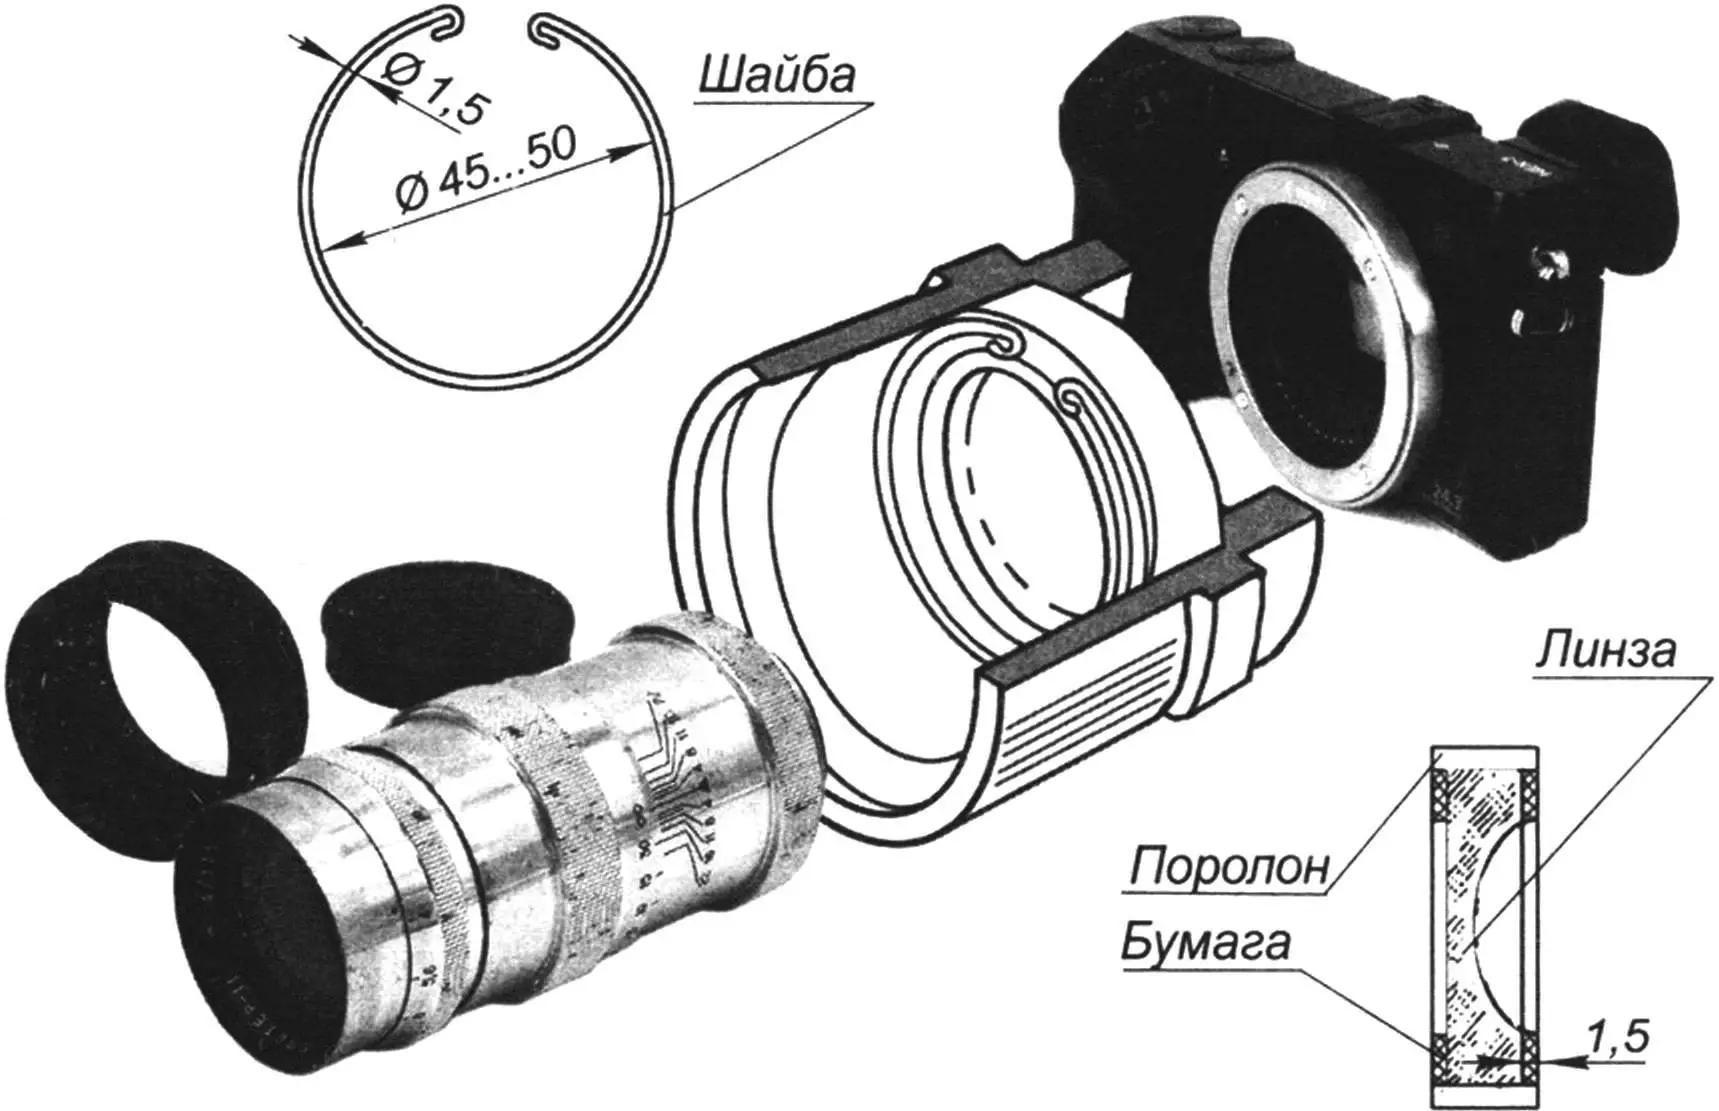
As the body of the attachment, we use an extension ring from a standard “Zenit” macro set with a height of 28 mm. A diverging lens needs to be inserted into it, which can be selected from eyeglass lenses. As a rule, their diameter is larger than necessary, so we will modify it. From thick paper, we cut out a circle whose diameter equals the inner diameter of the ring, and using rubber glue, attach it to the flat side of the lens. It is important here to precisely align the centers of the circle and the lens. To protect from scratches during processing, the concave side of the lens is completely covered with paper.
The easiest way to grind the lens is on a hand grinder, constantly rotating it to avoid local heating and cracking. After obtaining the required diameter, the protective paper is removed, and two diaphragms made of black cardboard with holes equal to the diameter of the meniscus are glued onto the lens. To make the glass sit tightly enough in the extension ring, a strip of foam rubber is glued around the circumference of the lens. It remains to secure the lens in the ring with a spring washer – the attachment is ready.
Since I am not a theorist, but more of a practical experimenter, I did not engage in any calculations. (If desired, the necessary formulas can be found in literature or on the internet.) The focal length of the resulting composite lens, comparing it with a friend’s branded “telephoto” lens, using the Yu-11 (135 mm), a diverging lens with optical power of 22D and a distance between them of 19.5 mm, I estimate to be somewhere around 400-500 mm. And the aperture drops by approximately one to one and a half stops. Of course, for shooting with such optics, a stable tripod is required.
Boris TRUFANOV
Recommend to read
 What additional parts are recommended to install on the bike
The purchase of a Bicycle is a great idea. The bike trip that would depend a great support the body and good mood. The standard set is often not enough for comfortable and safe drive, so... VASE-IMPROMPTU
Now on sale a lot of different liquids, for example mineral water in large plastic bottles, including a beautiful corrugated walls not only round but also square shapes. If they do ask...
