For water procedures there are quite a few different devices. In Russia, the traditional ones are the banya, the bathtub, and the shower. People say that the banya heals, the bathtub relaxes, and the shower invigorates. In addition, a shower is the quickest way to wash, not requiring any special preparations. In my view it is also the most economical of the three. So I, having a banya on my garden plot and a bathtub in the house, decided to make a shower as well, using the bathtub as a tray. But the bathtub was already old, and at a “family council” we decided that such an option was not really necessary for us. One shower would be enough, arranging it in place of the bathtub — in the corner of the boiler room, an annex to the house where the gas boiler was located. It is warm here even in the harsh Siberian frosts, and there is also a sewer line.
The preparatory work consisted in dismantling the old bathtub and purchasing the missing materials. Neither of these posed any serious problems.
When starting to build the shower cabin, I first decided on its “architecture”. I did not try to be too clever, but I still moved away from the simplest, already tiresome “cubic” shape and made its front corner (where I planned to arrange the entrance opening) beveled. And I think I was right. Besides the more attractive appearance of the cabin, the absence of a sharp corner made it easier to access other equipment in the boiler room, in particular the gas water-heating boiler and the electric storage heater.
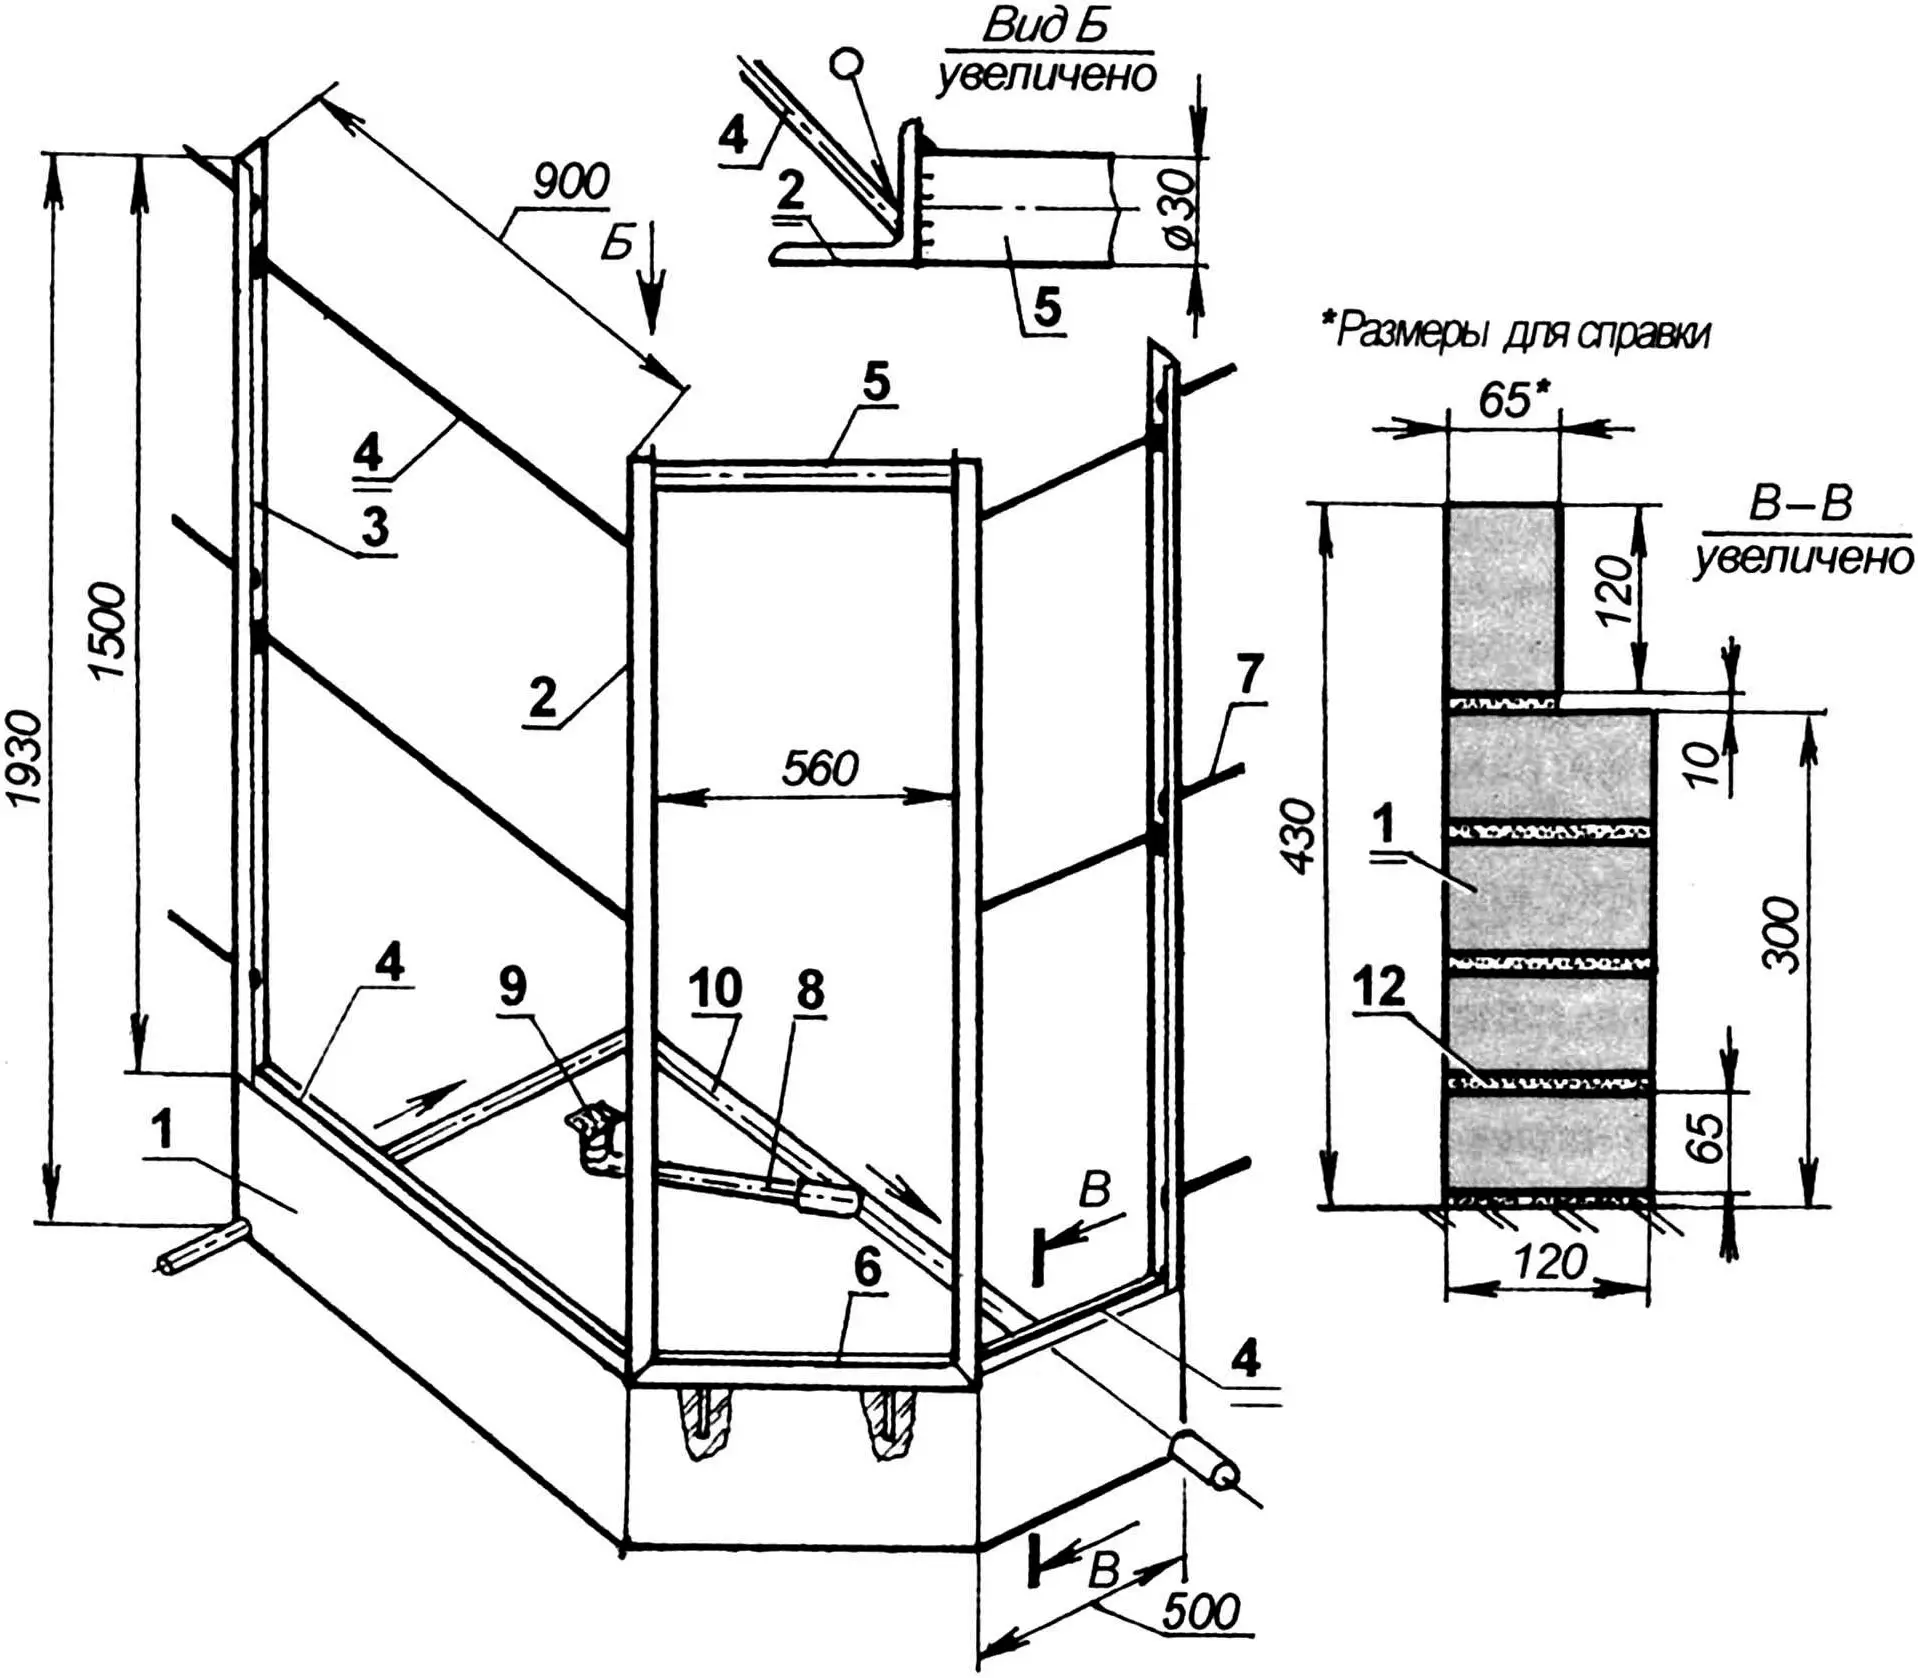
1 – plinth, b=1/2 brick (ceramic brick laid flat along its length); 2 – entrance frame post (rolled steel angle No. 7, 2 pcs.); 3 – wall post (rolled steel angle No. 7, 2 pcs.); 4 – tie (reinforcing wire rod Ø6, 6 pcs.); 5 – lintel (stainless steel tube Ø30); 6 – threshold (rolled steel angle No. 7); 7 – dowel (hardened steel, 6 pcs.); 8 – drain branch pipe (polyethylene pipe Ø60); 9 – receiving funnel; 10 – sewer pipe; 11 – gasket (rubber); 12 – mortar joint
Before starting the building work, I marked the position of the partitions in plan directly on the boiler room floor tiles, or more precisely, the foundation for them. Strictly speaking, this four-course masonry, half a brick thick, can be called a foundation only conditionally, since its base is not the ground but the boiler room floor. I will call this part a plinth — this name is probably the most appropriate for such a structure.
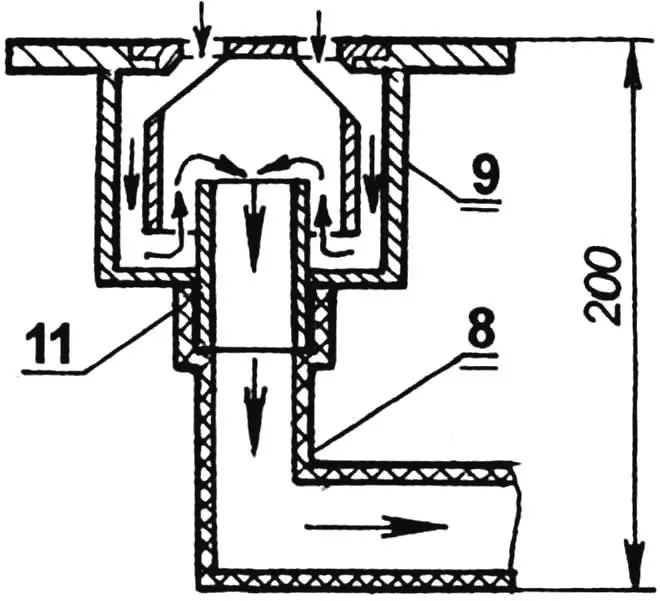
After laying the plinth, I moved on to installing the floor drain. Sailors use the word “trap” for a ship ladder, but in construction it means a subfloor device for collecting and discharging used water into the sewer. The floor drain consists of a receiving funnel and an outlet pipe. The funnel has a protective screen to prevent large debris from entering and a siphon — a hydraulic seal that blocks odors from coming back from the sewer. When installing the trap, it was important to meet two conditions. First, to lay the outlet pipe with a slight slope toward the sewer pipe. Second, to set the funnel screen at the level of the not-yet-existing finished floor of the shower cabin, which it was undesirable to raise too high. The free end of the outlet pipe was joined to the branch of the sewer pipe that had previously been connected to the bathtub spout. The direction of this branch, and therefore of the trap pipe in relation to the sewer pipe, was chosen quite acute so that the water flows would smoothly merge rather than “disturb” each other.
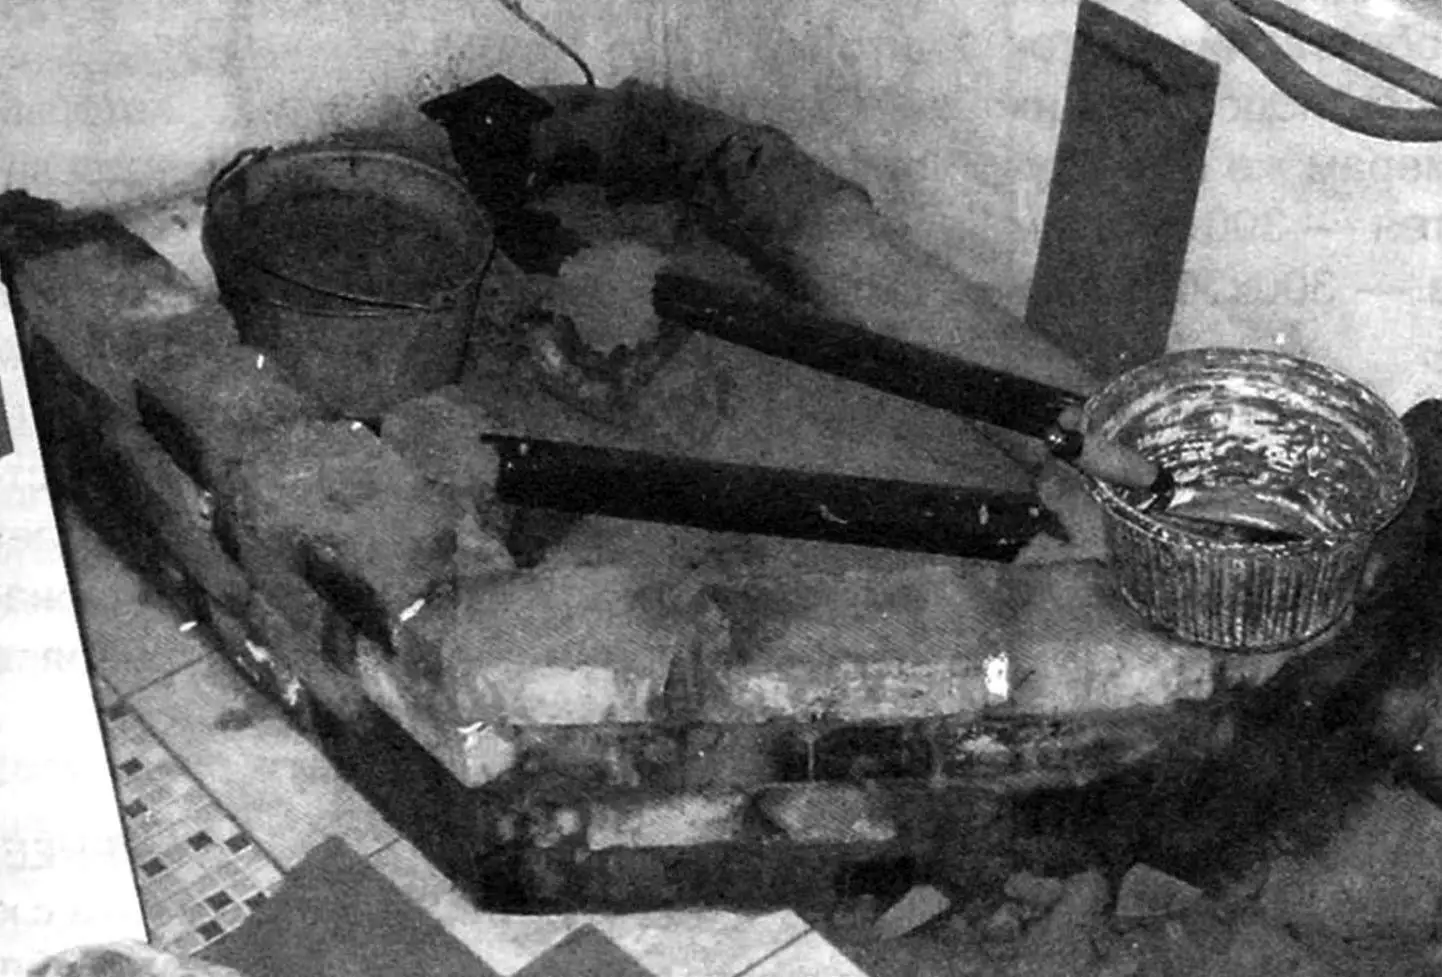
After that, I filled the entire volume between the plinth and the walls with broken brick, crushed stone, and other construction debris, and then soaked this whole mass with a “lean” cement mortar (binder content about 1:10–1:12). On top of it, over the entire area of the cabin, I arranged a screed — a 20 mm layer of a stronger mortar. I added liquid glass to the mix, sprinkled the surface with dry cement, and troweled it with a steel float to “iron” it. The screed was made with slight slopes (or rather rises) from the floor drain toward the walls and partitions, leaving the drain about 10 mm higher than the surrounding floor.
Then I waited several days — during this time the backfill and screed mortar set and gained strength, and only after that it was possible to walk on it.
In those same days, quite on cue, I came across an article in issue No. 4 for 2003 of the magazine “Modelist-Konstruktor” about building walls and partitions from bricks laid on edge, with a thickness equal to a quarter of a brick. I had thought about such a solution before, but I had doubts about the stability of such structures. Now I felt more confident. I cannot claim that I brought anything fundamentally new to this approach, but I did do some things in my own way.
Starting the masonry of the partitions, I first laid only one course of bricks on edge. On top of it I mounted a welded frame consisting of the entrance opening frame, wall posts, and ties between them. The posts (wall and frame) are made from rolled steel angle No. 7, and the frame threshold is from angle No. 3. The lintel of the frame is a stainless steel tube 30 mm in diameter. The ties are pieces of reinforcing wire 6 mm in diameter.
After checking their vertical position, the wall posts were fixed to the walls with hardened steel dowels driven through pre-drilled holes in the angles. The frame threshold was secured to the lower bricks with the same dowels, in sockets cut in advance. The posts (wall and frame) were connected with ties: the lower ties were welded solid immediately, while the middle and upper ones were only tack-welded at first. As the partition masonry progressed, it became clear whether their positions coincided with the mortar joints. If they did, I welded them completely; if not, I cut the tacks and lowered the tie to the nearest brick course.
The partitions were laid in a quarter-brick thickness up to the level of the door lintel on a cement-sand mortar mixed in a 1:5 ratio, with a joint thickness of about 10 mm. I used 500-grade cement and sieved the sand to remove particles larger than about 5 mm.
I was not overly concerned with the quality of the inner mortar joints, but I tried to level the outer surfaces of the partitions almost to a plane so that later it would be easier to tile the cabin with ceramic tiles.
I should note that laying in a quarter brick made it possible to almost halve the consumption of this expensive material. The price of a single brick, even of modest quality, has now almost reached the cost of a loaf of premium wheat bread.
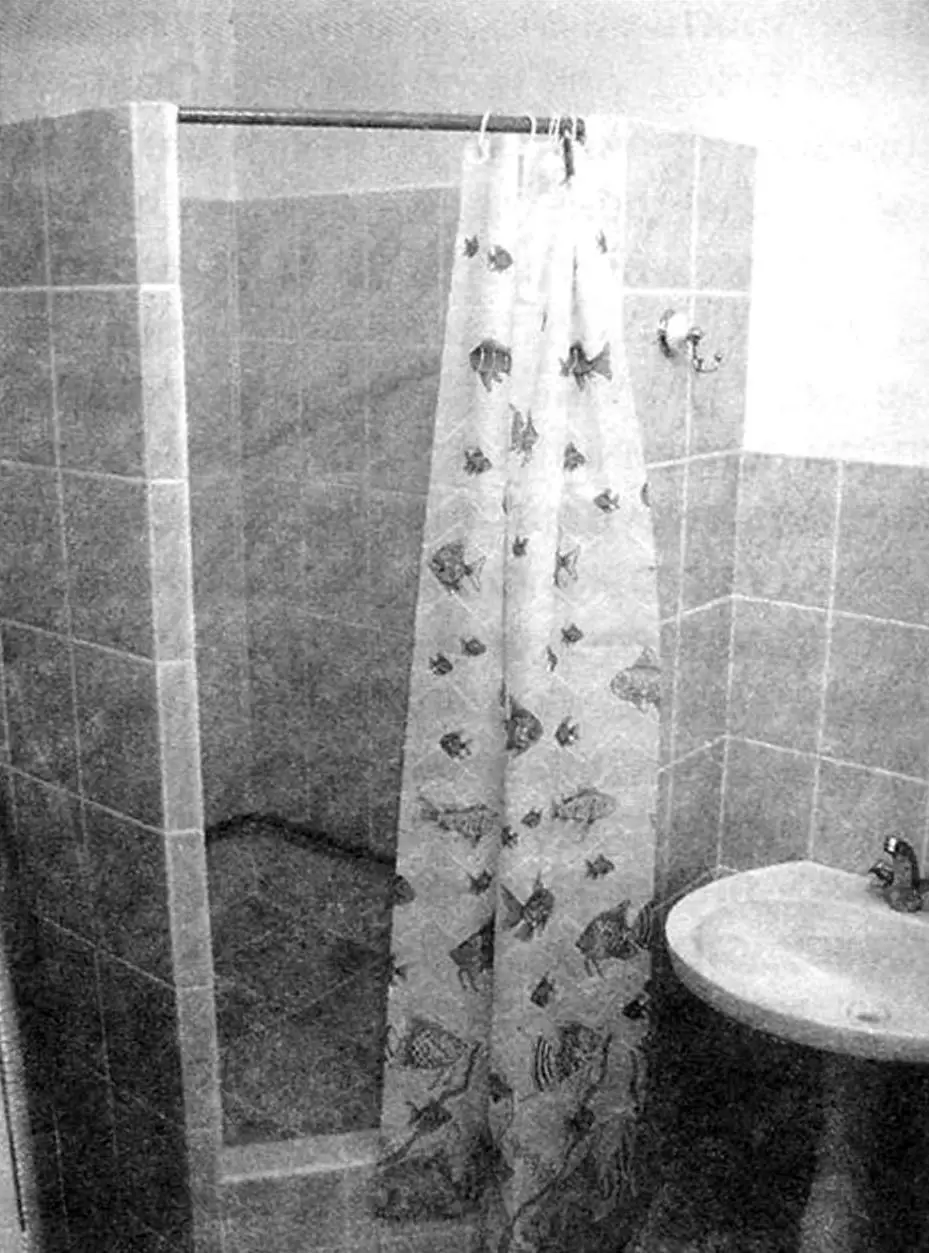
[caption id="attachment_86472" align="aligncenter" width="1303"]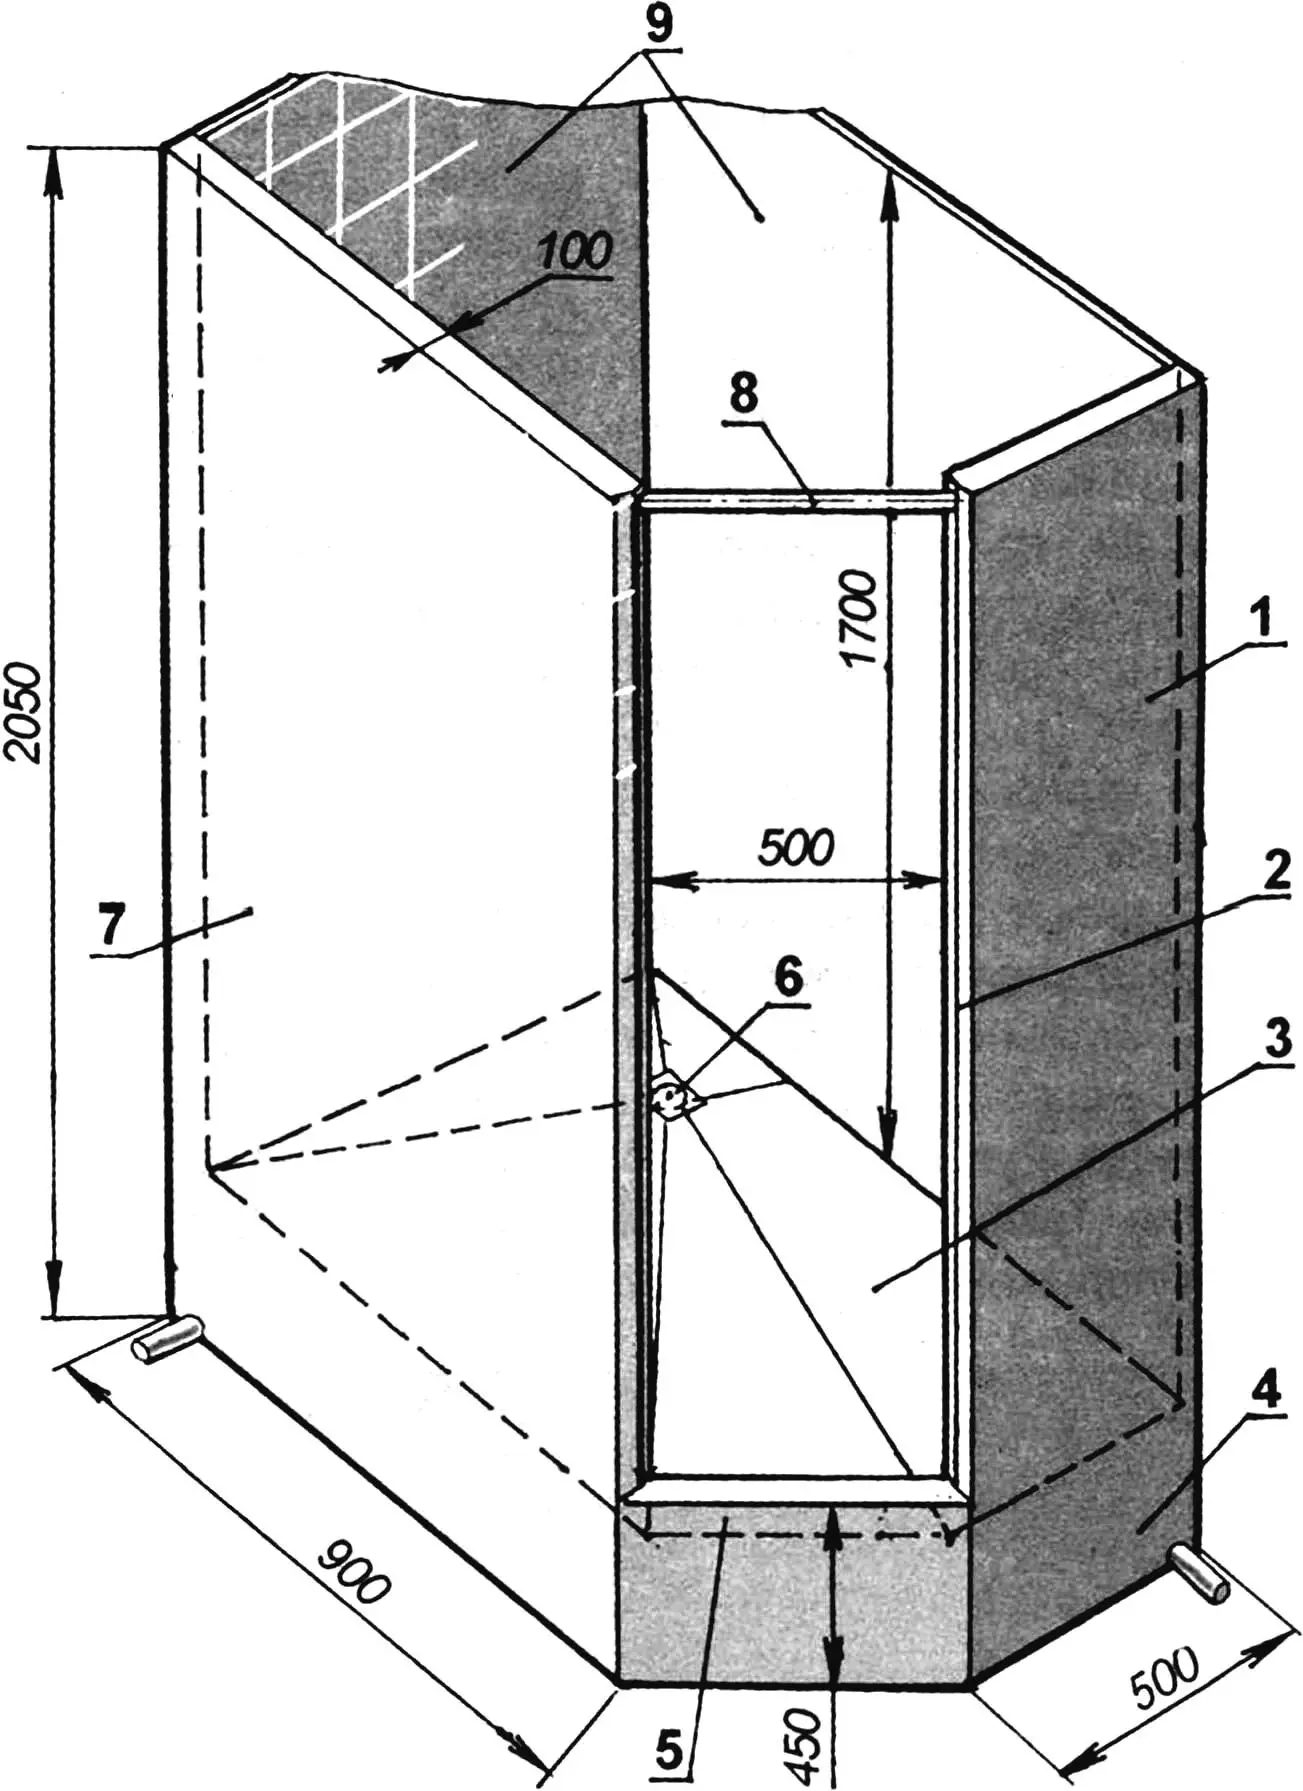 Shower cabin with quarter-brick partitions, tiled with ceramic tiles:
1 – narrow partition; 2 – entrance jamb (2 pcs.); 3 – floor covered with quarry tiles sloped from the walls and partitions toward the drain; 4 – plinth; 5 – threshold; 6 – floor drain; 7 – wide partition; 8 – lintel; 9 – part of the room walls incorporated into the shower cabin and tiled with ceramic tiles
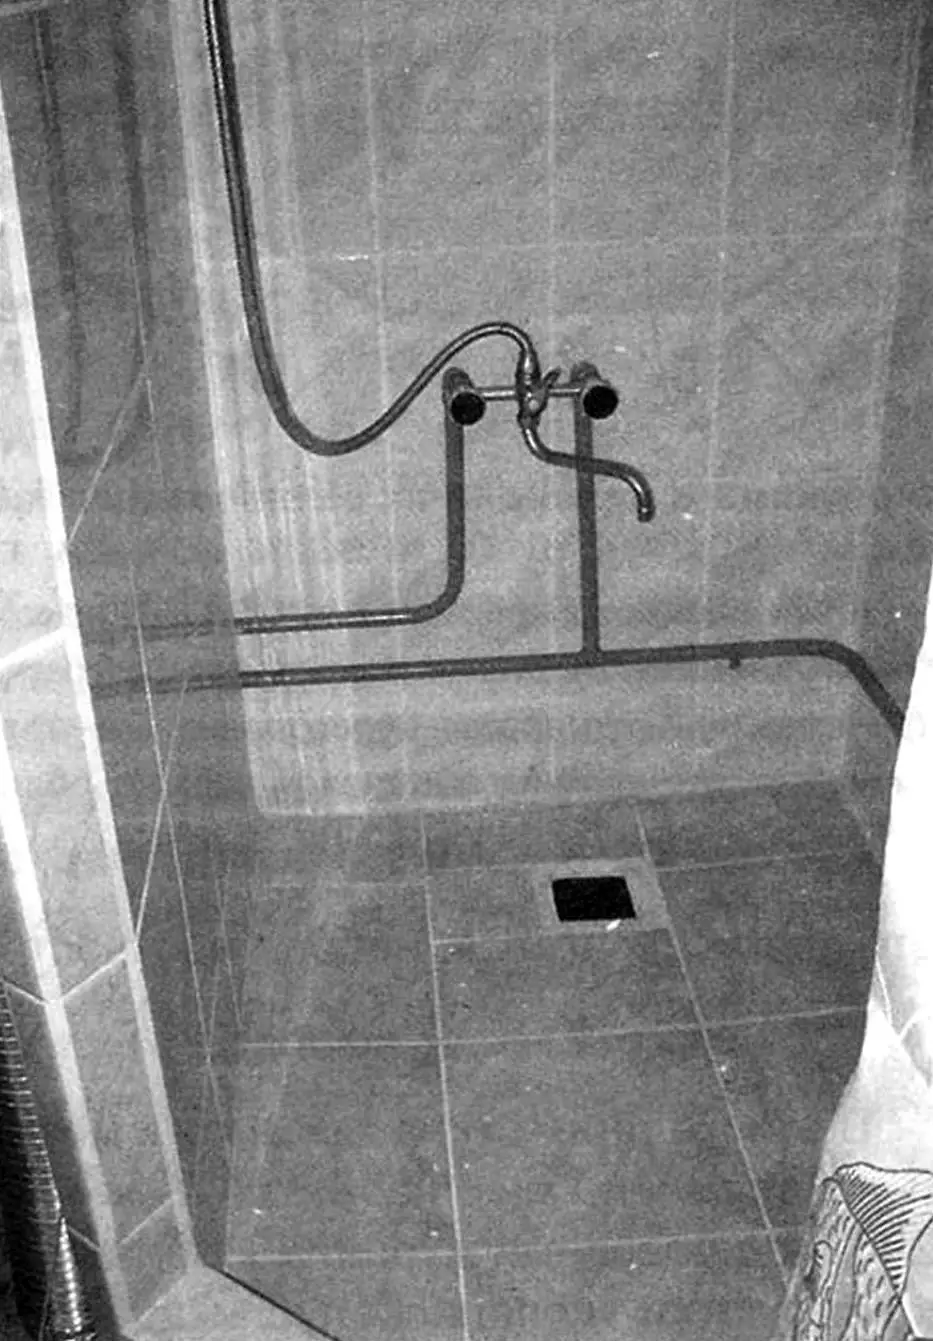
Continuing the story about the further stages of building the shower cabin, and specifically about tiling the partitions and the parts of the walls belonging to the cabin, I should mention that when buying tiles for the floor and walls I managed to match them by color. In size and texture they differ: for the walls I used 300×200 mm smooth tiles, and for the floor 300×300 mm rough tiles.
First I tiled the cabin floor, maintaining the drainage slopes toward the floor drain, and then the walls and partitions. After cladding the frame posts with tiles, the entrance opening width was 500 mm.
I see no need to describe the general technology of tiling floors and walls — there is plenty of literature on the subject. I will only note a few particular points that I used.

First, the wall height turned out not to be a multiple of the tile size, and in one course I had to cut the tiles. I decided to place this cut course at the very bottom — the eye rarely lingers there, and when you are showering you certainly do not care. The columns of cut tiles were “hidden” in the corners.
Second, tiling guides recommend using a special adhesive, a fine-dispersed cement-sand mixture with additives that increase plasticity and water resistance. What exactly these additives are is never specified, though the price is much higher.
I used a homemade mixture consisting of an ordinary cement mortar mixed with water containing added polyvinyl acetate (PVA) glue, which gives the mix the required properties.
Third, when tiling the floor I started laying tiles from the floor drain, level with its top, trying not to leave voids under them where water could accumulate. To achieve this I spread the adhesive mortar evenly and with a slight excess, added a “bump” in the center, and pressed each tile down into place so that the excess mortar squeezed out. I tried to press the tile with both palms over as much area as possible. You cannot see the voids, of course, but you can feel — or rather hear — them by tapping the tile after it has been set. For this operation you can make a simple tool: a wooden board slightly smaller than the tile, and press through it. Just make sure no mortar gets trapped between the board and the tile.
After tiling, I filled all the joints with a special waterproof, non-shrink grout, and hung a nice polyethylene curtain on the door lintel.
I kept the same mixer that had been used with the bathtub, but choosing the water heater required some thought: should I leave the existing electric storage unit or buy a gas water heater? I chose the former, especially since I had recently upgraded it (see “Modelist-Konstruktor” No. 4 for 2008), and it has been working flawlessly. In addition, it provides an alternative source of hot water in case of gas supply interruptions.
“Modelist-Konstruktor” No. 6’2009, A. FRENYOV
Recommend to read
 REPAIR IT YOURSELF!
A small speck of rust on the wing in a few weeks darkened, and then turned into a hole with ragged edges. Avtostantsii the sentence was harsh - the wing needs to be changed. Preliminary... GARBAGE SEPARATELY AND PETROL SEPARATELY
Looking at the picture, the reader will notice that the use of plastic bottles as funnels. But the funnel offer may be a good filter, capable to protect the fuel system of your vehicle...
