
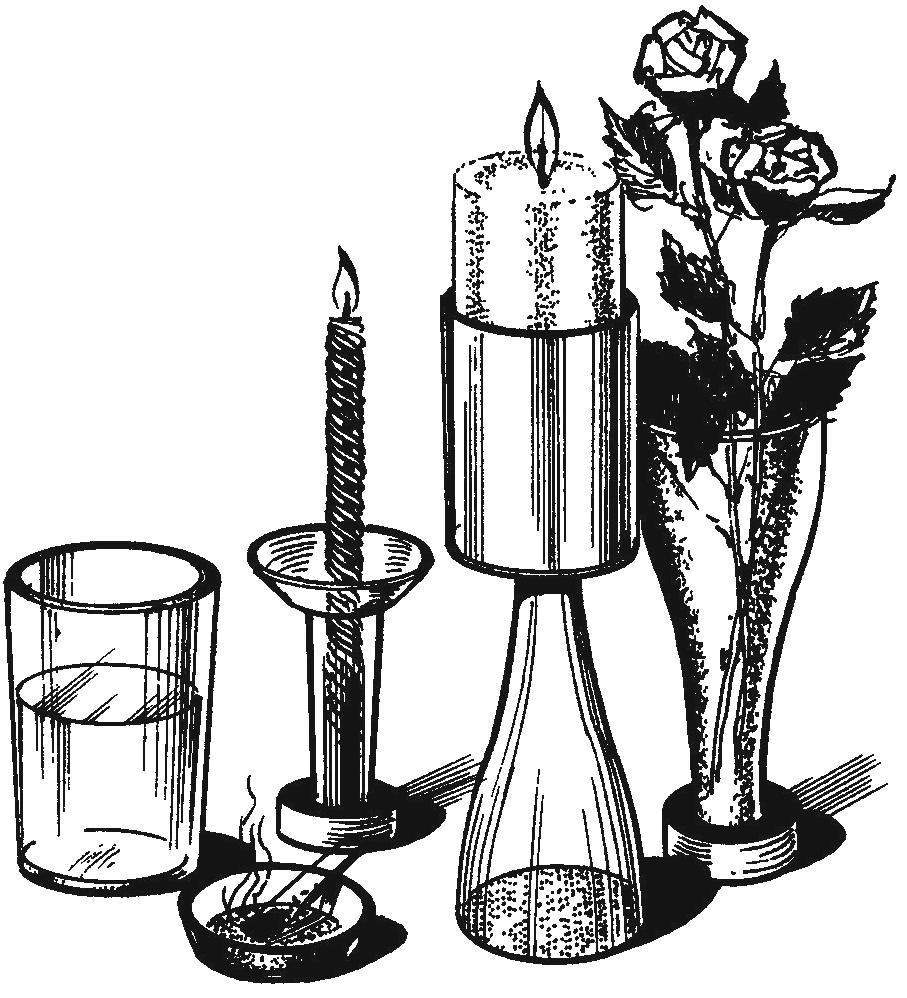
 It happens that the house accumulates a large amount of glass bottles of colored glass, unusual and beautiful in form that it is a pity to throw away. Such containers can serve as prompts to publish in the journal “Earmaster” (Hungary), the main material for the “production”… the original glasses. As a tool used homemade box-cutter. To work you will also need epoxy glue, and in addition different grit abrasive paper.
Steklorezami box
The basis of box — Board dimensions mm. 300x200x20 it with glue and screws attached stationary side wall; it should be at a distance of 30 mm from the edge of the base.
Next to the wall is attached to the clamping support strut for the glass cutter. Dimensions of the stand 100x30x30 mm; material — solid wood with sawn groove under the cutter, tighten the bolt with the wing nut.
Opposite the stationary wall is mounted adjustable movable fixed on two brackets with the eyelets under the wing nuts. The brackets are made from steel strip 20×2 mm length 130 mm, curved at a distance of 30 mm from the edge at right angles to the ends. On the long wing of each bracket progressirovanii in the longitudinal direction of the grooves with a width of 6 mm.
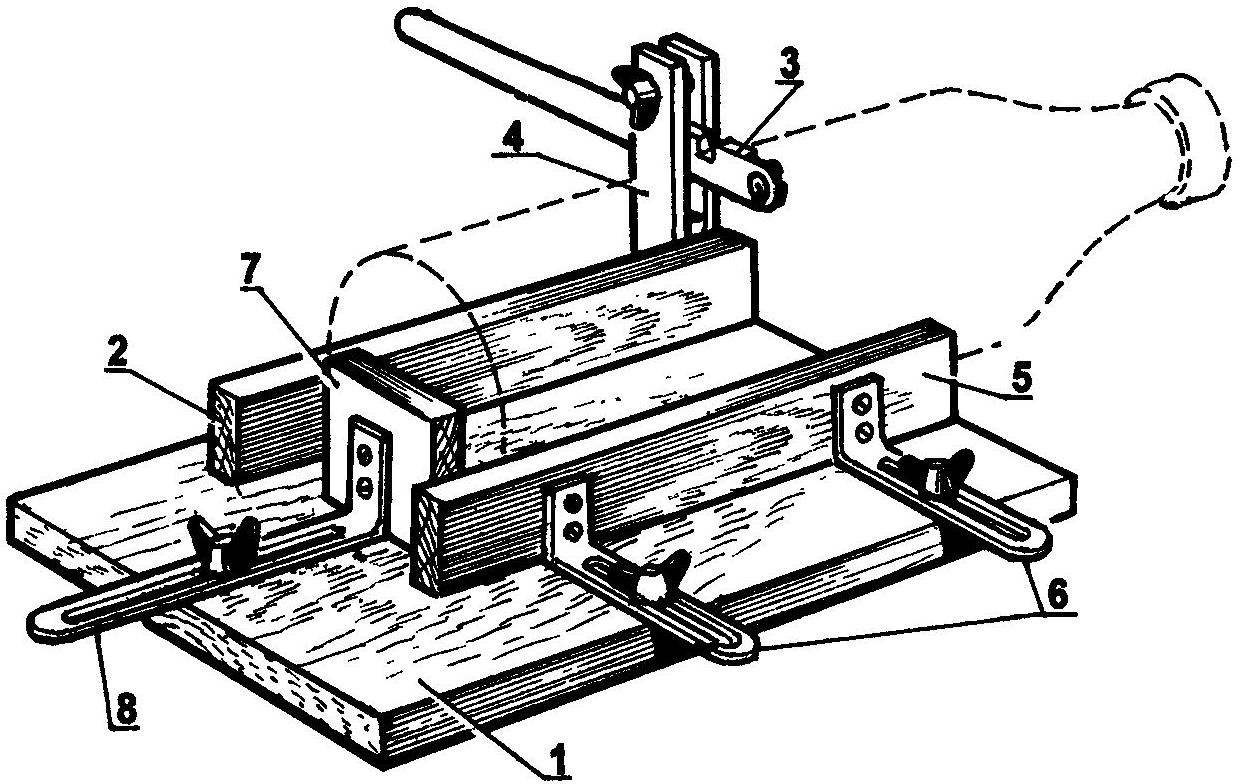
Box-cutter:
1 — base; 2 — stationary wall; 3 glass cutter; 4 — hour clamping of the glass cutter; 5 — movable (adjustable) wall, 6 — adjusting the brackets of the movable wall; 7 — resistant heel; 8 — adjusting bracket heel
Between the walls is set resistant heel size 50x40x20 mm, which rests on the bottom of the bottle. The heel is also adjustable through the bracket, such as a movable wall.
In securing the front mounted glass cutter, and box fit the bottle pressed to her cutting roller as it rotates leaves on the glass a thin incision for later articulations of the bottle.
Cutting bottles
In the beginning choose a traditional round shape bottle with a smooth surface (rejected bottles with a rough or uneven surface, as well as bottles unsuitable for the job).
Place the box in front of him so that the glass cutter was on our side. Place the bottle between the side walls of the neck to the right. Will handle the movement resistant heel the length of the cut portion of the bottle, then tighten the screws regulating brackets. Finally, install the cutter so that it had a weak pressure on the glass.
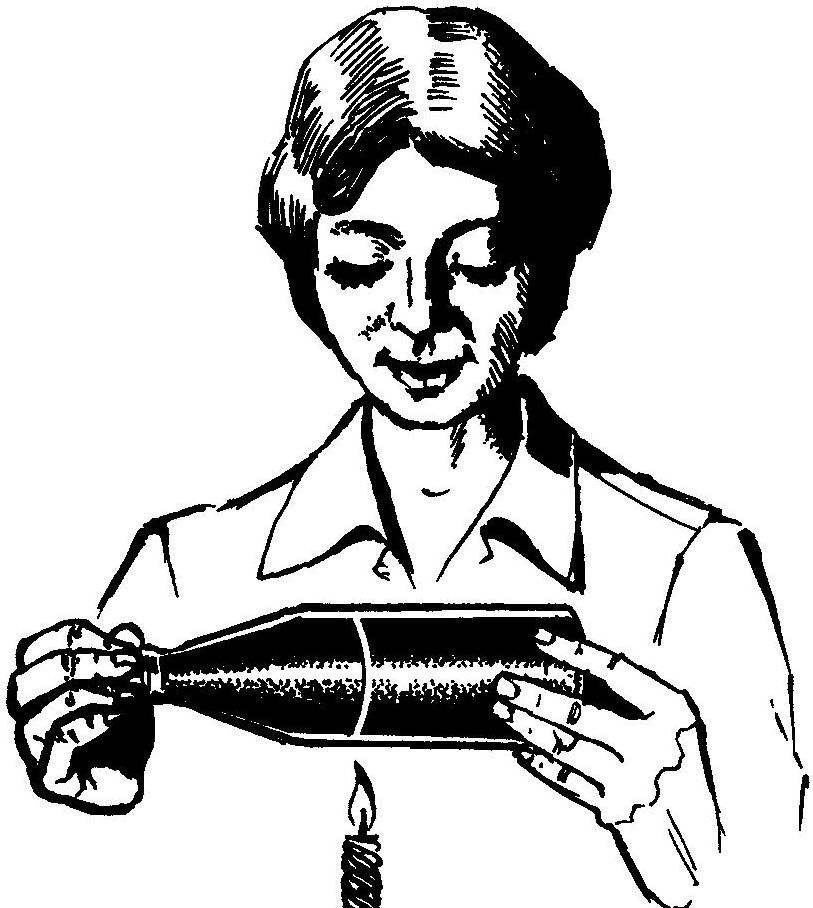
The heating of the cutting line of the bottle over a candle flame
Tighten again the wing nuts, and then start cutting by turning the bottle. Cutting is considered to be correct if in the process you hear a distinctive light crackle. It is important that the section line is not interrupted and its exactly the beginning combined with the end. You can get glass of different thickness or a flattened bottle. The cutting process slightly more complicated.
Incised bottle now divide into two parts For this evenly rotate the bottle over the candle flame, warming up the notch. As soon as you hear the clicking and light up the trail of a glass cutter, remove from heat the bottle In order to avoid uneven contact moisten the cut area with a wet sponge — the bottle must be carefully separated. If not — knock at the cut lines hammer: glass housing splits into two parts.
Grinding
The sharp edges of the divided bottle can be easily cut. To avoid this, will fix these by using abrasive paper of three types, depending on grit. Initially, we use the larger, and finally processing the edges smallest.
Each of them lay on the Board of the Foundation facing up and attach with buttons Put the bottle chipped edge on the paper and start to make easy translational movement, continuing this work until then, until the surface of the cut will not be smooth After that Prikope to the Board sandpaper of a lesser grit and try sanding a Small piece of abrasive paper abrade the edges of the inside and outside (this can be done with abrasive stone). Finally the surface of the sandpaper with the fine abrasive.
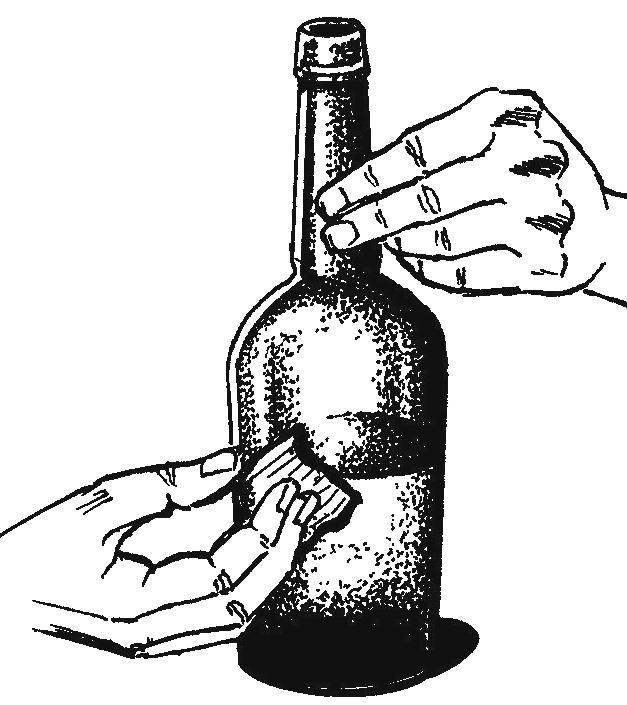
The wetting of the cutting line heated bottle
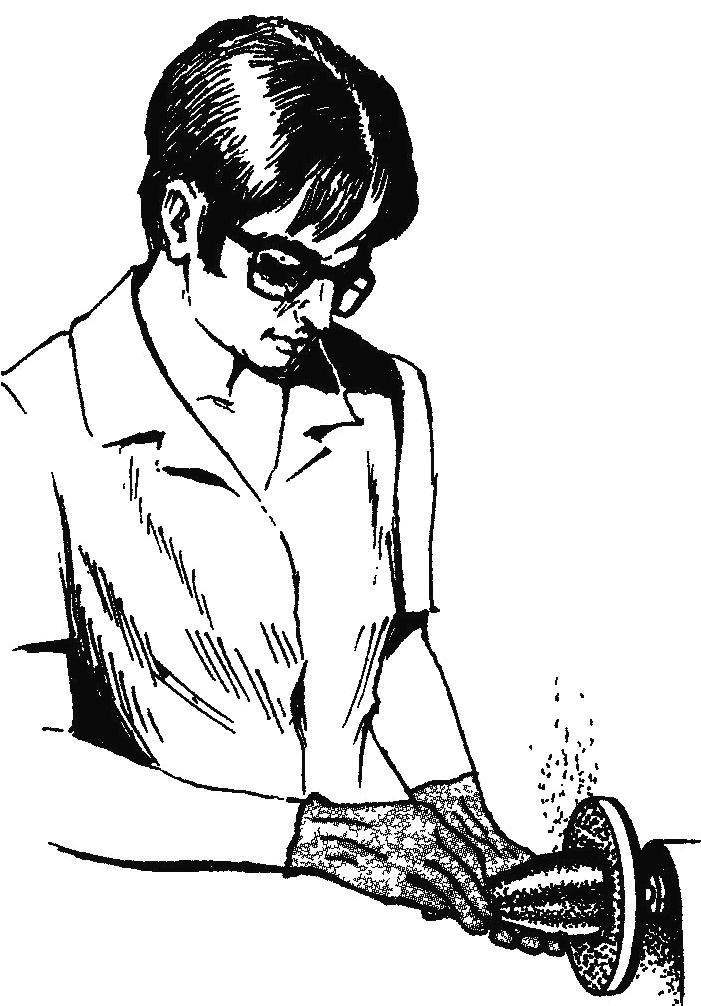
Grinding edges of the cut bottle on the abrasive wheel
To facilitate and speed up this work would sanding disc. However, its use requires caution Before machine polishing is recommended to wear safety glasses and leather or canvas gloves. During operation, do not lean close to the rotating disk, and to exert strong pressure on the glass. If you want to process a few bottles in a row, in this case, in order to avoid falling shrapnel dust in the respiratory tract it is advisable to apply a protective bandage is pre-soaked with water In the process is continuously moistened with water the stone and the bottle and make a pause, to exclude the possibility of a split bottle from overheating.
Finally, we offer another solution. Manual grinding can be done on a flat thick glass, causing the surface of the mixture of water and abrasive powder.
Bonding
Most of the decorative items produced from bottles, consists of two parts (except for simple vases and glasses) For bonding such components apply epoxy glue. Contact with each other surface (e.g., bottom and stem of wine glass) is recommended before gluing sanding, so the glue adheres better. After applying it to the surface you must wait half an hour for thickening the glue, and only then to connect the parts. This way we reduce the danger of slipping of the parts during pressing.
48 hours after bonding is already possible to use the ready-made object of glass.
Recommend to read
 THE STORE LOADS
In Amateur practice when developing or establishing a device is often required to connect to it a certain load and still it is necessary to measure its output parameters. This scheme...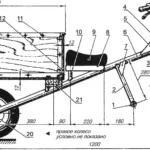 RIDING A WINCH
In this issue of "M-K", we want to introduce our readers to one of the most efficient soil cultivation mechanisms, which has recently been gaining more popularity among DIY builders. This...
